Search Our Database
How to add DNS domain in VestaCP
Introduction
This article is intended for users who manage domains and DNS settings through the Vesta Control Panel (VestaCP). It covers the process of adding a DNS domain within the VestaCP platform. These steps should be followed when you need to configure or manage DNS records for a specific domain. This solution is applicable to any domain hosted on a server managed via VestaCP. The guide will show you how to input your domain and its corresponding IP address, ensuring proper DNS management through your control panel.
Prerequisites
- Access to VestaCP control panel
- Domain name and corresponding IP address
Step-by-Step Guide
Step 1: Navigate to the DNS tab in VestaCP
- Open your VestaCP control panel.
- Click on the DNS tab located on the main dashboard.
- Click the green “+” button to add a new DNS domain.

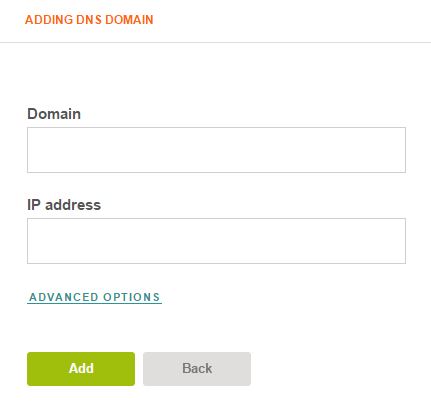
Step 2: Add the domain and IP address
- In the Domain field, enter the domain name you want to manage.
- In the IP Address field, enter the corresponding IP address for the domain.
- After filling in the form, click the Add button to complete the process.

Conclusion
You have successfully added a DNS domain in VestaCP. You can now manage the DNS settings for your domain directly from the control panel. If you encounter any issues during this process, feel free to reach out for support.
For additional assistance or if you encounter any issues, please contact our support team at support@ipserverone.com.
Article posted on 24 February 2020 by Louis