Search Our Database
How to Set Mailbox Quotas as a User in Plesk 17
Introduction
Managing email storage efficiently is crucial for ensuring smooth communication and optimal performance of your server. This guide will walk you through the process of adjusting the mailbox quota for an email account in the Plesk Control Panel. Adjusting the mailbox quota allows you to allocate the appropriate amount of storage space to each user based on their needs. This is particularly useful for businesses and organizations that manage multiple email accounts with varying storage requirements. Whether you are a system administrator overseeing multiple users or an individual managing your own email, this guide will help you easily modify mailbox quotas in a few simple steps.
Prerequisites
- Access to the Plesk Control Panel with administrative privileges.
- An existing email account for which you want to modify the mailbox quota.
Step-by-step Guide
Step 1: Log in to Your Plesk Control Panel
- Use your credentials to log in to the Plesk Control Panel. This is typically done through your hosting provider’s website or directly via a dedicated URL (e.g.https://yourdomain.com:8443)
Step 2: Access the Mail Settings
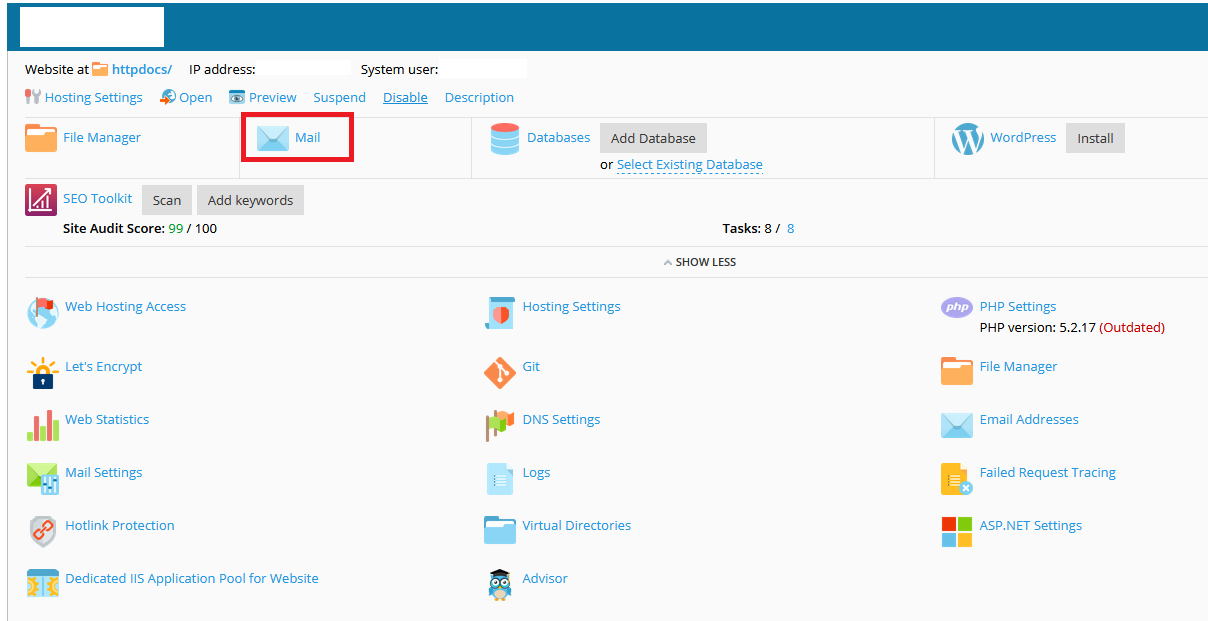
- Once logged in, click on the Mail option.
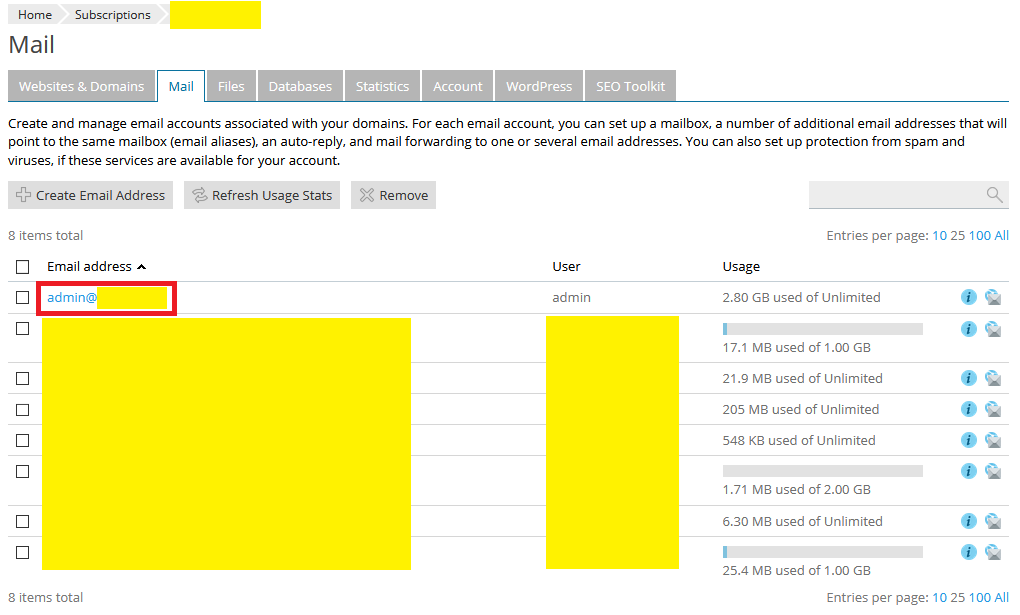
- This will display a list of all email addresses associated with your domains.
Step 3: Select the Email Address
- Click on the email address for which you want to change the mailbox quota.
- This action will open the settings page for the selected email account.
Step 4: Modify the Mailbox Quota
- Look for the Mailbox section on the settings page.
- Refer to the “Another size” field. Enter your desired quota in megabytes (MB) or gigabytes (GB). For example, to set a quota of 1GB, enter 1
Another size: 1
- This value determines the maximum storage allowed for this email account.
Step 5: Save Changes
- Click the Apply button to save your changes.
- Then, click OK to finalize the update.
Conclusion
You have successfully changed the mailbox quota for the specified email account in Plesk. This will help manage your email storage more effectively. If you need to adjust the quota for other accounts, repeat the process for each email address. Regularly monitor your mailbox usage to avoid exceeding the set quota, which can prevent new emails from being received.
Article posted on 21 March 2020 by Louis


