Search Our Database
Jaring: How to configure email in Outlook
Introduction
Outlook is a widely used email client developed by Microsoft, enabling users to send, receive, and manage emails from various email accounts. It is essential for efficient communication and organization, particularly in professional settings. This guide covers the steps to configure an email account in Outlook, suitable for personal or business use, ensuring a smooth email setup and management experience.
Prerequisite
- Email account details (email address, password, server settings)
- Outlook installed on your device
- Basic understanding of email protocols (IMAP/POP/SMTP)
Step-by-step guide
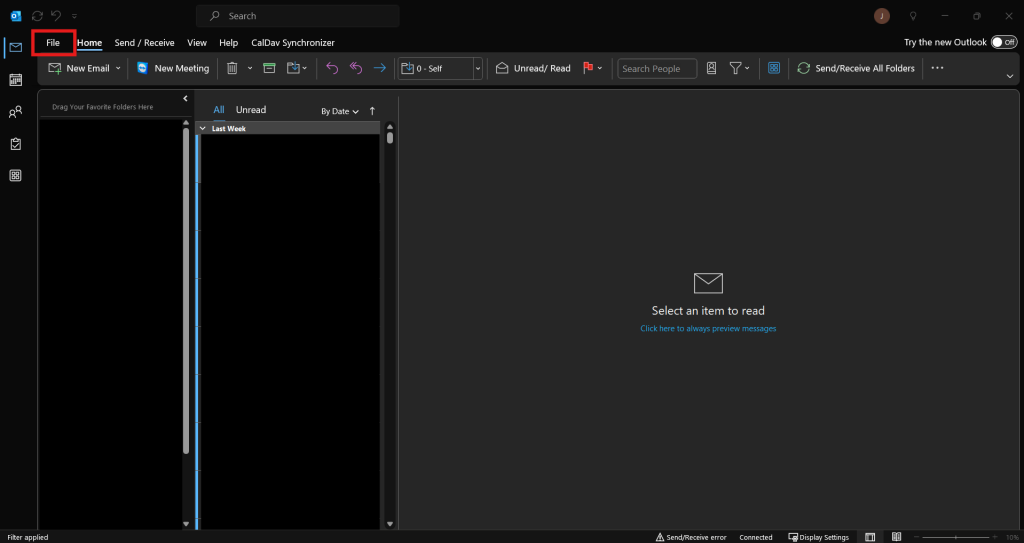
Step 1: Open Outlook
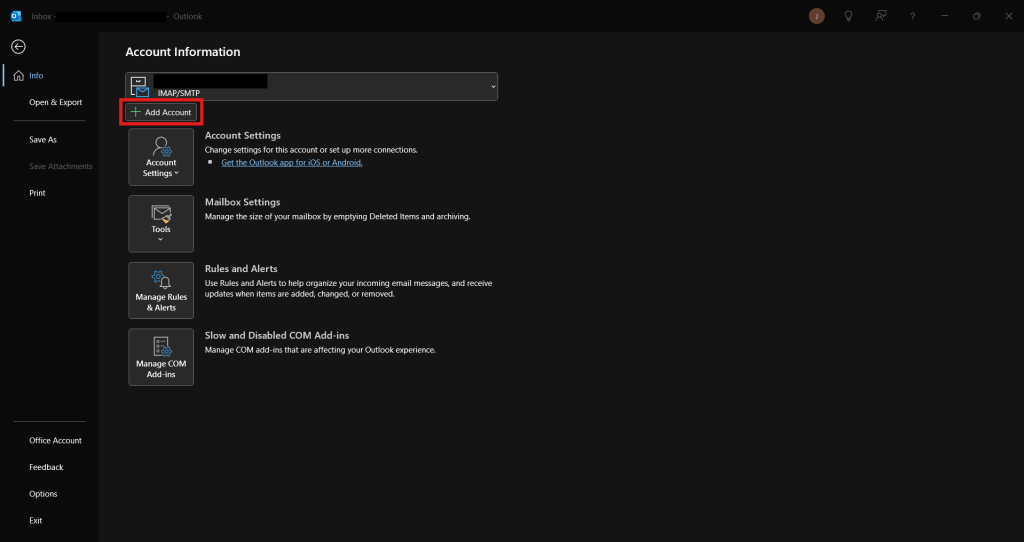
Step 2: Add new account
Step 3: Configure new account
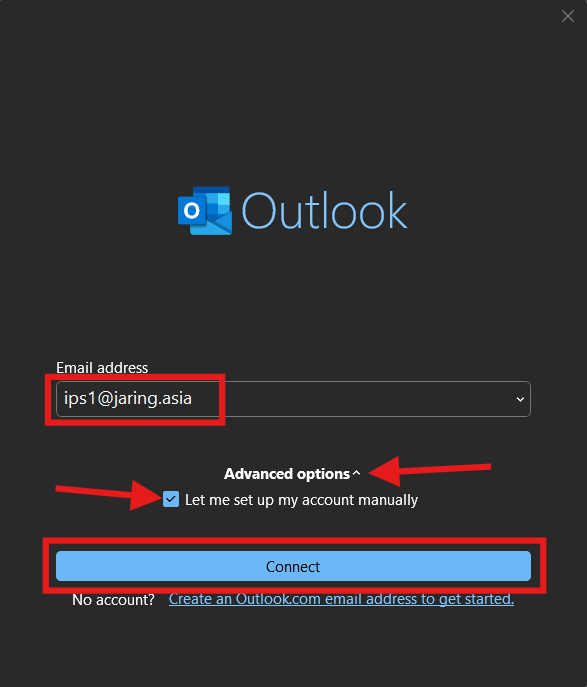
- Enter your email address. Then, click the drop down for Advanced options and select Let me setup my account manually. Then click on Connect.
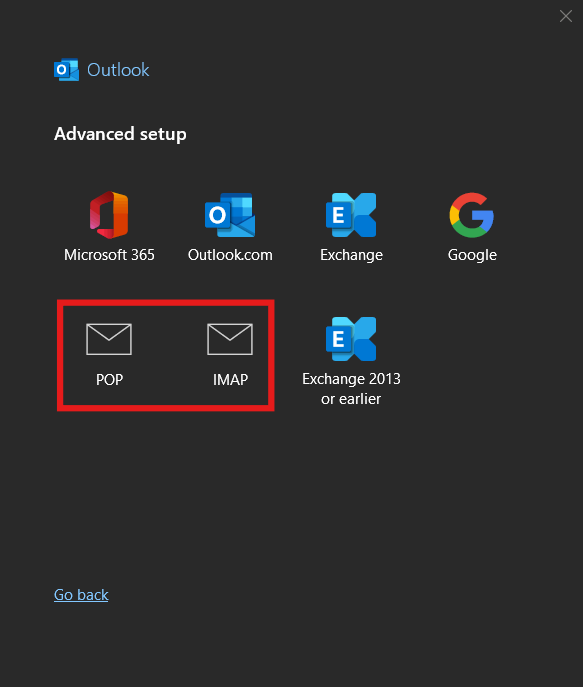
- You may select between POP or IMAP.
POP: Downloads emails to Outlook (local PC) and removes them from the mail server.
IMAP: Synchronizes emails between the mail server and Outlook, keeping them in sync across devices.
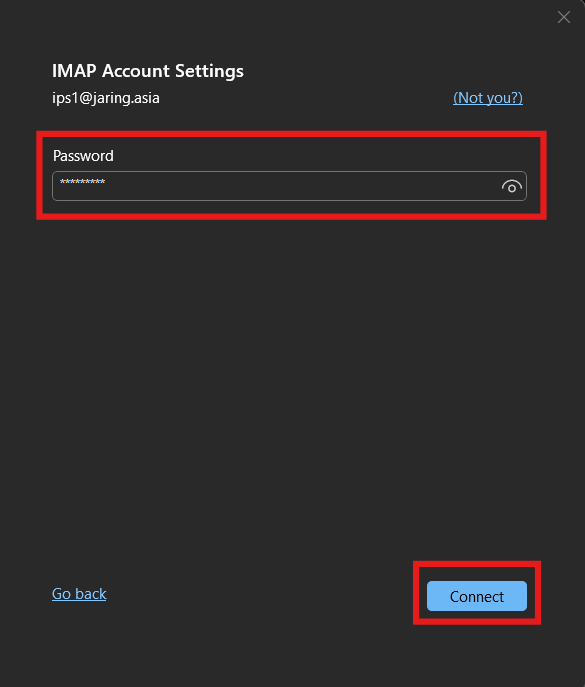
- Enter your email account password and click Connect.
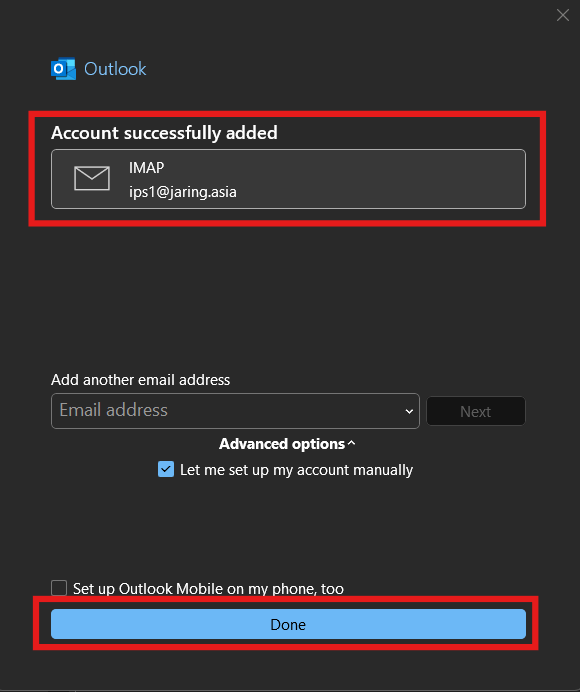
- The email account should be added successfully, then click on Done to exit the page.
Step 5: Verify the server settings
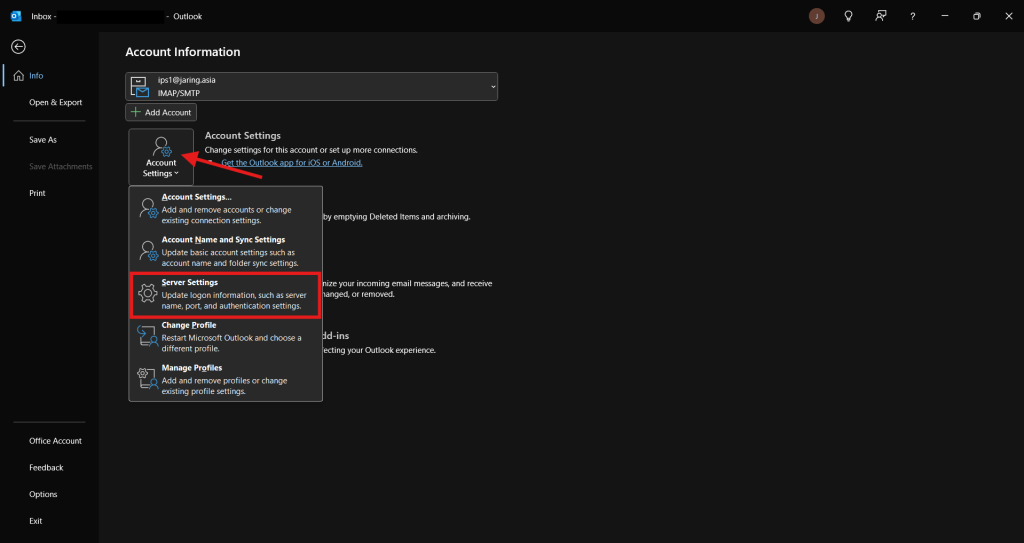
- You may need to make sure the port and email server in correctly configured. Navigate to File tab again, select Account Settings then Server Settings.
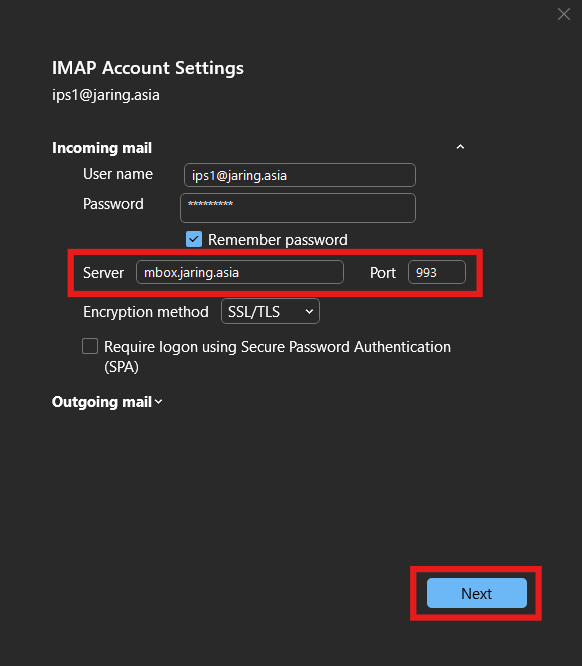
- Make sure the mail server and port were show as below, then click Next to complete the setup:
For POP Account Settings
Mail server: mbox.jaring.asia
Incoming mail server POP port: 995
Outgoing mail server (SMTP) port: 465
For IMAP Account Settings
Mail server: mbox.jaring.asia
Incoming mail server IMAP port: 993
Outgoing mail server (SMTP) port: 465
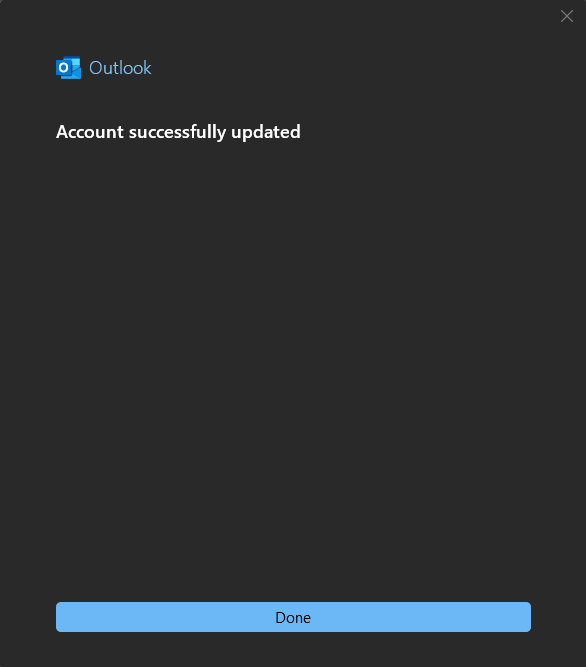
- Once the configuration is completed, you will see Outlook shows the completion message.
Conclusion
By going through this guidance, you will be able to configure your email account in Outlook, enabling seamless access to send, receive, and manage your emails efficiently.
For additional assistance or if you encounter any issues, please contact our support team at support@ipserverone.com.
