Search Our Database
How to purge CDN content on Cloudflare
Introduction
This guide is intended for system administrators and website owners who are using Cloudflare as their Content Delivery Network (CDN) and need to purge cached content. It covers the steps to manually clear cached files from the Cloudflare CDN when new content is uploaded or changes are made. This is essential to ensure that the most up-to-date version of your website is being delivered to users. Follow these steps when you need to force a cache refresh on Cloudflare’s network.
Prerequisites
- You must have an active Cloudflare account.
- Administrative access to the Cloudflare dashboard.
- The domain must be configured under Cloudflare.
Step-by-Step Guide
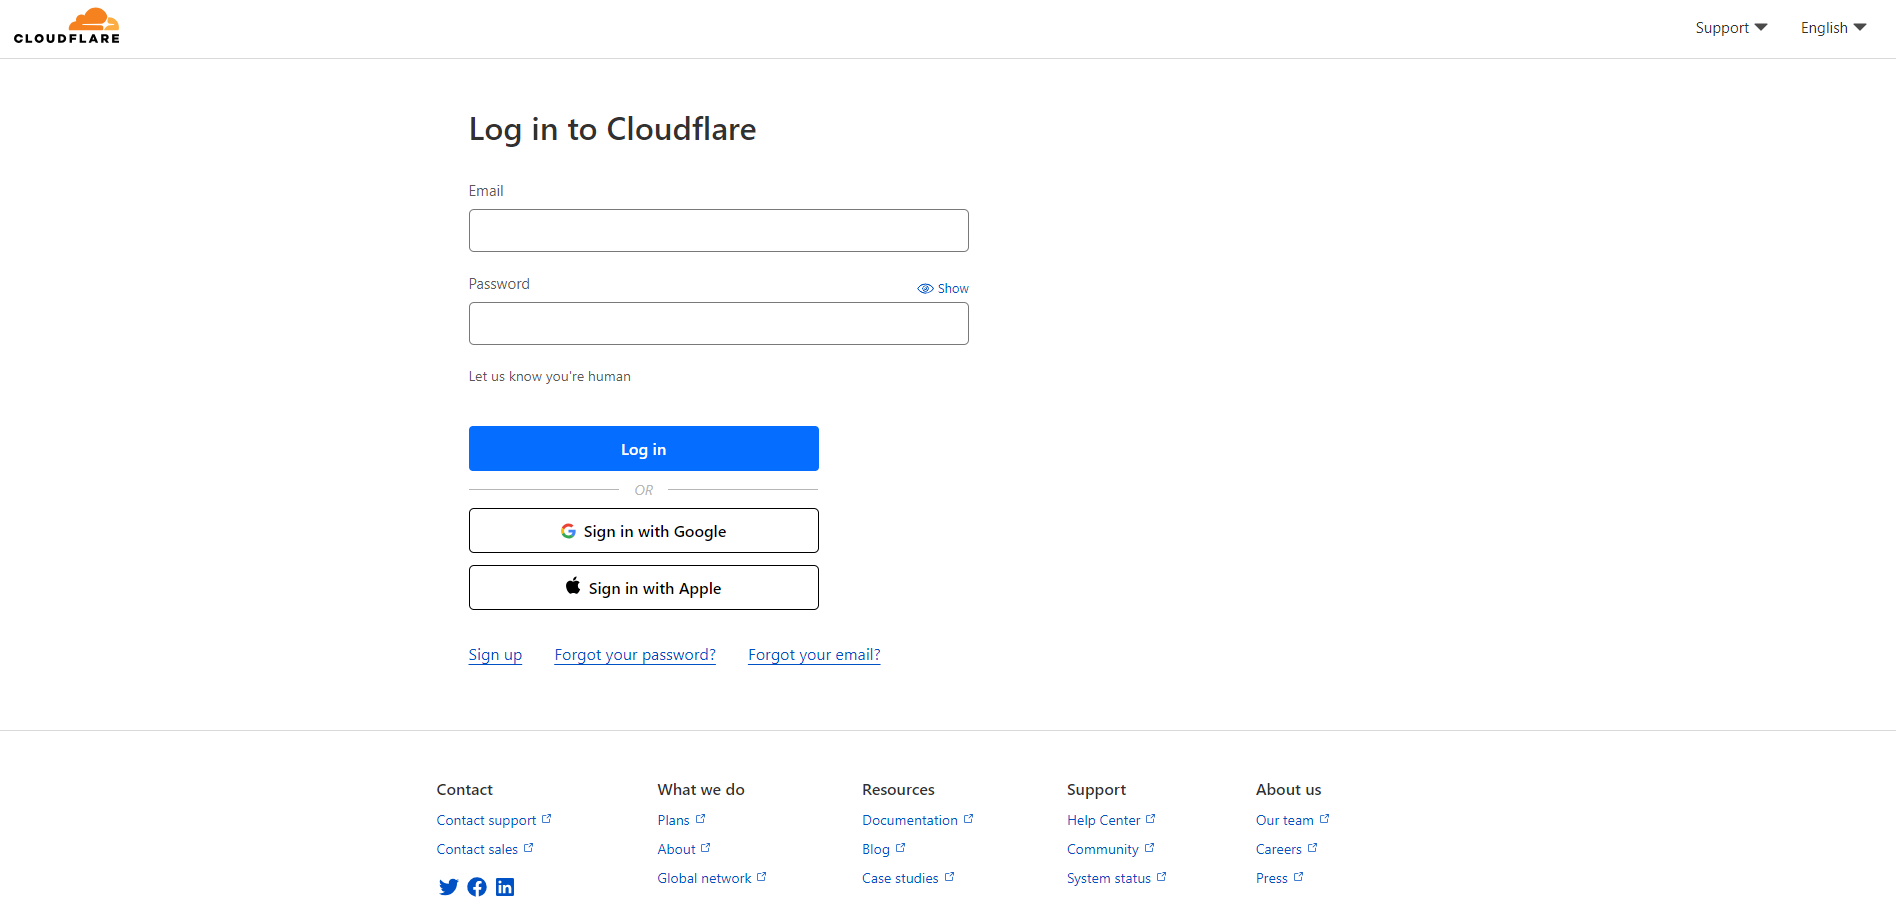
1. Log in to your Cloudflare account.
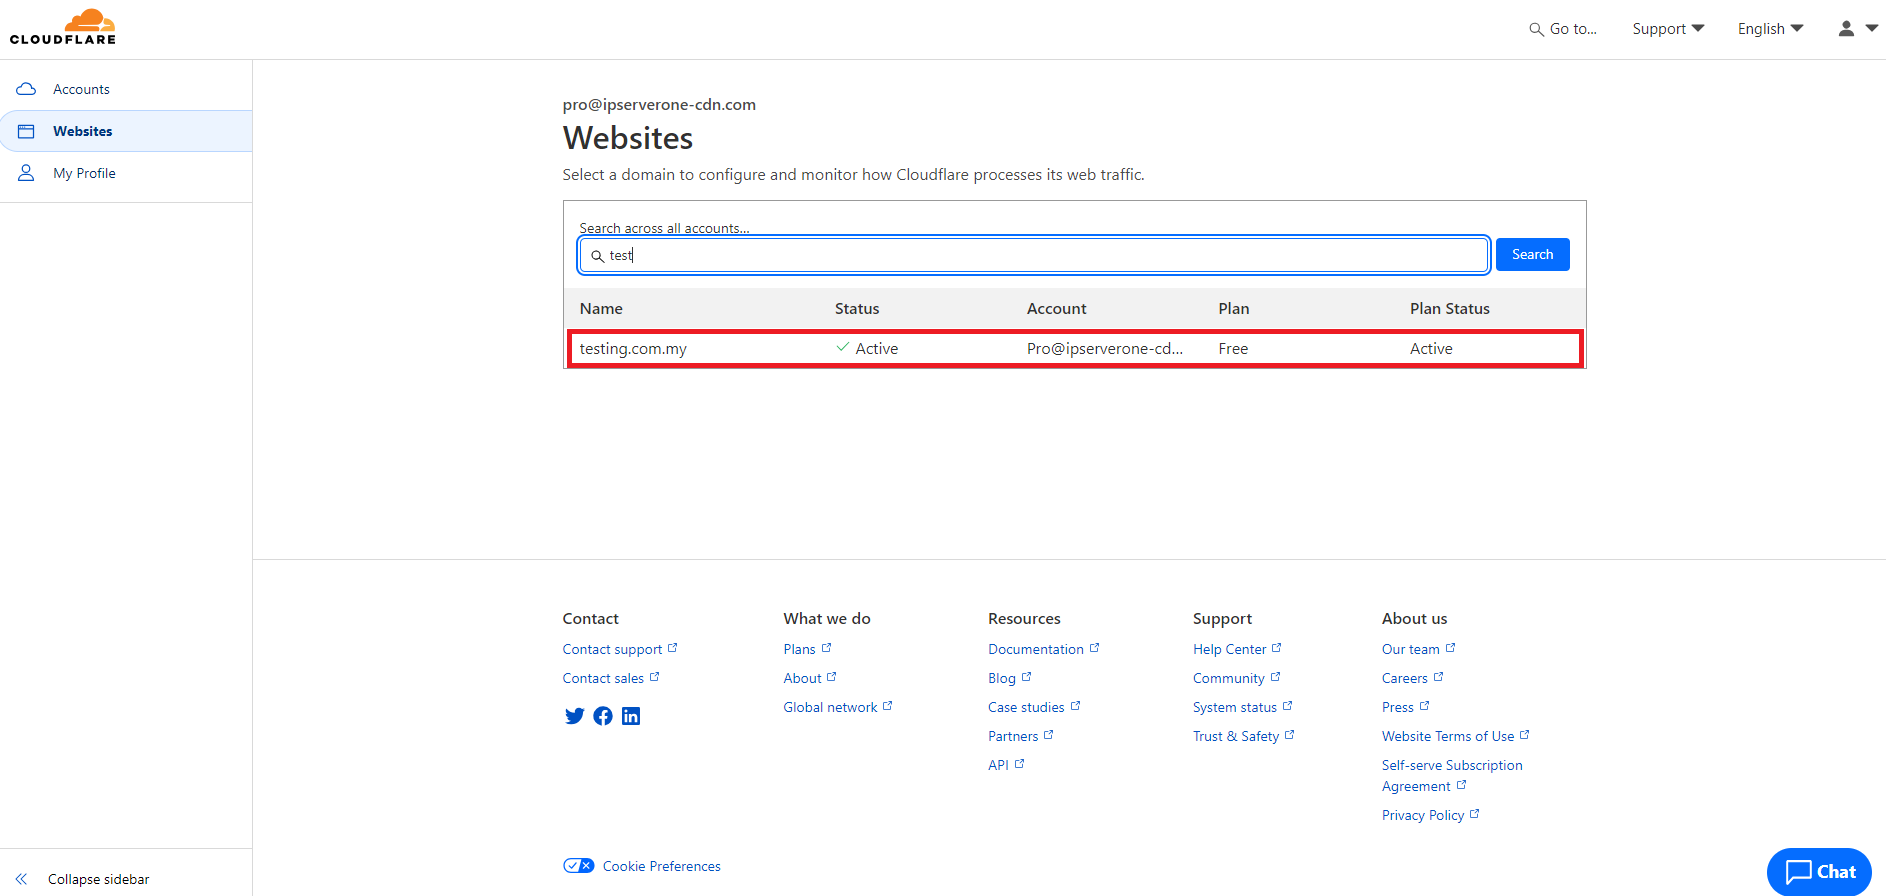
2. From the Cloudflare Website dashboard, click on the domain you wish to manage.
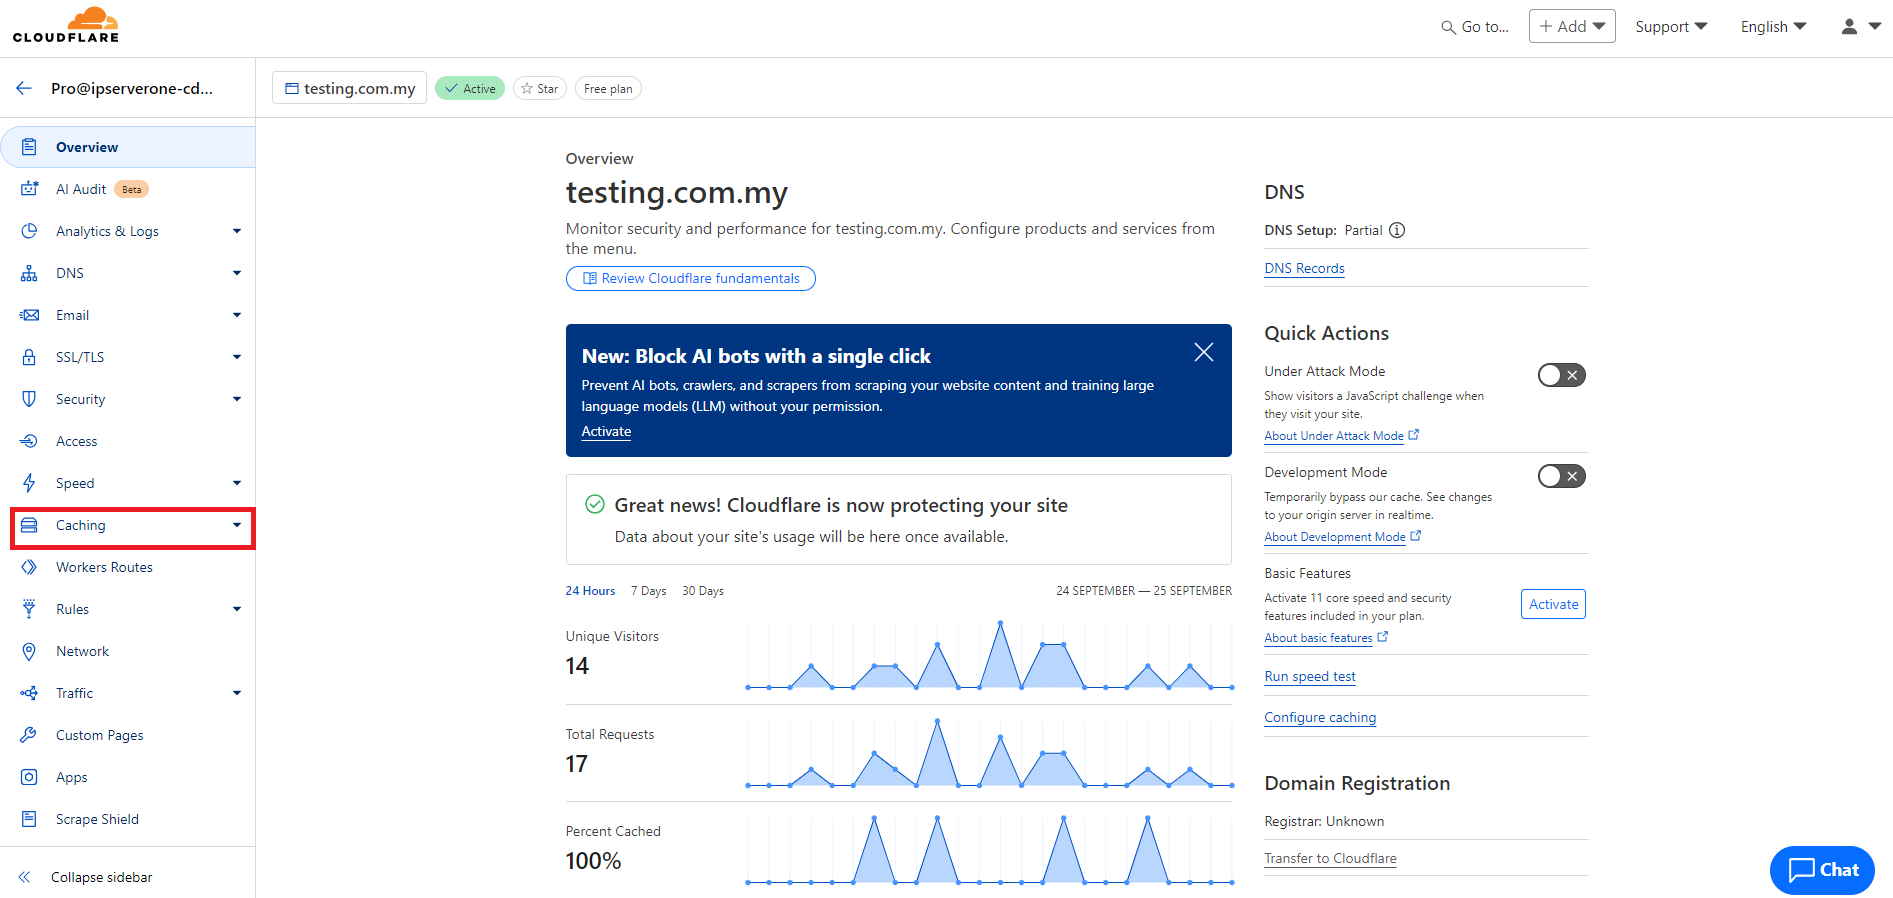
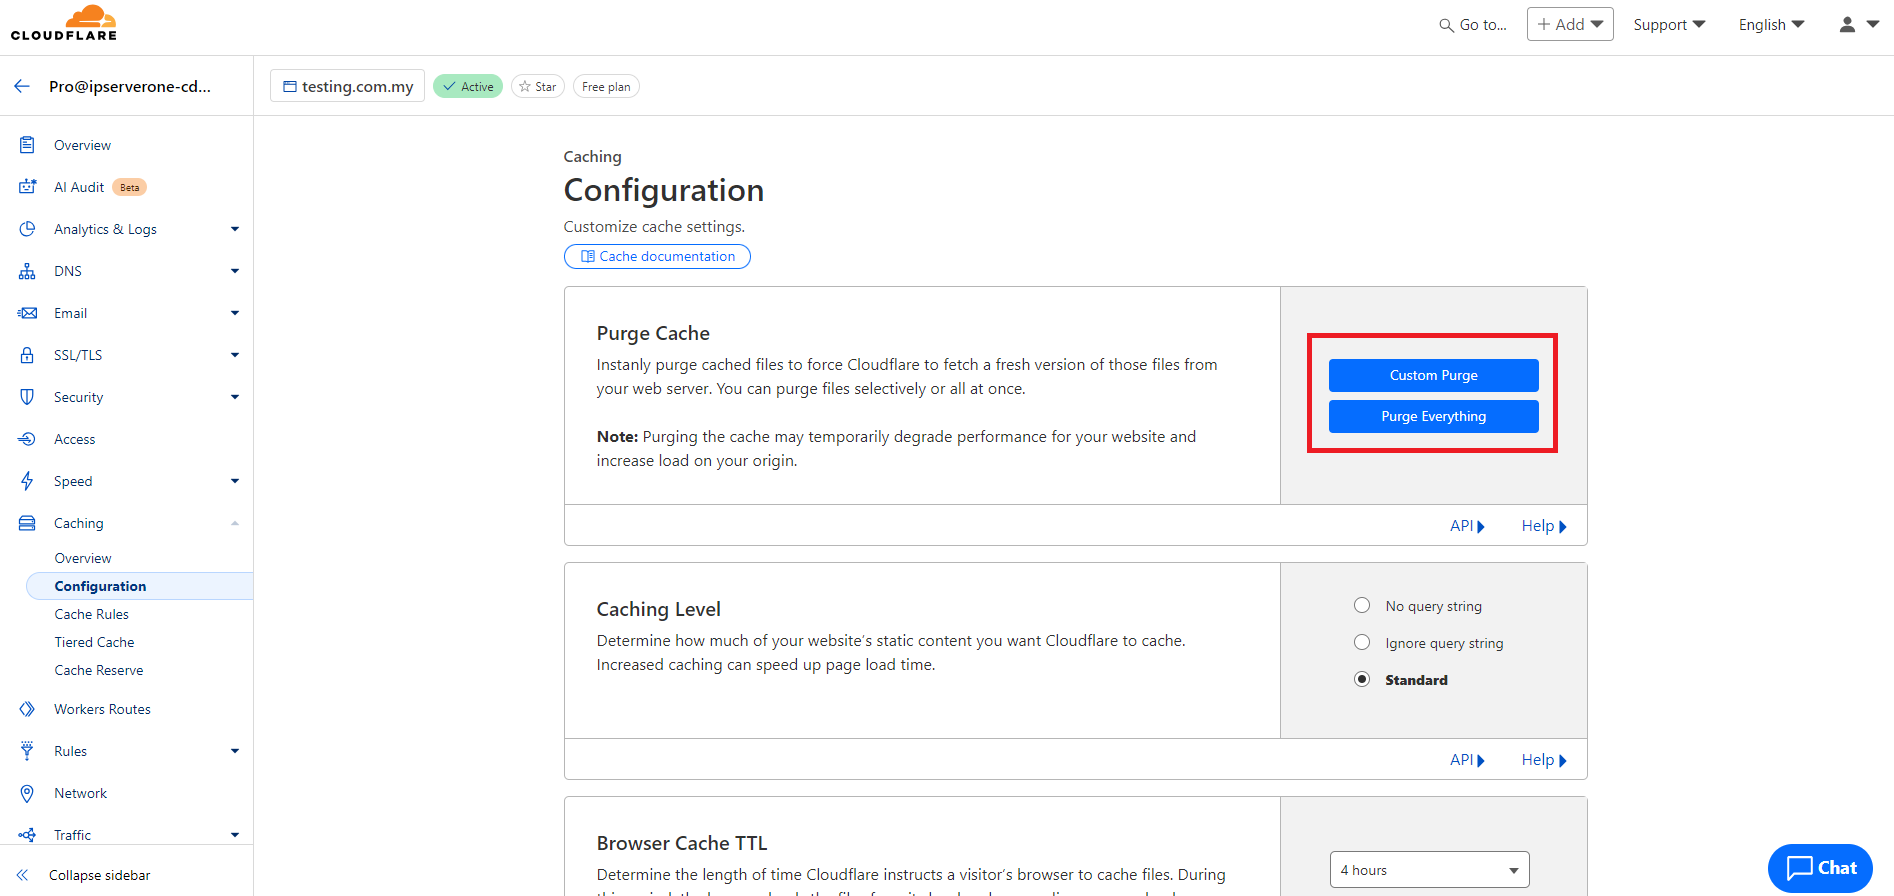
3. Once inside the domain settings, locate and click on the Caching tab from the options available at the left panel.
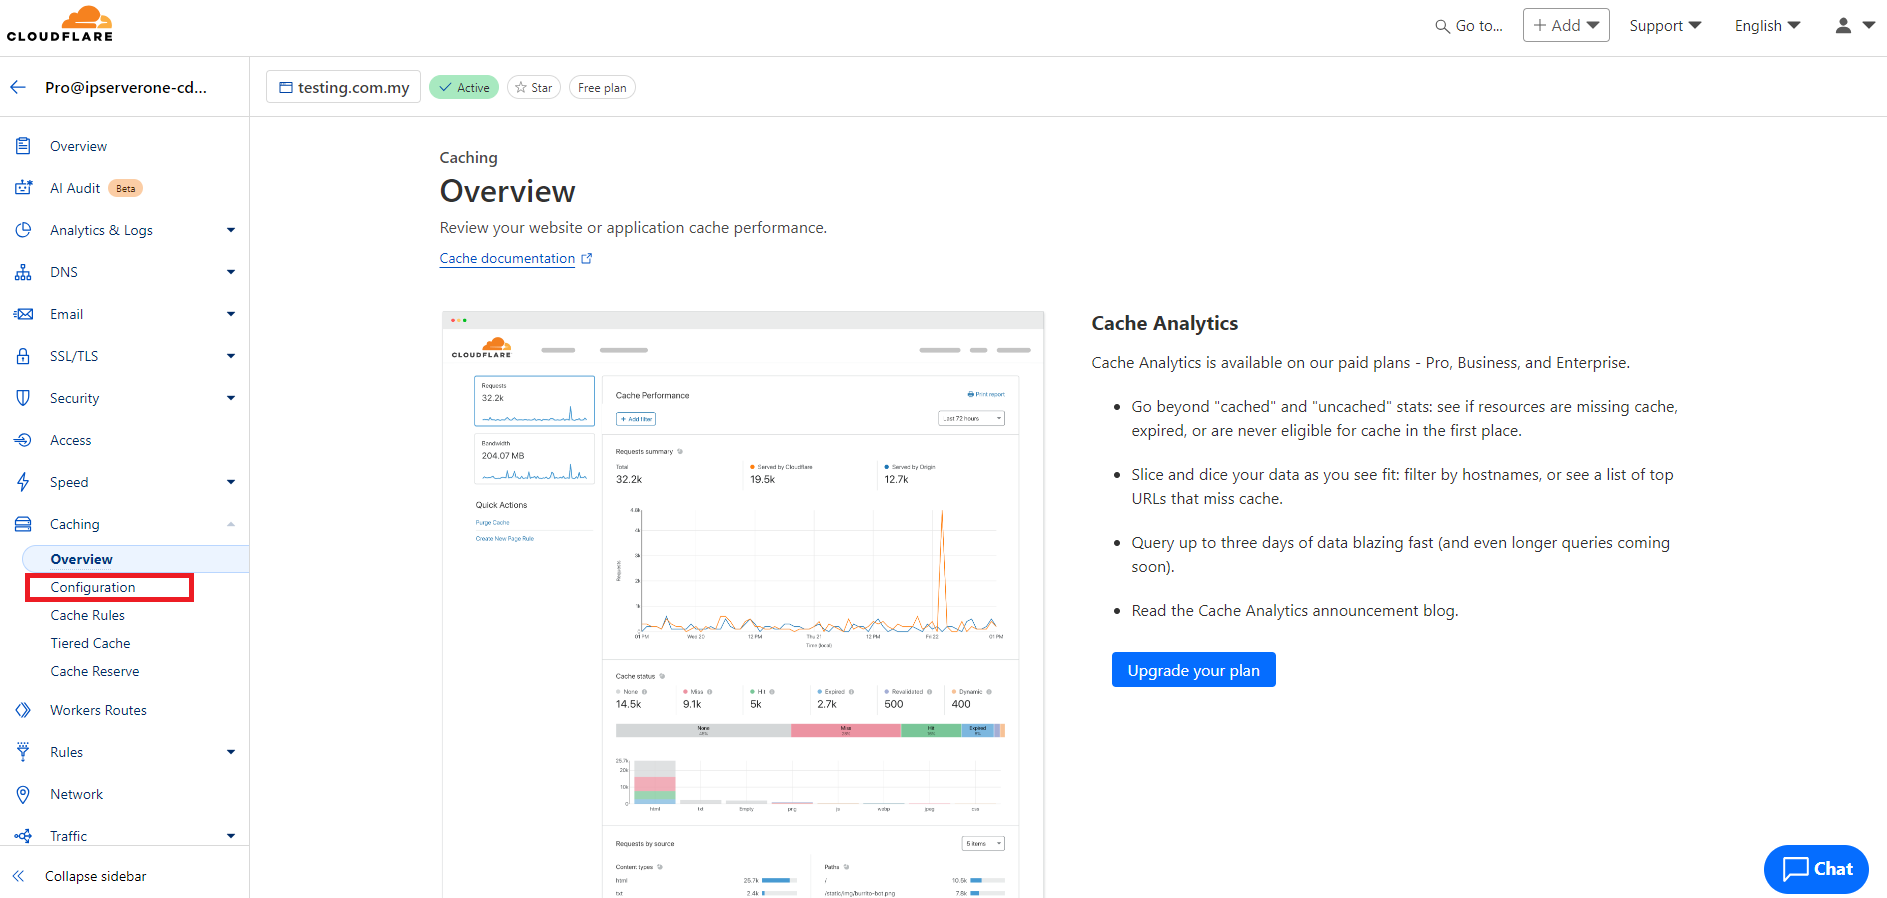
4. After that, click Configuration.
5. In the Purge Cache part, you can find the Custom Purge and Purge Everything button.
- Click on Purge Everything. This action will clear all cached content for the selected domain.
- If you only want to purge specific files, choose Custom Purge and enter the URLs of the files you want to clear from the cache.
6. Visit your website to confirm that the updated content is being served. You may also use development tools or third-party services to verify that the cached version has been cleared.
Conclusion
Purging cached content on Cloudflare is a straightforward process that ensures your users always see the latest version of your website. It is important to purge cache when new content is added, significant changes are made, or troubleshooting cache-related issues.
For additional assistance or if you encounter any issues, please contact our support team at support@ipserverone.com.
