Search Our Database
How to install SSL certificates in IIS (Window)
Introduction
An SSL certificate is a digital certificate used to establish a secure, encrypted connection between a web server and a web browser. It verifies the authenticity of a website, ensuring that users are connecting to the intended site and not an imposter. SSL certificates are issued by trusted organizations called Certificate Authorities (CAs) and enable HTTPS (Hypertext Transfer Protocol Secure), which encrypts data, such as passwords and credit card information, to protect it from being intercepted by malicious actors during transmission. This enhances trust, security, and privacy for users on the internet.
Prerequisites
- Basic knowledge of IIS service in Windows Server
- SSL certificate in form of PFX
- Access to Windows Server
Step-by-step Guide
1. RDP to window server and open Internet Information Services Manager
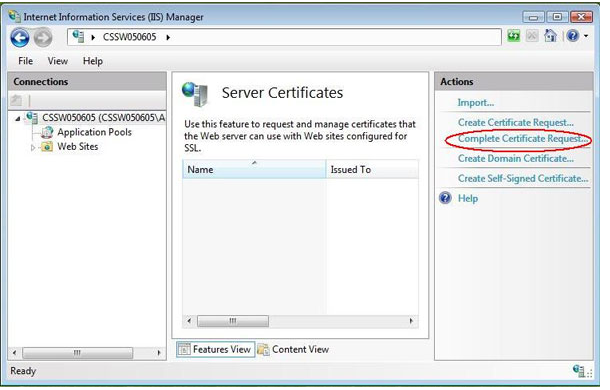
2. Click on Administrative Tools and click on “Server Certificate”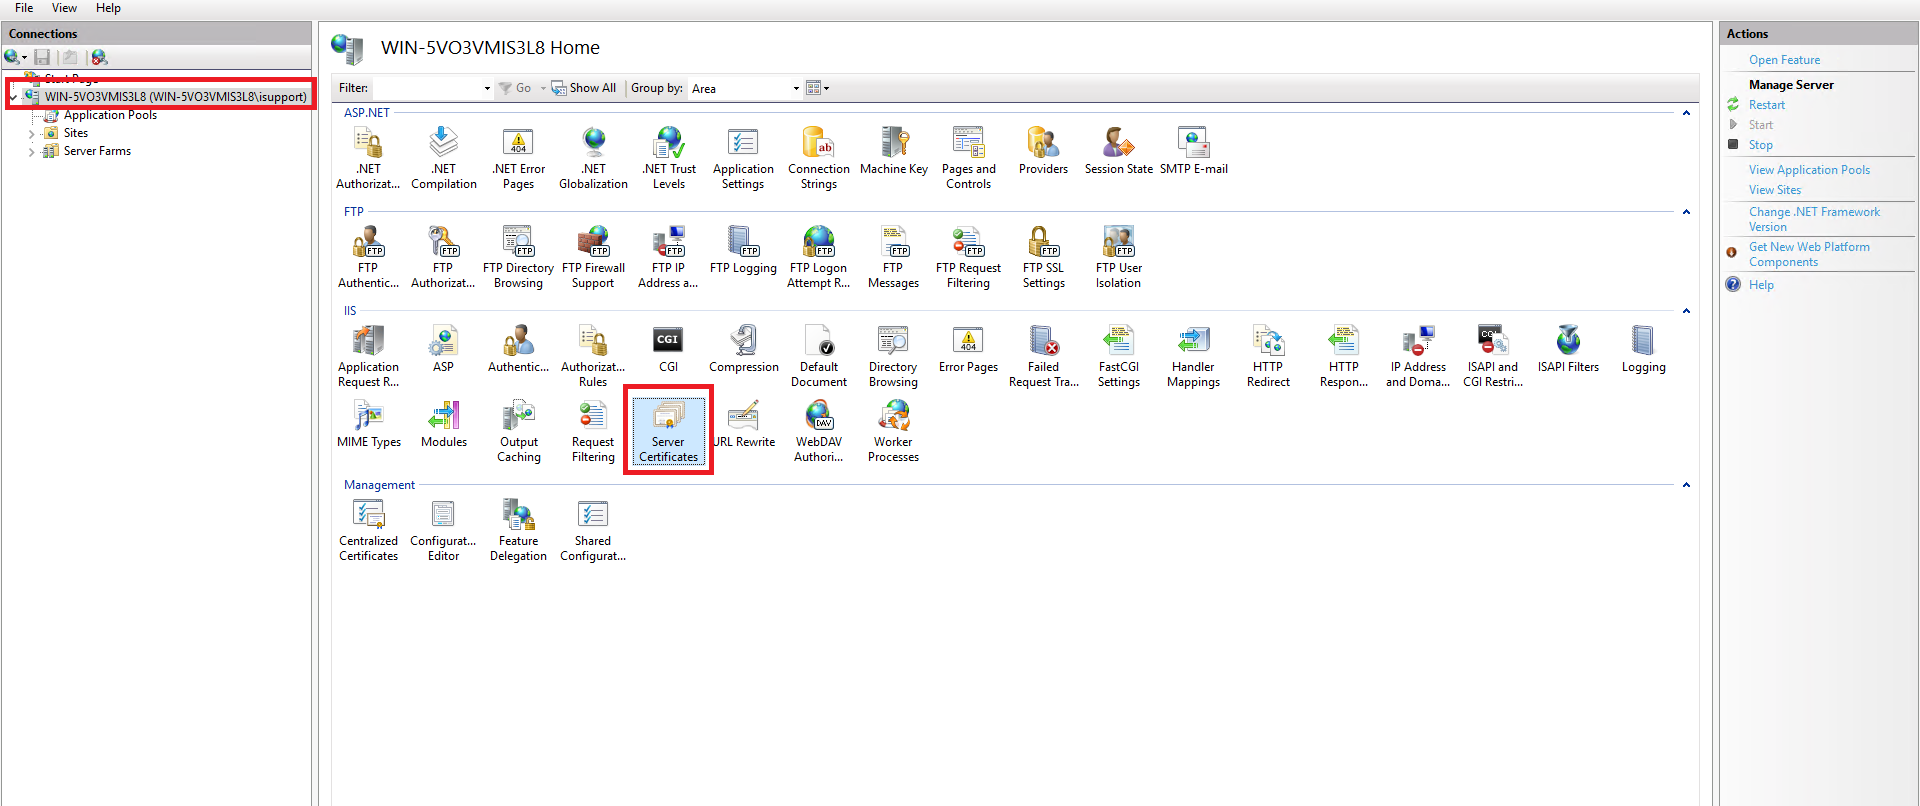
3. Click on “Create Certificate Request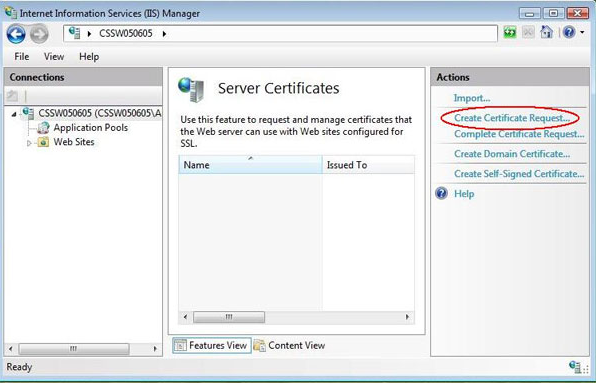
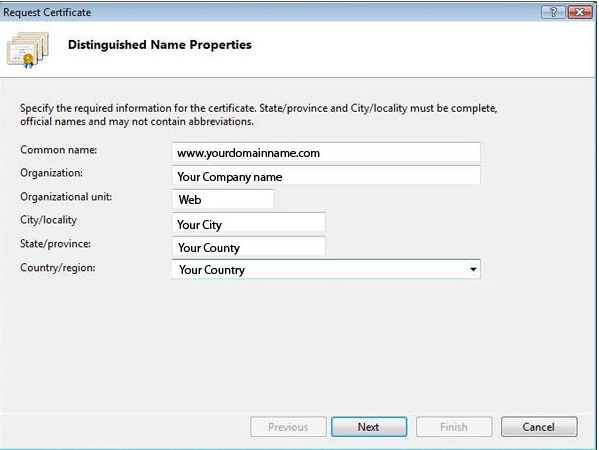
4. Enter relevant Information
5. Next, In the Cryptographic Service Provider Properties Window, both settings at default.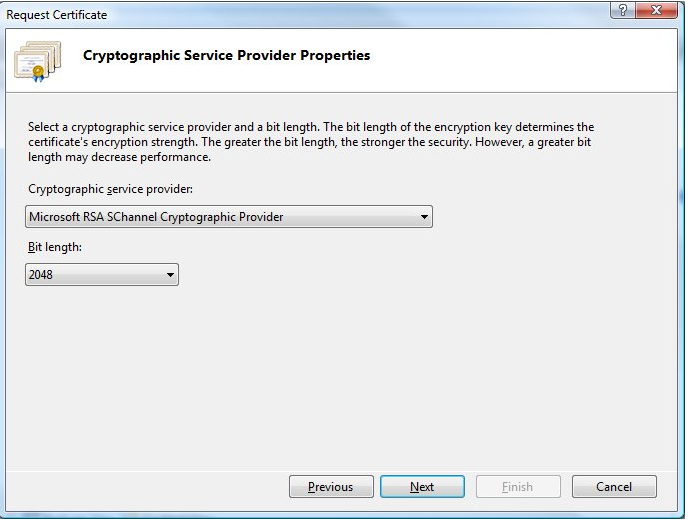
6. Enter location to save CSR on window server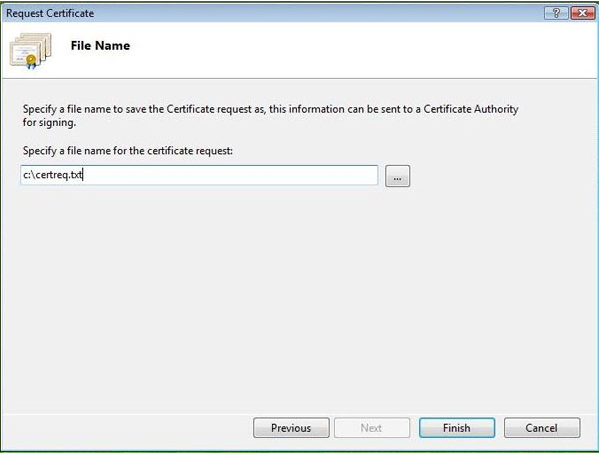
7. Click “Complete Certificate Request”
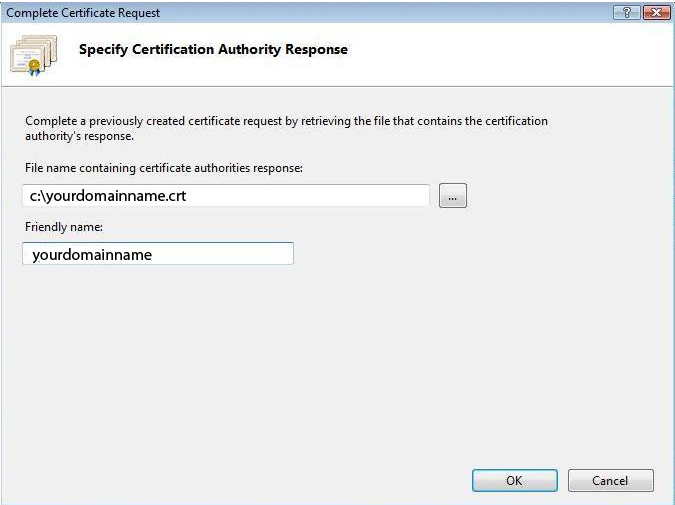
8. Key in location of certificate and friendly name.
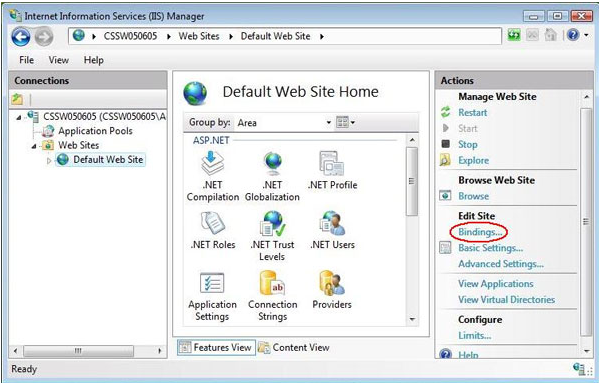
9. Select domain in IIS and click on “Bindings”
10. Click on Add and select HTTPS and choose SSL certificate.
11. Hostname www.domain.com
12. Click OK and restart IIS to complete installation for SSL.
Conclusion
You have successfully installed an SSL certificate on your website using cPanel, providing encryption for data exchanged on your site and boosting visitor confidence. Regularly check your SSL certificate’s status to maintain security and trustworthiness.
For additional assistance, please contact support at support@ipserverone.com.
Article posted on 22 November 2021
