Search Our Database
Upgrading Ubuntu from 18.04 to 20.04
Introduction
This guide will walk you through the process of upgrading your Ubuntu system from version 18.04 LTS to 20.04 LTS. This involves updating installed packages, removing obsolete kernels, and performing the actual distribution upgrade. Ensure you have a backup of your important data before proceeding.
Prerequisites
- Access to the server with root privileges.
- Ensure all important data is backed up.
- Stable internet connection for downloading updates and packages.
Steps to Upgrade
Step 1: SSH into the Server
First, SSH into your server using an account with root privileges.
ssh user@<your_server_ip>
Step 2: Upgrade All Installed Packages on Ubuntu 18.04 LTS
- Update and Upgrade Packages: Begin by updating the package list and upgrading all installed packages.
sudo apt update sudo apt upgrade -y
If you encounter an issue where the upgrade process is stalled or locked, proceed with the following steps to resolve it.

-
- Check for Running apt Processes: Identify any running apt processes.
ps aux | grep -i apt

-
- Terminate apt Processes: Locate the process ID (PID) in the output (found in the second column) and terminate any active apt processes.
kill <pid>
-
- Remove Lock Files: Delete any lock files that might be preventing the upgrade.
sudo rm /var/lib/dpkg/lock-frontend
sudo rm /var/lib/dpkg/lock
-
- Reconfigure the Package Database: Reconfigure the package database to ensure all packages are in a consistent state.
sudo dpkg --configure -a
-
- Retry the Upgrade: Run the upgrade command again to complete the installation of updated packages.
sudo apt upgrade -y
- Reboot the System: Restart the system to apply all changes.
sudo reboot
Step 3: Remove Unused Old Kernels
- Clean up old, unused kernels to free up disk space.
sudo apt --purge autoremove
- Install the update-manager-core.
sudo apt install update-manager-core
Step 4: Upgrade to the Latest LTS Release
- Initiate the distribution upgrade.
sudo do-release-upgrade
Step 5: Handling the Upgrade Process
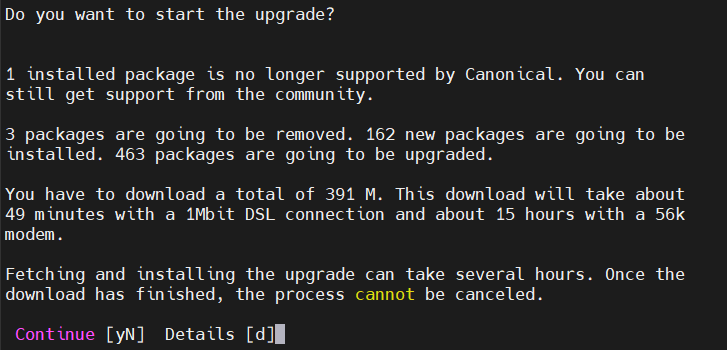
- You will be presented with details of the upgrade including the number of packages to be removed, installed, and upgraded. Follow the prompts, typically pressing ‘y’ to proceed.
- During the upgrade, you might encounter some configuration settings:
Updating repository information

While scanning your repository information no mirror entry for the
upgrade was found. This can happen if you run an internal mirror or
if the mirror information is out of date.

Do you want to rewrite your 'sources.list' file anyway? If you choose
'Yes' here it will update all 'bionic' to 'focal' entries.
If you select 'No' the upgrade will cancel.

Continue [yN]
Press Y and Enter to continue.
Press Y and Enter to continue.

Choose Y and Enter to continue.
Configuration file '/etc/vnstat.conf'
==> Modified (by you or by a script) since installation.
==> Package distributor has shipped an updated version.
What would you like to do about it ? Your options are:
Y or I : install the package maintainer's version
N or O : keep your currently-installed version
D : show the differences between the versions
Z : start a shell to examine the situation
The default action is to keep your current version.
*** vnstat.conf (Y/I/N/O/D/Z) [default=N] ?
Press Enter to continue.
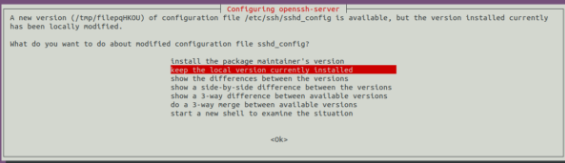
Choose Keep the local version currently installed and press Enter to continue.
Remove obsolete packages?

39 packages are going to be removed.

Continue [yN] Details [d]
Press Y and Enter to continue.
Step 6: Reboot the System
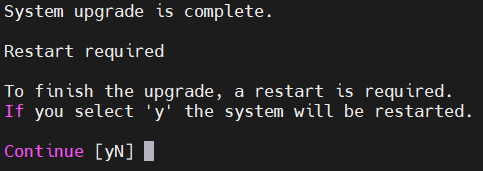
Upon completion of the upgrade, reboot your server.
You may see this after the upgrade is completed, press Y and Enter to reboot.
Else, you may enter this to reboot.
sudo reboot
Step 7: Verification
After the system restarts, verify the new distribution version.
lsb_release -a
Expected output:
No LSB modules are available.
Distributor ID: Ubuntu
Description: Ubuntu 20.04.6 LTS
Release: 20.04
Codename: focal
Conclusion
Your Ubuntu system should now be successfully upgraded from 18.04 LTS to 20.04 LTS. Ensure to check your applications and services to confirm they are running as expected.
For additional assistance or if you encounter any issues, please contact our support team at support@ipserverone.com.