Search Our Database
How to upgrade SmarterMail on Windows
Introduction
This guide will walk you through the process of upgrading SmarterMail on a Windows server. This process is essential for administrators who want to leverage the latest features, security patches, and performance improvements offered by the SmarterMail platform. This article covers all necessary steps, including pre-upgrade checks, downloading the latest version, backing up your existing configuration, and performing the installation. Following this guide ensures a smooth transition to the new version, minimizing downtime and preserving existing settings.
Prerequisites
- SmarterMail installed
- System Admin Access: Ensure you have administrative privileges on the server where SmarterMail is installed.
- Backup Solution: Have a backup solution ready.
Step-by-Step Guide
Step 1: Check the current SmarterMail version
- Log in to the SmarterMail web interface.
- Navigate to User at the top right corner > About Smartermail
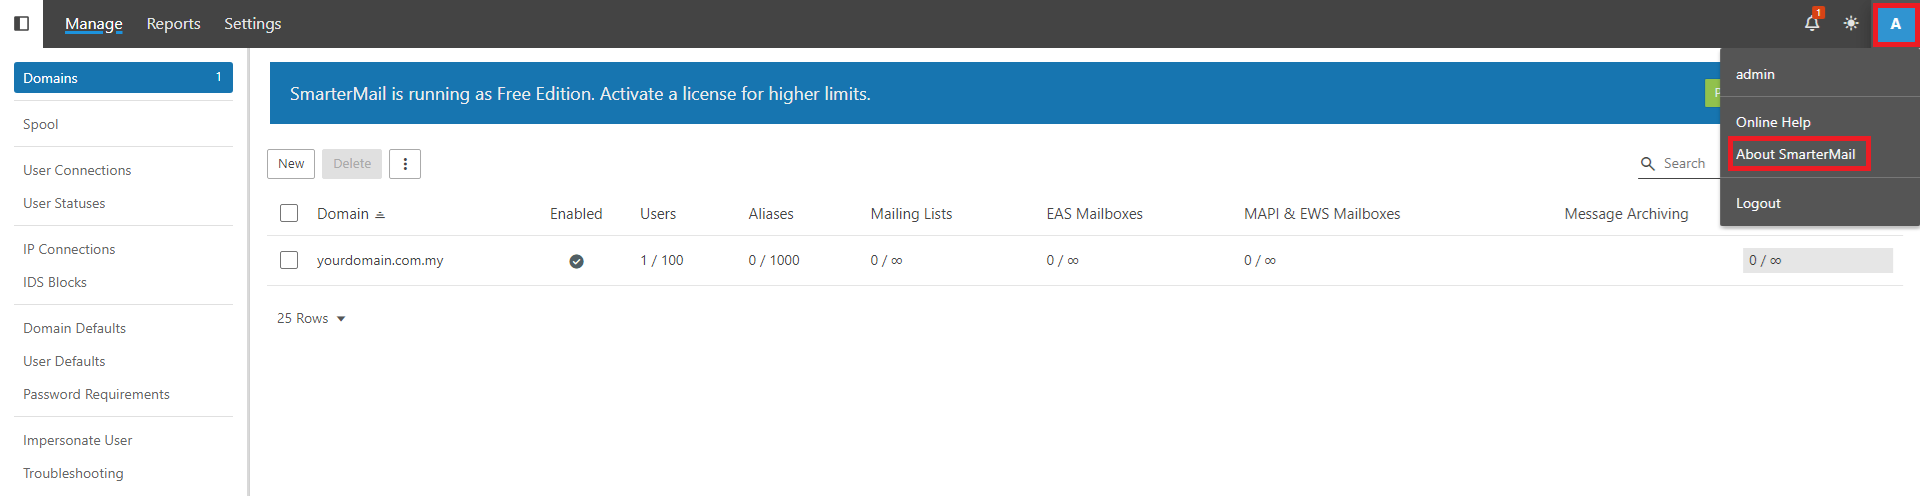
- Record the current version number to compare after upgrading.
Step 2: Identify SmarterMail installation and Domain data path
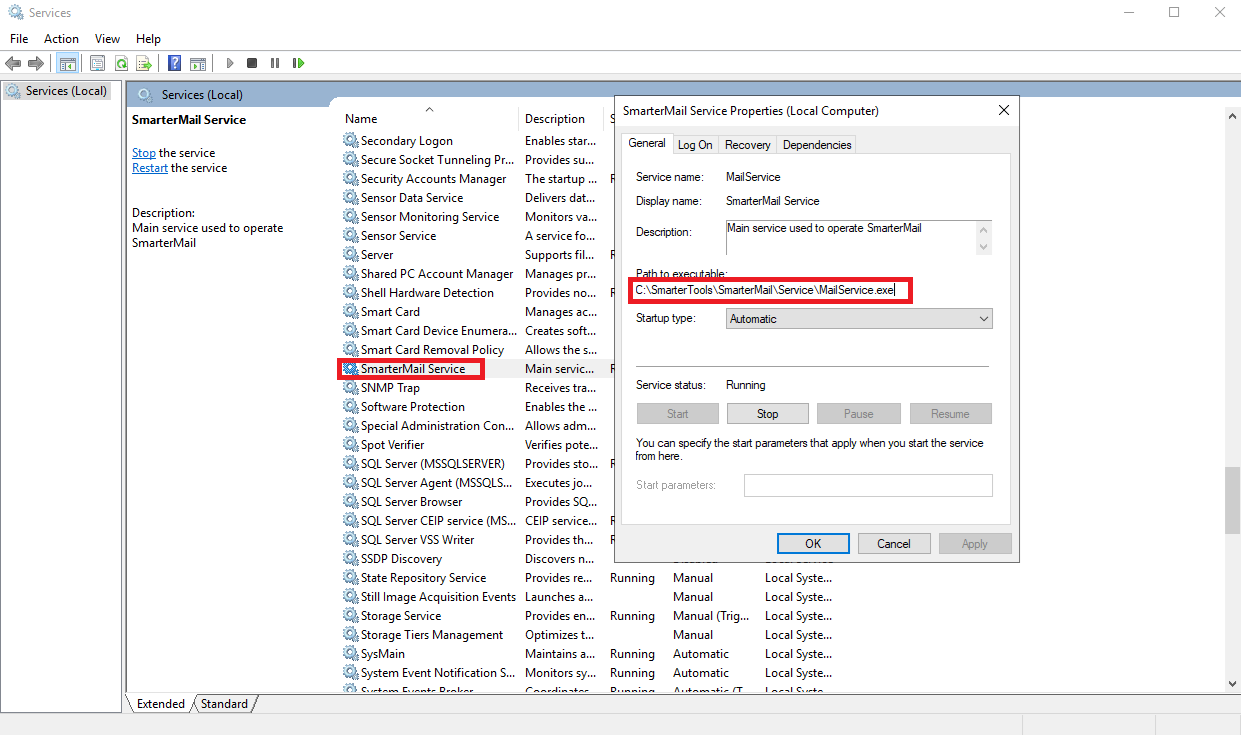
- Installation folder:
- Open Services in Windows.
- Right-click SmarterMail Service and select Properties
- Take note on the path eg. C:\SmarterTools\SmarterMail\
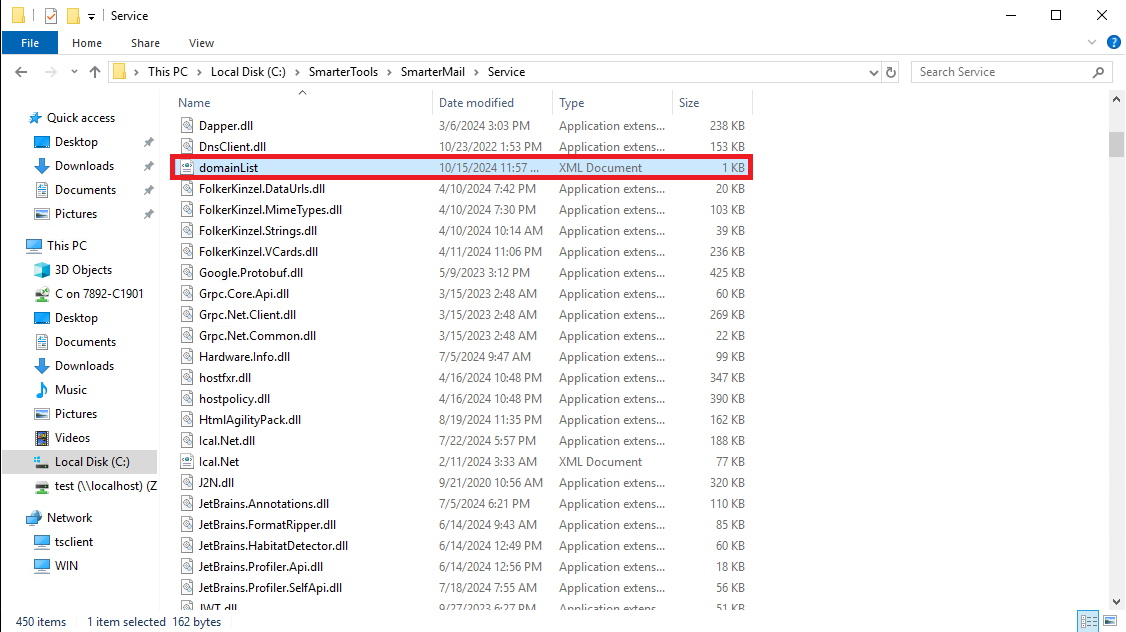
- Domain data
- Navigate to installation path in this example the path is C:\SmarterTools\SmarterMail\Service
- Open file domainList
- Take note on the domain data path eg. C:\SmarterMail\Domains

Step 3: Back up your SmarterMail configuration and data
- Stop the SmarterMail service temporarily:
- Open Services in Windows.
- Right-click SmarterMail Service and select Stop.
- Back up the directory when you take note on previosly:
- C:\SmarterTools\SmarterMail (installation folder)
- C:\SmarterMail\Domains (domain data)
Step 4: Download the latest SmarterMail version
- Visit the official SmarterTools website at https://www.smartertools.com/smartermail/downloads
- Download the latest stable release.
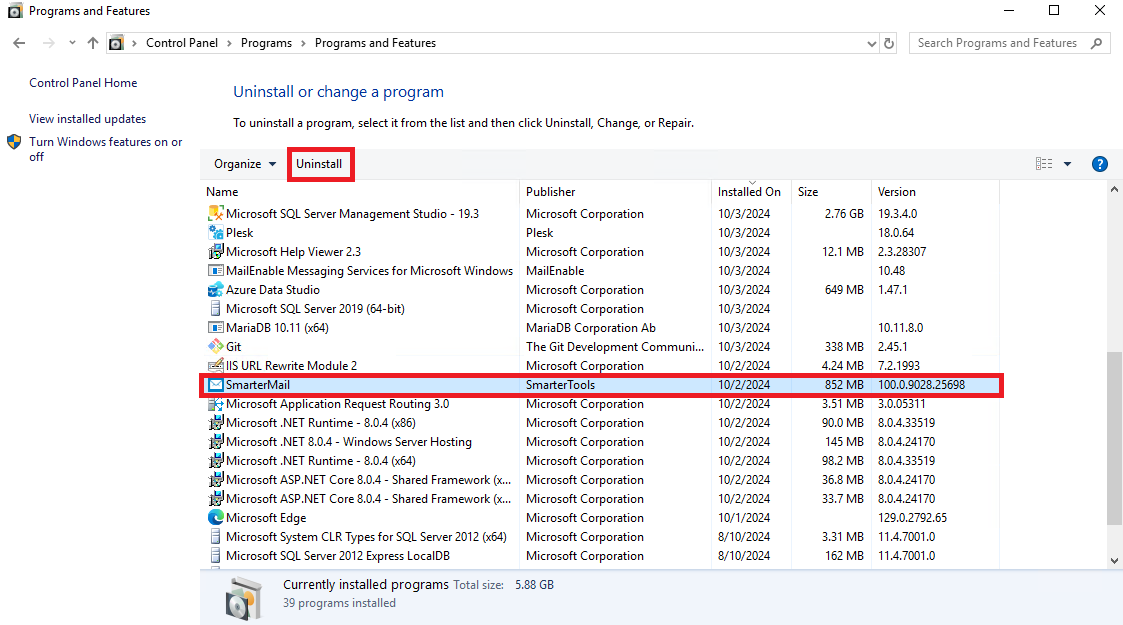
Step 5: Uninstall SmarterMail
- Open control panel > Uninstall program
- Choose SmarterMail > Uninstall
Step 6: Install the SmarterMail update
- Locate the downloaded installer and run it as Administrator.
- Follow the installation prompts. Ensure the installation path matches your existing installation directory, eg. C:\SmarterTools\SmarterMail\

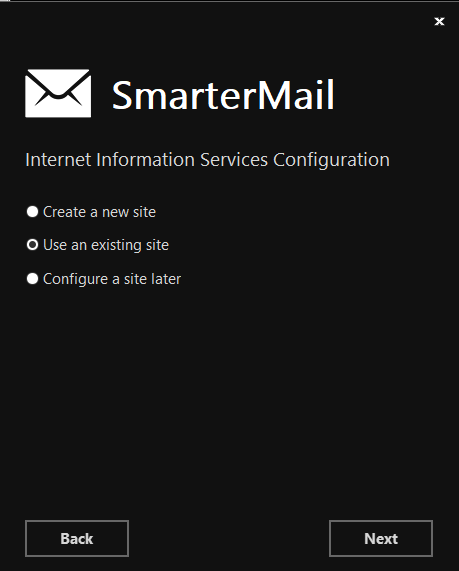
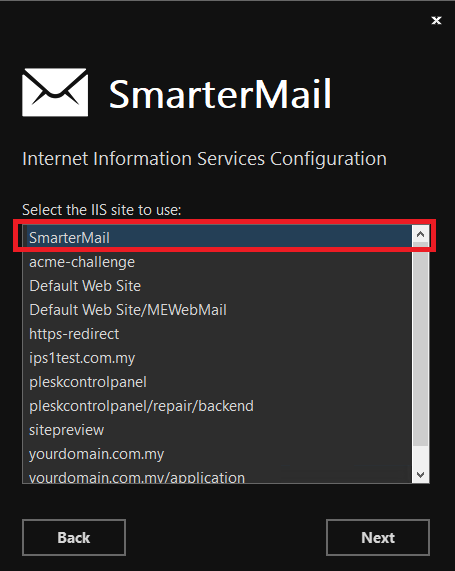
- Choose use an existing site > SmarterMail
- Complete the installation, then ensure the SmarterMail service is running.
Step 7: Verify the upgrade
- Log back into the SmarterMail web interface.
- Navigate to User at the top right corner > About Smartermail and confirm the version number reflects the new update.
- Test the system by sending a test email to confirm functionality.
Conclusion
Upgrading SmarterMail on Windows enhances performance, security, and access to new features. By following this guide, you ensure a smooth upgrade with minimized downtime. Should you encounter any issues during the upgrade, consult SmarterMail support or reach out to our support team.
For additional assistance or if you encounter any issues, please contact our support team at support@ipserverone.com.