Search Our Database
How to set up privacy on the directory in cPanel
Introduction
Securing sensitive directories on your website is crucial to protecting important files and data from unauthorized access. cPanel provides a built-in feature called Directory Privacy, which allows you to restrict access to specific directories by requiring a username and password. This guide will walk you through the step-by-step process of enabling password protection for a directory in cPanel, ensuring that only authorized users can access its contents.
Prerequisites
- An active cPanel account.
- Your cPanel login credentials (username and password).
Step-by-Step Guide
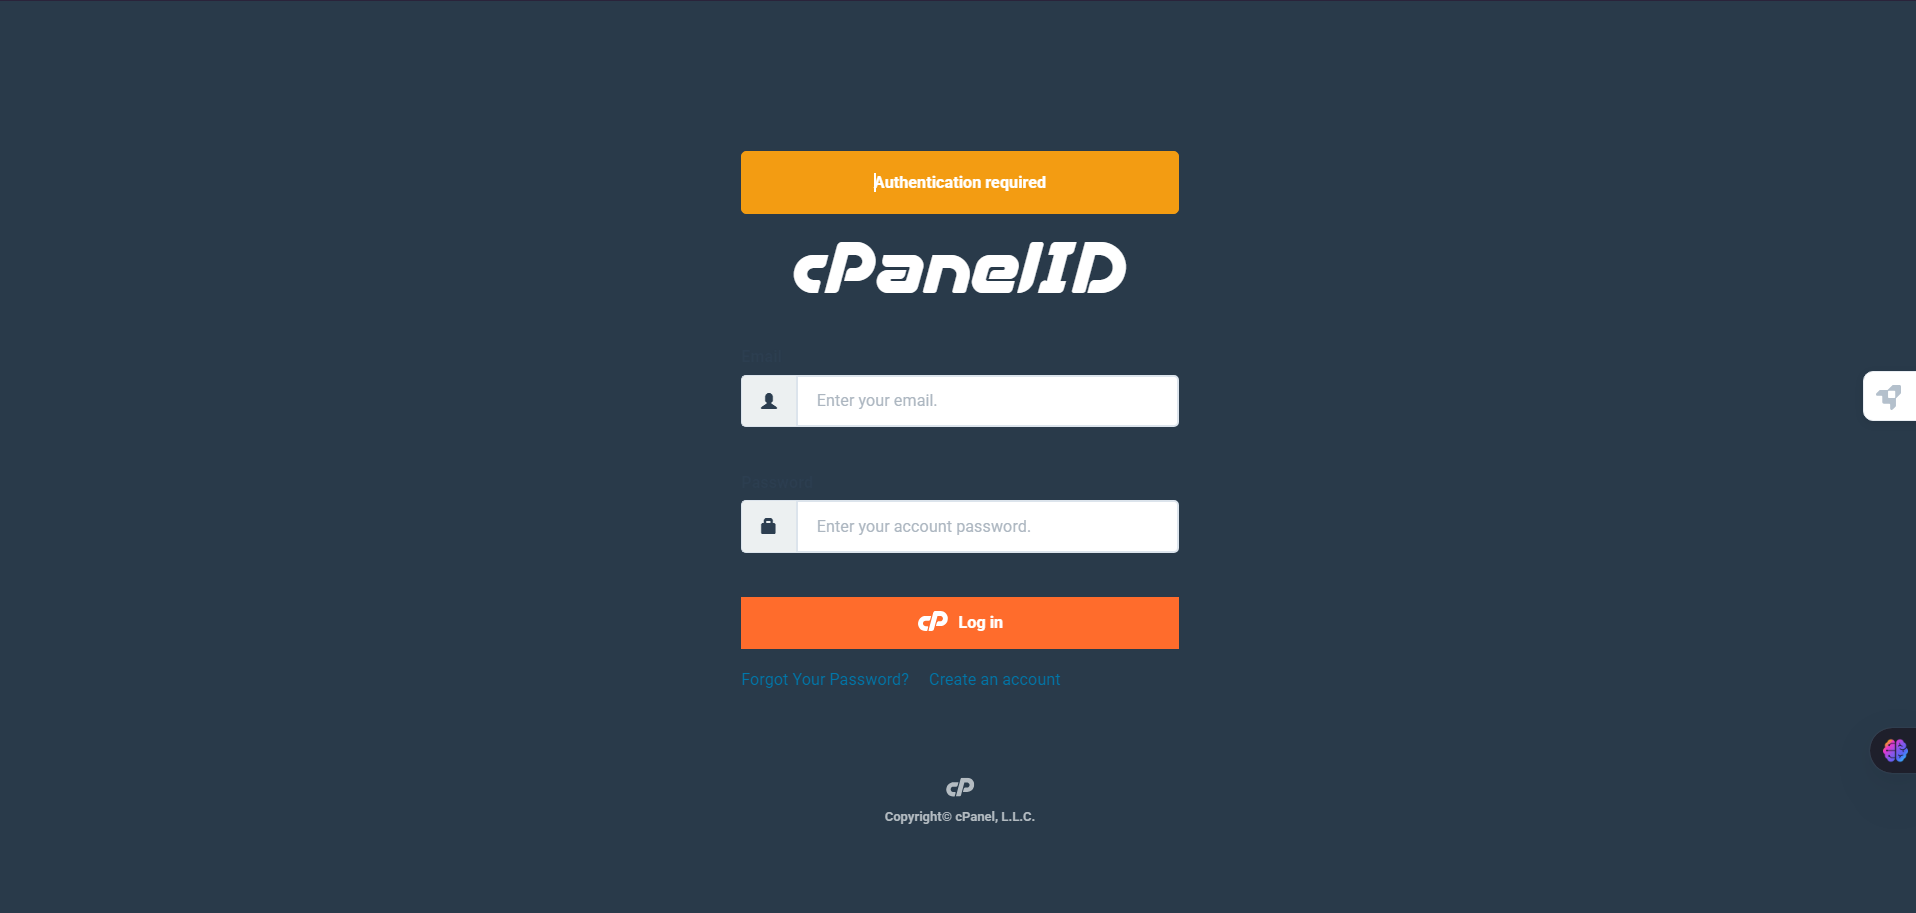
Step 1: Log in to the cPanel account
- Log in to cPanel using Username & Password. i.e; (https://yourdomain.com:2083 or https://yourdomain.com/cpanel)
Step 2: Navigate to Redirects
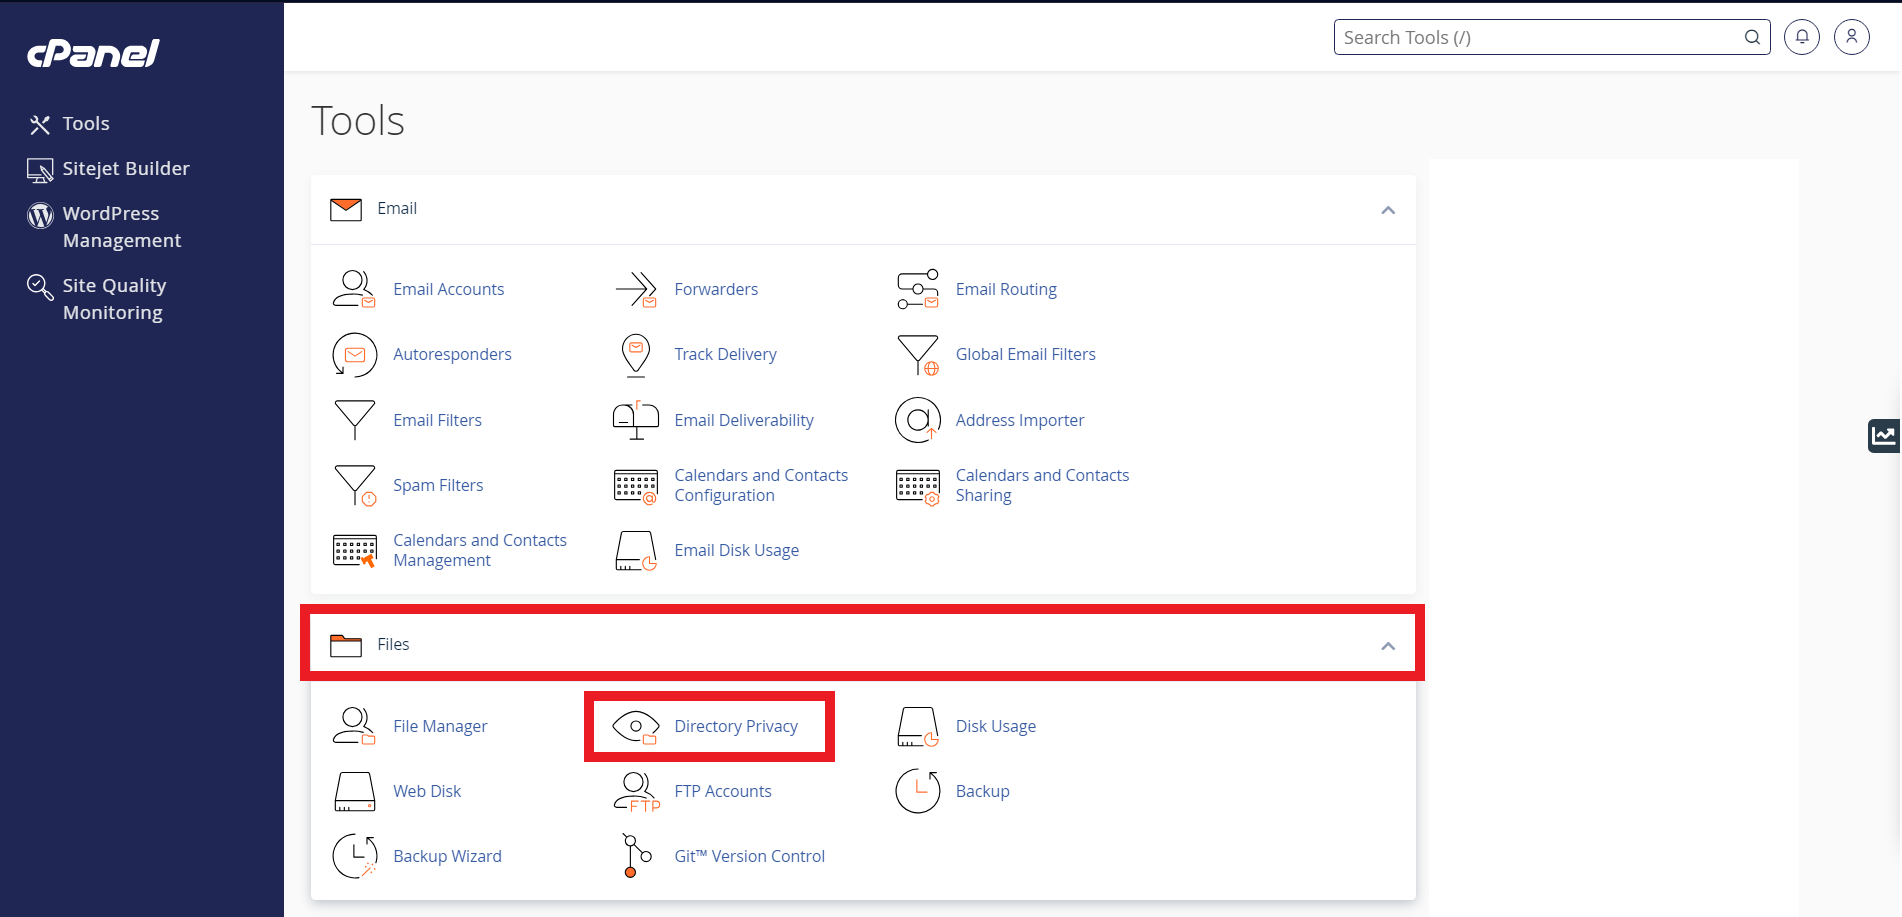
- On the cPanel dashboard, scroll down to the Files section. Click on Directory Privacy .
Step 3: Select Directory to Manage
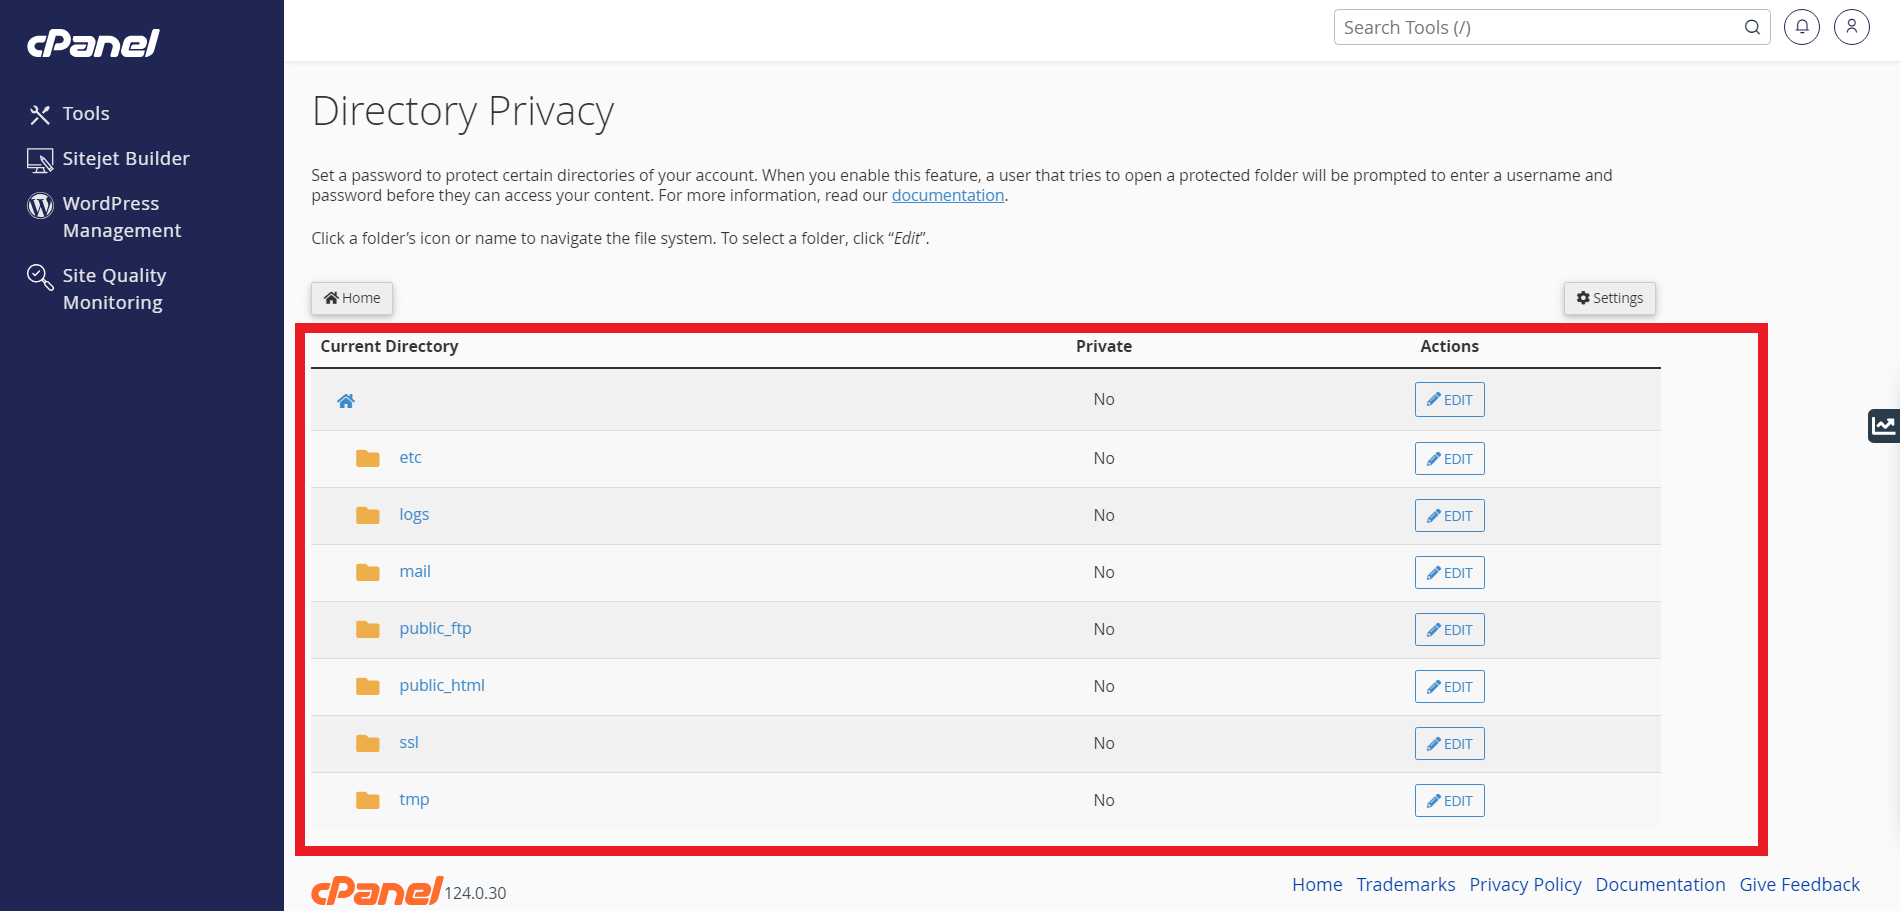
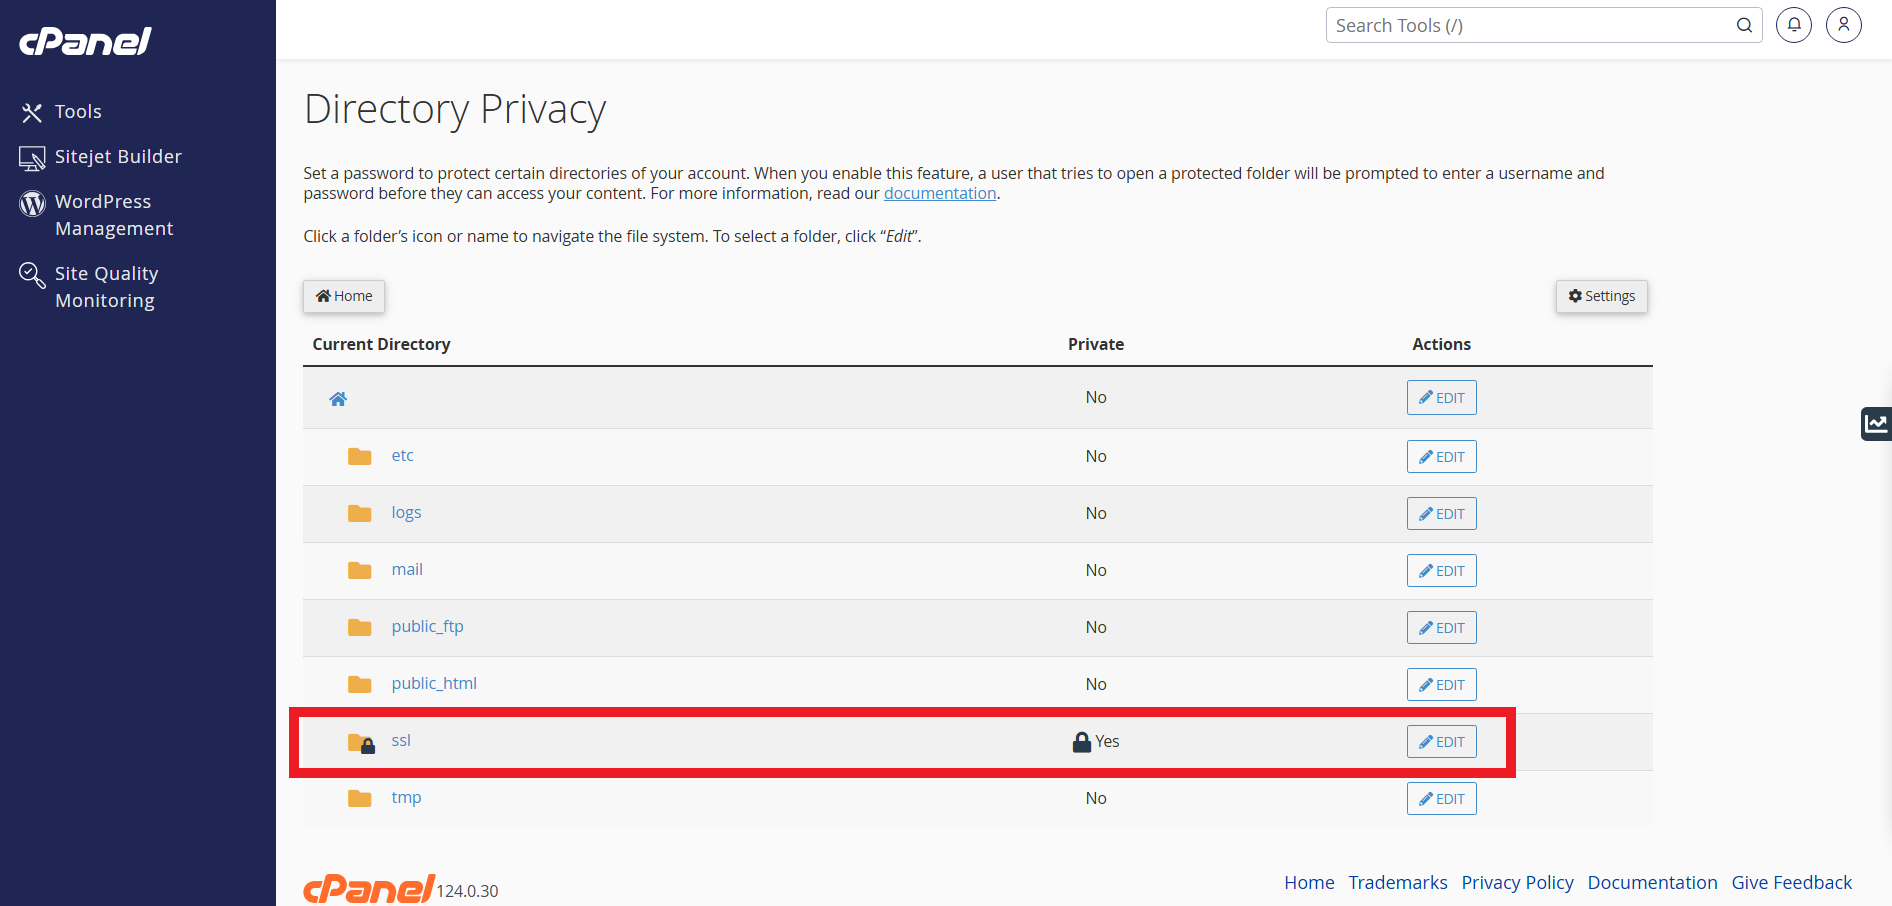
- To configure the security settings for a directory or subdirectory, click Edit under the Actions column.
- To view and select subdirectories, click the parent directory’s name. Then, click the desired subdirectory name.
- A protected directory’s subdirectories inherit their parent directory’s password protection.
- The lock icon indicates that Directory Privacy configurations already exist for that directory.
Step 4: Enable Password Protection for the directory.
- To password protect the selected directory, perform the following steps:
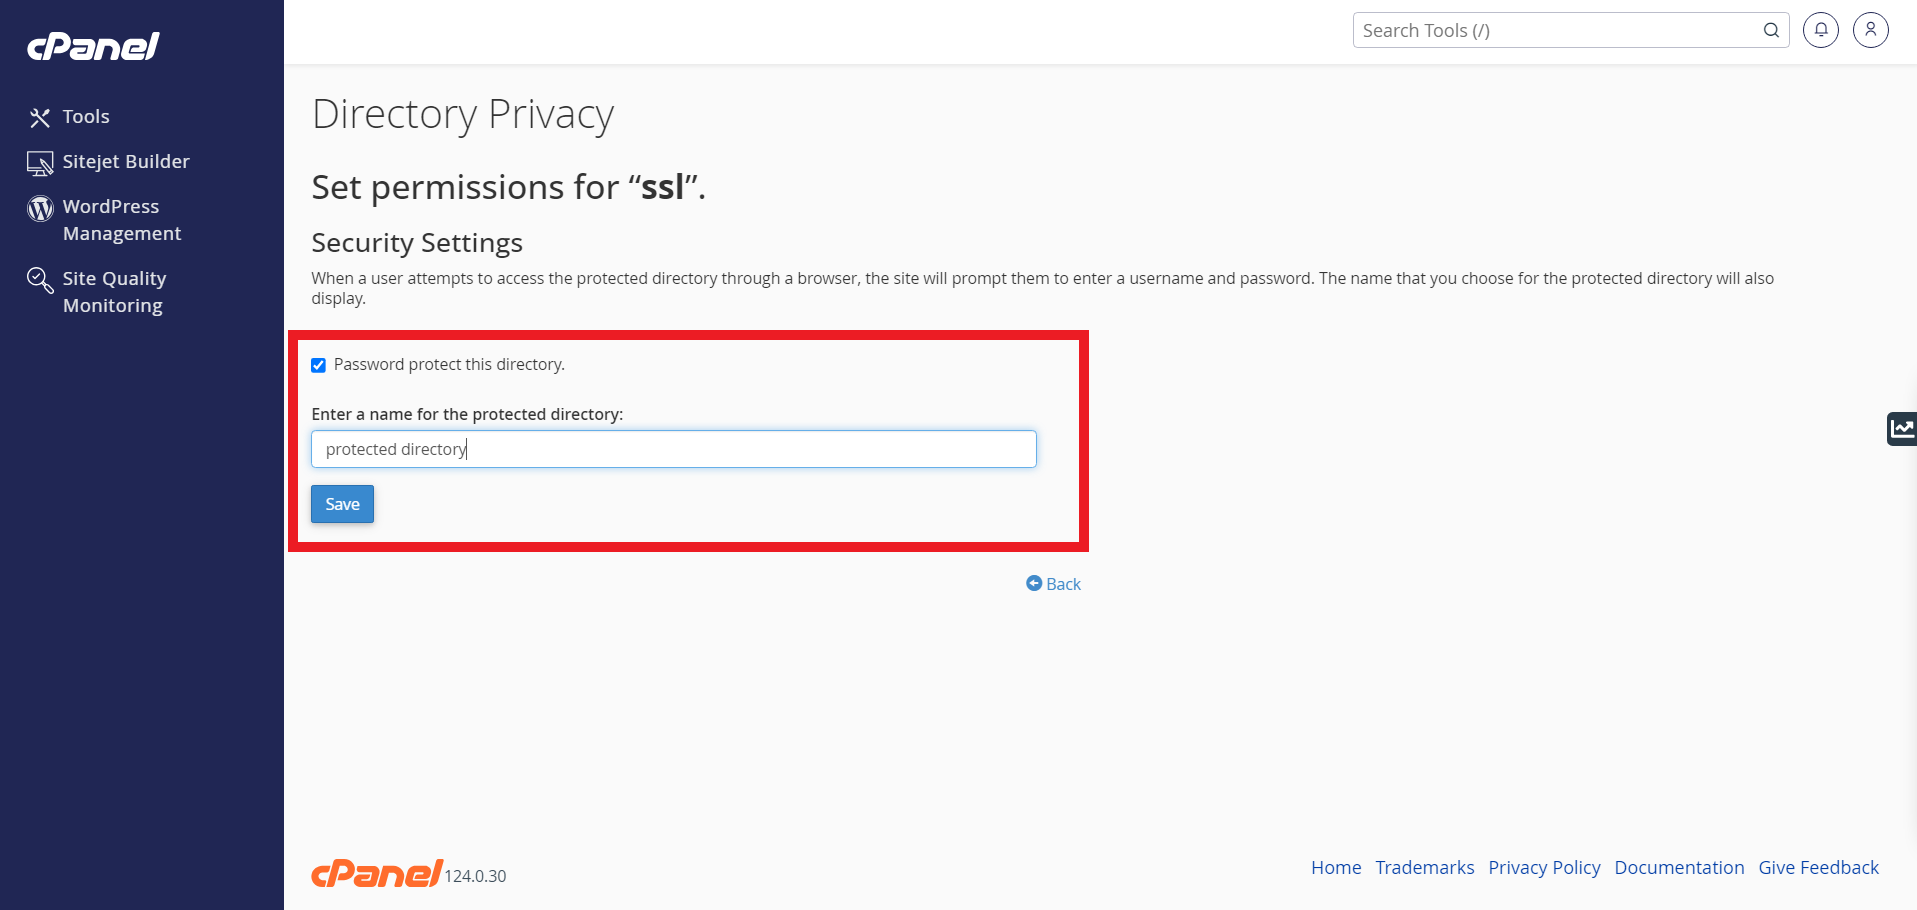
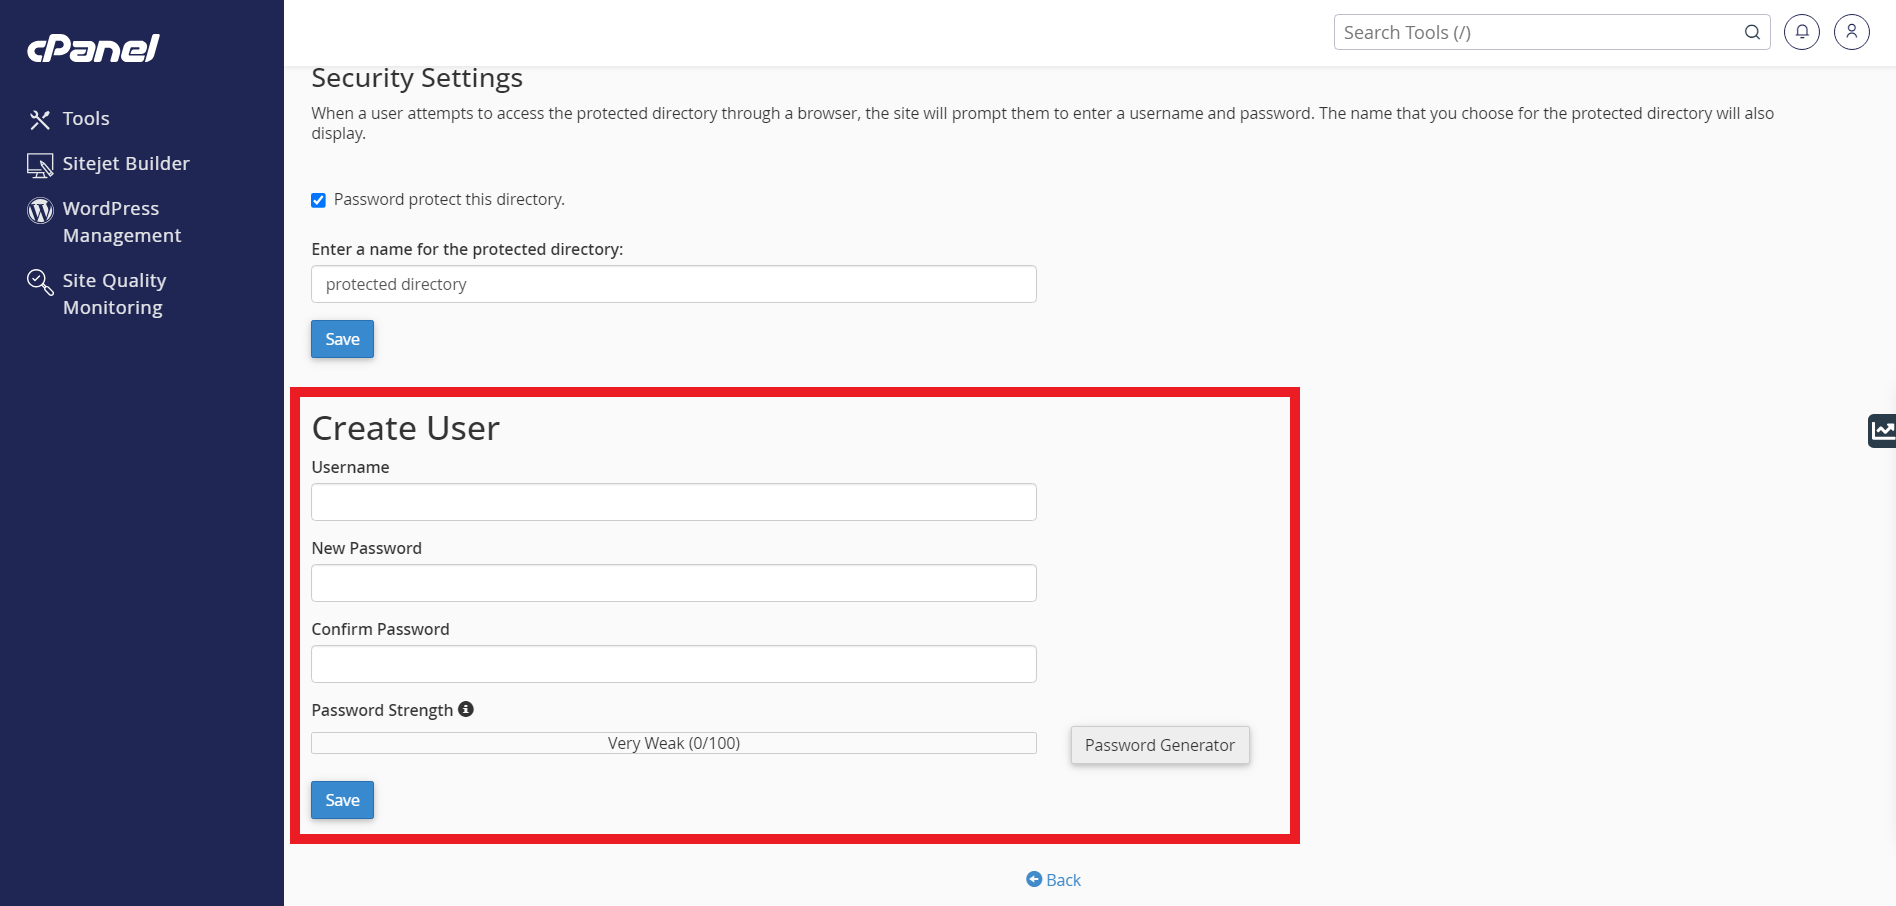
- Select the Password protect this directory checkbox.
- Enter a label for the directory in the Enter a name for the protected directory text box.
- Click Save. A confirmation message will appear. Click Go Back to return to the directory’s configuration.
Note:
- To remove password protection from a directory, deselect the Password protect this directory checkbox. Then, click Save.
- This name only functions as a label for the directory in its .htaccess file. Do not confuse it with the directory’s actual name.
Step 5: Create Authorized User
To create an authorized user for the selected directory, perform the following steps:
- Enter the desired username in the Username text box.
- Enter and confirm the new password in the appropriate text boxes.
- Click Save. A confirmation message will appear. Click Go Back to return to the directory’s configuration.
Note:
- The system evaluates the password that you enter on a scale of 100 points. 0 indicates a weak password, while 100 indicates a very secure password.
- Some web hosts require a minimum password strength. A green password Strength meter indicates that the password is equal to or greater than the required password strength.
- Click Password Generator to generate a strong password.
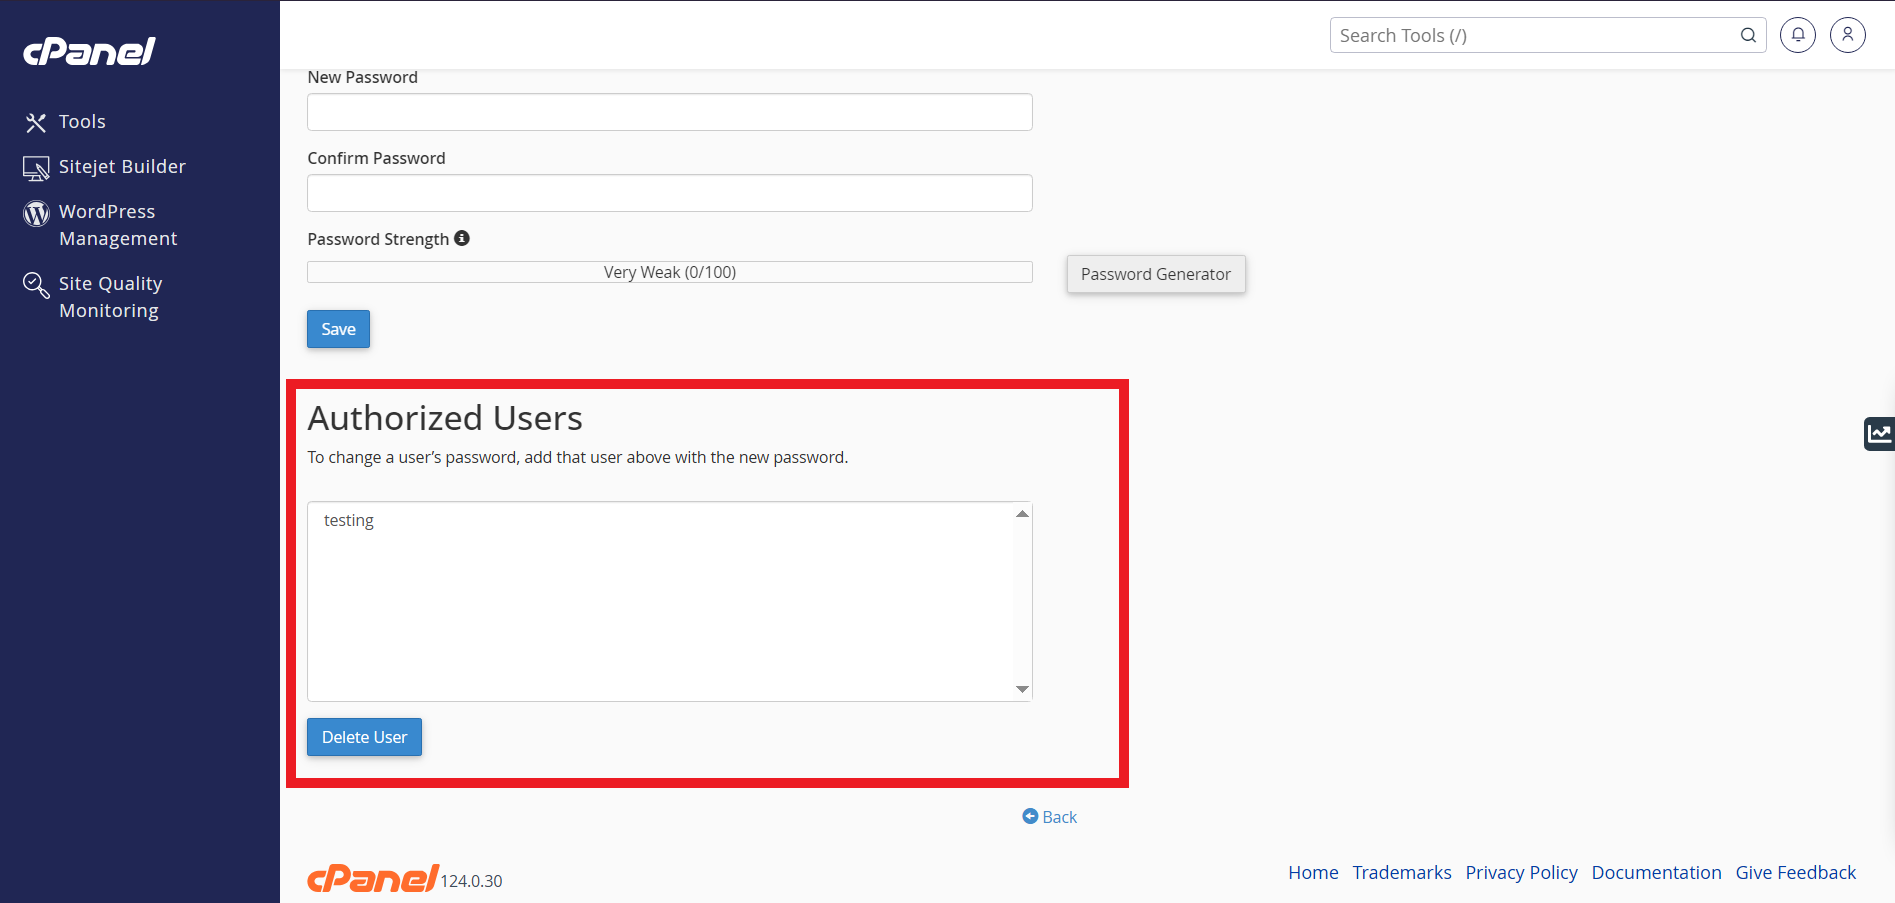
- To change an existing user’s password, enter the user’s information and the new desired password. Then, click Save.
- The Authorized Users menu lists the directory’s existing authorized users.
- To delete a user, select that user and click Delete User. A confirmation message will appear. Click Go Back to return to the directory’s configuration.
- After setup, the directory folder icon will display a lock icon.
Conclusion
By following these steps, you have successfully set up password protection for your directory in cPanel. This added layer of security helps safeguard your website’s sensitive data and restricts access to authorized users only. Remember to manage your authorized users carefully and use strong passwords to maintain a secure environment. If you need to make changes, you can always update permissions or remove password protection through the cPanel interface.
Should you encounter any issues or have any questions, our support team at IPSERVERONE is always here to assist you. Don’t hesitate to reach out to us at support@ipserverone.com for any help you need.
