Search Our Database
Delegate access in portal: Assigning roles and notifications to secondary users
Introduction
Assigning a secondary user (also called delegate access) enables businesses to grant the right level of control to the right individuals. This process is particularly useful for account management, collaboration, and workload distribution.
Delegate Access Overview
Delegate access provides the flexibility to share tasks and permissions with trusted team members or partners. This significantly reduces bottlenecks by eliminating the need for continuous oversight from the primary user. Additionally, you can tailor notification preferences for each delegated user, ensuring that they only receive messages pertinent to their responsibilities.
Benefits of Delegate Access and Customizing Notification Preferences
Delegate access and tailored notification settings work together to streamline workflows, strengthen security, and maintain continuous operations. By assigning only the necessary permissions to each user, you minimize bottlenecks and ensure that important processes remain uninterrupted—even if the primary account holder is unavailable. Clear role definitions make it easier to track responsibilities and actions, while customized notifications help prevent information overload by directing essential alerts—such as billing notices and maintenance updates—to the right person at the right time. This focused approach ultimately improves accountability, reduces the chance of overlooked tasks, and keeps team members aligned with their specific duties.
Available Secondary User Roles/Permissions::
When assigning a secondary user, you can choose one or more roles. Each role grants distinct privileges:
- Manager Role
This role allows you to manage secondary users by assigning or removing roles for themselves and others, configure notification settings, access ‘My Services’ section to view all service lists, and update name servers, WHOIS data, and domain ownership. - Technical Role
This role covers managing services via NovaCloud, viewing active service lists, and submitting support tickets through the Help Center. - Billing Role
This role grants the ability to view services that are expiring or expired, and to access the Billing & Payment sections to make payments - Purchasing Role
This role enables you to make purchases from the Dashboard or My Services sections. - Visitation Role
This role provides access to My Services and the Data Center menus, allowing you to submit visitation requests.
For a details on each role’s capabilities, refer to the Secondary User Login in Portal and Role Details guide.
This guide covers:
- How to assign secondary users and define roles and permissions
- How to customize notification emails
By delegating access, you can simplify internal processes, strengthen security, and improve overall operational performance. You can configure this feature within the Account Settings of the IPSERVERONE customer portal.
1. Access “My Account” and Delegate Access
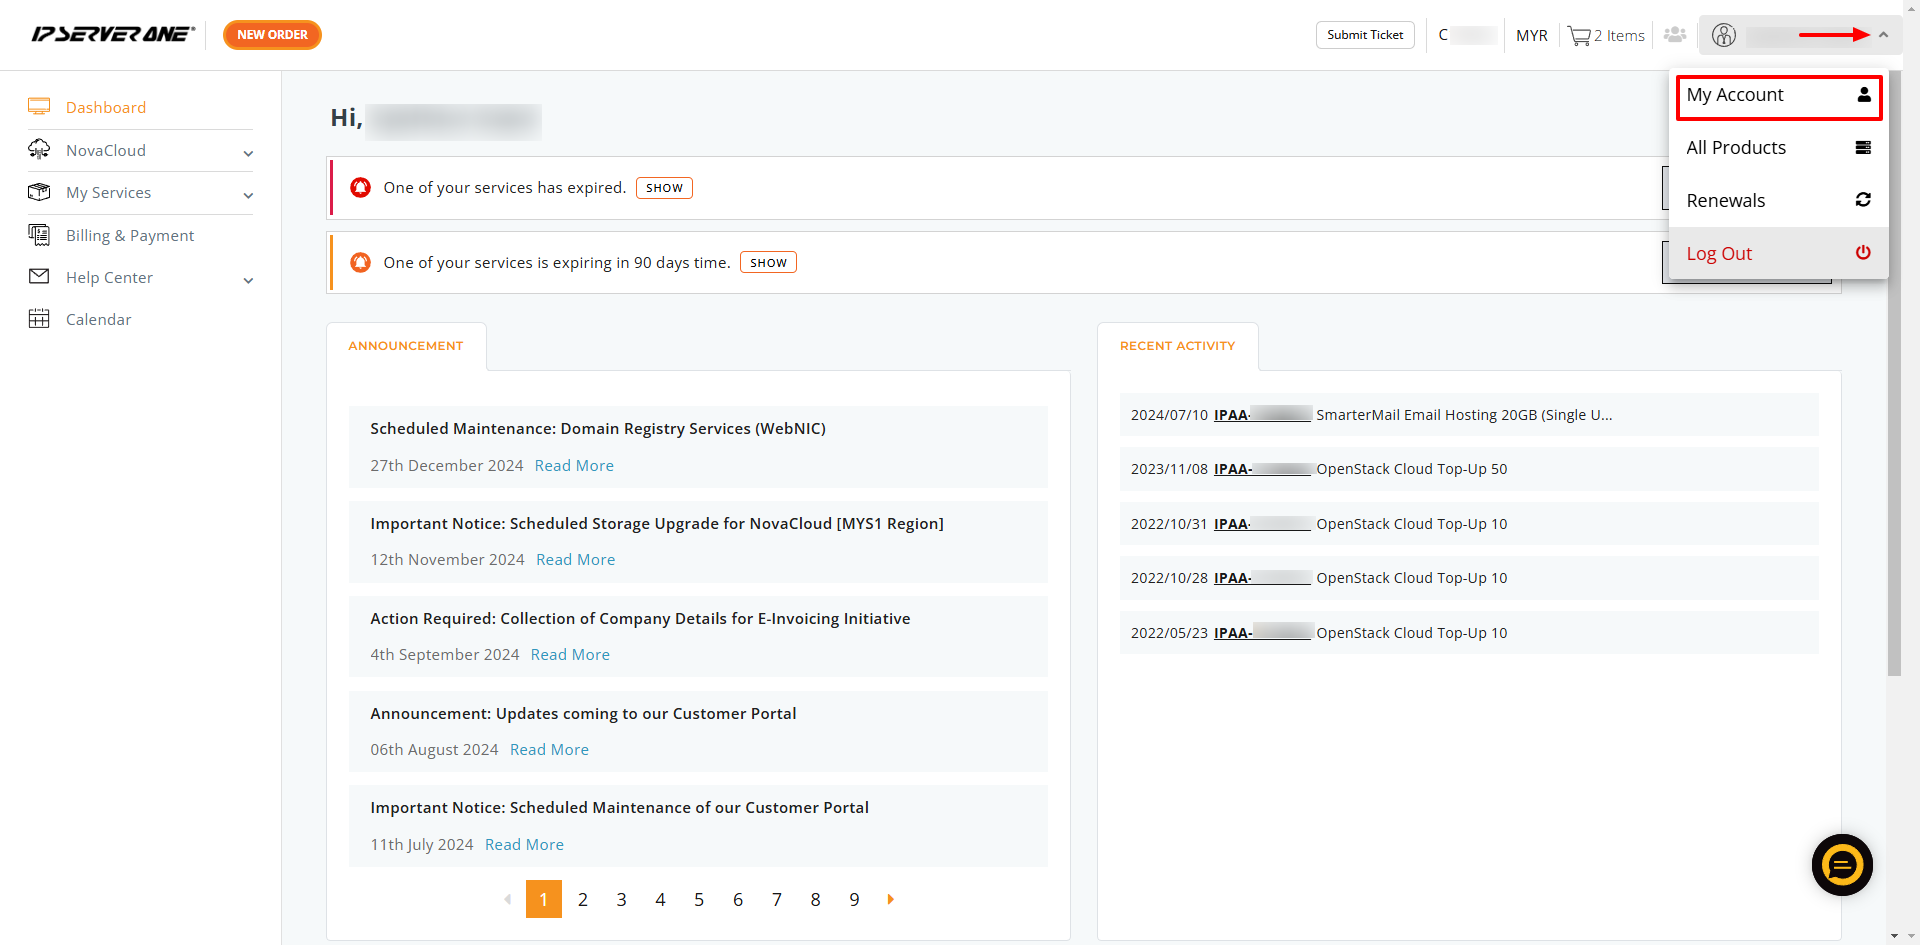
Log in to your customer portal at https://portal.ipserverone.com. Next, click your username in the top-right corner and select My Account from the dropdown menu.
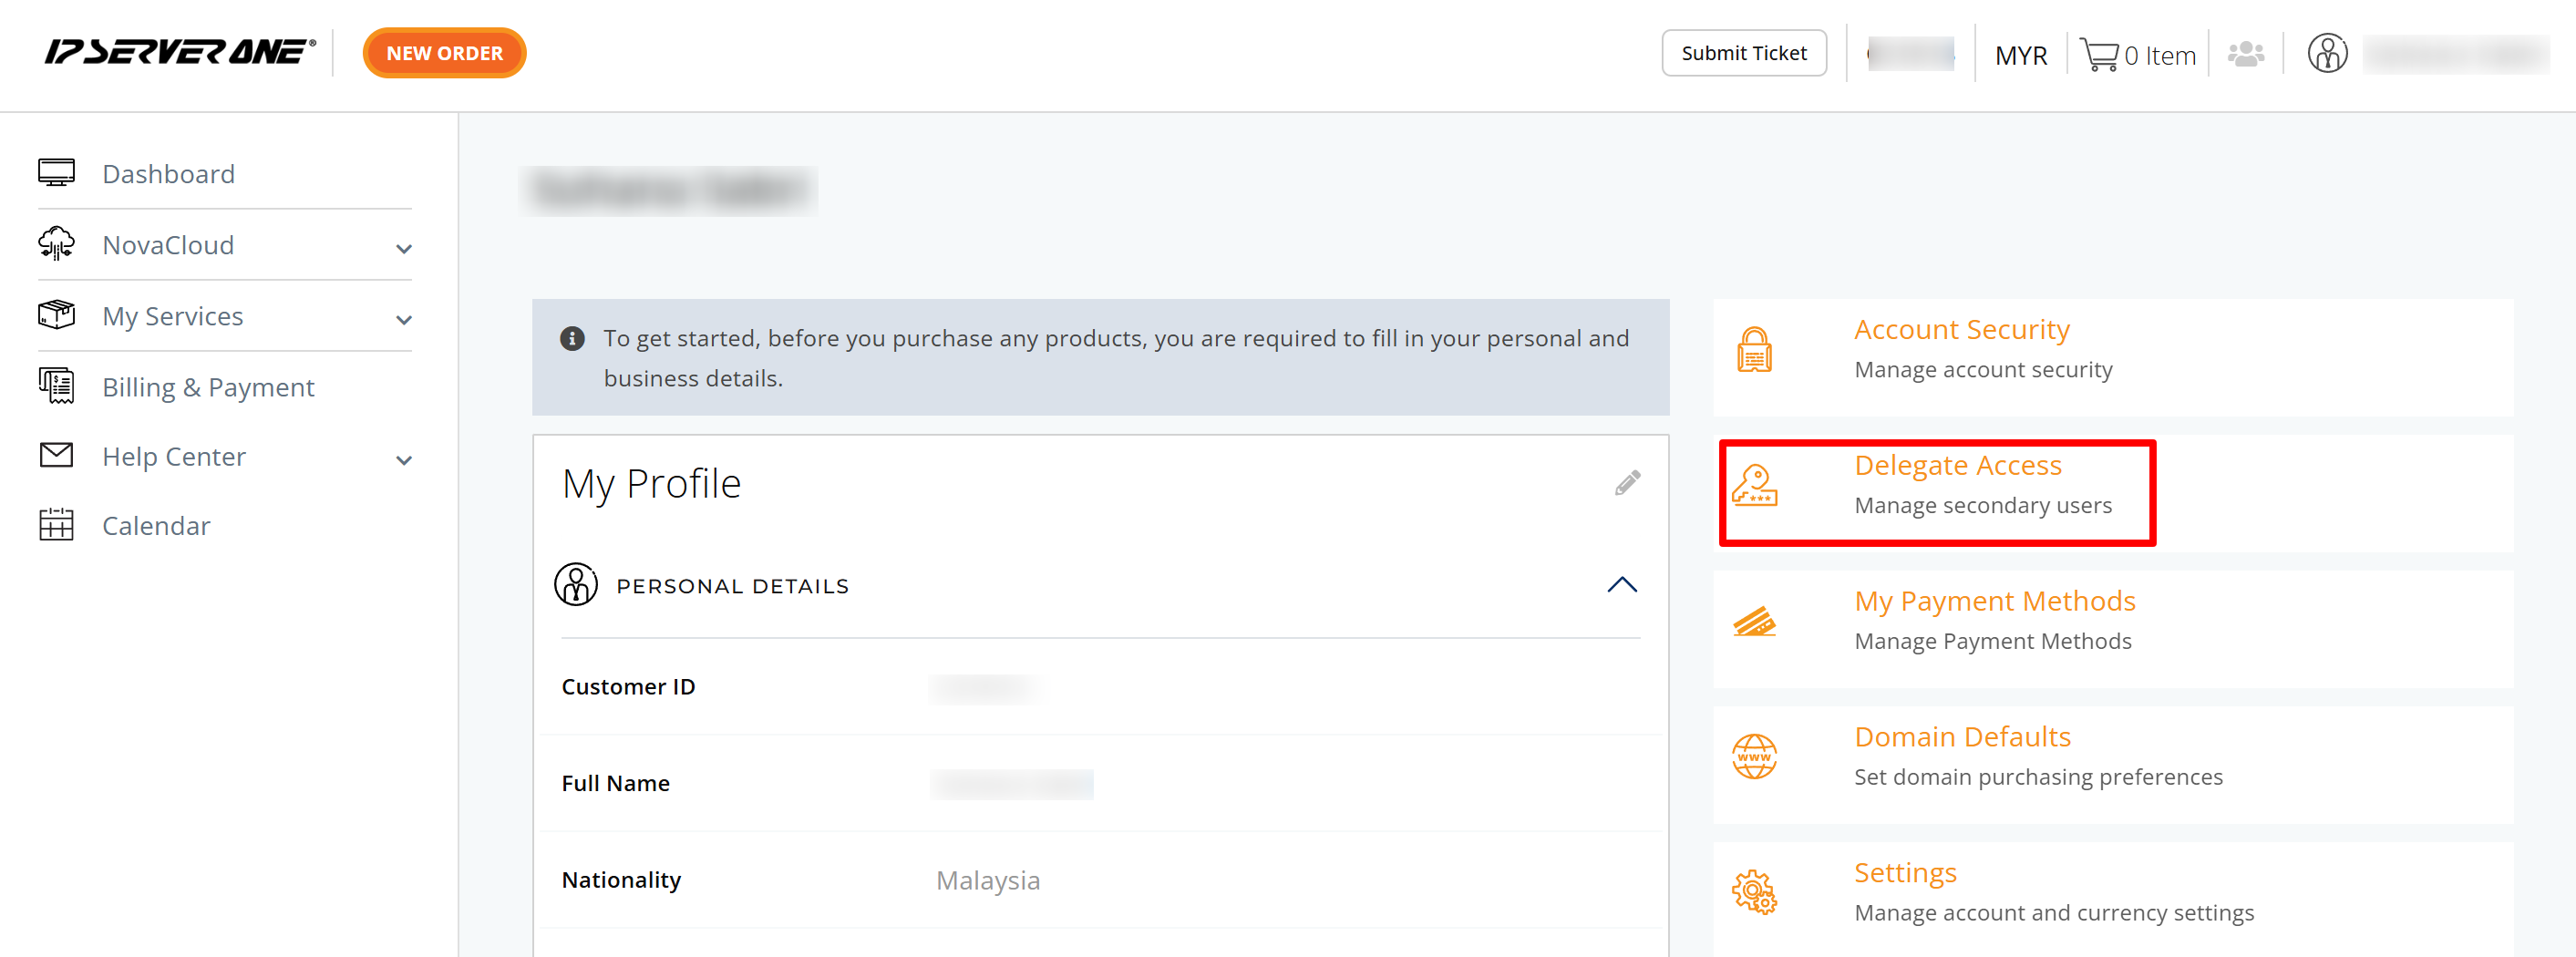
On the next page, click on Delegate Access to add and manage secondary users.
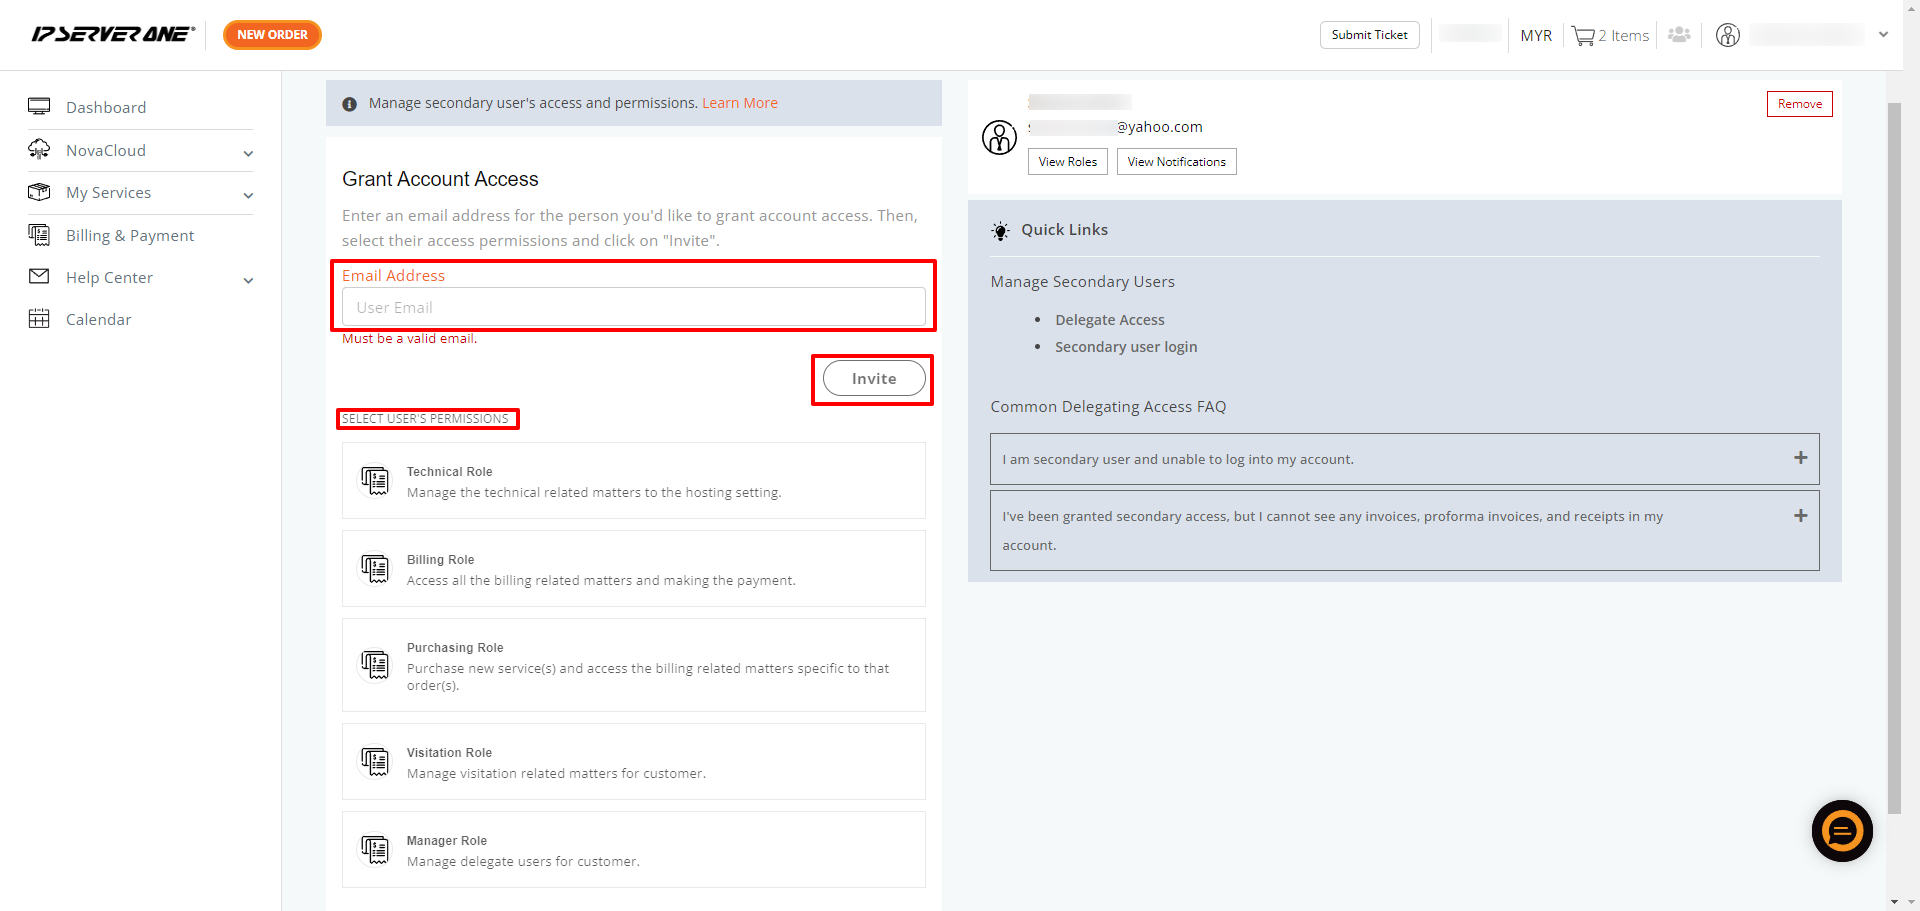
2. Enter secondary user’s email and set permissions
- Enter the email address of the secondary user.
- Select the roles and permissions you want to grant.
- Click Invite.
3. Notification for the Secondary User
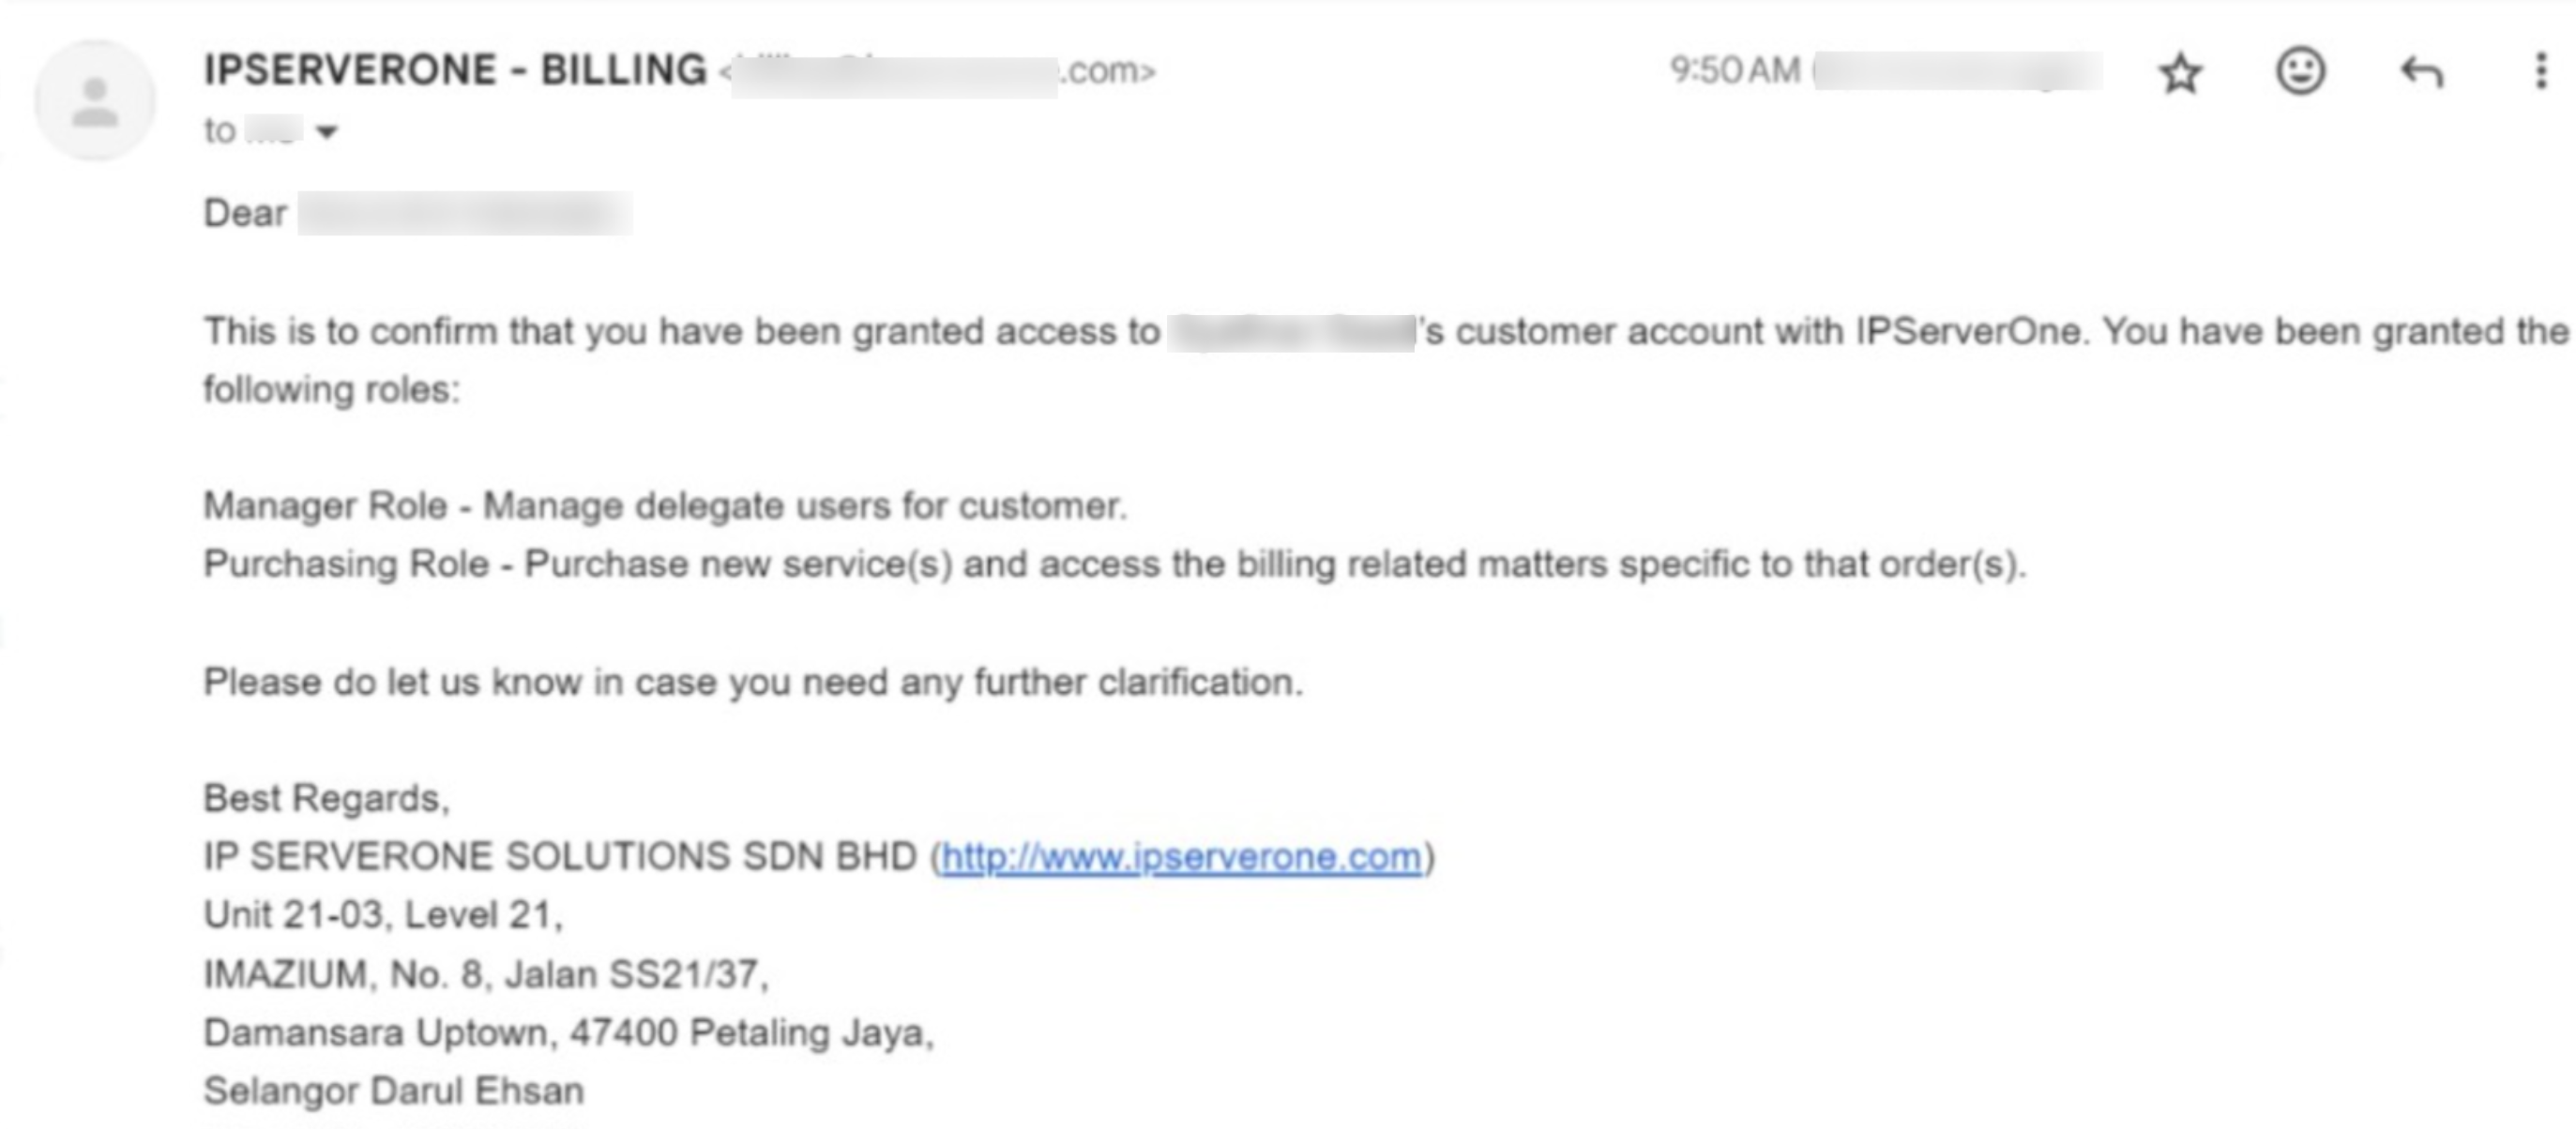
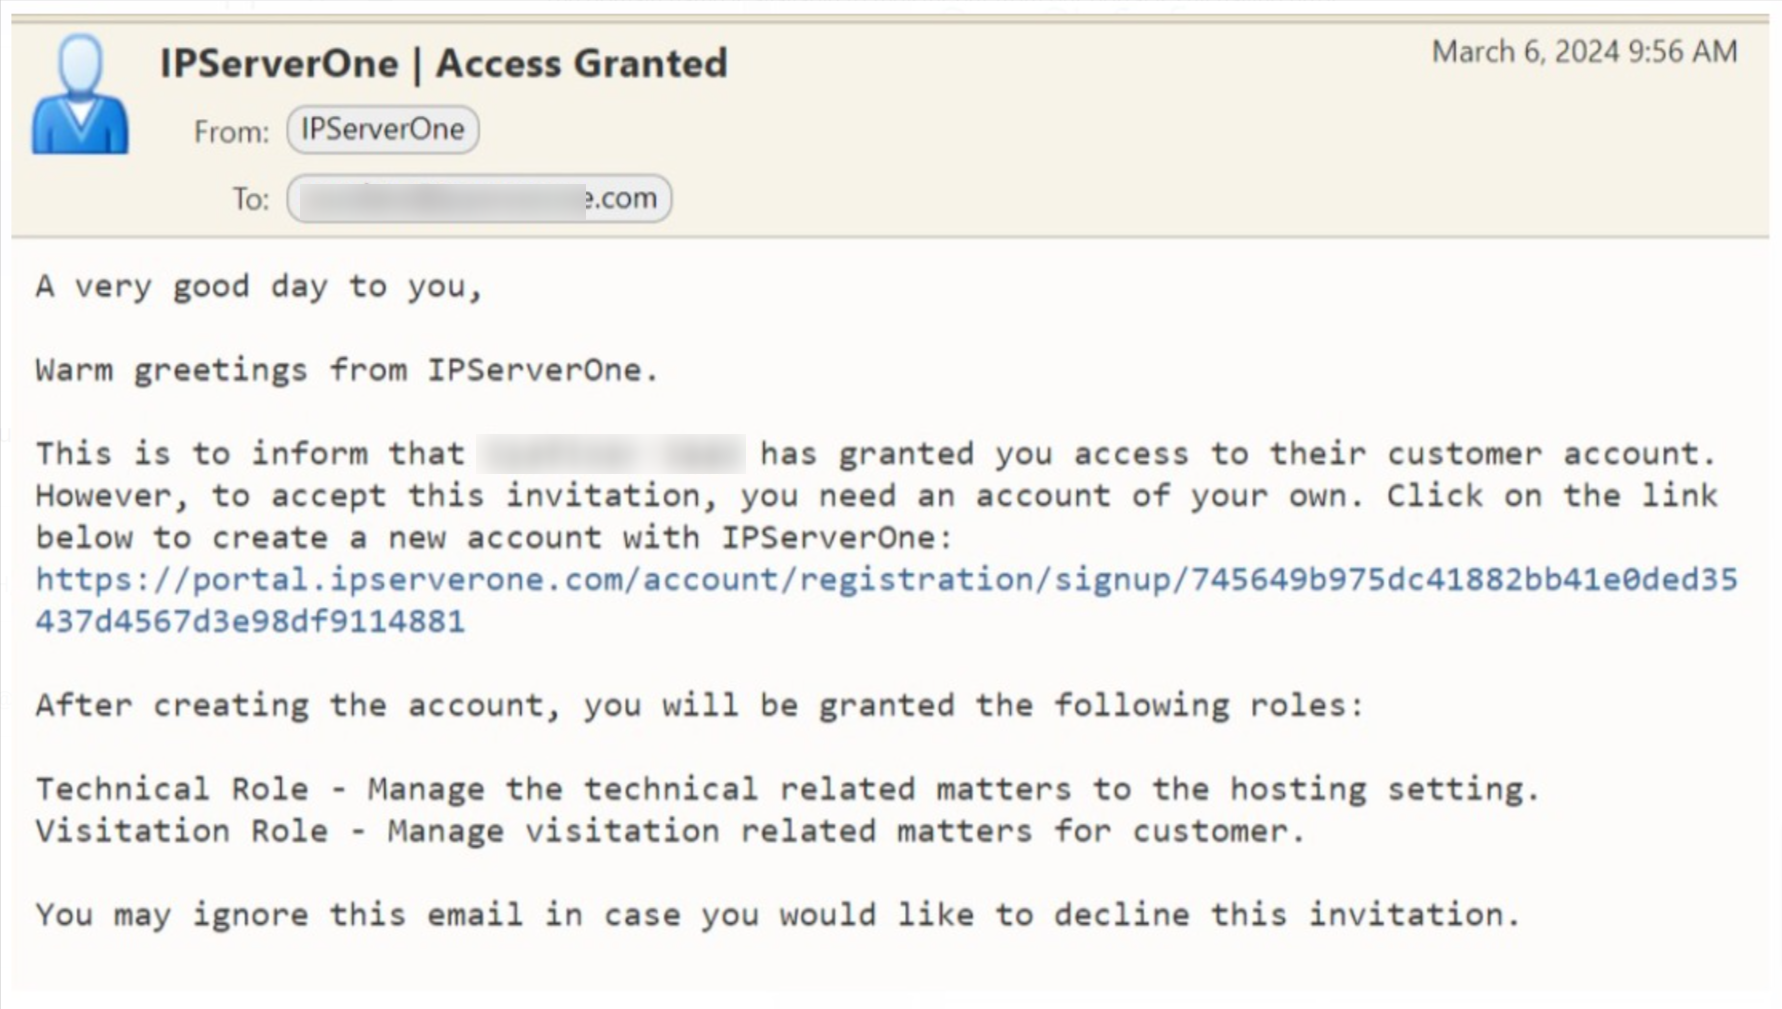
Once you grant delegate access, the designated secondary user will receive a notification email. At this point, two scenarios can occur::
- If the secondary user has an IPServerOne account and their email is registered in the customer portal, the process is faster. As soon as the primary user grants access, the secondary user will receive a notification email confirming they have been set as a secondary user. They can then immediately begin performing their delegated roles.
- If the secondary user’s email address is not registered, the delegate access status appears as Request Pending. The secondary user will receive an email informing them of the delegation and must click the link provided to accept the role. They must then create an account to finalize the process.
When granting secondary user access, it’s important to manage their roles and notifications so they only receive updates relevant to their responsibilities. Below are the steps to view, remove, and customize notifications for secondary users:
1. View Secondary Users
Once a secondary user has been added, you can see their name, roles, and notification preferences in Delegate Access page under My Account. If they haven’t configured their notifications yet, you’ll notice a Setup Notification prompt in red.
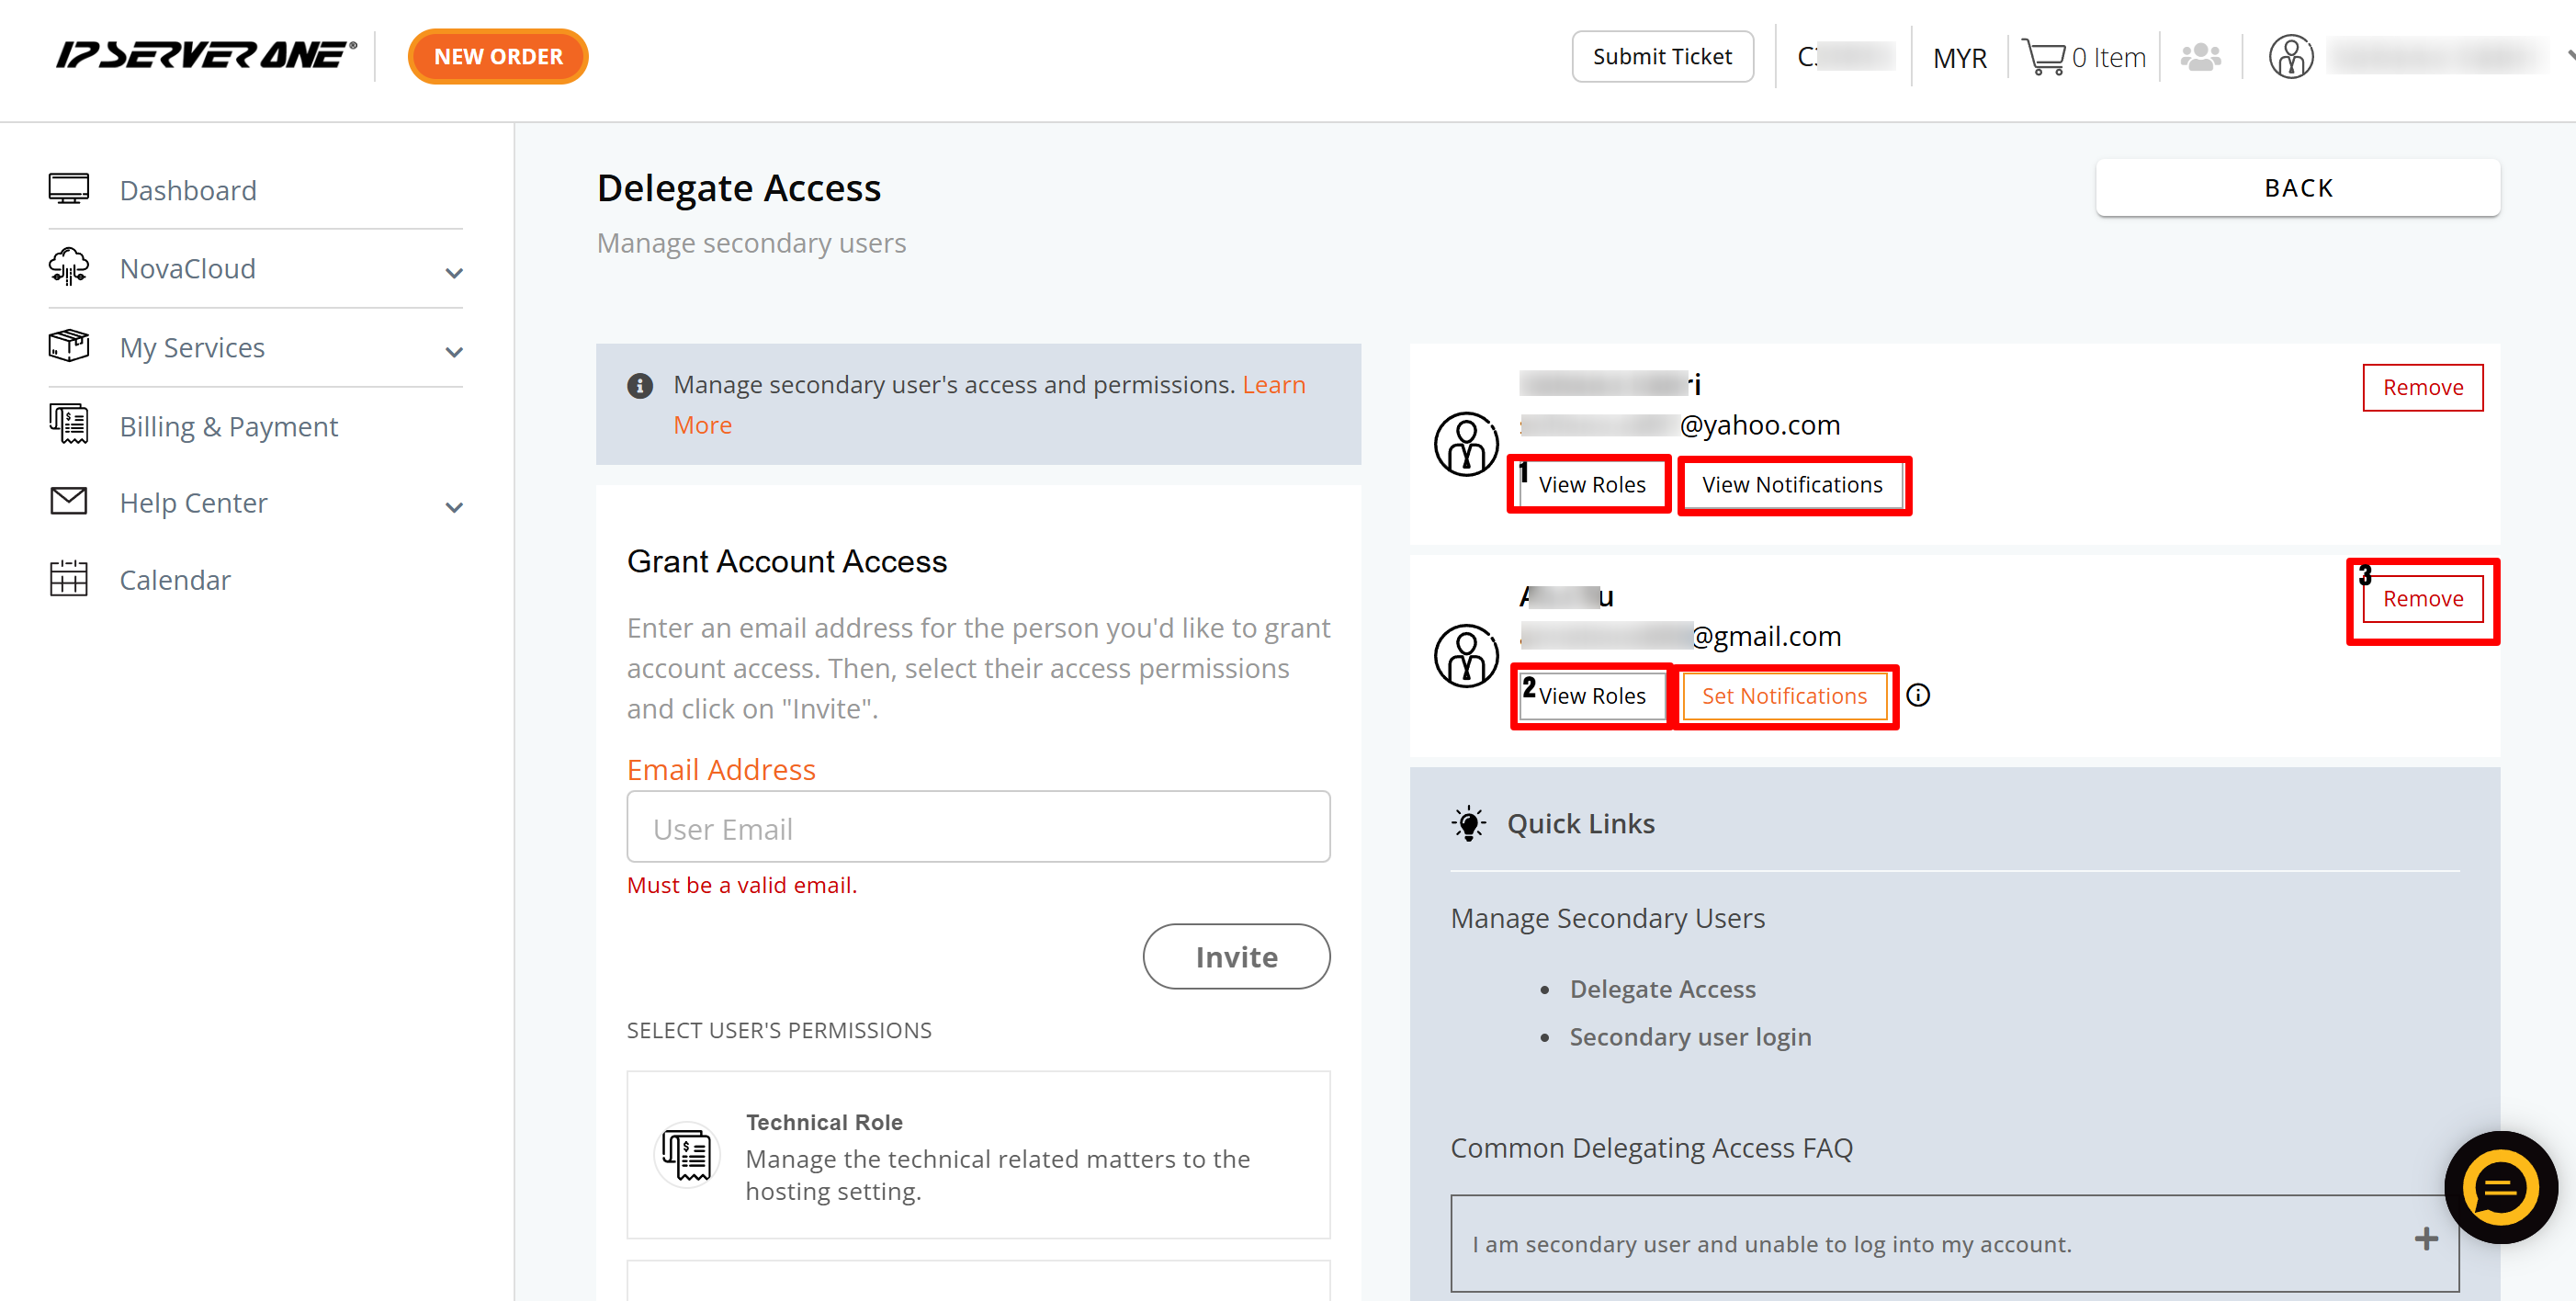
2. Customize Notification Preferences
In the Delegate Access page, select Set Notification or View Notifications next to the secondary user you want to edit. Choose the notification categories you wish to enable—there’s no limit to the number of categories you can select. Click Change to save your settings.
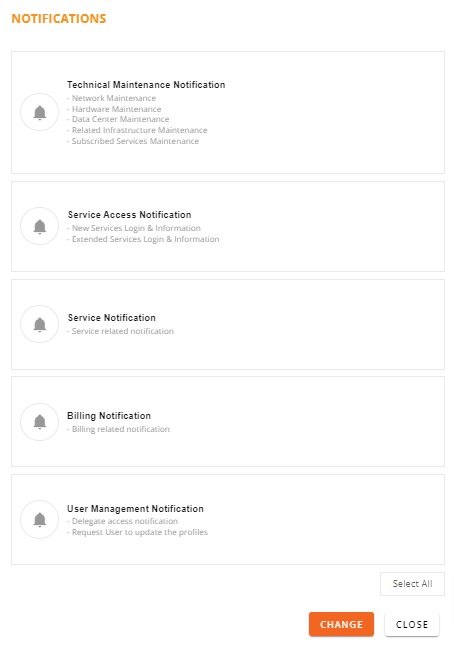
Available Notification Options
Secondary users can receive various notifications depending on their roles and responsibilities. These include:
Technical Maintenance Notifications
Alerts related to cloud credit thresholds, plus network, hardware, data center, infrastructure, and service maintenance updates.
Service Access Notifications
Notices when new services are activated, or current services are extended.
Service Notifications
Information regarding renewals, expirations, domain statuses, promotions, DNS changes, service upgrades, and order confirmations.
Billing Notifications
Reminders for unpaid or upcoming invoices, invoice requests, and automated invoice issuance.
User Management Notifications
Updates about delegate access changes, role amendments, and profile modifications.
3. Remove or Revoke Access (Optional)
As the primary account holder, you can Remove access for any secondary user at any time by clicking the Remove button next to their name.
For comprehensive details on accessing a primary account as a secondary user—or if you need to manage multiple primary accounts—please consult the Secondary User Login in Portal and Role Details guide.
Conclusion
By assigning secondary users, defining appropriate roles, and tailoring notifications within the customer portal, you can enhance your team’s productivity, accountability, and security. Delegating tasks to the right people ensures critical responsibilities are handled promptly—even when the primary account holder is unavailable.
If you need any help or have additional questions, please submit a support ticket through the customer portal or contact our Customer Support Team at cs@ipserverone.com.
Happy managing!
Article posted on February, 2024.