Introduction
This article provides a step-by-step guide on how to set up two-factor authentication (2FA) for SmarterMail email accounts. It is intended for users looking to enhance the security of their email by adding an extra layer of protection. Two-factor authentication adds an additional security step, requiring a second form of verification along with your password. This solution explains how to enable and configure 2FA within the SmarterMail webmail interface.
Prerequisites
- Access to your SmarterMail email account.
- A mobile device with a compatible authentication app (e.g., Google Authenticator or Microsoft Authenticator).
- Ensure two-factor authentication (2FA) is enabled for your SmarterMail server by the administrator.
Step-by-Step Guide
Step 1: Log in to SmarterMail webmail
Open your web browser and go to the SmarterMail webmail login page. Enter your email address and password, then click ‘Login’.
Step 2: Access the two-factor authentication settings
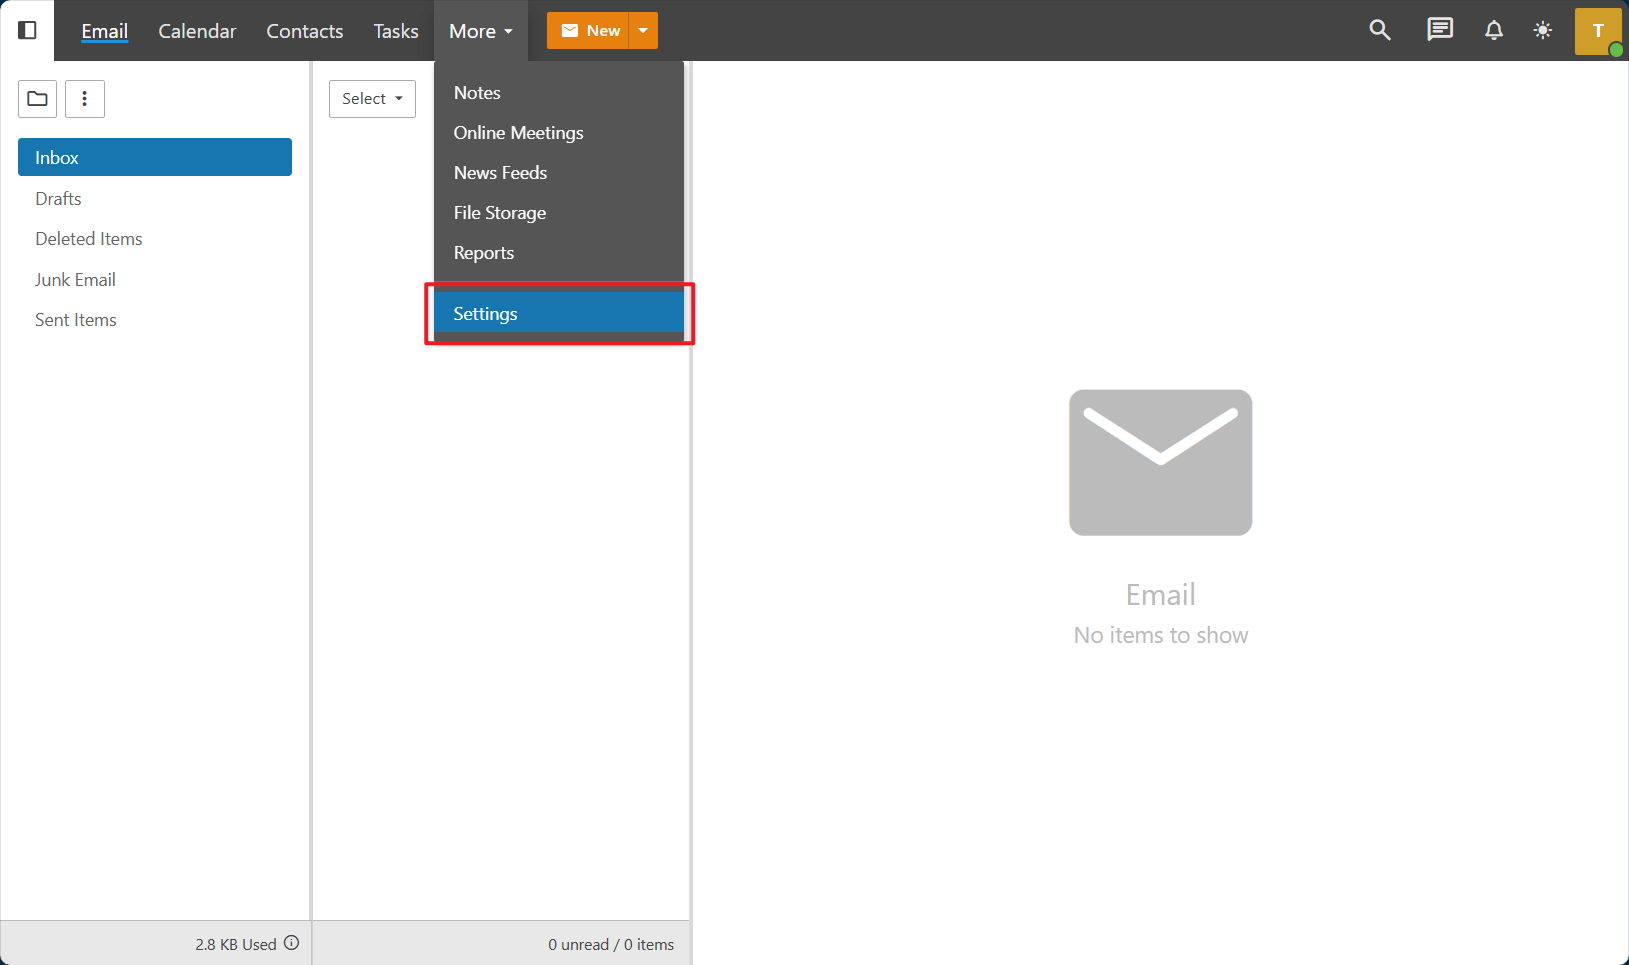
1. Click on the ‘More’ button in the top menu bar. Then, select ‘Settings’.
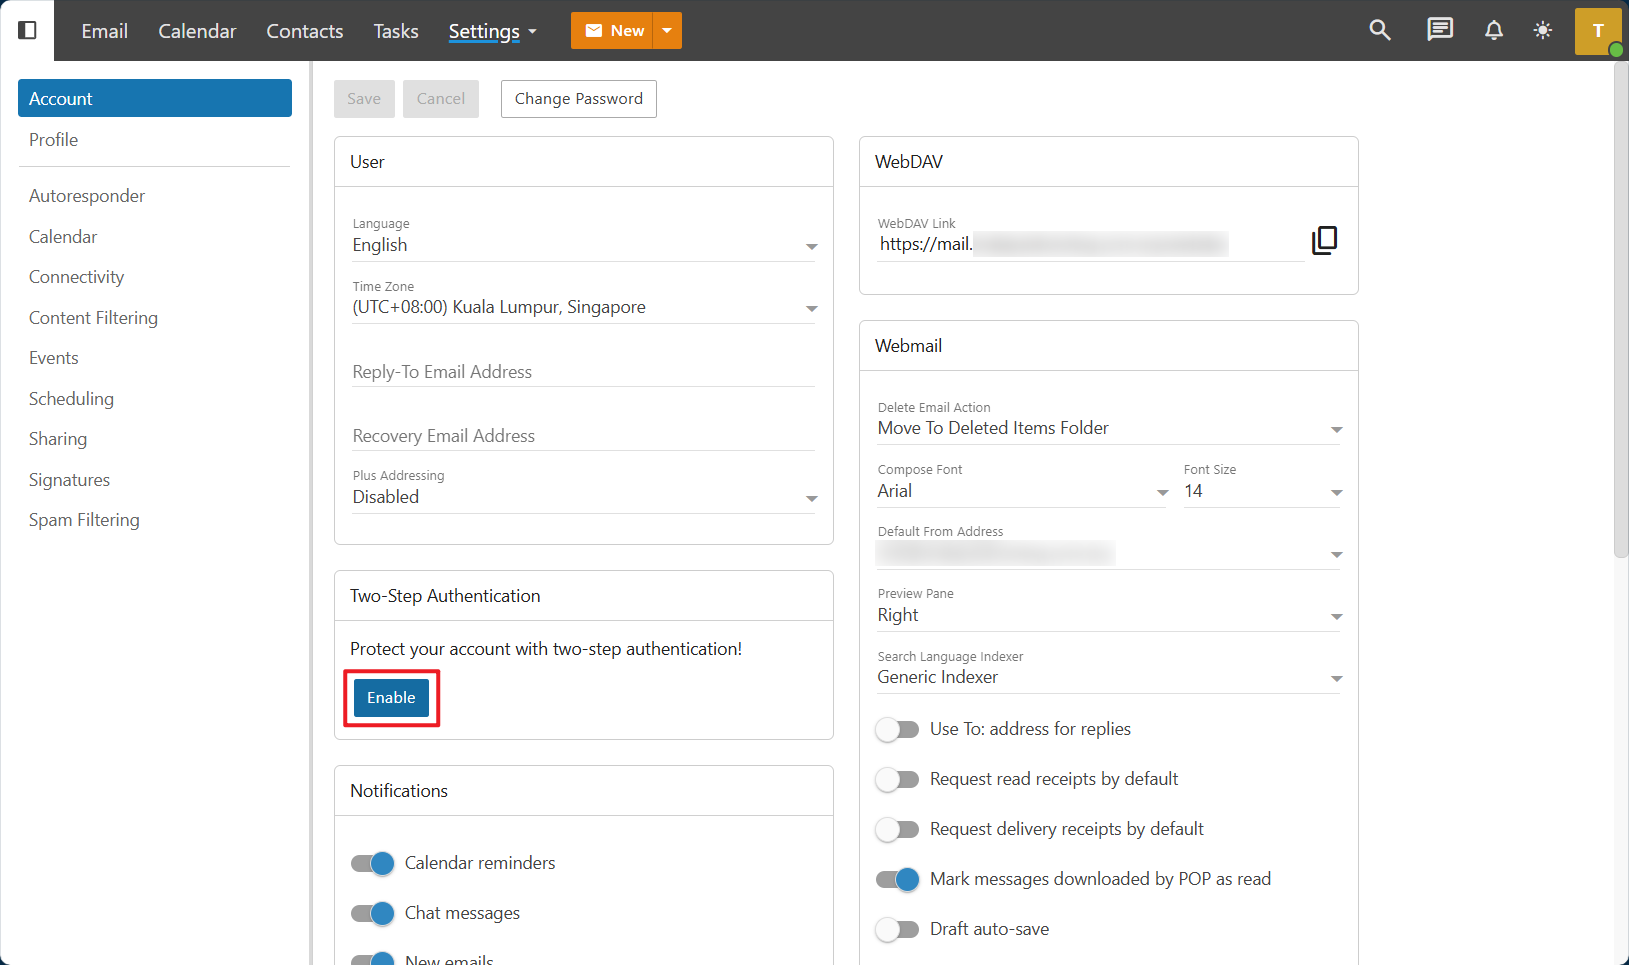
2. Make sure you are under in Account section at the left panel. Click on ‘Enable’ button under the Two-Step Authentication section.
Step 3: Choose the verification method
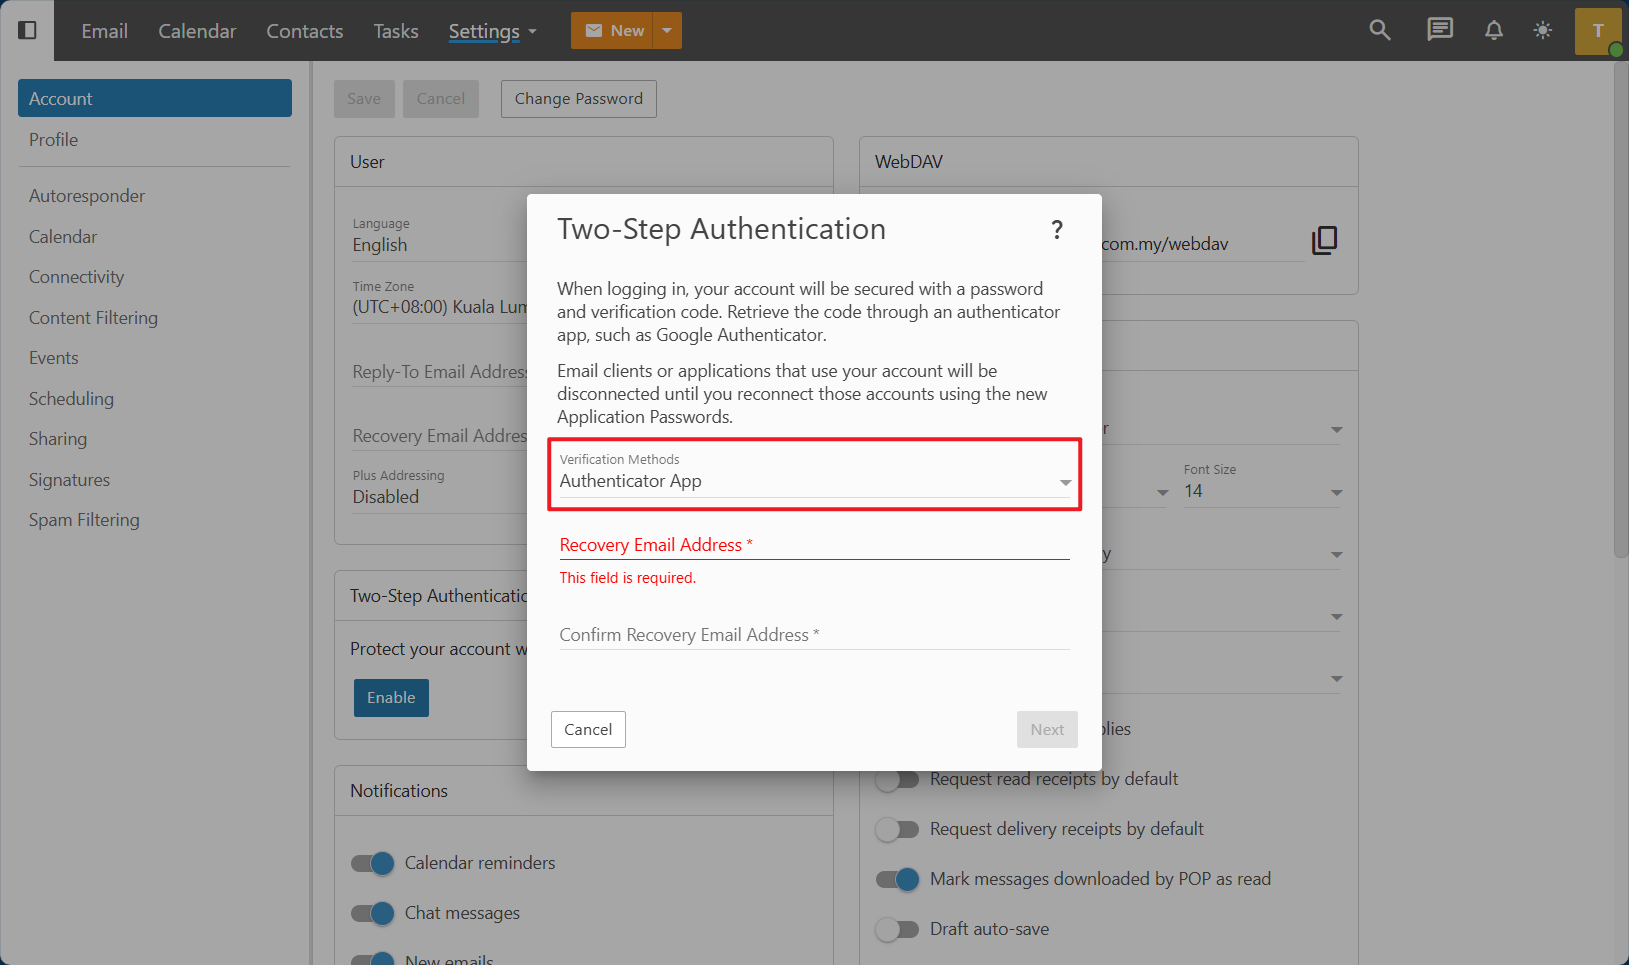
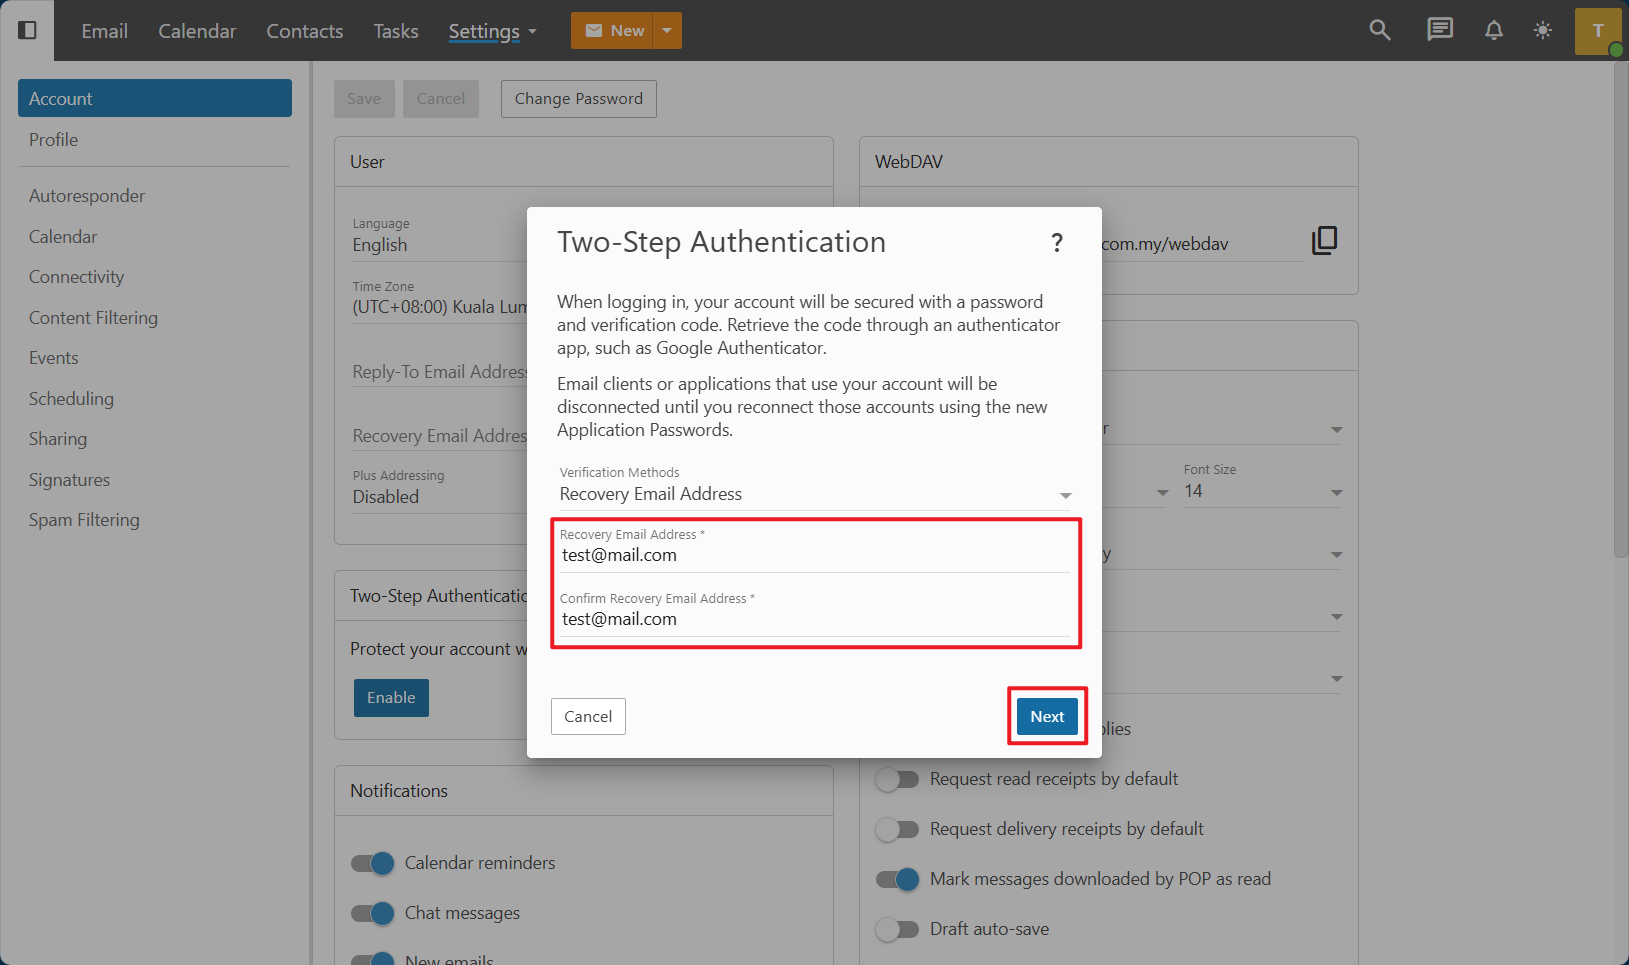
1. After click on ‘Enable’ button, a Two-Step Authentication window will pop up. Click on the Verification Methods drop down menu.
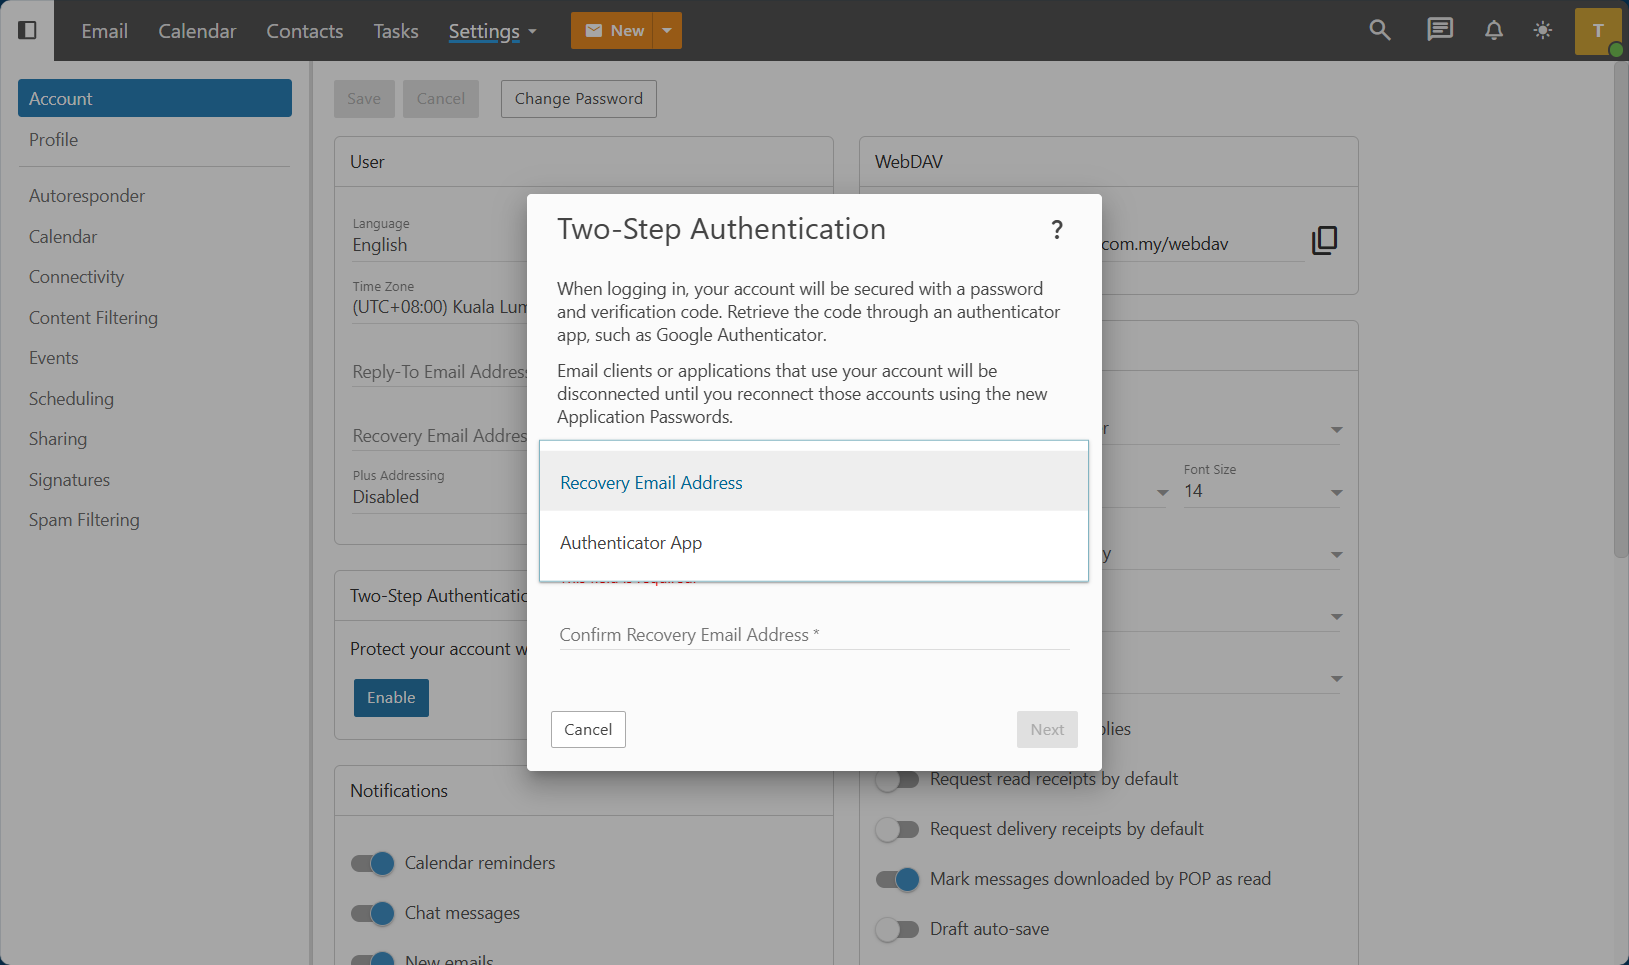
2. There are two types of verification method that you can select: Recovery Email Address and Authenticator App. Select the one that applicable to your use case.
If you are selecting Recovery Email Address verification method
- Recovery Email Address: This will send a verification code to the inbox of your recovery email address. Note: If you didn’t receive the verification code in your inbox, check your junk or spam folder.
1. Type your recovery email address at the Recovery Email Address input field, and second time at the Confirm Recovery Email Address input field. Then click on ‘Next’ button.
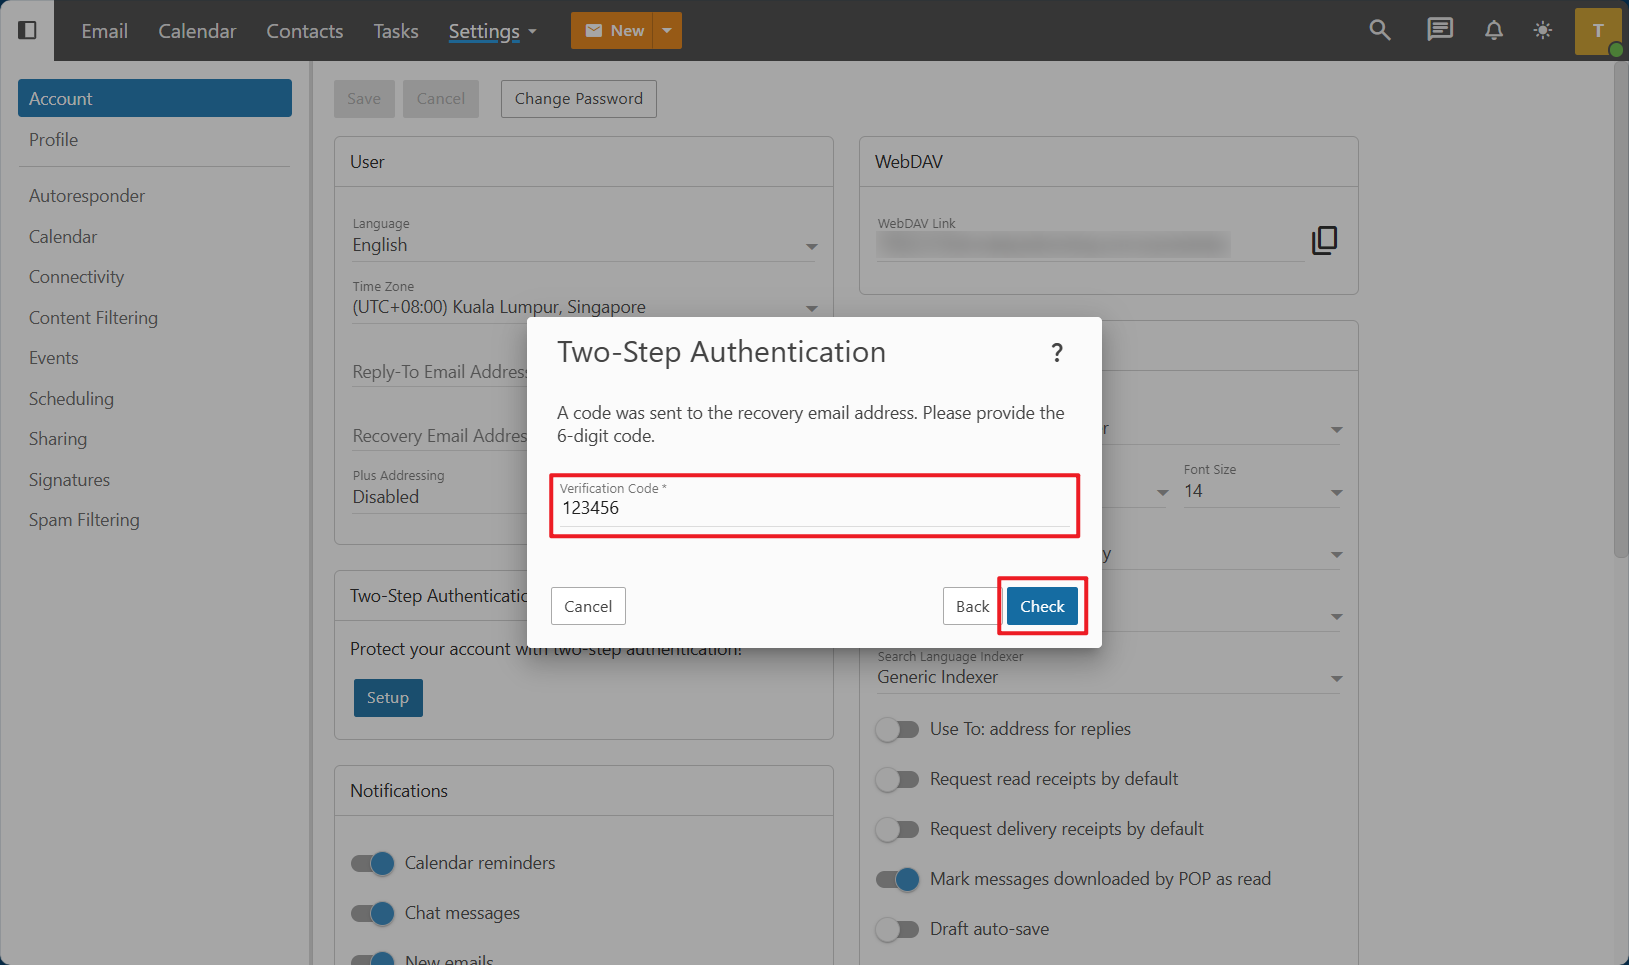
2. A verification code will send to inbox of your recovery email address. Copy the verification code and paste it at the Verification Code input field. Then click on ‘Next’ button.
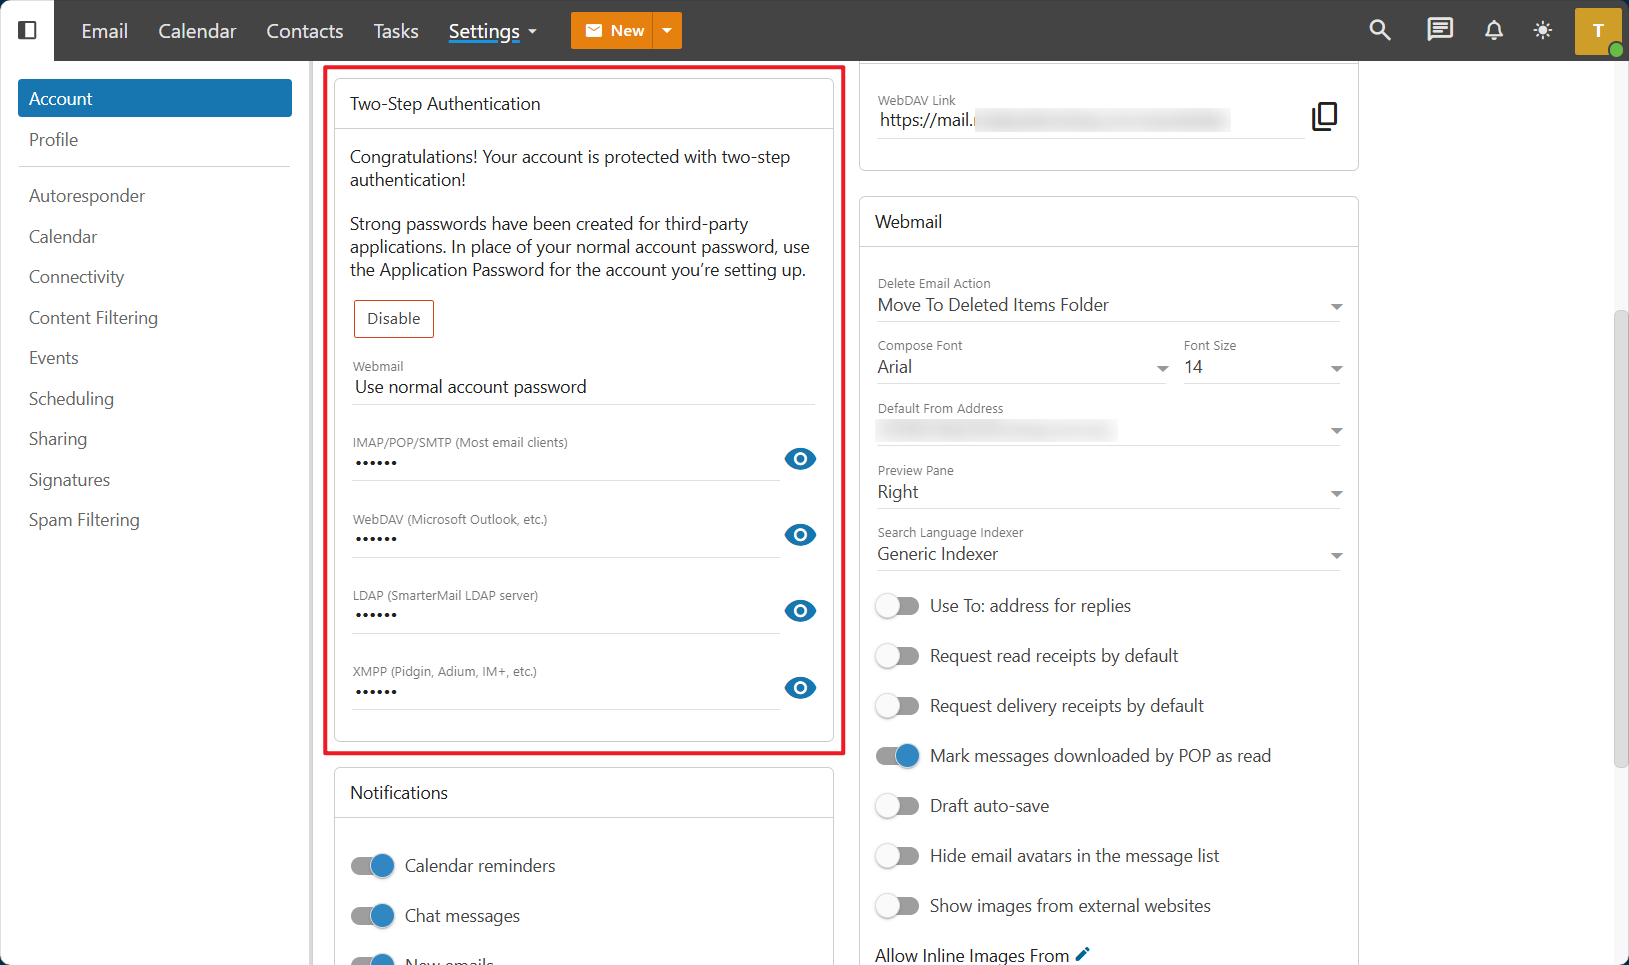
3. After finished verified your verification code. You will see that the Two-Step Authentication function has been enabled.
If you are selecting Authenticator App verification method
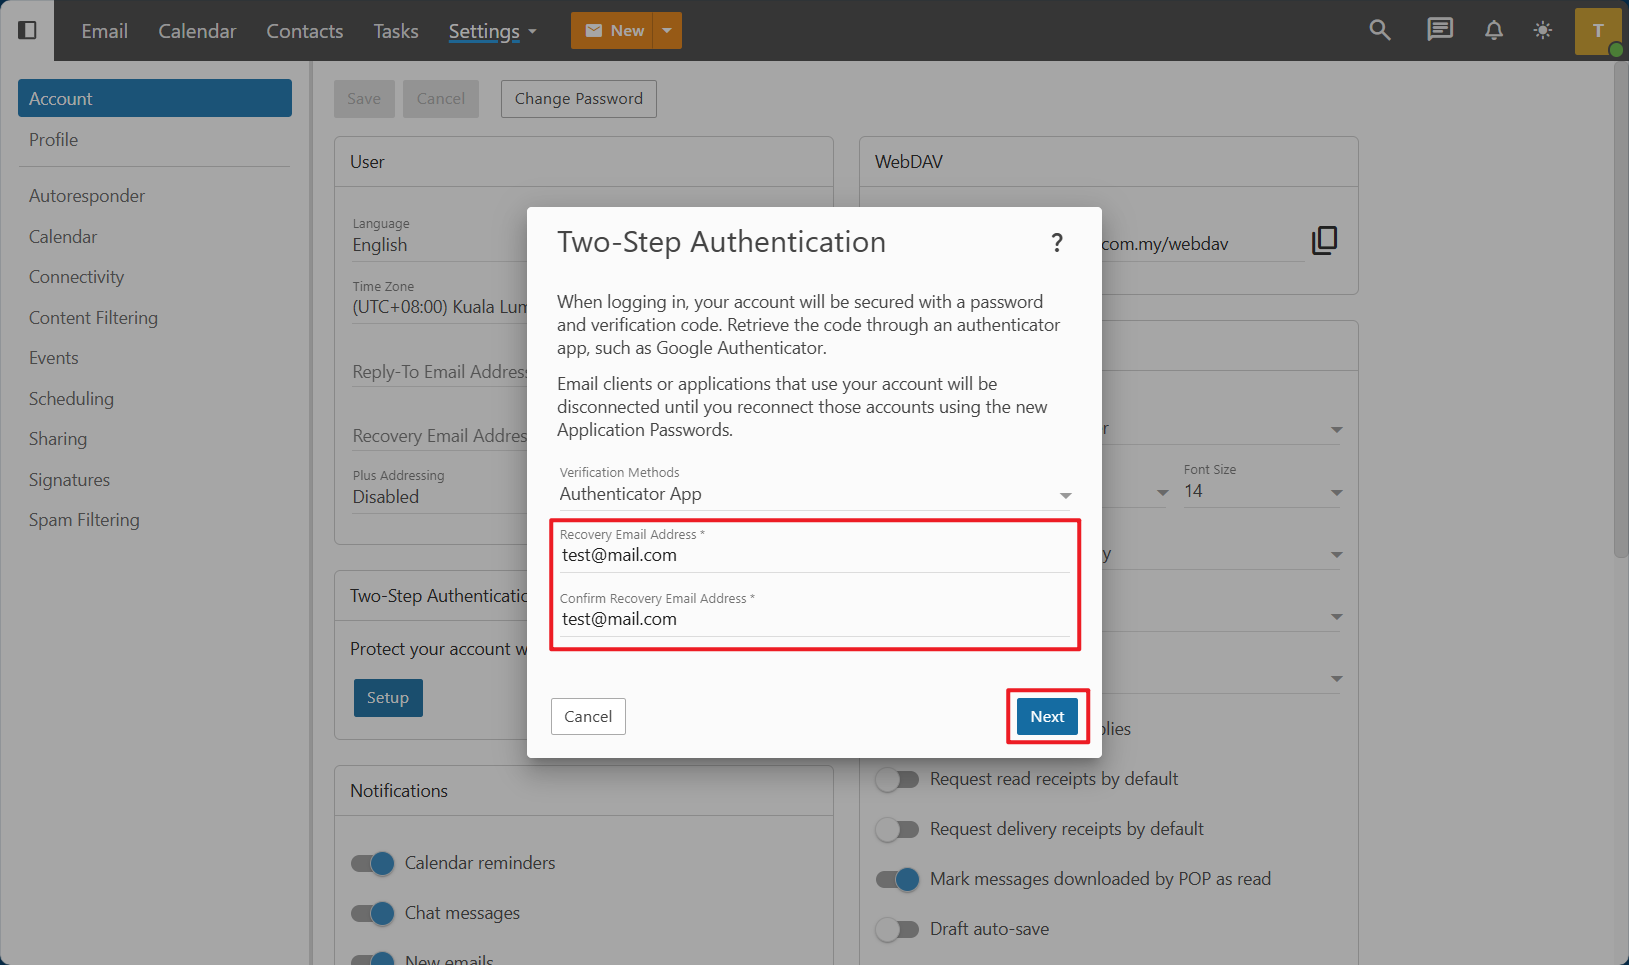
- Authenticator App: You will use an authenticator app on your mobile phone (i.e.: Google Authenticator, Microsoft Authenticator) to retrieve your verification code.
1. Type your recovery email address at the Recovery Email Address input field, and second time at the Confirm Recovery Email Address input field. Then click on ‘Next’ button.
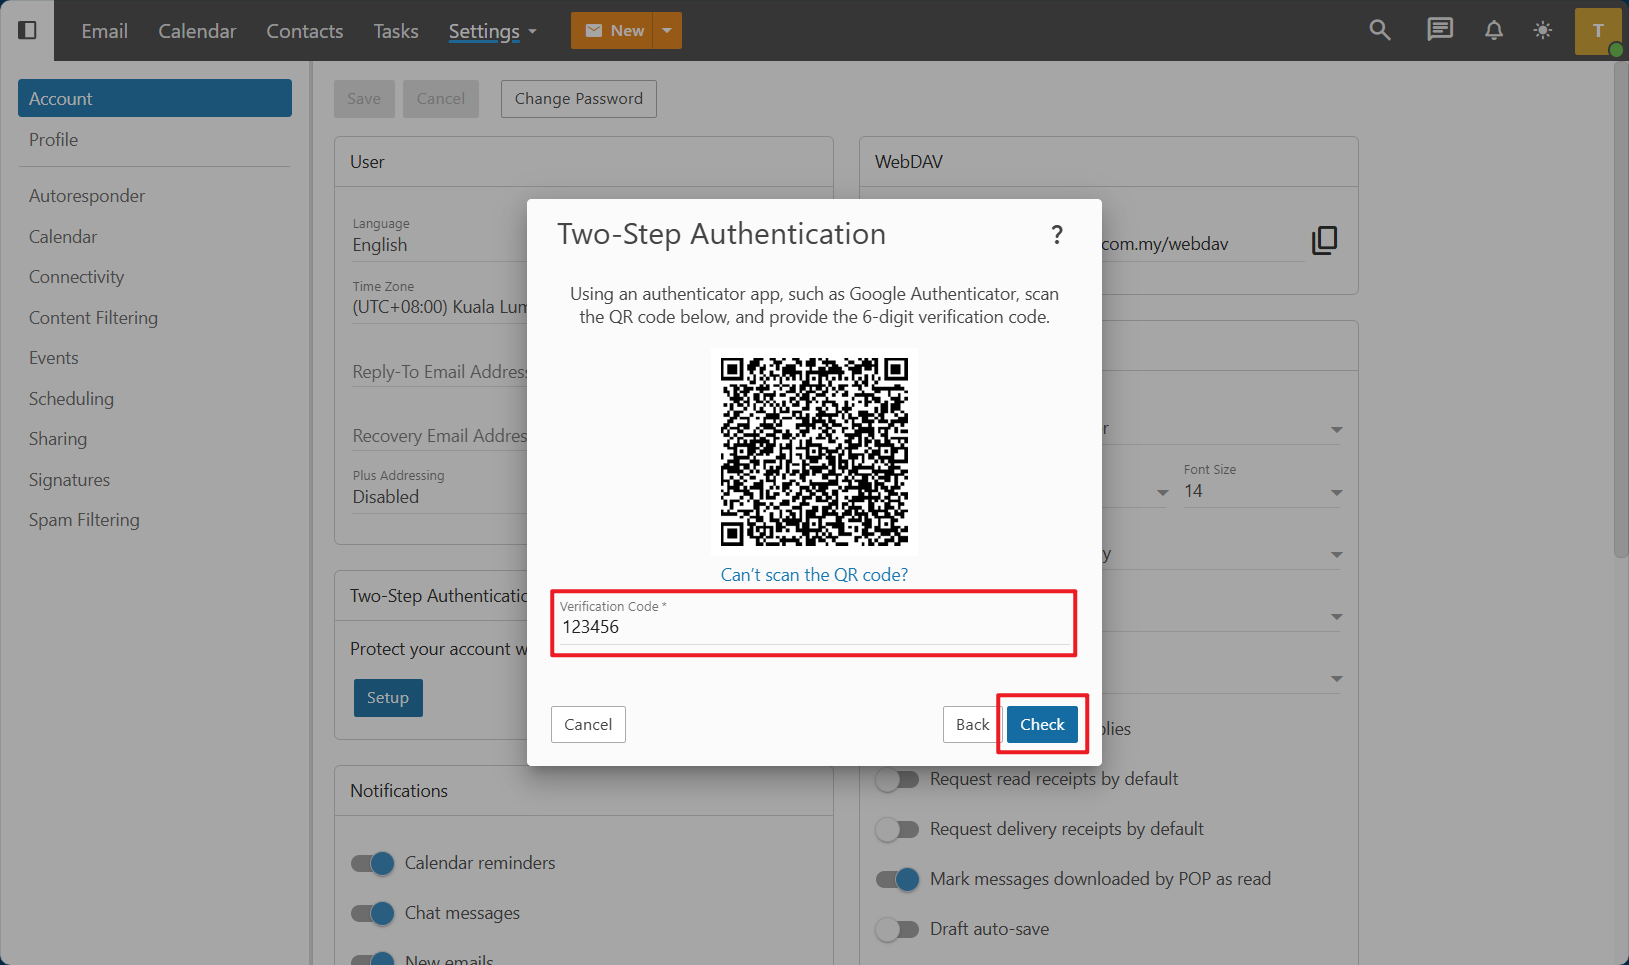
2. Use your authenticator app to scan the QR code, and type the 6-digit verification code at the Verification Code input field. Then click on ‘Check’ button.
3. After finished verified your verification code. You will see that the Two-Step Authentication function has been enabled.
Conclusion
You have successfully enabled two-factor authentication (2FA) on your SmarterMail email account. With 2FA activated, you will now be prompted to enter a code from your recovery email address or authentication app each time you log in, providing an extra layer of security.
Article posted on 1 March 2022.
