Search Our Database
How to whitelist or blacklist email address in Hotmail
Introduction
This article is intended for Hotmail users who want to manage their email inbox by controlling which emails they receive or block. It covers the steps to whitelist email addresses or domains to ensure important messages are delivered to your inbox, as well as how to blacklist unwanted senders. These steps should be followed whenever you want to fine-tune your email filtering preferences in Hotmail. This guide applies to any Hotmail or Outlook user looking to customize their spam and junk email settings. By following the instructions, you’ll learn how to easily add trusted email addresses to your whitelist and block unwanted emails to keep your inbox organized and secure.
Prerequisites
- You have a Hotmail or Outlook account.
- You know the email addresses or domains you want to whitelist or blacklist.
Whitelisting email addresses
Step 1: Log in to your Hotmail account
- Login to your Hotmail account.
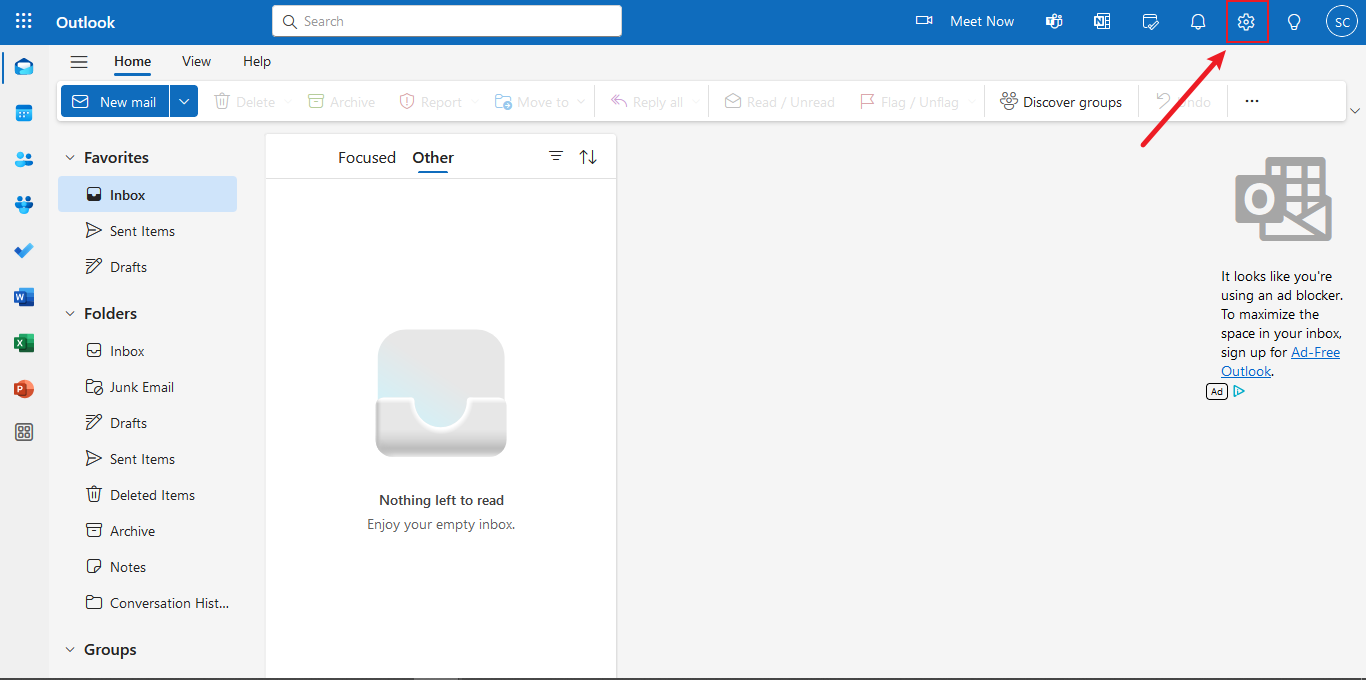
- Once logged in, click on the settings icon located at the top right corner of the page.
Step 2: Open the Junk Email settings
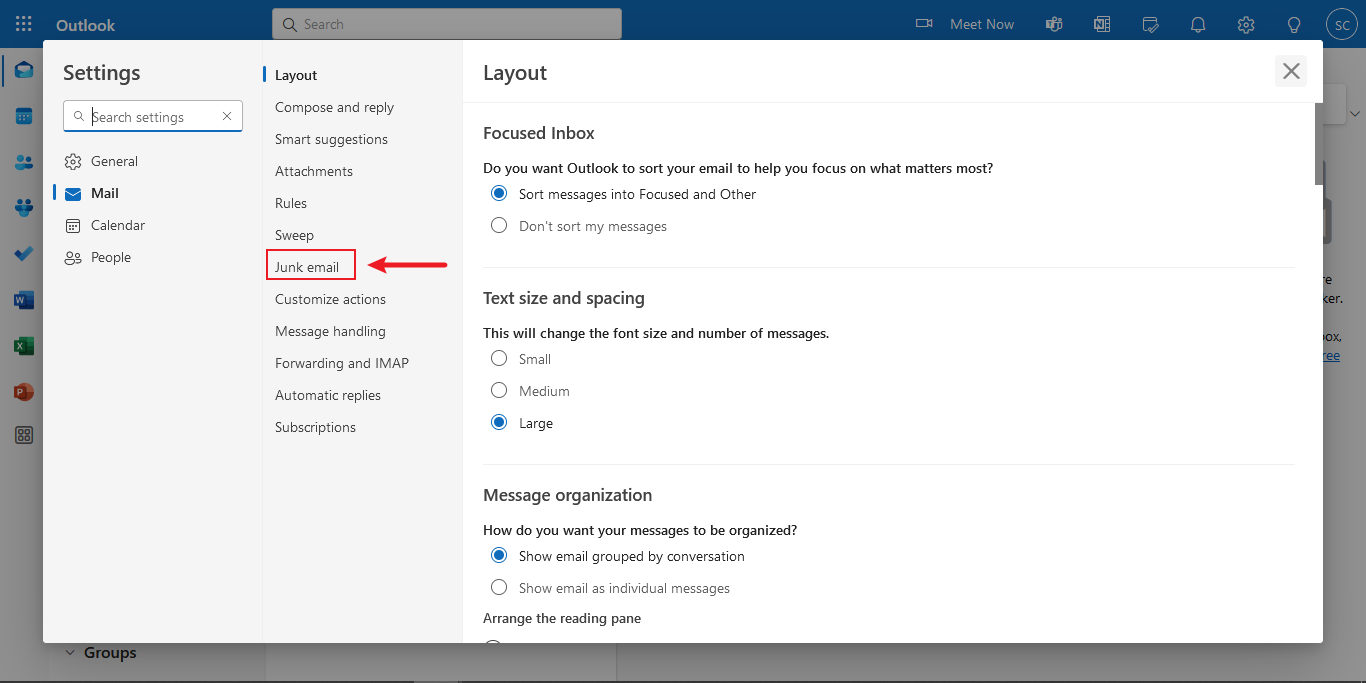
- A pop-up window will appear. From the available options, click on “Junk Email”.
Step 3: Navigate to the Senders section
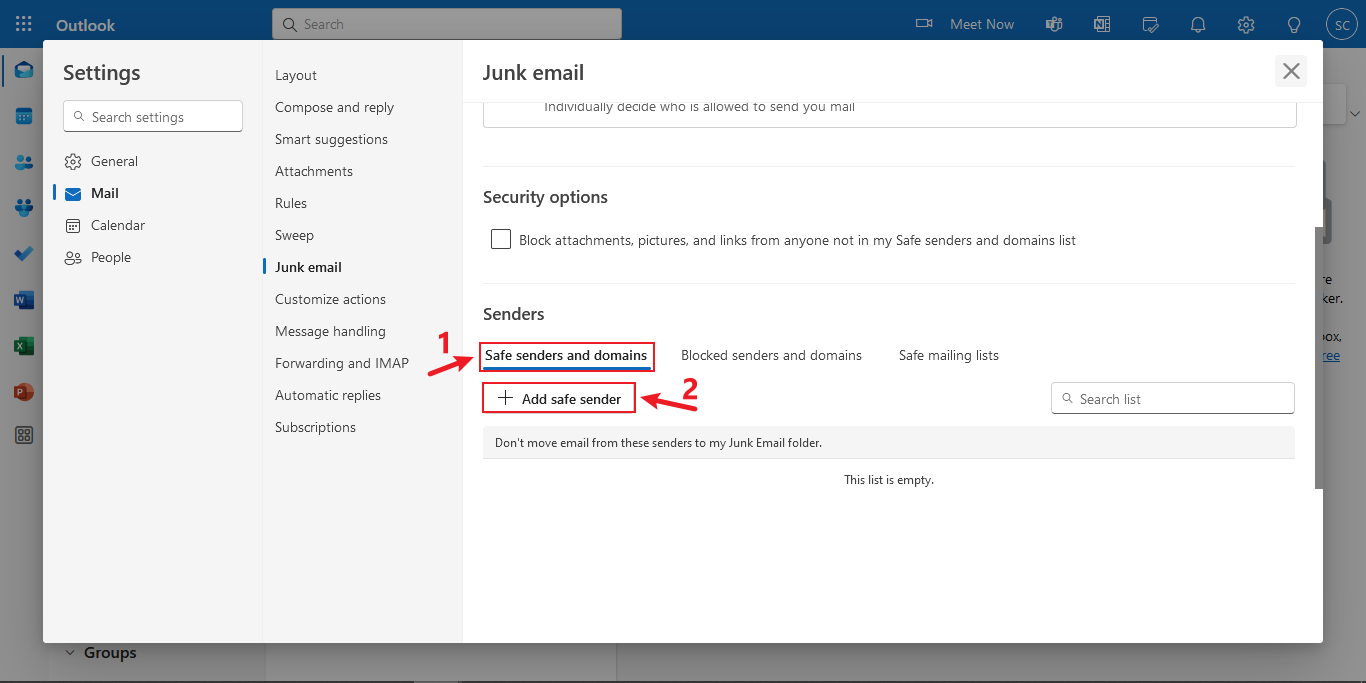
- Scroll to the “Senders” section.
- Click on “Safe senders and domains”.
- Click on “Add safe sender”.
Step 4: Add the email address to whitelist
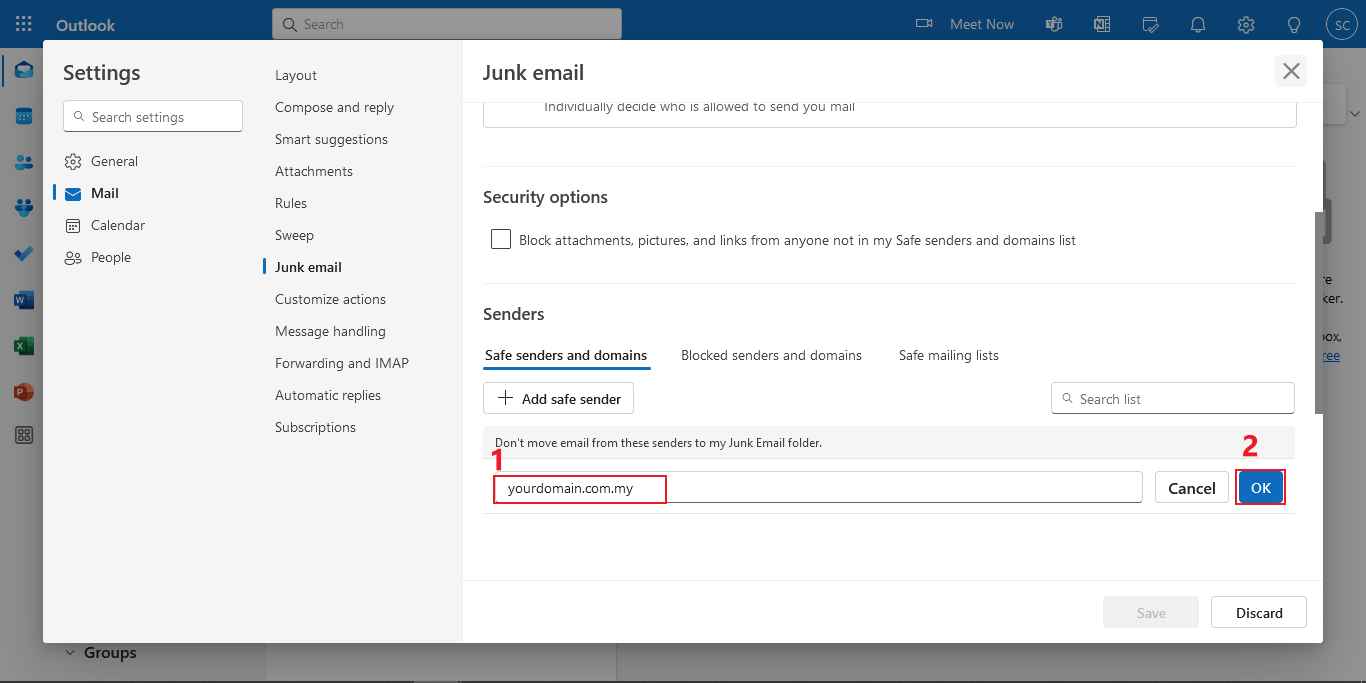
- Enter the email address (e.g., user@yourdomain.com.my) or domain (e.g., yourdomain.com.my) you want to whitelist.
- Once done, click “Ok”.
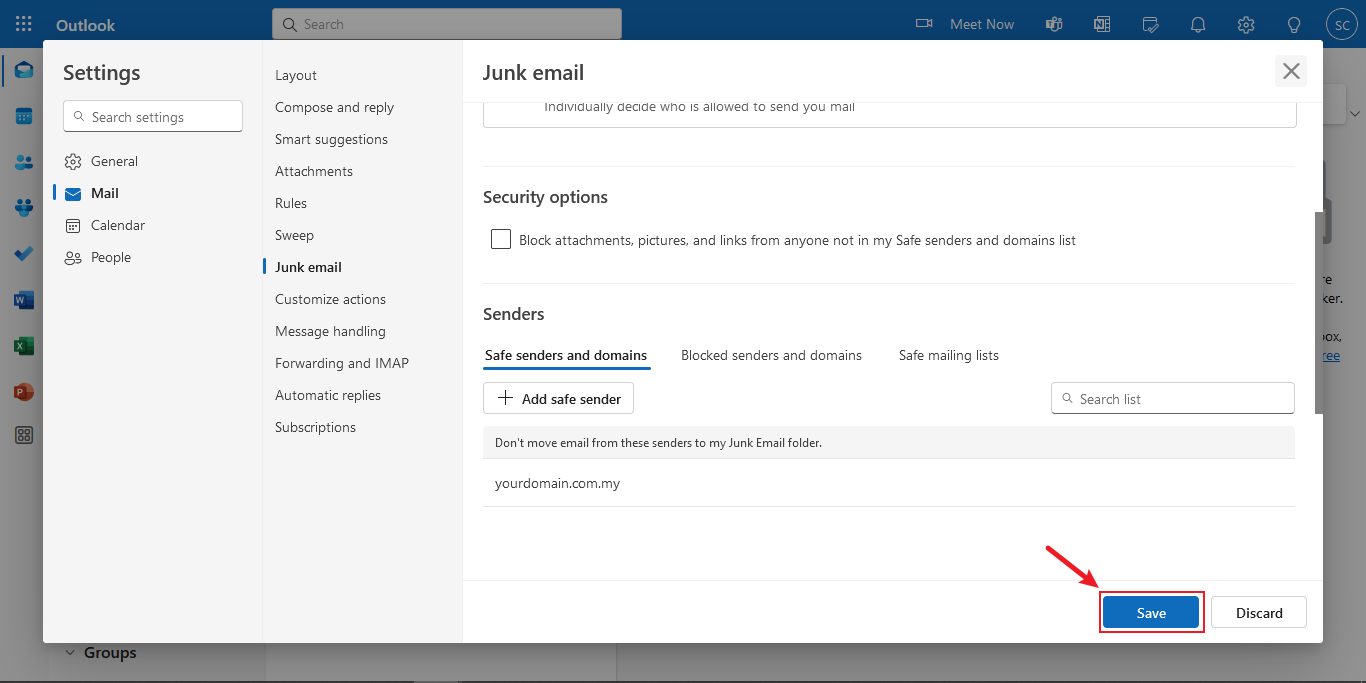
Step 5: Save your changes
- Finally, click “Save” to apply your changes.
Blacklisting email addresses
Step 1: Access the Junk Email settings
- Login to your Hotmail and navigate to the Junk Email settings as outlined above.

Step 2: Go to the Senders section
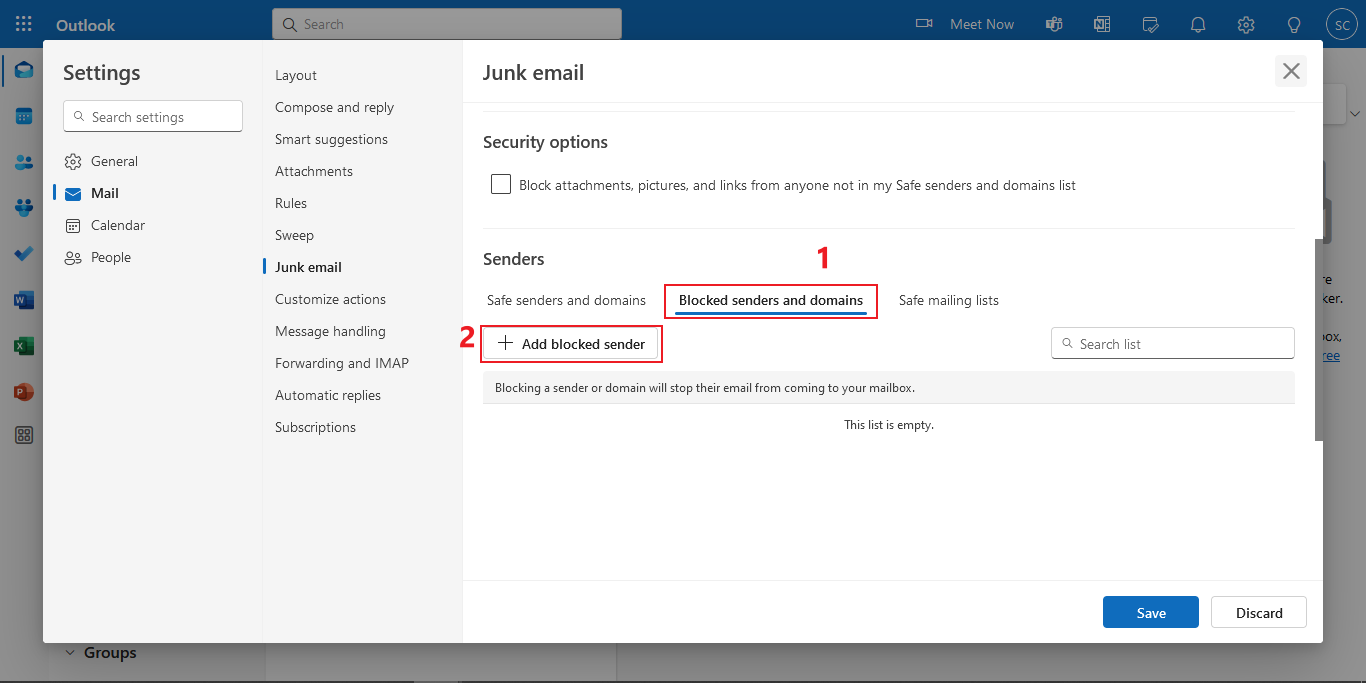
- Scroll to the “Senders” section.
- Click on “Blocked senders and domains”.
- Click on “Add blocked sender”.
Step 3: Add the email address to blacklist
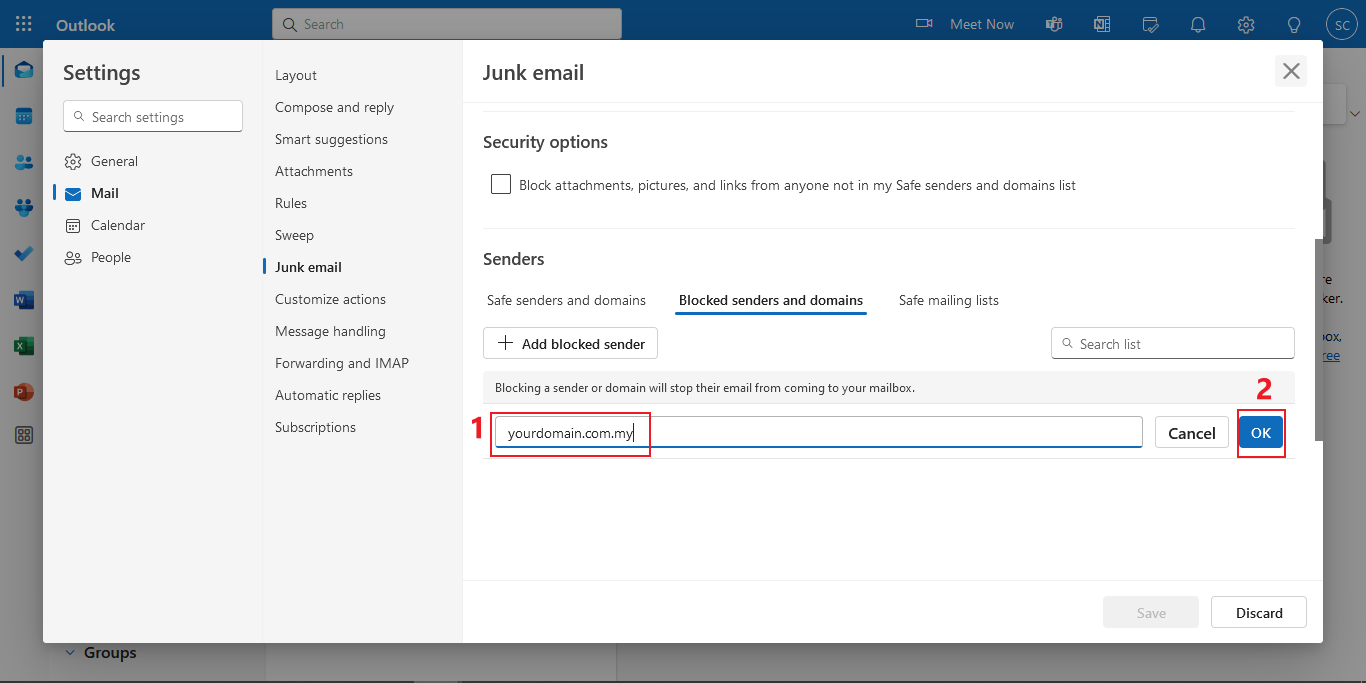
- Enter the email address (e.g., user@yourdomain.com.my) or domain (e.g., yourdomain.com.my) you want to block.
- Click “Ok” to confirm.
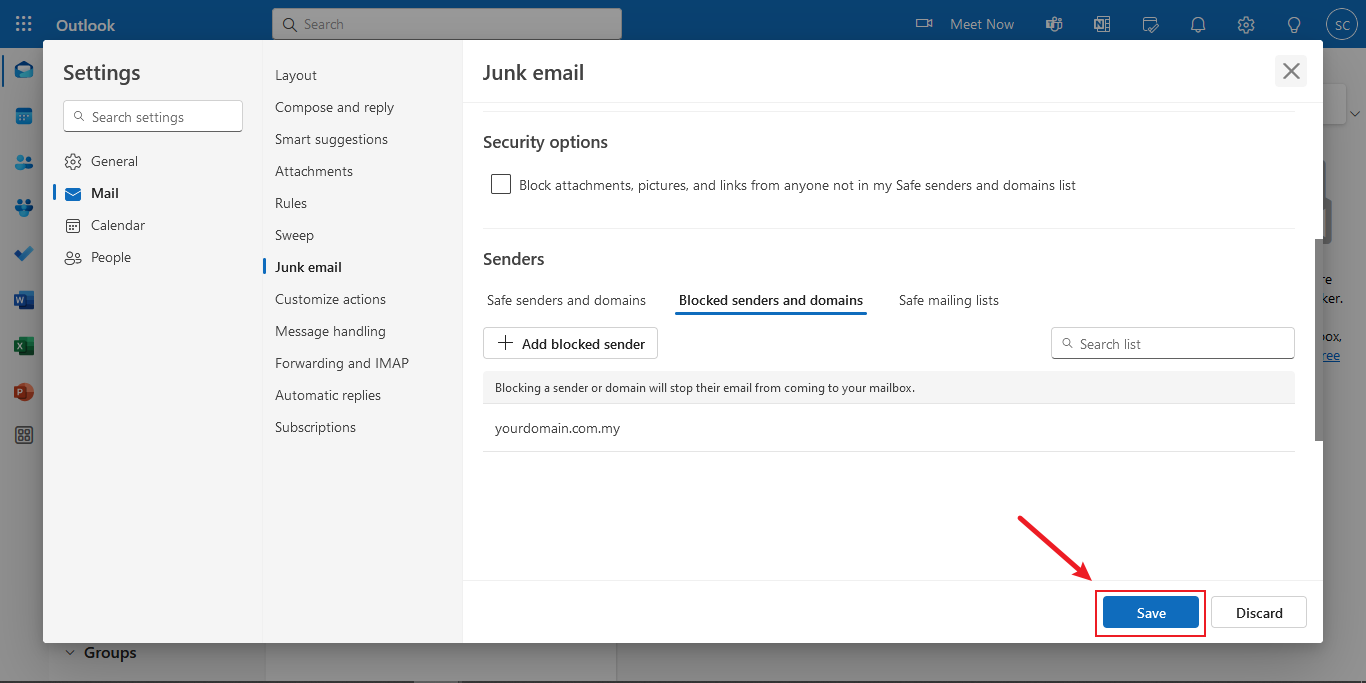
Step 4: Save your changes
- Click “Save” to finalize the changes.
Conclusion
By following the steps outlined above, you can easily manage the emails allowed into your inbox by whitelisting trusted email addresses or blocking unwanted ones. These settings provide a convenient way to filter out spam and ensure that important messages are always delivered to your inbox. For additional assistance or if you encounter any issues, please contact our support team at support@ipserverone.com.
Article posted on 20 March 2020 by Louis