Search Our Database
Calendar and Contacts Sync on Android by CalDAV and CardDav from cPanel
Introduction
Synchronizing your calendar and contacts across devices is essential for streamlined communication and organization, especially in business environments. cPanel provides built-in support for CalDAV (calendar synchronization) and CardDAV (contact synchronization), allowing users to integrate these services with Android devices. By setting up CalDAV and CardDAV, you can ensure that your events and address books remain consistent between your Android device and your web hosting account’s email server.
This guide outlines the step-by-step process for configuring CalDAV and CardDAV on Android to sync calendar events and contacts directly with your cPanel-hosted account. This is particularly useful for users managing domains on cPanel and who wish to integrate native Android apps with their cPanel webmail services.
Prerequisites
- Access to a cPanel account with email services enabled.
- An Android device (Android 8.0 or later recommended).
- A CalDAV/CardDAV-capable sync application installed on your Android device (e.g., DAVx⁵).
- Your cPanel email address and password.
- Your server’s hostname or IP address.
Step-by-step Guide
Step-by-step Guide
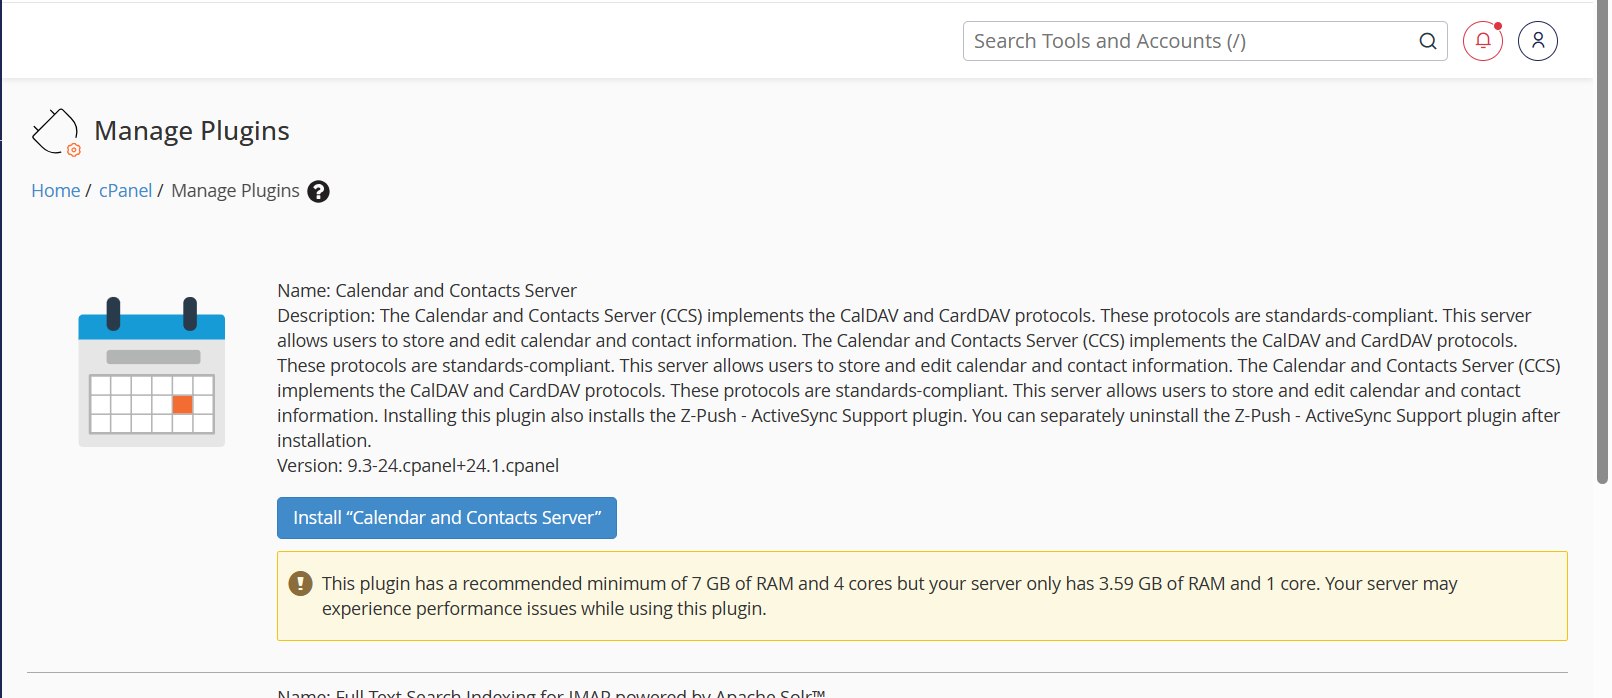
Step 1: Enable Calendar and Contacts Server in WHM
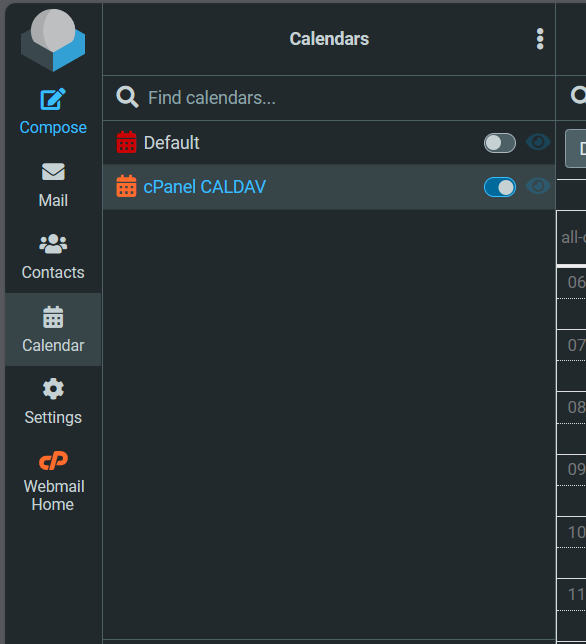
Step 2: Create Calendar and Contacts in Webmail
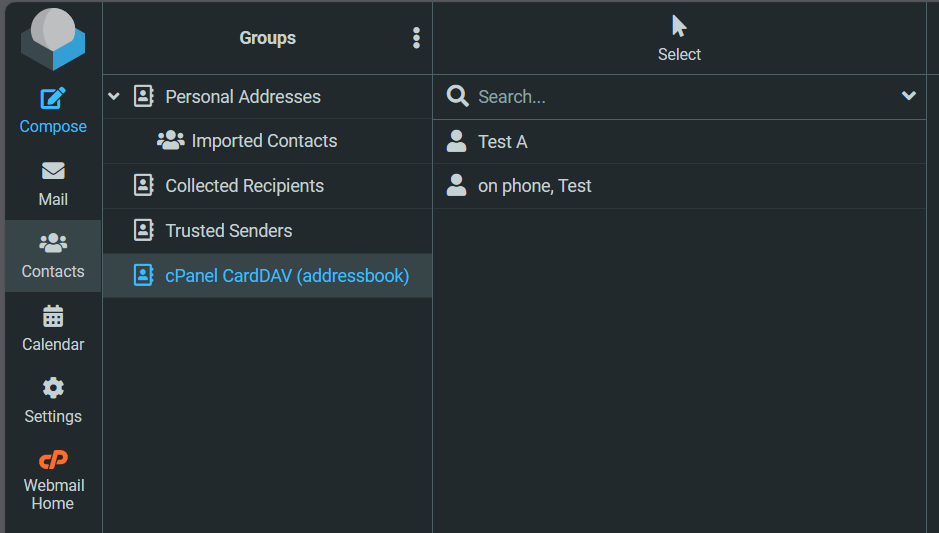
- Repeat the same for your Contacts by creating or importing contacts under the cPanel CardDAV address book.
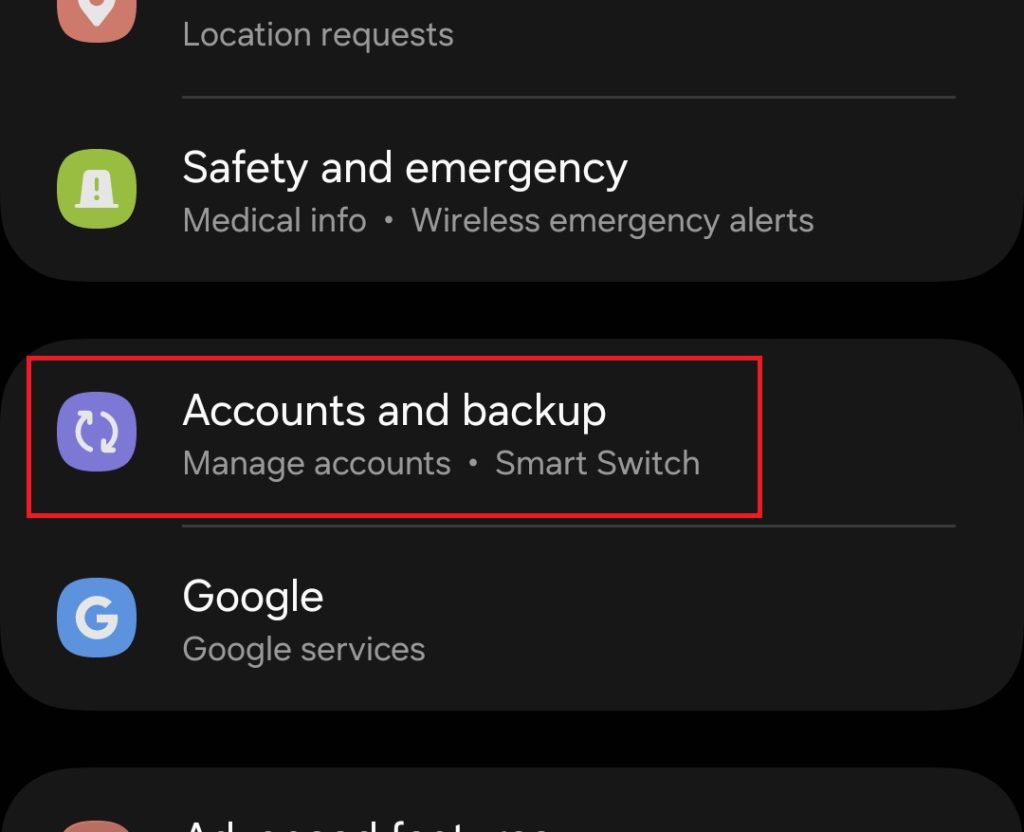
Step 3: Configure Your Android Device
- Open Settings on your phone.
- Scroll to Accounts (this may vary depending on your phone manufacturer).
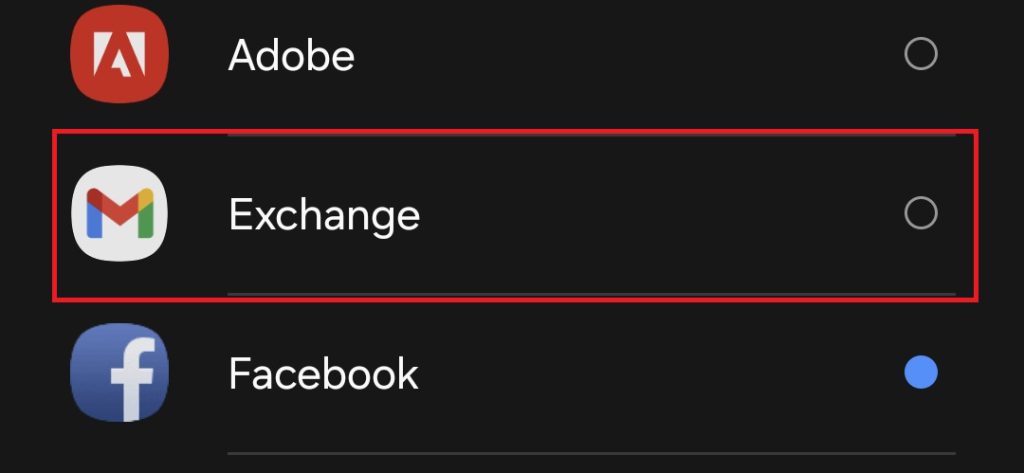
- Tap Add Account.
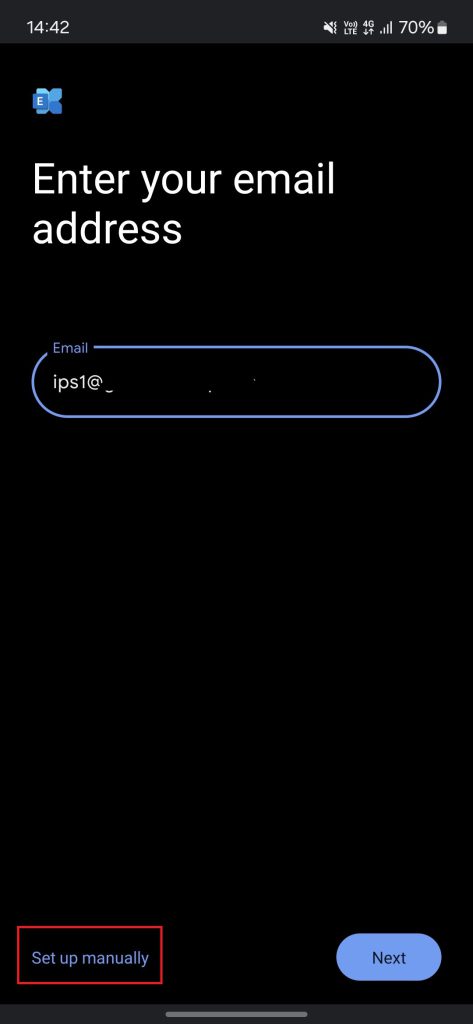
Step 4: Add Exchange Account
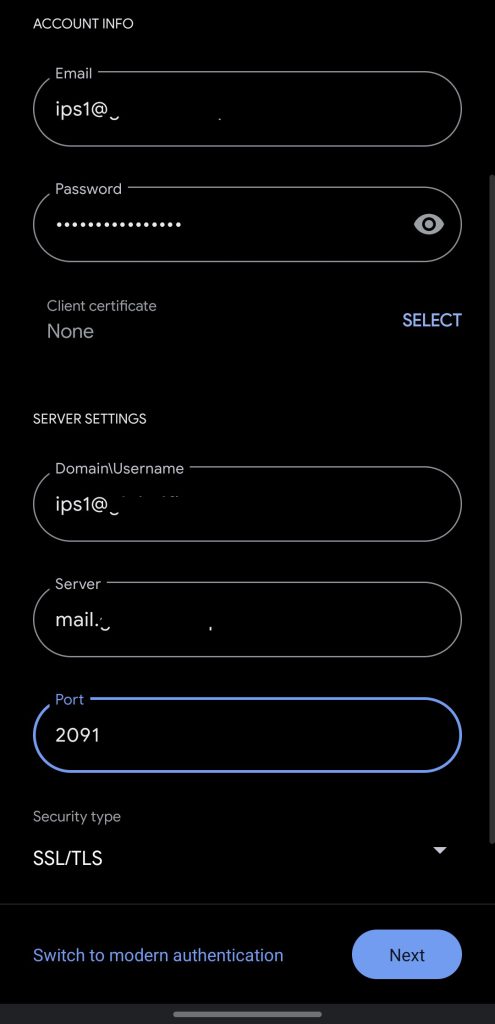
Step 5: Input Email Settings
- Email: Your full email address.
- Password: Your email password.
- Server: mail.<yourdomain>.com
- Port: 2091
Tap Next to complete the setup.
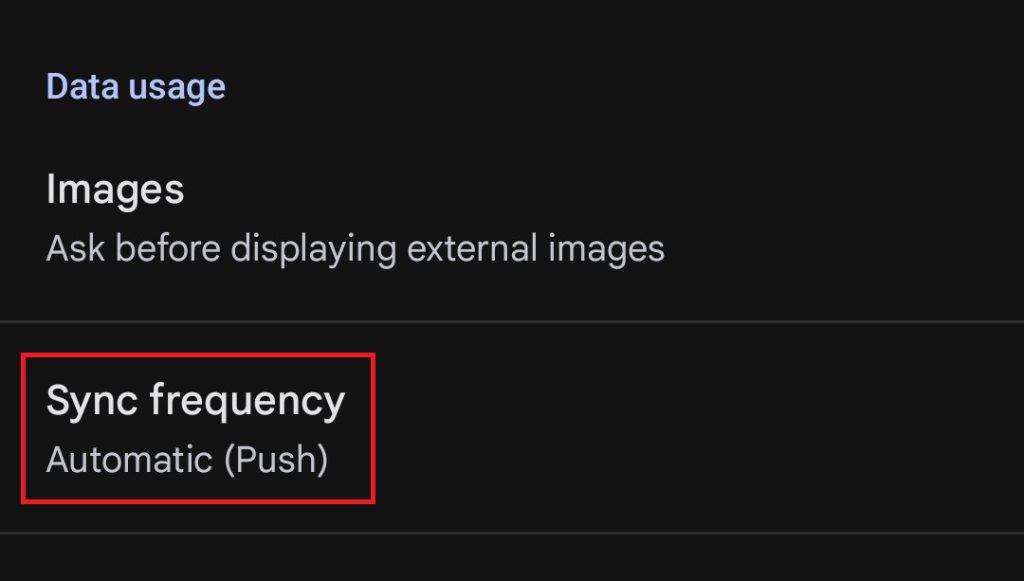
Step 6: Adjust Sync Settings
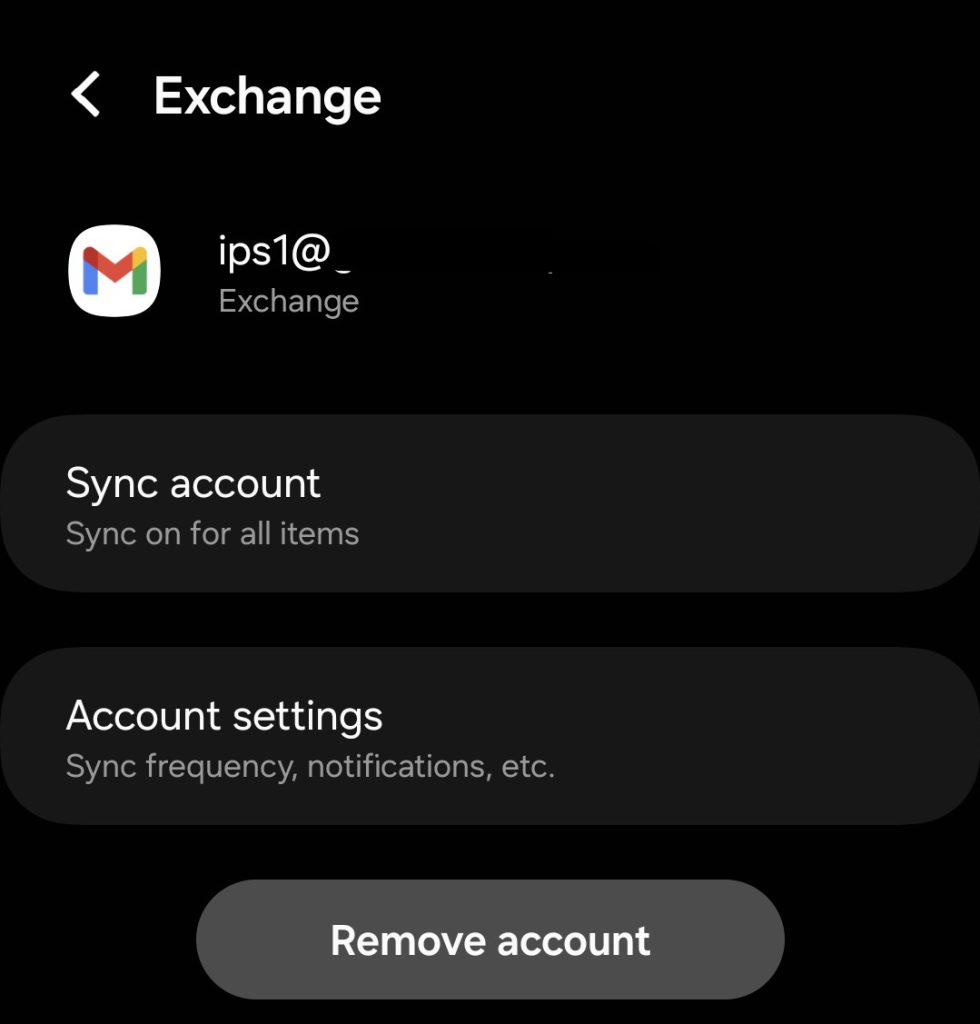
- Go back to Account Settings and select your Exchange account.

- You will find:
- Sync Account: Choose to sync Contacts, Emails, and Calendar.
- Account Settings: Set Sync Frequency to Automatic.
Step 7: Verify Sync
Your Android device should now sync your cPanel Calendar and Contacts automatically.
Conclusion
You have successfully configured your Android device to sync calendar and contact data using CalDAV and CardDAV from cPanel. This setup helps maintain data consistency across your mobile device and webmail services.
Should you have any inquiries about the guidelines, please feel free to open a ticket through your portal account or contact us at support@ipserverone.com. We’ll be happy to assist you further.
