Search Our Database
Configuring SMTP in WordPress via Web Console
Introduction
This guide provides detailed instructions on how to configure an SMTP mailer plugin in WordPress using the “Configure SMTP” plugin. SMTP plugins are essential for ensuring reliable email delivery from your WordPress site. This particular plugin simplifies the setup process, especially for Gmail SMTP. Follow the steps below to configure the plugin and start sending emails from your WordPress site efficiently.
Step by step Guide
1. Download the Configure SMTP plugin from the WordPress plugins site. Extract the downloaded file and upload it to this directory: wp-content/plugins/
http://wordpress.org/extend/plugins/configure-smtp/
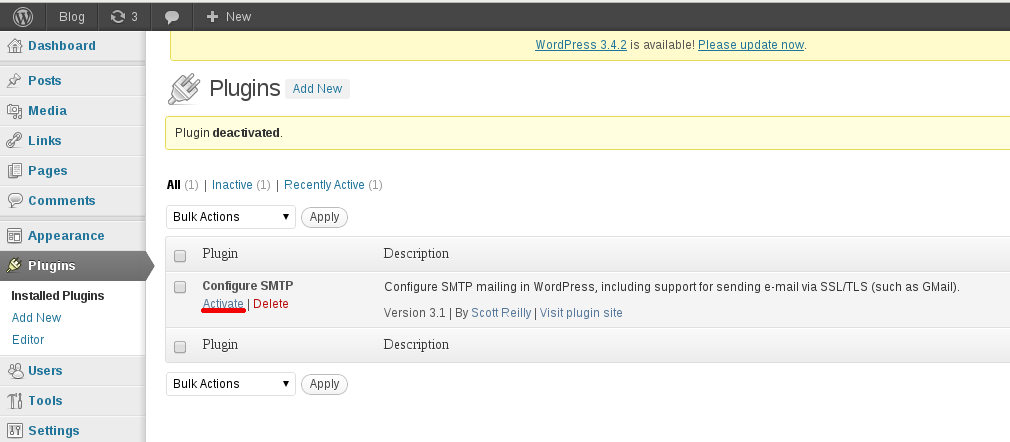
2. After uploading the file, log into the wordpress admin configuration page and activate the plugin.
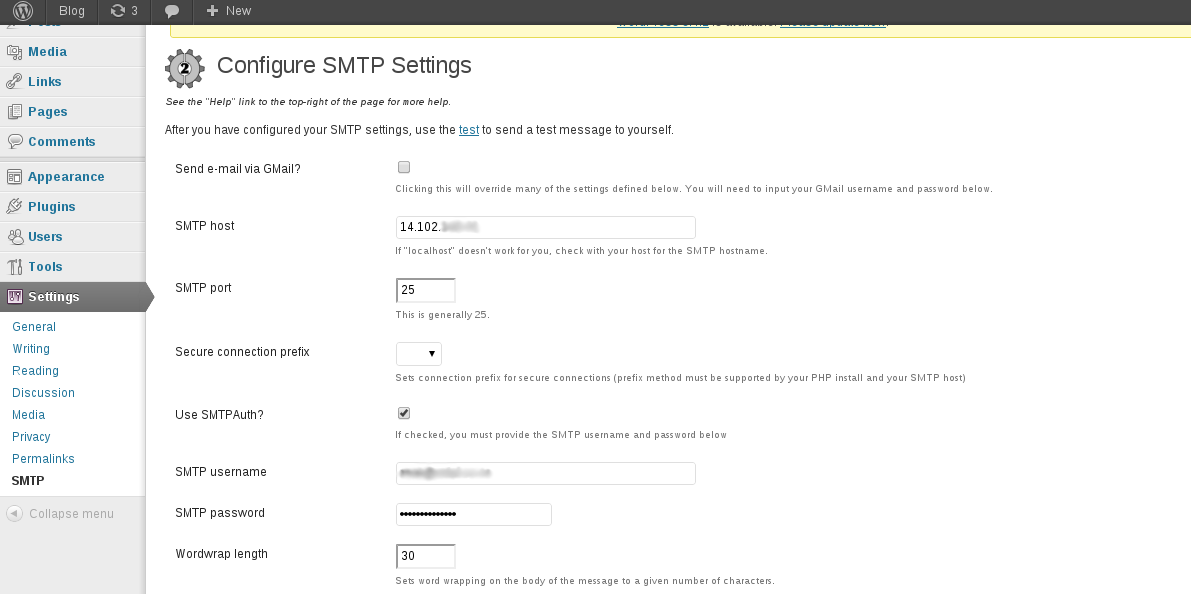
3. The SMTP will now appears on the Settings tab. Click on the SMTP to go into the configuration page.
4. For local mail servers, use the configuration settings below:
SMTP host : mail server IP address or domain mail server hostname
SMTP port: 25 or 2525 or 587
Secure connection prefix: Leave as blank
Use SMTPAuth?: check SMTP
SMTP username: Full Email address
SMTP password: Password for the email address
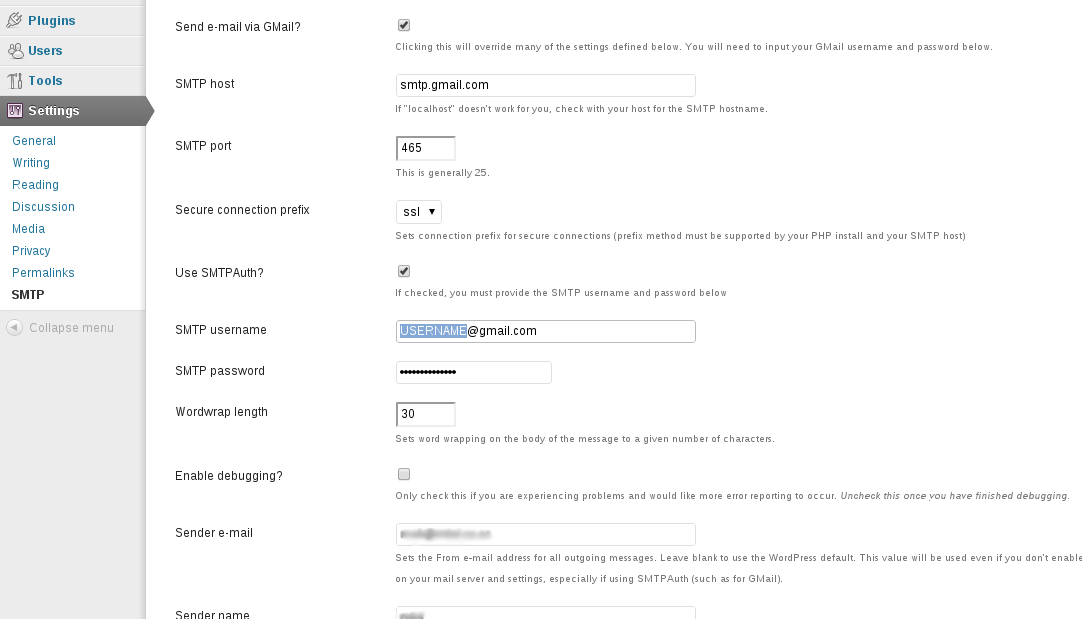
5. For Gmail SMTP, just check on the box of “Send e-mail via Gmail?” and settings will be auto filled up. You will only be needed to fill in the Gmail email account and password.
6. Save the changes and you may now send a test email. If there are any errors, please try debugging mode and provide us with the debugging results for troubleshooting.
Conclusion
By following these steps, you have successfully configured the “Configure SMTP” plugin for your WordPress site. This setup ensures that your emails are delivered reliably, whether using a local mail server or Gmail SMTP. For additional assistance or if you encounter any issues, please contact our support team at support@ipserverone.com.
Article posted on 2 February 2020 by Louis


