Search Our Database
Creating a New User in Windows Server with Administrator Privileges
Introduction
Creating a new user with administrator privileges in Windows Server enables you to delegate administrative tasks and manage server permissions efficiently. This setup is essential for teams needing multiple users with elevated access. This guide walks through the steps to create a new user with administrative privileges in Windows Server, helping system administrators manage access control and maintain system security seamlessly.
Prerequisites
- Administrator access to Windows Server
- Basic knowledge of Windows Server management tools
Step-by-Step Guide
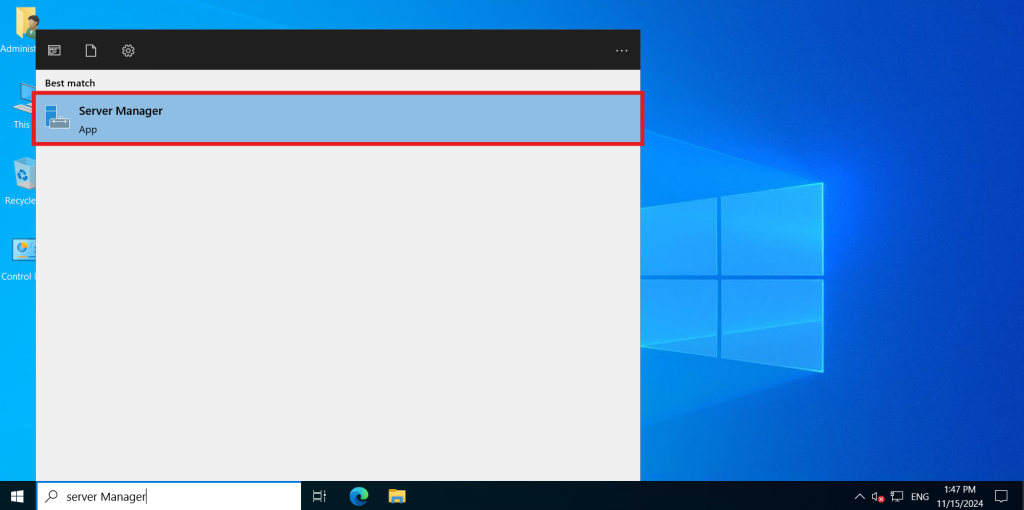
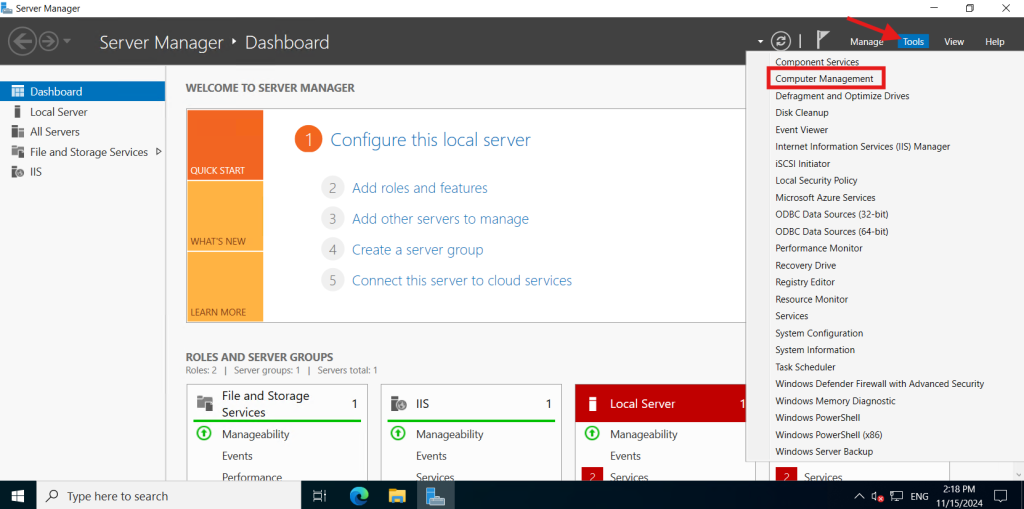
Step 1: Access Server Manager
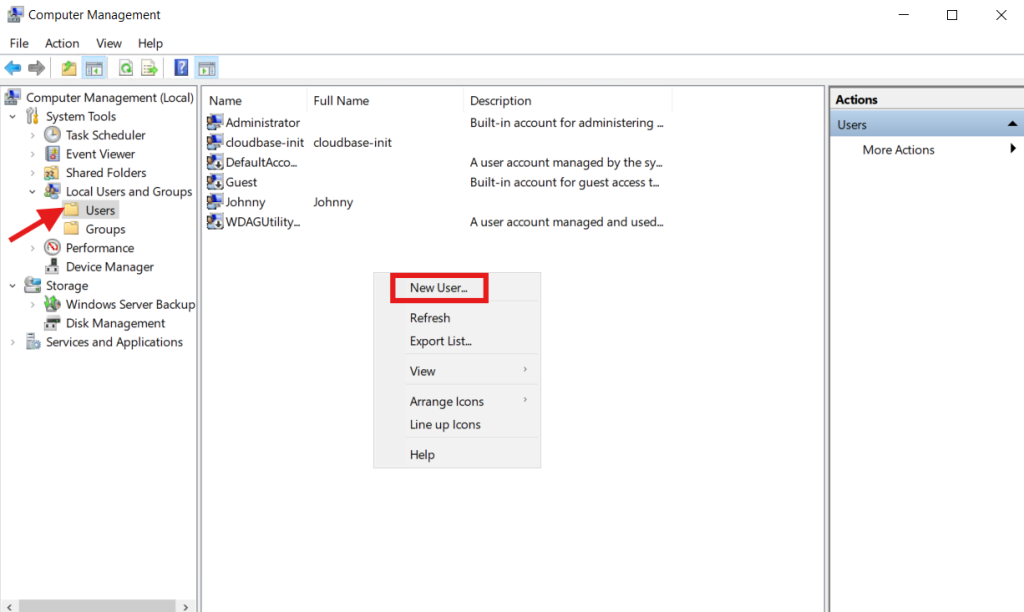
Step 2: Create new user
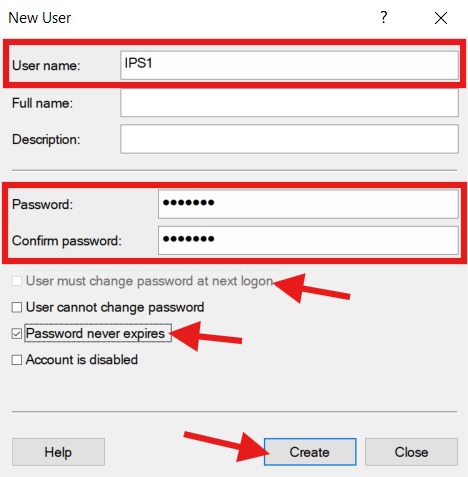
- Enter User name and Password, then untick the User must change password at next logon and tick Password never expires.
Step 3: Assign to Administrators group
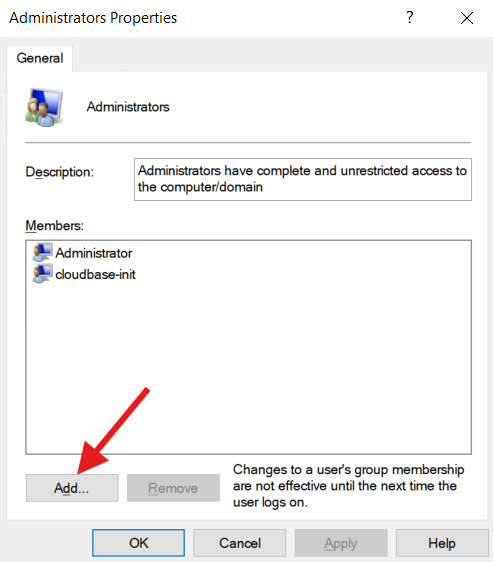
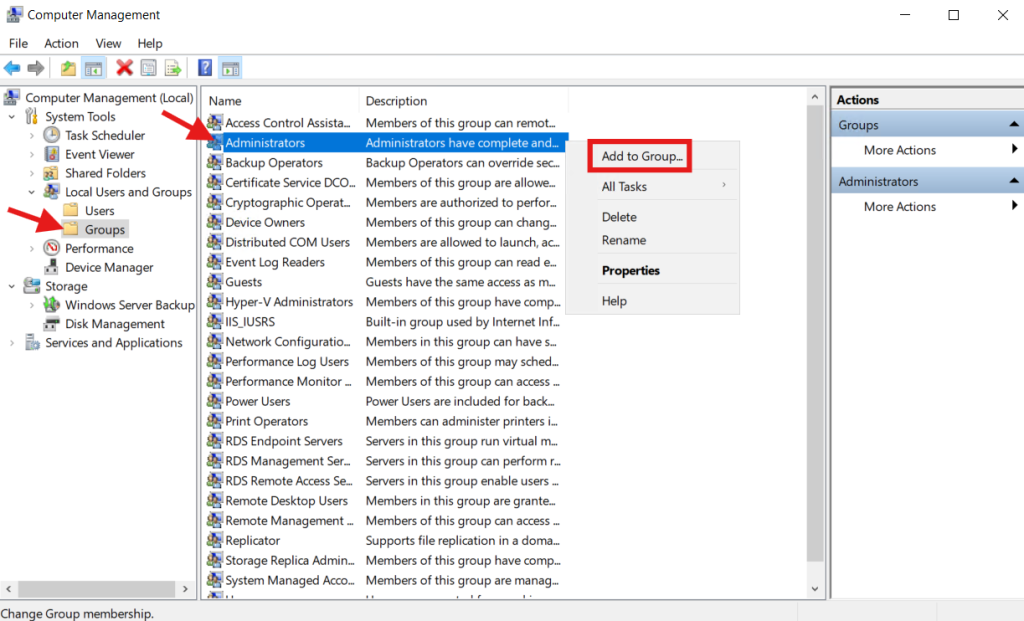
- Navigate to Groups, then right click Administrators to select Add to Group…. **You may use this to assign the user in different group too.
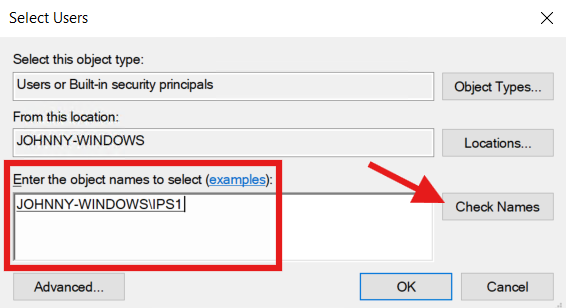
- Enter User name then click Check Names. After Check Names, you will be seeing the result as below. The structure was <ServerName\UserName>.
Click OK to add the user.
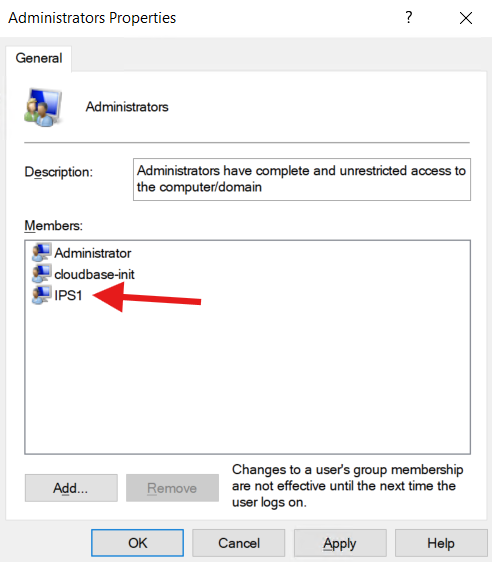
- You should be seeing the user was added into Administrators group. Click Apply to apply the changes and click OK to exit the Properties.
Conclusion
By going through this guidance, you will be able to create a new user with administrator privileges in Windows Server, enabling effective delegation of administrative responsibilities.
If you encounter any issues or require further assistance, please contact our support team at support@ipserverone.com.
Article posted on 09 March 2024 by Tze Hing.
