Search Our Database
How to add a new domain in cPanel
Introduction
Adding a new domain to your cPanel account allows you to host multiple websites or separate content within the same hosting environment. This process enables you to manage multiple domains under a single cPanel account efficiently. In this article, we’ll guide you through the steps to add a new domain to your cPanel.
Prerequisites
- Access to your cPanel account.
- A registered domain name ready to be added.
- DNS already pointed to the server you wish to add
- Basic knowledge of navigating cPanel’s interface.
Step-by-Step Guide
Step 1: Access SSL in cPanel
- Log in to your cPanel account. eg. https://yourdomain.com.my:2083
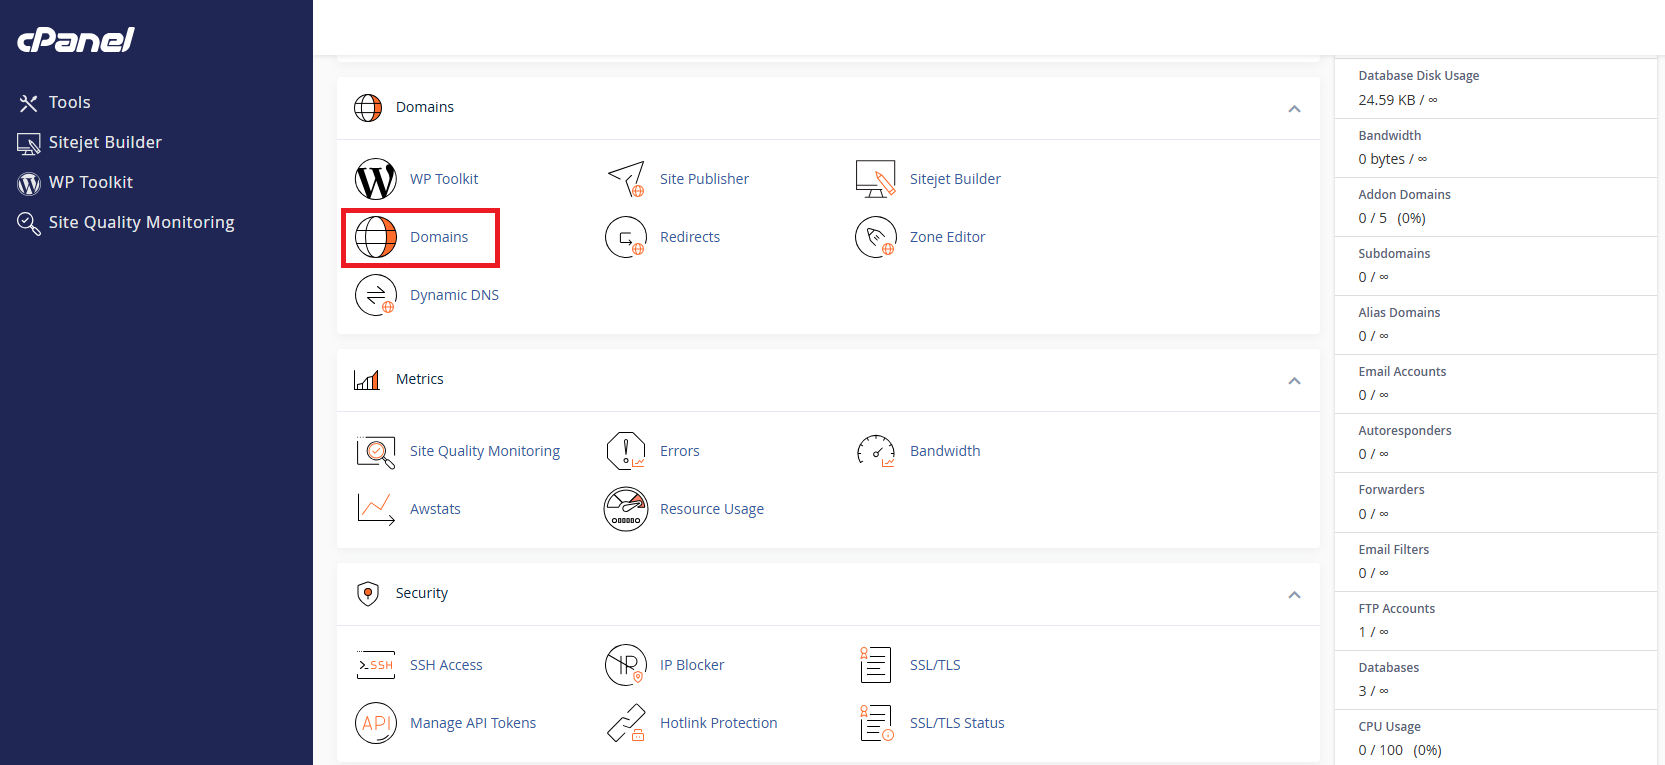
- Scroll down and navigate to the Domains section and select Domains.
Step 2: Create domain
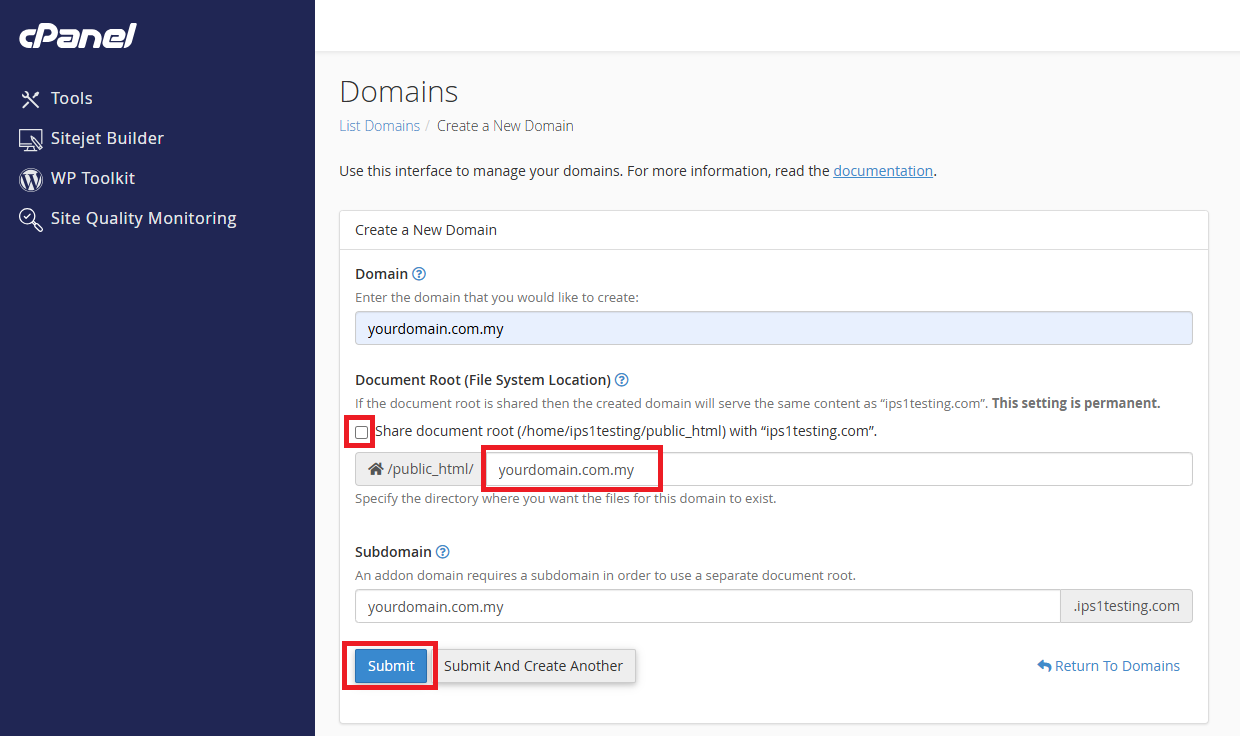
- In the following page, click the “Create A New Domain” button.
- Enter the domain name to add in the “Domain” text box.
Step 3: Document Root
- Untick “Share document root” if you want to have a different document root.
- By default, cPanel assigns a folder in the public_html/yourdomain.com.my directory for the new domain. You can accept this default or specify a different directory if desired.
- Click Submit
- If you would like the new domain to share the same document root as the primary domain, tick the Share document root.
- Click submit
Conclusion
Once you have completed these steps, your new domain should be successfully added and configured in your cPanel account. This process allows for efficient management of multiple domains under a single hosting account, making it easier to expand and manage your web presence.
For additional assistance or if you encounter any issues, please contact our support team at support@ipserverone.com.


