Search Our Database
How to add reCAPTCHA (v3) for Contact Form 7 plugin in WordPress
Introduction
reCAPTCHA helps protect your website from spam and abuse by requiring users to complete a CAPTCHA before submitting forms. This guide will walk you through the process of integrating Google reCAPTCHA (v3) with the Contact Form 7 plugin in WordPress.
Prerequisites
- You have access to the WordPress admin dashboard
- The Contact Form 7 plugin is already installed and activated
- You have a Google reCAPTCHA account and access to the site keys
Step-by-Step Guide
Step 1: Obtain Google reCAPTCHA site and secret keys
1. Visit the reCAPTCHA Admin Console website and log in with your Google account.
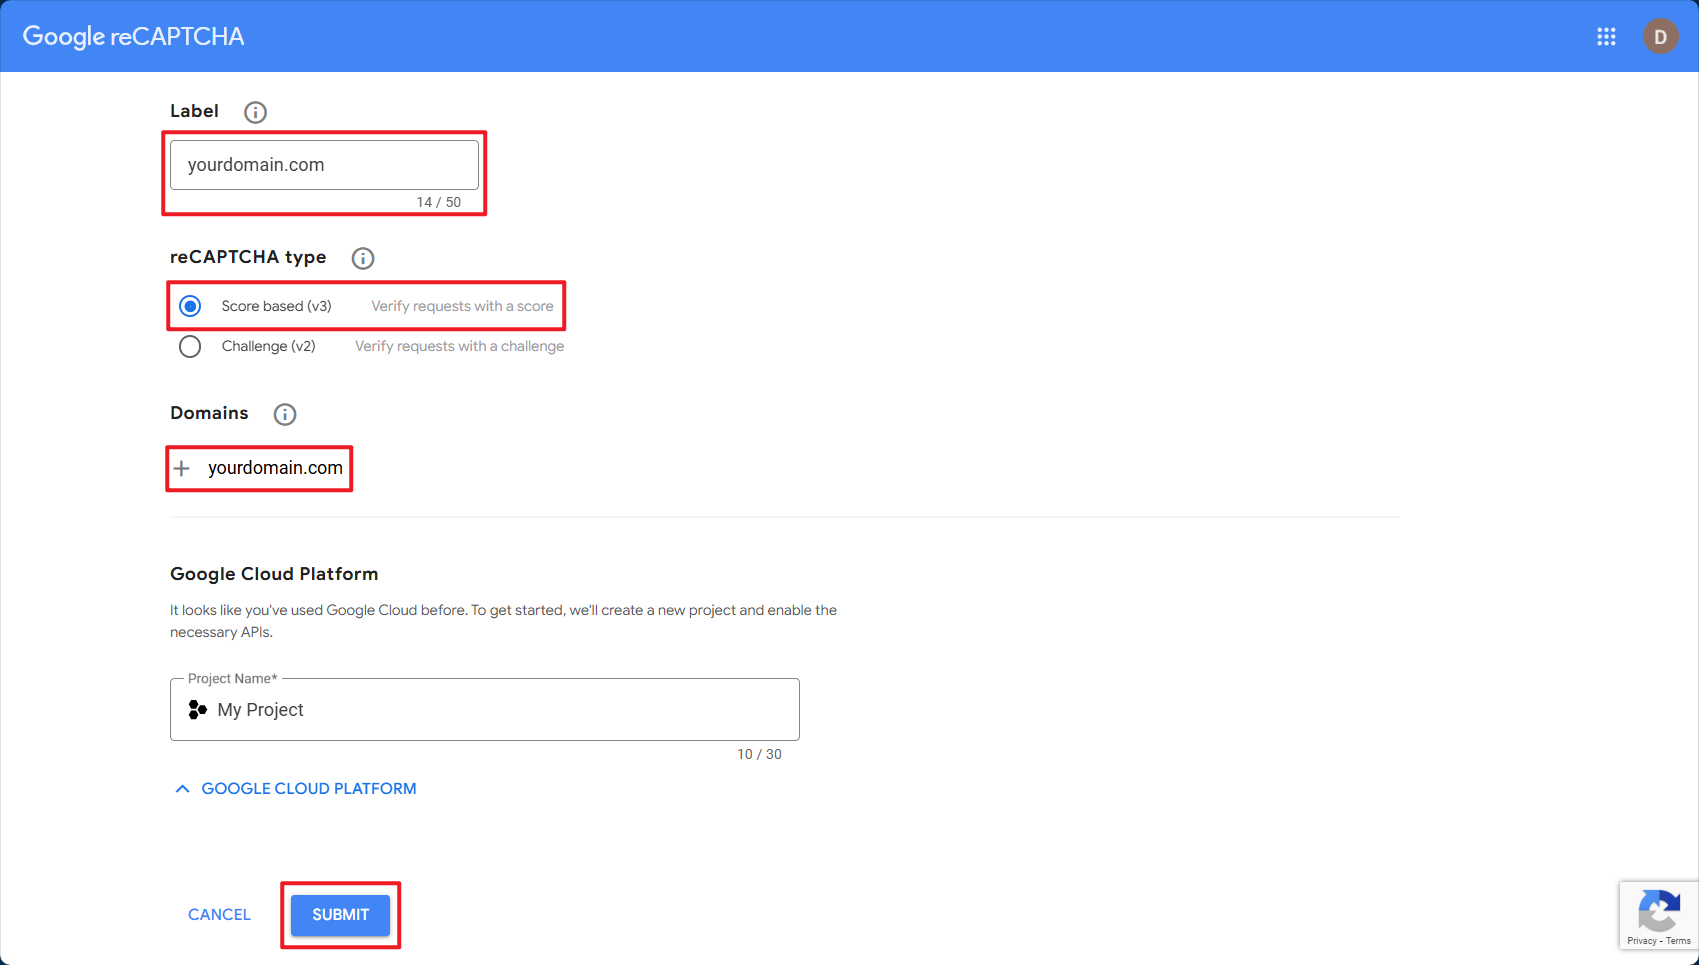
2. Type your desired name at the Label input field. Choose Score based (v3) from type options, type your domain name at the Domains input field. After finished filling up the details, click on the ‘SUBMIT’ button.
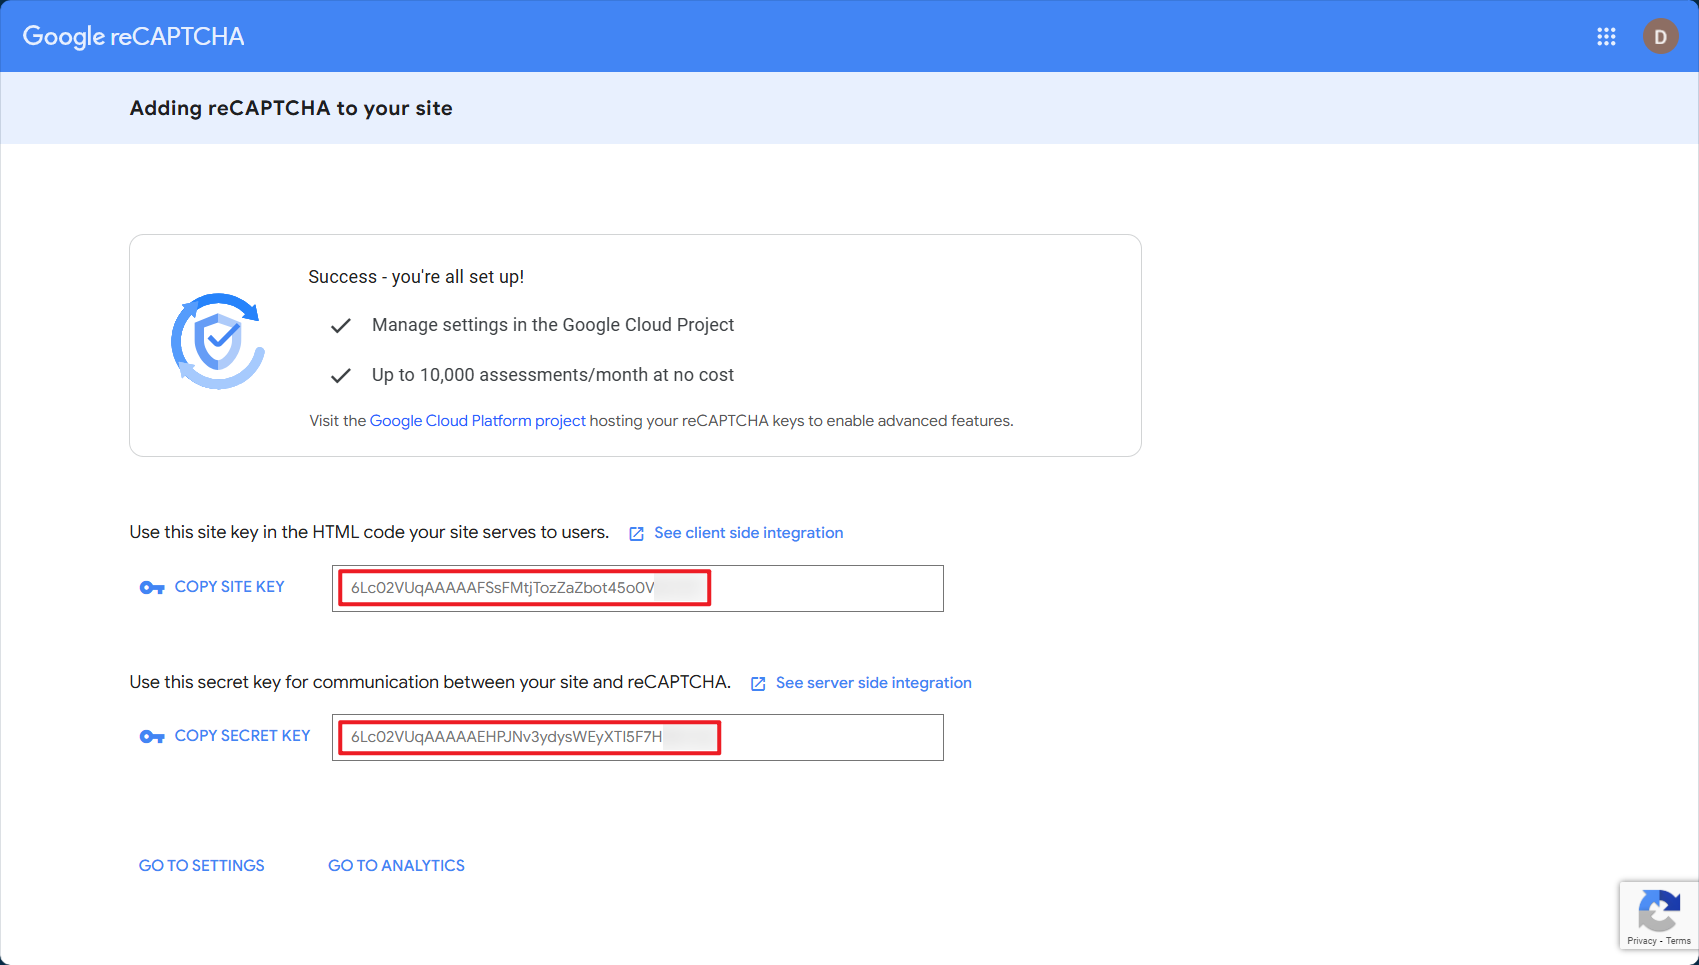
3. After you register a website, you will get the site key and secret key for the site. Copy the site key and secret key.
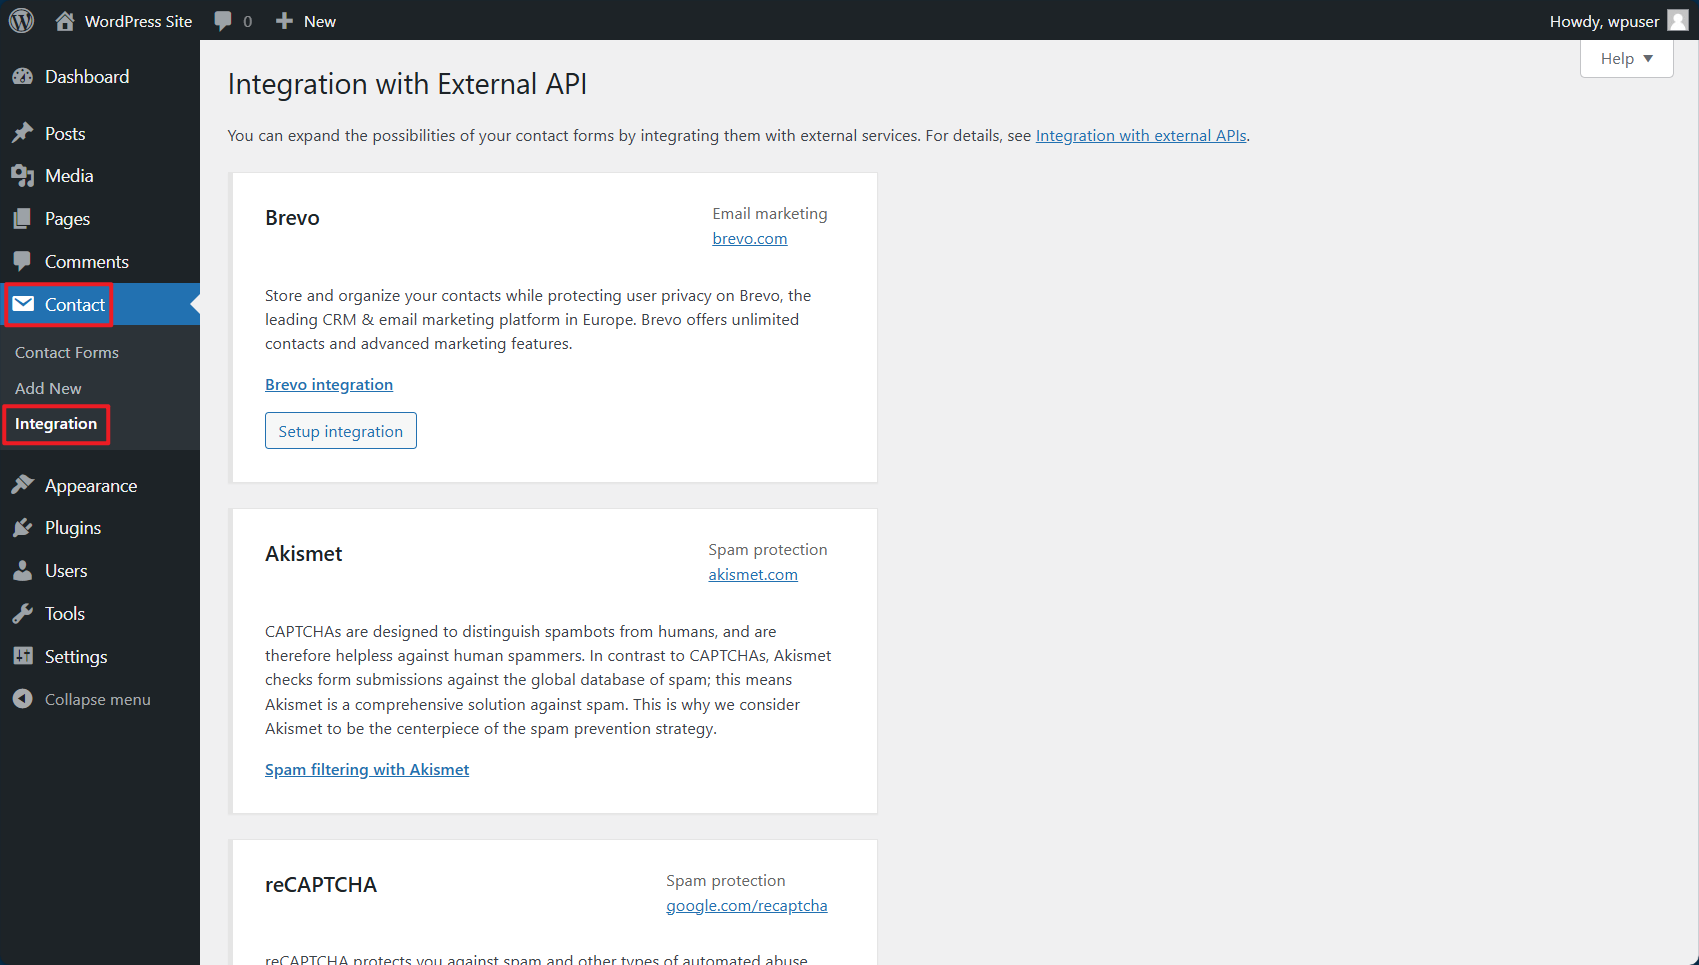
4. Next, move to the WordPress admin screen and open the Contact > Integration menu page.
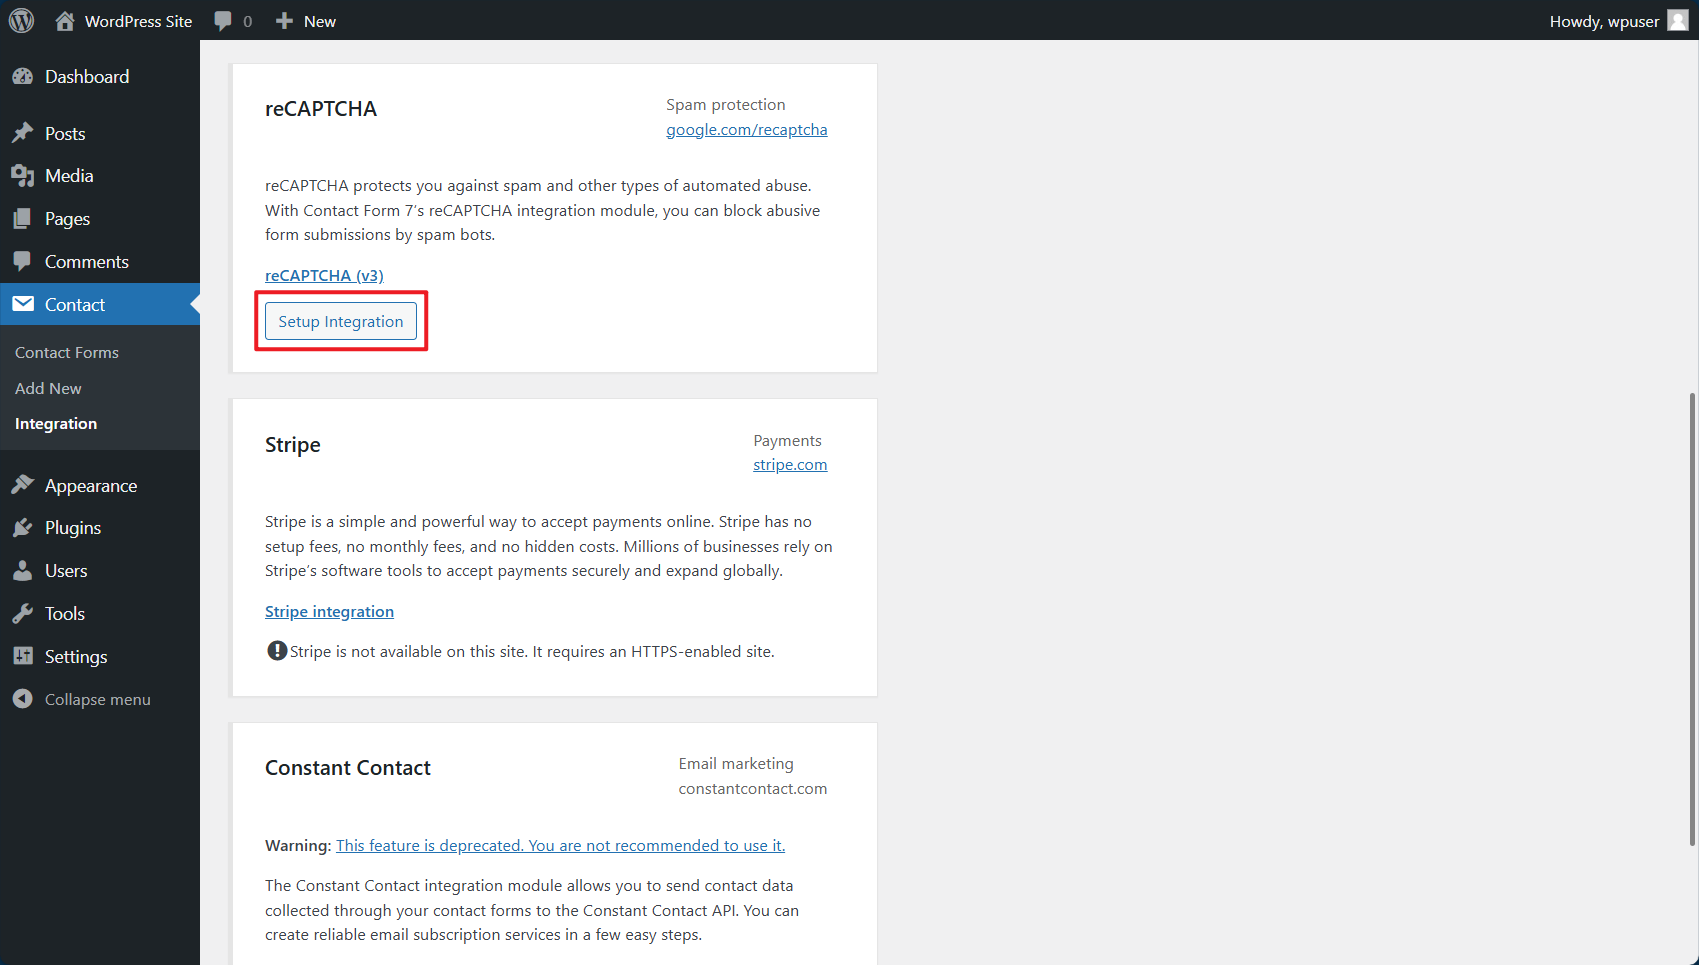
5. You will see a box titled reCAPTCHA there. Click ‘Setup Integration’ button in the box.
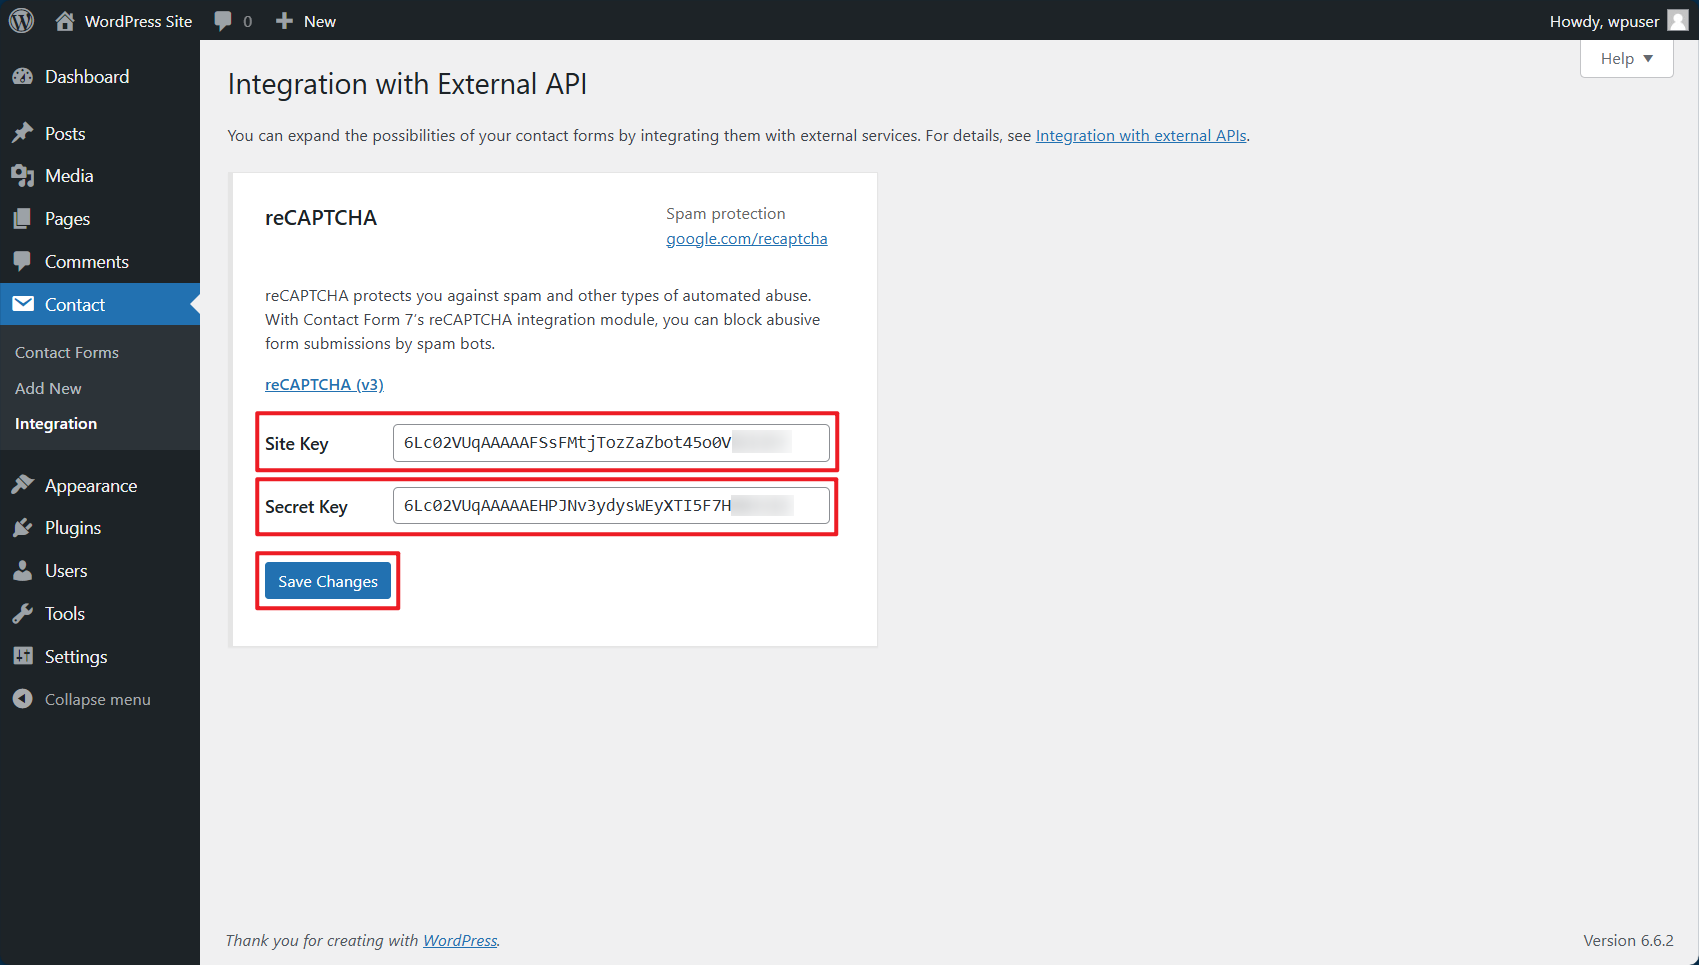
6. It will display input fields Site Key and Secret Key. Paste the two keys you received in the previous step into the fields, and click ‘Save Changes’.
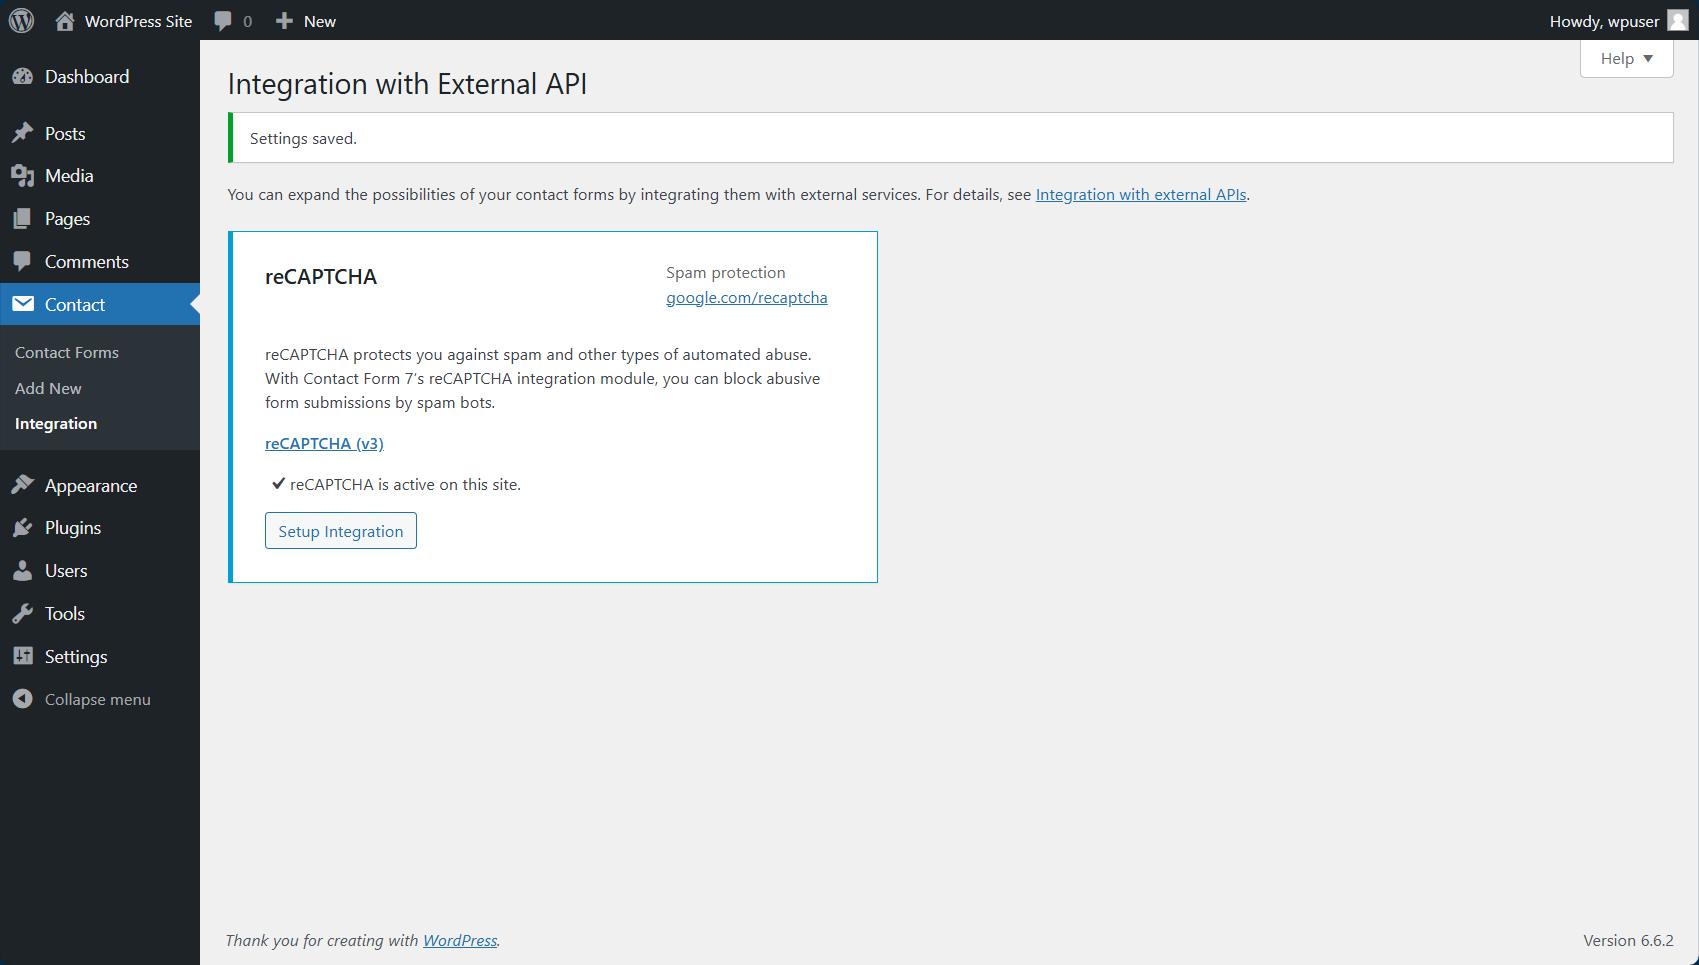
7. That’s it, the reCAPTCHA is active on your site. Now your contact forms use reCAPTCHA’s score to verify whether the form submission is from a human or from a spam bot.
Conclusion
By following these steps, you have successfully added reCAPTCHA to the Contact Form 7 plugin in WordPress. This additional layer of security helps protect your website from spam and malicious bots. Make sure to test the form after the integration to ensure everything works as expected.
For additional assistance or if you encounter any issues, please contact our support team at support@ipserverone.com.
Reference: https://contactform7.com/recaptcha/
Article posted on 18 May 2020.
