Search Our Database
How to assign a new key to an instance when server access is unavailable in Hourly Cloud Instance
Introduction
At times, you may find yourself unable to access your IPServerOne Cloud Instance due to issues with your server’s access key. Whether the key is lost, compromised, or otherwise unavailable, this guide will walk you through the process of assigning a new key to your instance, ensuring you can regain access and maintain the security of your server. This process involves deleting your current instance (while preserving its data volume) and creating a new instance using the preserved volume and a new key.
Prerequisites
- IPServerOne Cloud Account: You need to have an active account with IPServerOne.
- Existing Cloud Instance: This guide assumes you have a cloud instance already set up and are looking to regain access.
- New SSH Key: Ensure you have generated a new SSH key that you will assign to the new instance.
Steps to Reset the Key for an Instance in IPServerOne’s NovaCloud
Step 1: Log into the Customer Portal
- Access the IPServerOne Customer Portal and log in with your credentials.
Step 2: Navigate to the Instances Section
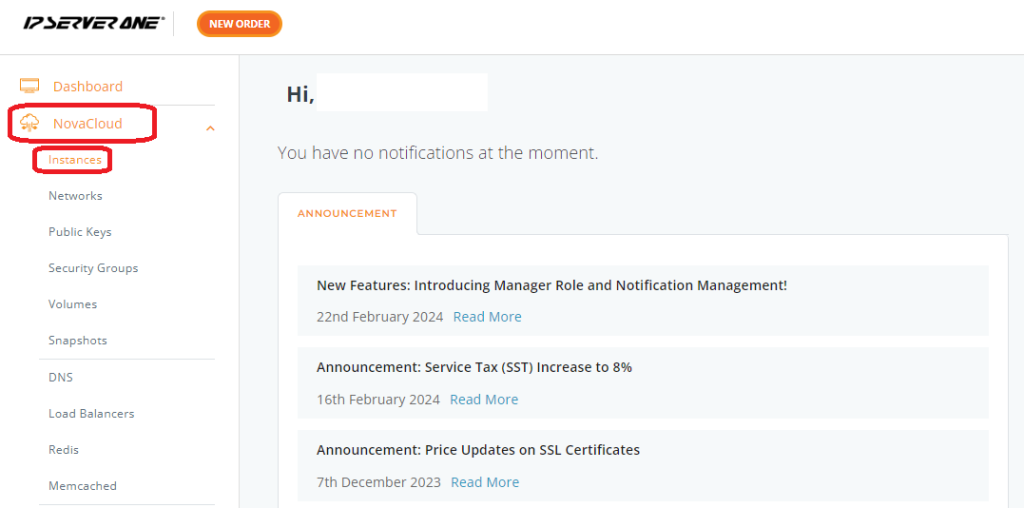
- In the portal dashboard, click on NovaCloud, then select Instances to view your active instances.
Step 3: Delete the Existing Key
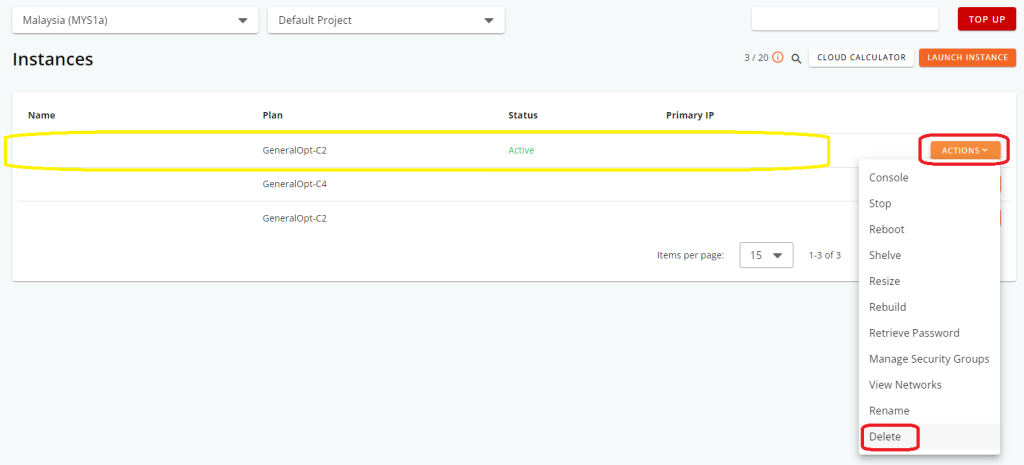
- Locate the instance for which you want to reset the key. Click Action next to the instance, then select Delete.
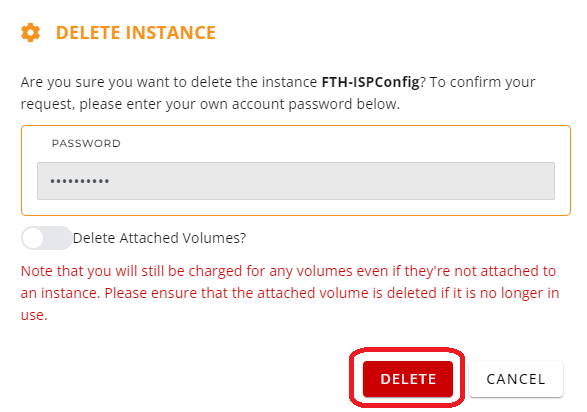
- Enter your Customer Account password and confirm by clicking DELETE.
Important Note: Ensure that the option to delete the volume is unchecked to retain your data and maintain service continuity.
Step 4: Recreate the Instance
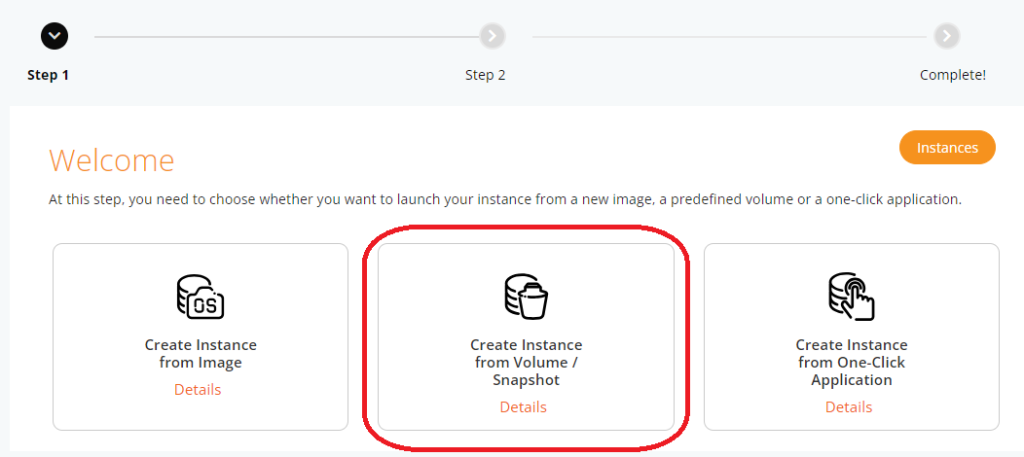
- After the instance deletion completes, click Launch Instance.
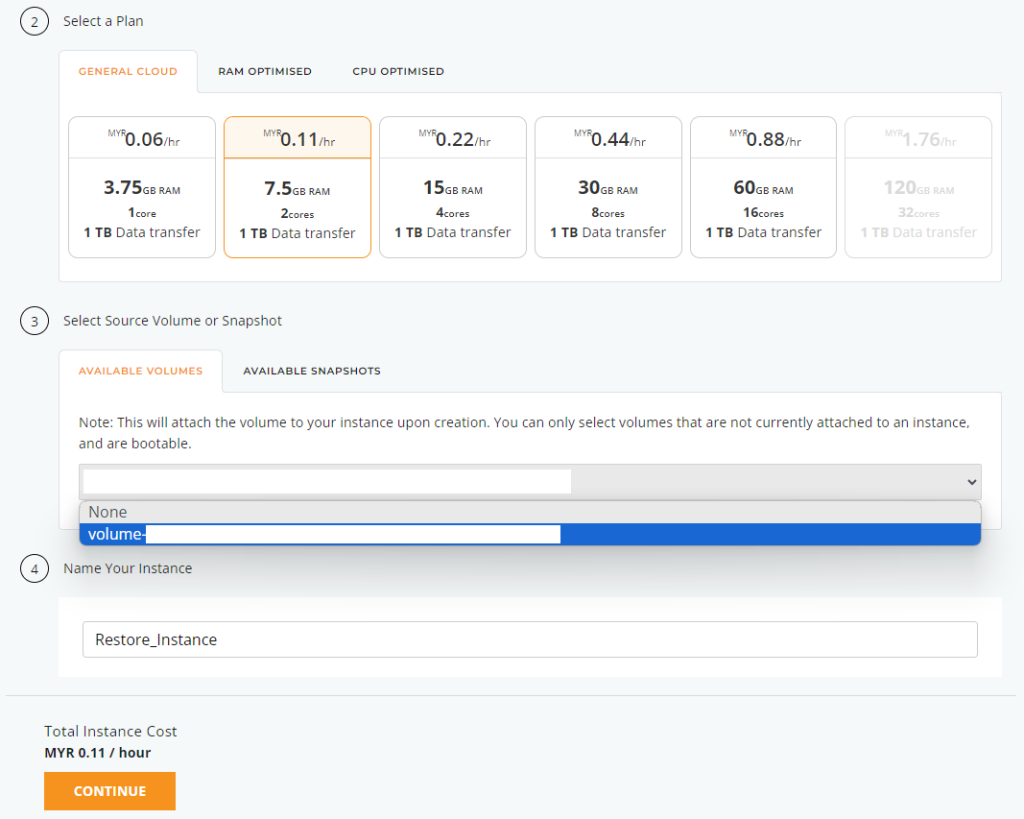
- Select Create Instance from Volume/Snapshot.
- Choose the instance plan and select the volume from the previously deleted instance. Enter a name for the new instance, then click Continue.
Step 5: Assign a New Public Key
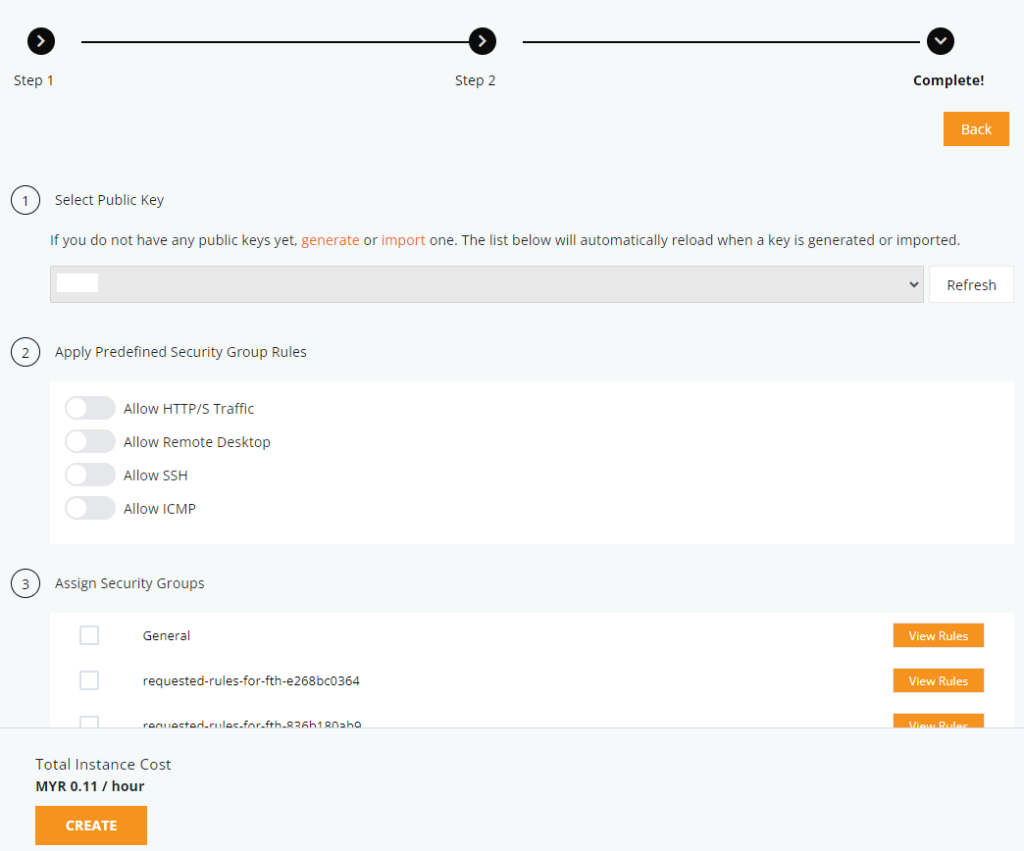
- Select a new public key for the instance, configure any additional settings, then click Create.
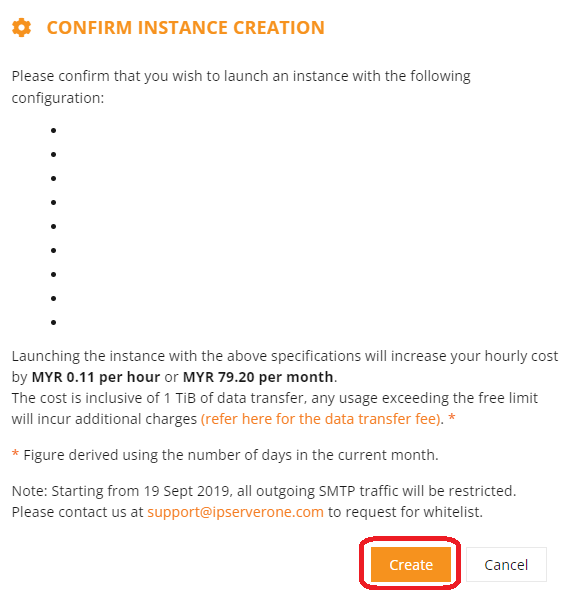
- Review the instance settings for accuracy, then click Create to finalize the setup.
Step 6: Access the New Instance
- Once the instance is created, use the assigned private key to log in to the server securely.
Conclusion
By adhering to these steps and paying careful attention to the warnings about preserving your volume, you can successfully reassign a new key to your cloud instance, even when direct server access is unavailable. This guide ensures that your data remains secure and accessible throughout the process.
For additional assistance or if you encounter any issues, please contact our support team at support@ipserverone.com.

