Search Our Database
How to assign mailbox size limit in SmarterMail
Introduction
SmarterMail is a powerful email server software commonly used for managing domains and user accounts. As an administrator, adjusting the mailbox size limit for individual users is a common task, particularly as storage needs change over time. Managing disk space quotas helps prevent mailboxes from exceeding capacity and ensures optimal performance.
This guide explains the step-by-step process for updating the disk space quota for a user in SmarterMail. It will cover accessing the administrative settings, navigating to the appropriate domain, and modifying the user’s mailbox size limit. This process is essential for system administrators who need to maintain control over the server’s resources and manage users’ storage effectively.
Prerequisites
- Administrator access to SmarterMail.
- The domain and user for which you wish to modify disk space quotas.
- Basic familiarity with SmarterMail’s interface.
Step-by-step Guide
Step 1: Log in to SmarterMail
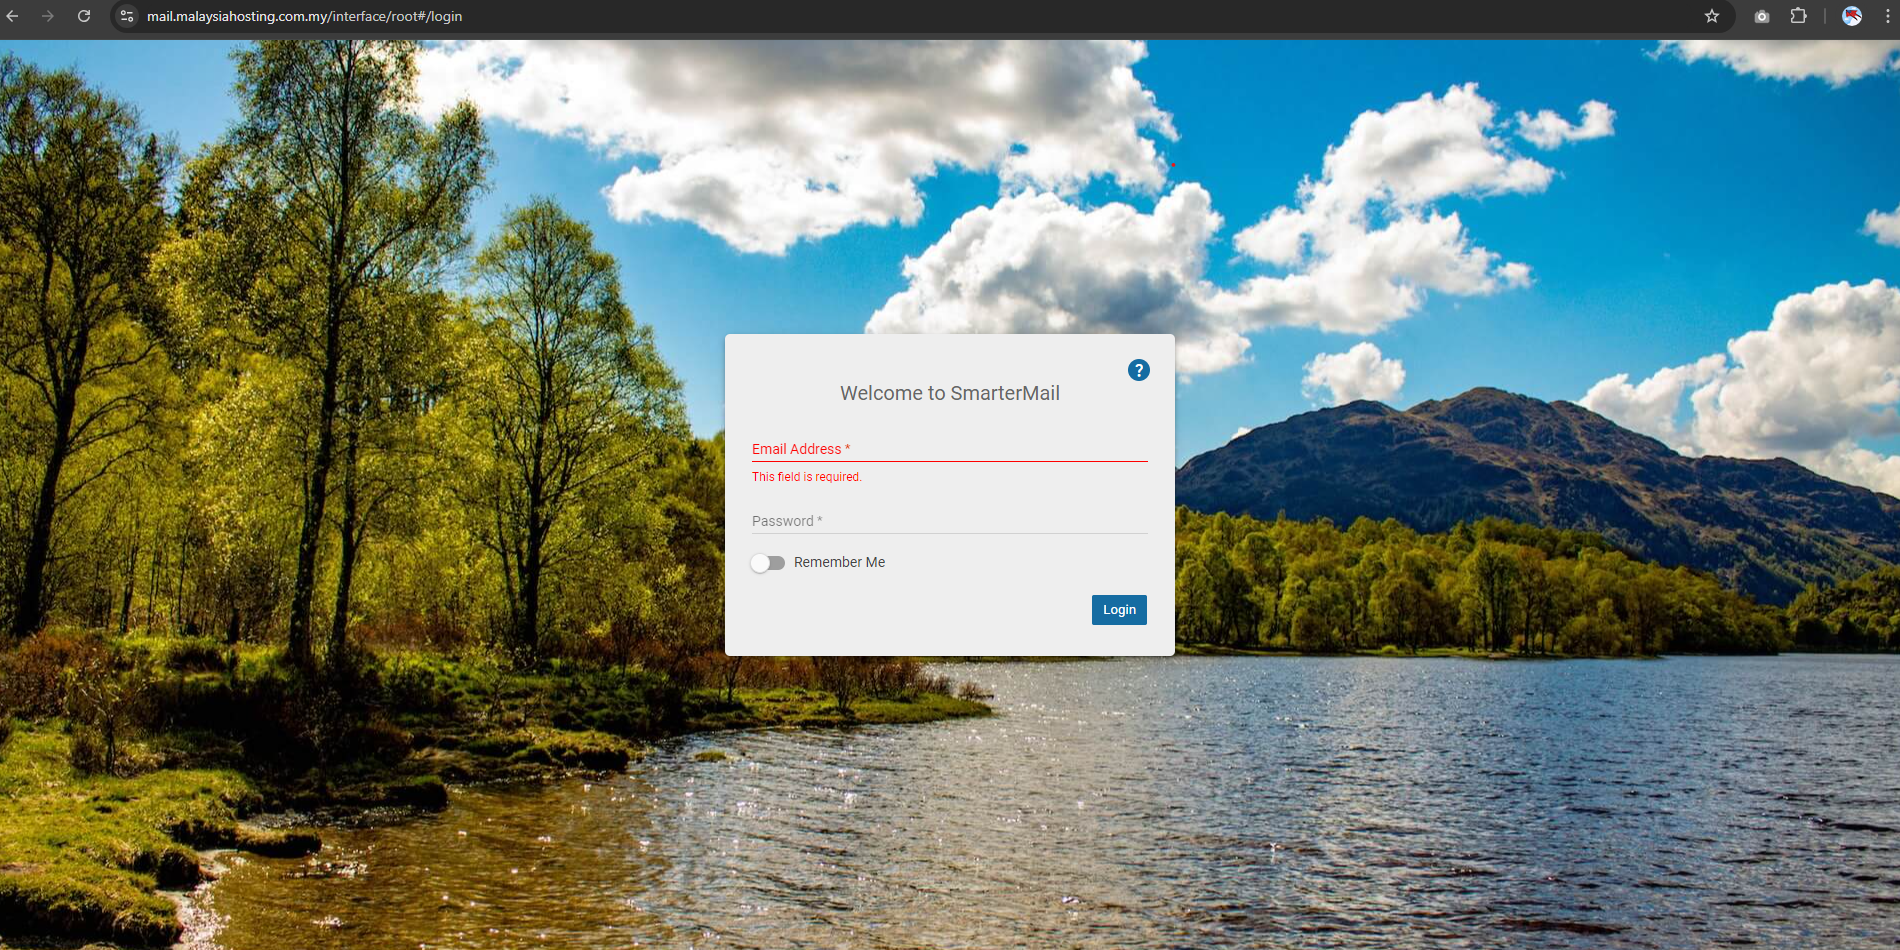
Start by logging in to SmarterMail using your administrator credentials. Open your web browser and navigate to the SmarterMail login page. Enter your admin username and password to gain access to the administrative dashboard.
Step 2: Access Domain Settings
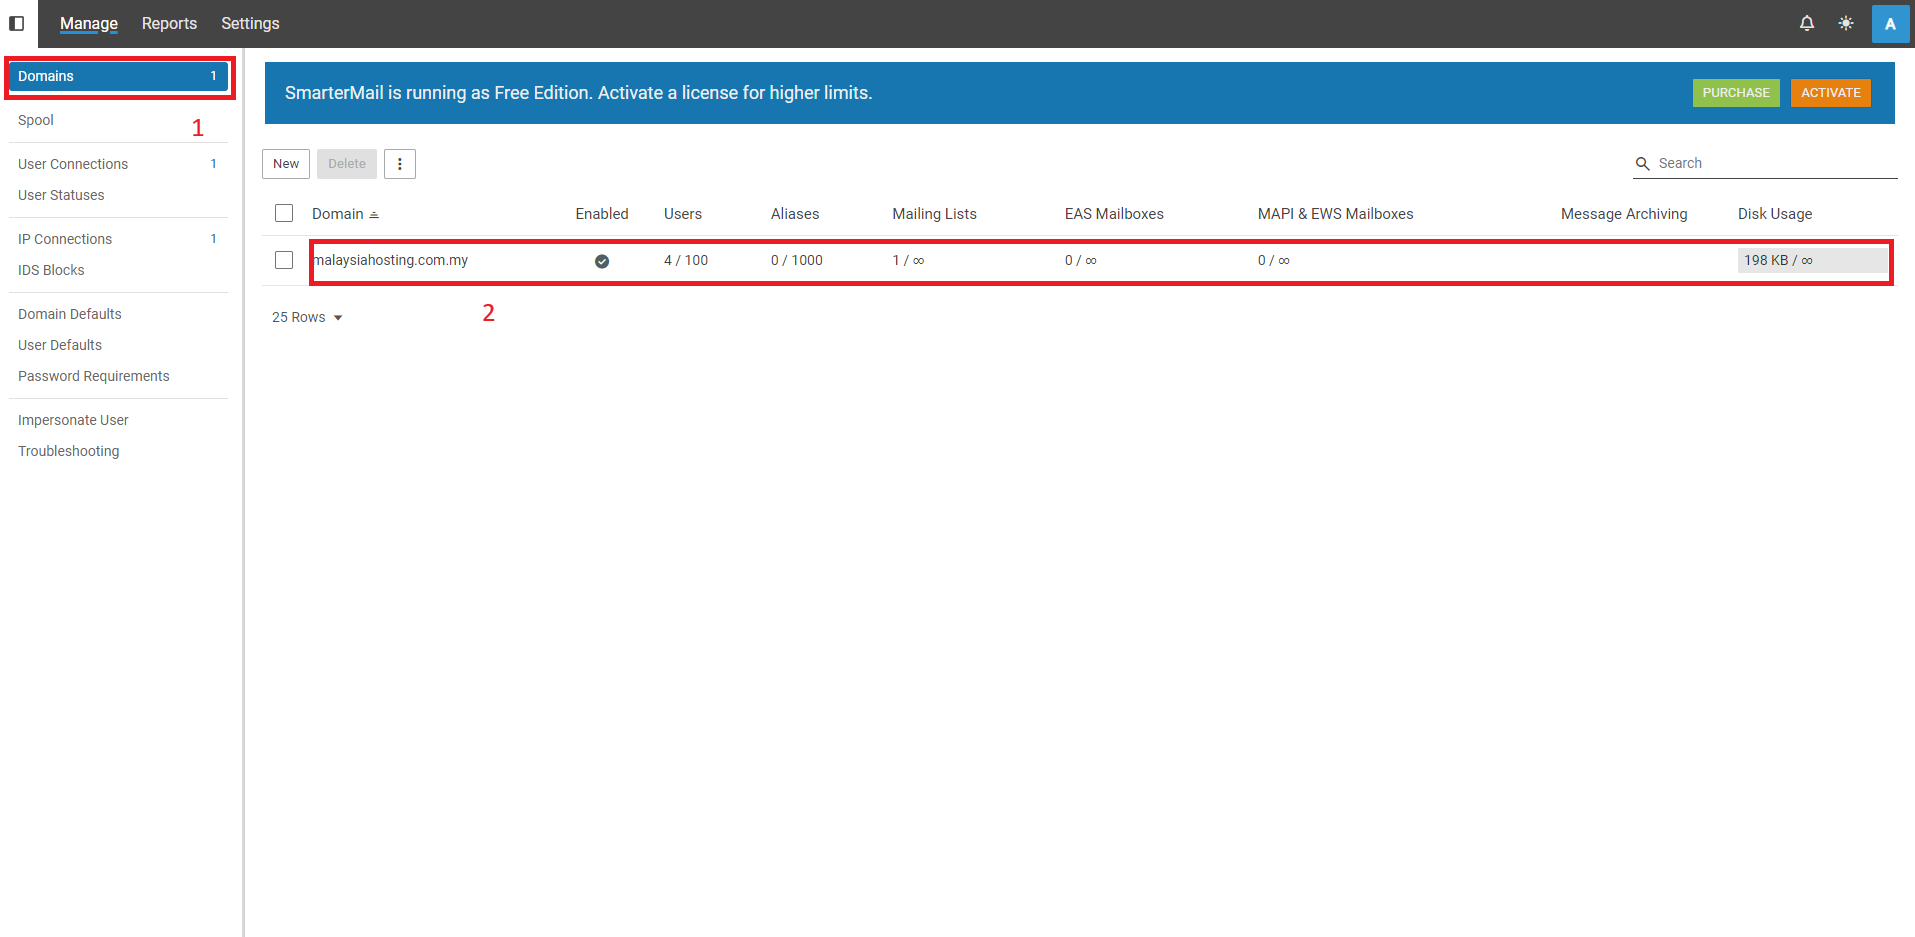
Once logged in, navigate to the domain where the user’s mailbox resides. In the SmarterMail dashboard, browse to the Domains section and select the specific domain you wish to manage.
Step 3: Navigate to the Accounts Tab
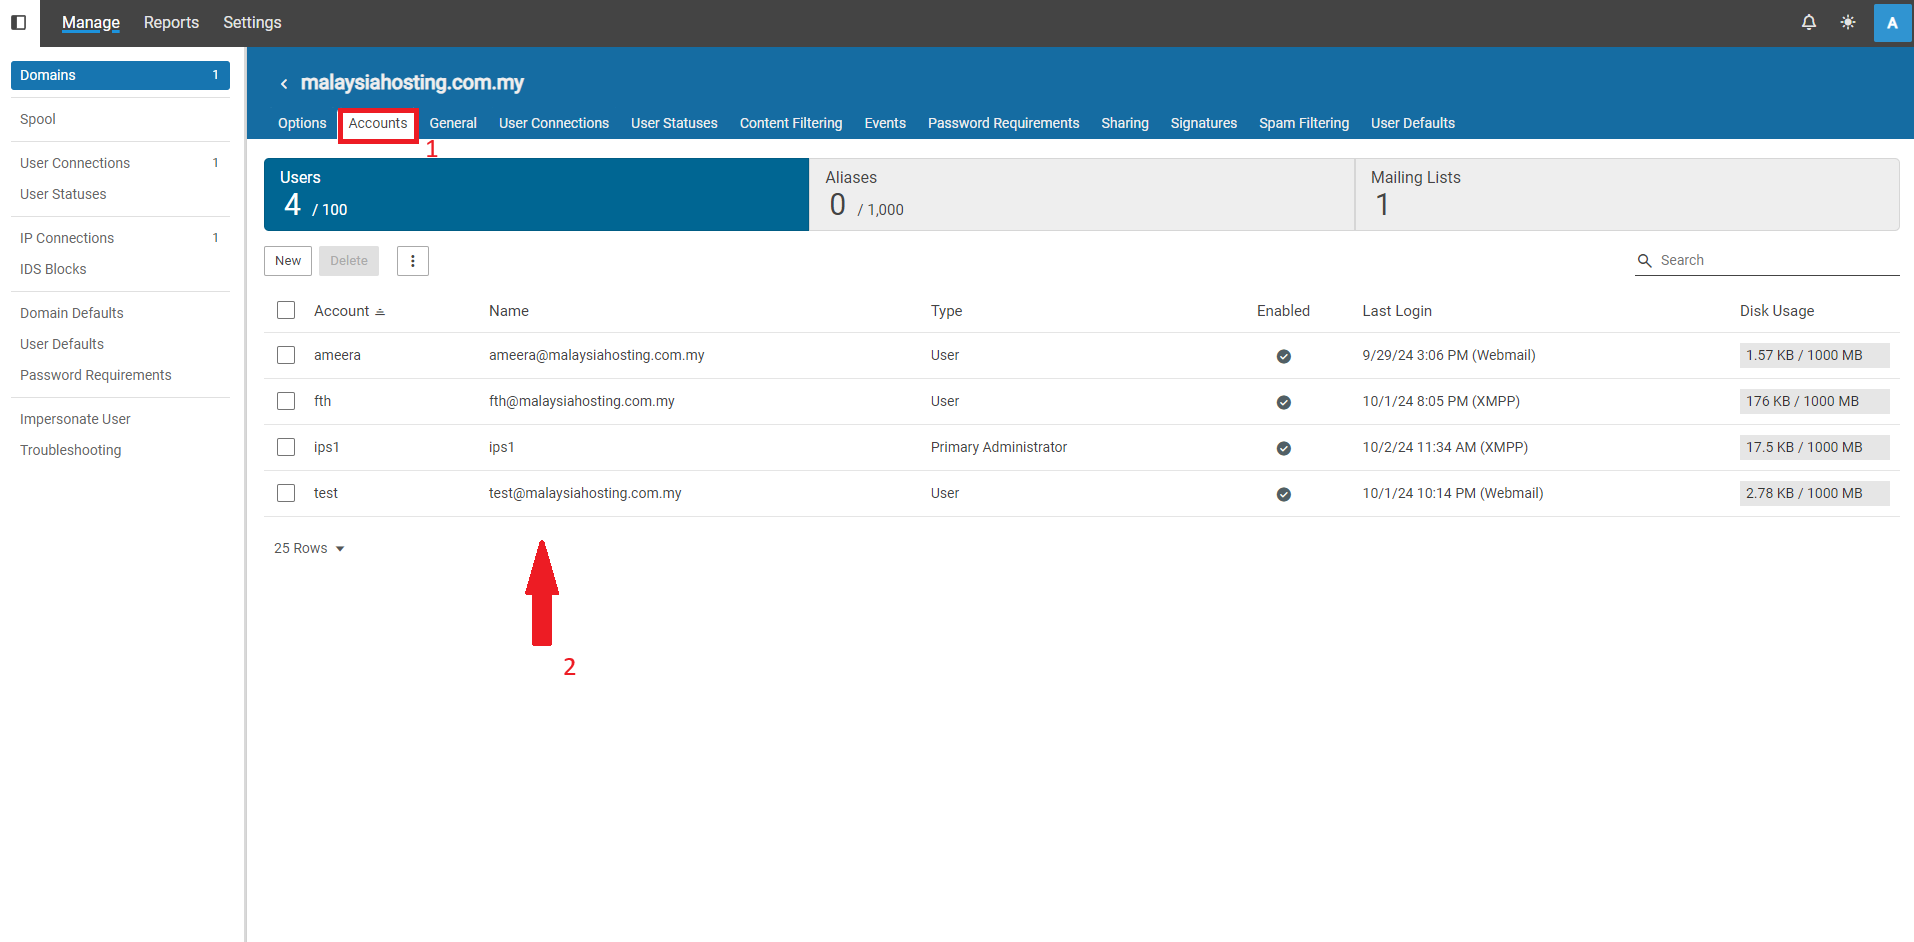
In the domain settings, click on the Accounts tab. This tab displays a list of all users associated with the domain. Select the user whose mailbox disk space quota you want to adjust by clicking on their username.
Step 4: Modify the Mailbox Size Limit
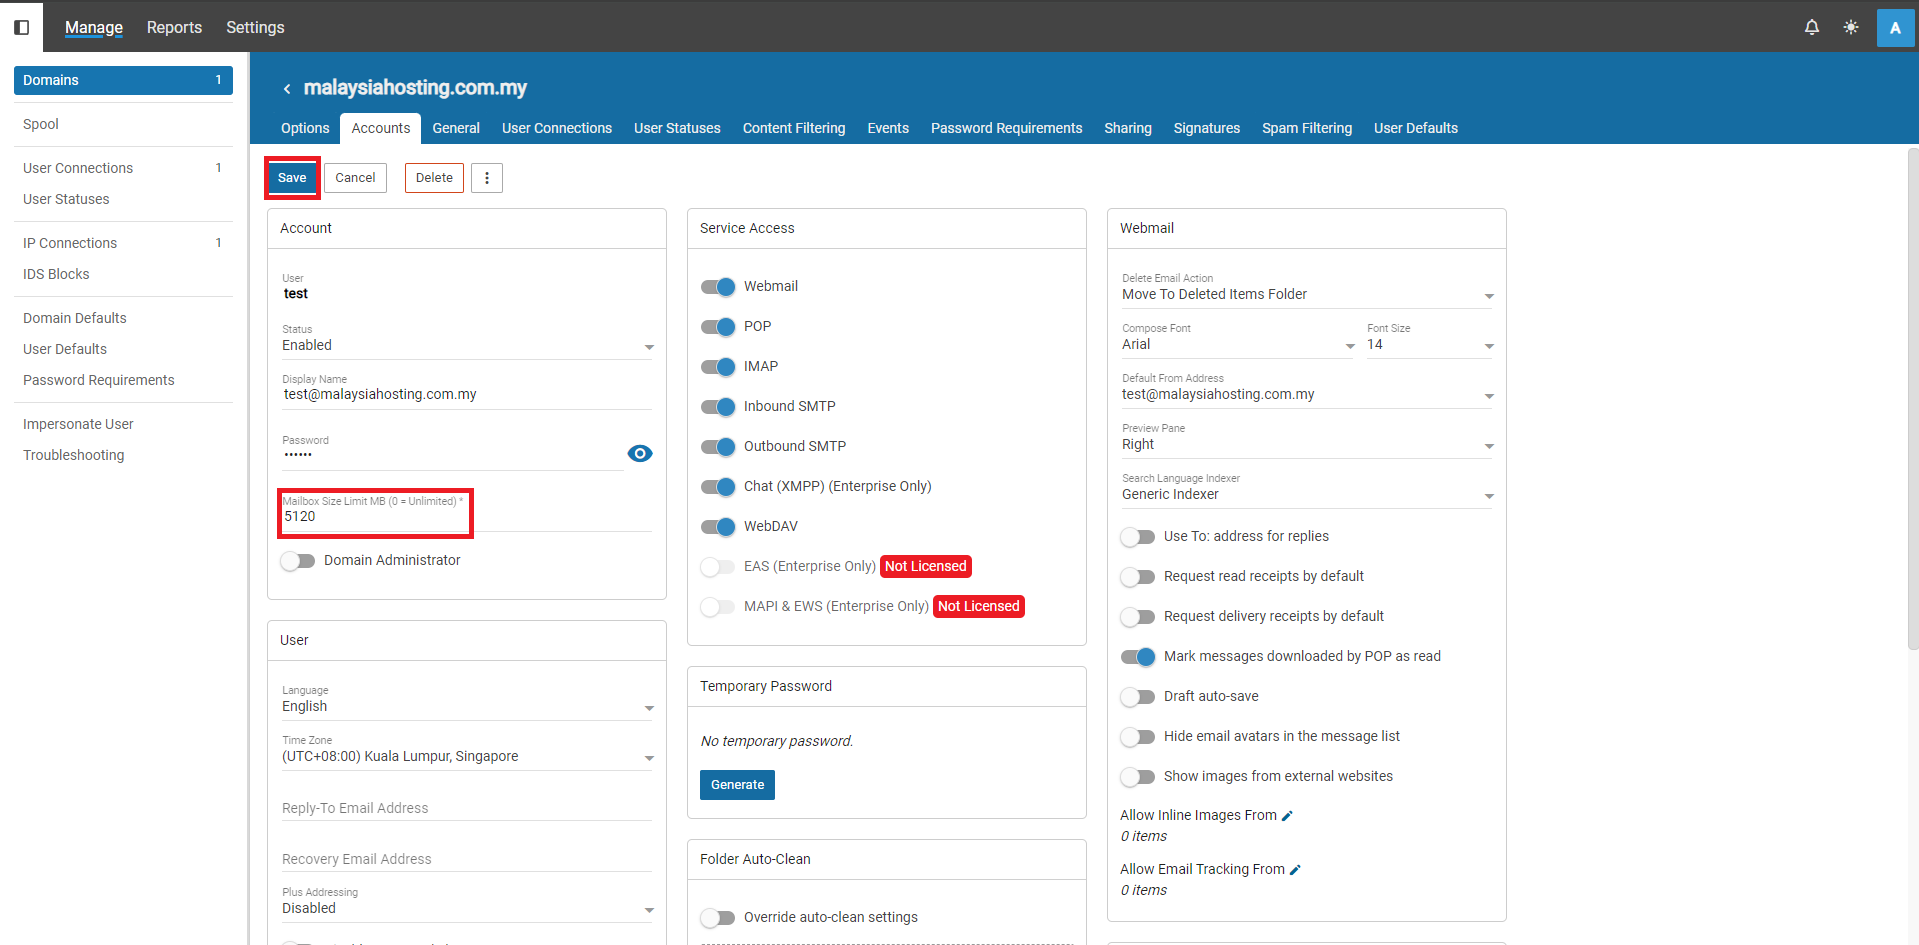
When the user’s settings page opens, locate the Mailbox Size Limit field. This field displays the current disk space quota allocated to the user’s mailbox. Enter the new desired quota to update the allowed disk space.
Step 5: Save the Changes
After adjusting the Mailbox Size Limit to the new value, click Save to apply the changes. The user’s mailbox will now reflect the updated disk space quota.
Conclusion
By following these steps, you can easily adjust the disk space quota for a user in SmarterMail. This process helps administrators control resource usage and prevent users from exceeding their mailbox limits.
Should you have any inquiries about the guidelines, please feel free to open a ticket through your portal account or contact us at support@ipserverone.com. We’ll be happy to assist you further.
Article posted on 20 April 2020 by Louis


