Search Our Database
How to Change Server Hostname in DirectAdmin
Introduction
In this article, we will guide you through the process of changing the hostname in DirectAdmin. The hostname is the name assigned to your server and should be a fully qualified domain name (FQDN) that resolves to your server’s IP address. For example: ns1.server.com.
Prerequisites
- DirectAdmin credentials with admin privilege
Steps to Change the Hostname
1. Access the DirectAdmin Control Panel
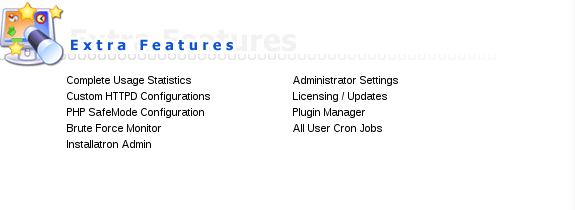
Log in to the DirectAdmin control panel using your admin credentials. Navigate to the “Administrator Settings” page, as illustrated below:
2. Update the Hostname
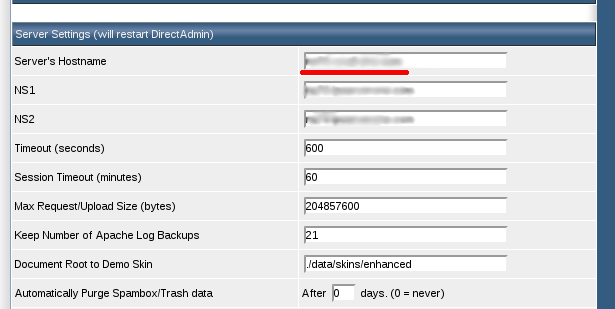
On the “Administrator Settings” page, scroll down to the “Server Settings” category and locate the “Server’s Hostname” field. Here, you can enter the new hostname for your server.
3. Save the Changes
After entering the new hostname, scroll down to the bottom of the page and click on the Save button. DirectAdmin will apply and save the changes.
4. PTR Record
If your server hosts an email server, you will need to contact your hosting provider, or if it’s hosted with IPSERVERONE, please send a request to support@ipserverone.com to update the server’s PTR record. PTR records are essential for email servers to verify the sender’s IP address and help prevent spam.
Conclusion
Changing the hostname in DirectAdmin is a straightforward process that involves accessing the control panel, updating the hostname, and saving the changes. Ensure that the new hostname is a valid FQDN that correctly resolves to your server’s IP address. Properly updating the hostname helps maintain server identification and functionality.
Article posted on 22 February 2020 by Louis

