Search Our Database
How to configure windows built-in client for L2TP/IPSEC VPN
Introduction
Configuring a VPN connection on Windows using the built-in client is a reliable method for establishing a secure connection to a private network over the internet. One of the most common VPN protocols is L2TP (Layer 2 Tunneling Protocol) combined with IPsec for encryption. This setup ensures secure communication by encrypting the data transmitted between your device and the VPN server.
This guide will walk through configuring the Windows built-in VPN client for an L2TP/IPsec connection. It is designed for users who want to securely access remote networks, such as corporate environments or personal VPN servers, and need to configure the connection manually.
The steps outlined here apply to any version of Windows with the built-in VPN feature, such as Windows 10 or Windows 11. This guide is suitable for users who have the necessary credentials (IP address, pre-shared key, and login information) for the VPN server.
Prerequisites
Before configuring the VPN connection, ensure that you have the following:
- The IP address of the VPN server.
- The pre-shared key provided by your VPN provider.
- A valid username and password for authentication.
Step-by-step Guide
Step 1: Open the Settings App
In the Windows search bar, type “Settings” and click on the Settings app to open it.

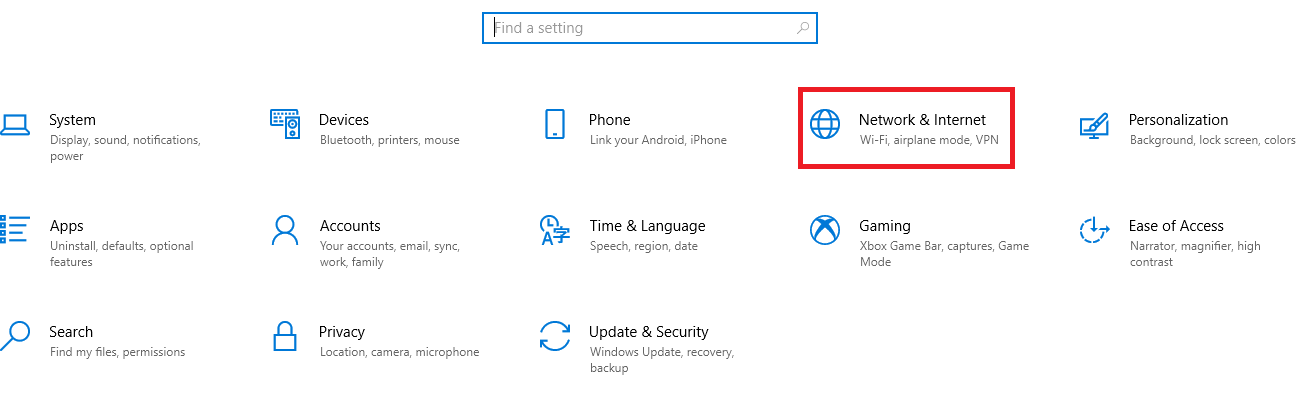
Step 2: Navigate to Network & Internet
In the Settings app, click on Network & Internet to access network-related configurations.
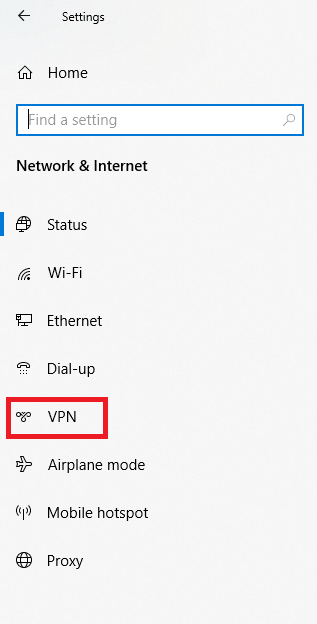
Step 3: Access the VPN Settings
Under the Network & Internet section, select VPN from the options listed on the left-hand side of the screen.
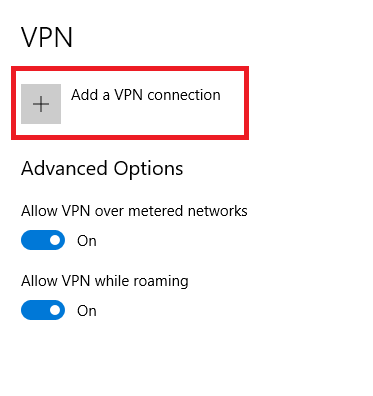
Step 4: Add a VPN Connection
Click on the Add a VPN connection button to begin configuring your VPN connection.
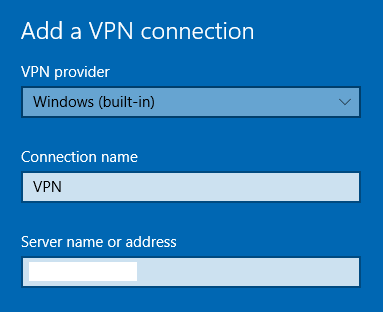
Step 5: Configure VPN Provider and Connection Name
- For the VPN provider, select Windows (built-in).
- Enter a Connection name of your choice. This name will help you identify the VPN connection later.
- In the Server name or address field, input the IP address provided when launching the VPN instance.
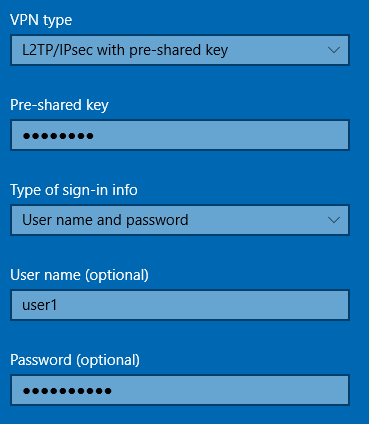
Step 6: Set VPN Type and Input Pre-shared Key
- For the VPN type, select L2TP/IPsec with pre-shared key.
- In the next field, input the Pre-shared key provided by your VPN provider.
Step 7: Input Sign-in Information
- Under Type of sign-in info, select User name and password.
- Enter the User name and Password required for authentication to the VPN server.
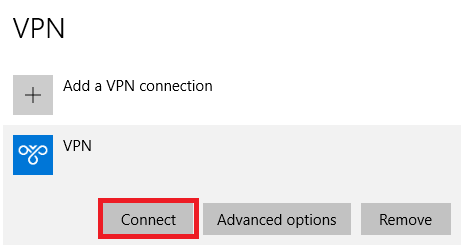
Step 8: Save the Connection Settings and Connect
Click on Save to store the VPN connection settings. After saving, click on Connect to establish the VPN connection.
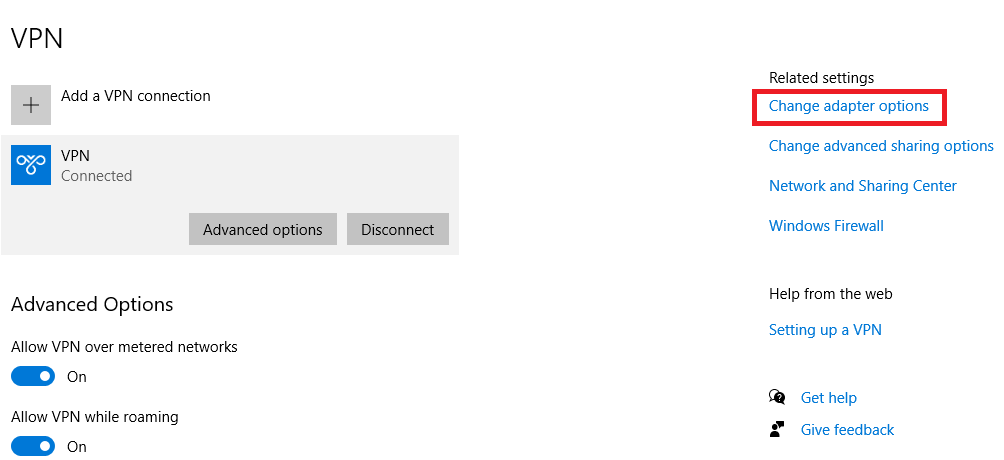
Step 9: Verify VPN Traffic Routing
To ensure that all your network traffic is routed through the VPN, you must verify that the VPN gateway is being used. Start by navigating to the Change adapter options.
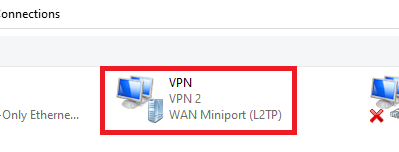
Step 10: Access VPN Adapter Settings
In the Network Connections window, locate the VPN adapter you created. The adapter name will correspond to the Connection name you defined earlier. Double-click the adapter to open its properties.
Step 10: Look for your VPN adapter and double click. The Adapter name will follow the name of your VPN connection that you have created previously.
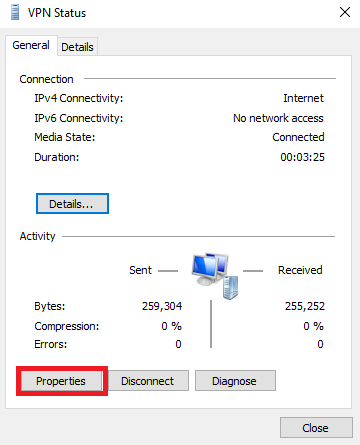
Step 11: Open Adapter Properties
Click on Properties to access the configuration options for your VPN adapter.
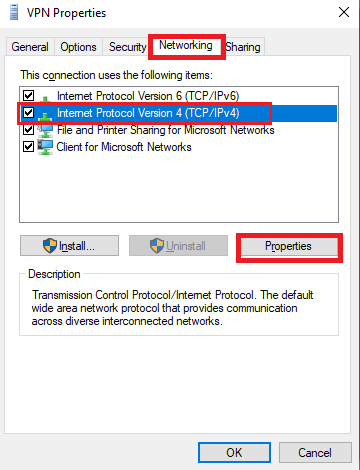
Step 12: Modify IPv4 Settings
In the Properties window, navigate to the Networking tab. Select Internet Protocol Version 4 (TCP/IPv4) and click on Properties.
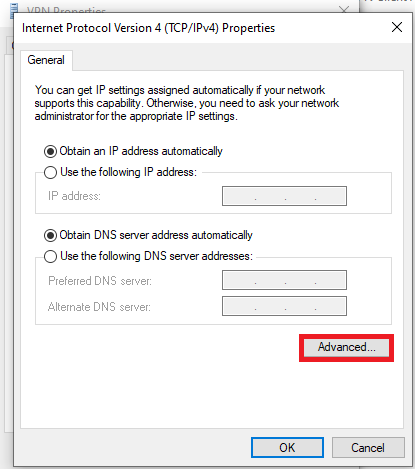
Step 13: Access Advanced Settings
In the IPv4 Properties window, click on Advanced to modify advanced network settings.
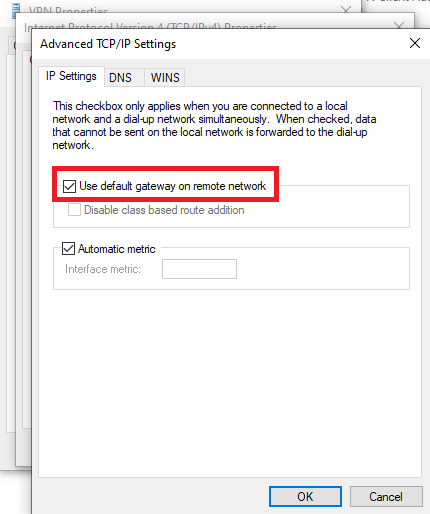
Step 14: Enable Default Gateway on Remote Network
Ensure that the Use default gateway on remote network option is checked. This setting routes all internet traffic through the VPN, ensuring a secure connection.
Conclusion
By following this guide, you have successfully configured the Windows built-in client for an L2TP/IPsec VPN connection. This setup ensures that your network traffic is encrypted and securely routed through the VPN. Make sure to verify the connection and traffic routing for a secure experience.
Should you have any inquiries about the guidelines, please feel free to open a ticket through your portal account or contact us at support@ipserverone.com. We’ll be happy to assist you further.
Article posted on 9 December 2020 by jzyap