Search Our Database
How to create a signature for outgoing emails in SmarterMail
Introduction
This guide is intended for SmarterMail users who need to add a signature to outgoing emails. Signatures are commonly used to provide company information, or legal notices at the end of an email. This article explains how to create a signature in SmarterMail, ensuring that it is automatically appended to all outgoing emails.
Prerequisites
- Access to SmarterMail.
Step-by-Step Guide
1. Log in to SmarterMail
Log in to SmarterMail as a user.
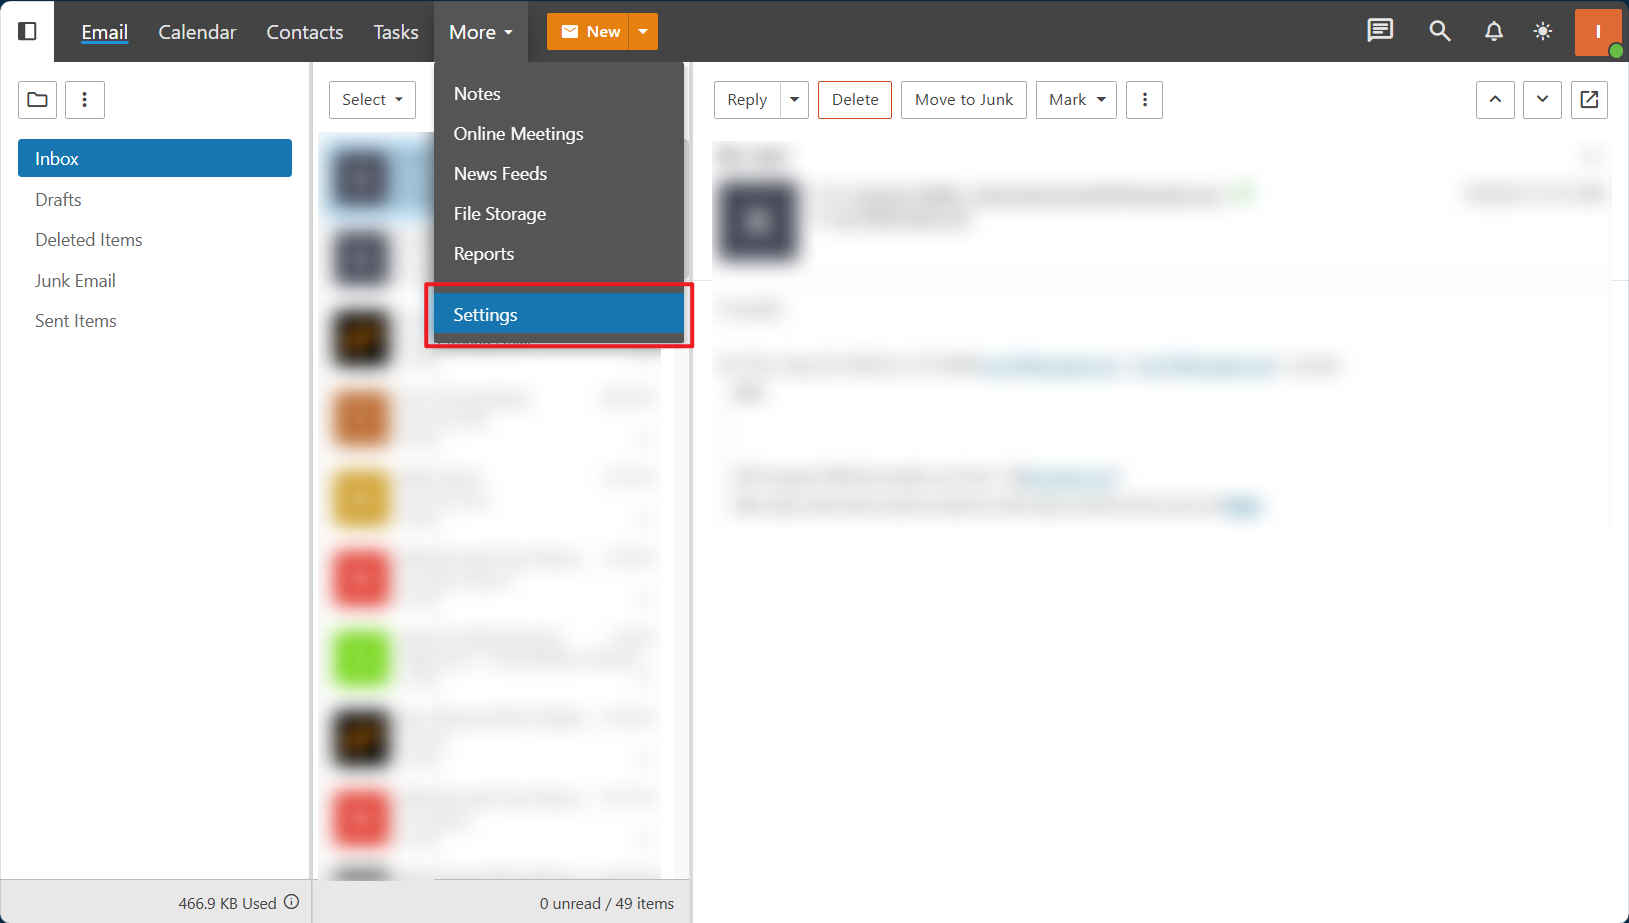
2. Navigate to Settings
Click on the ‘More’ button in the top menu bar. Then, select ‘Settings’.
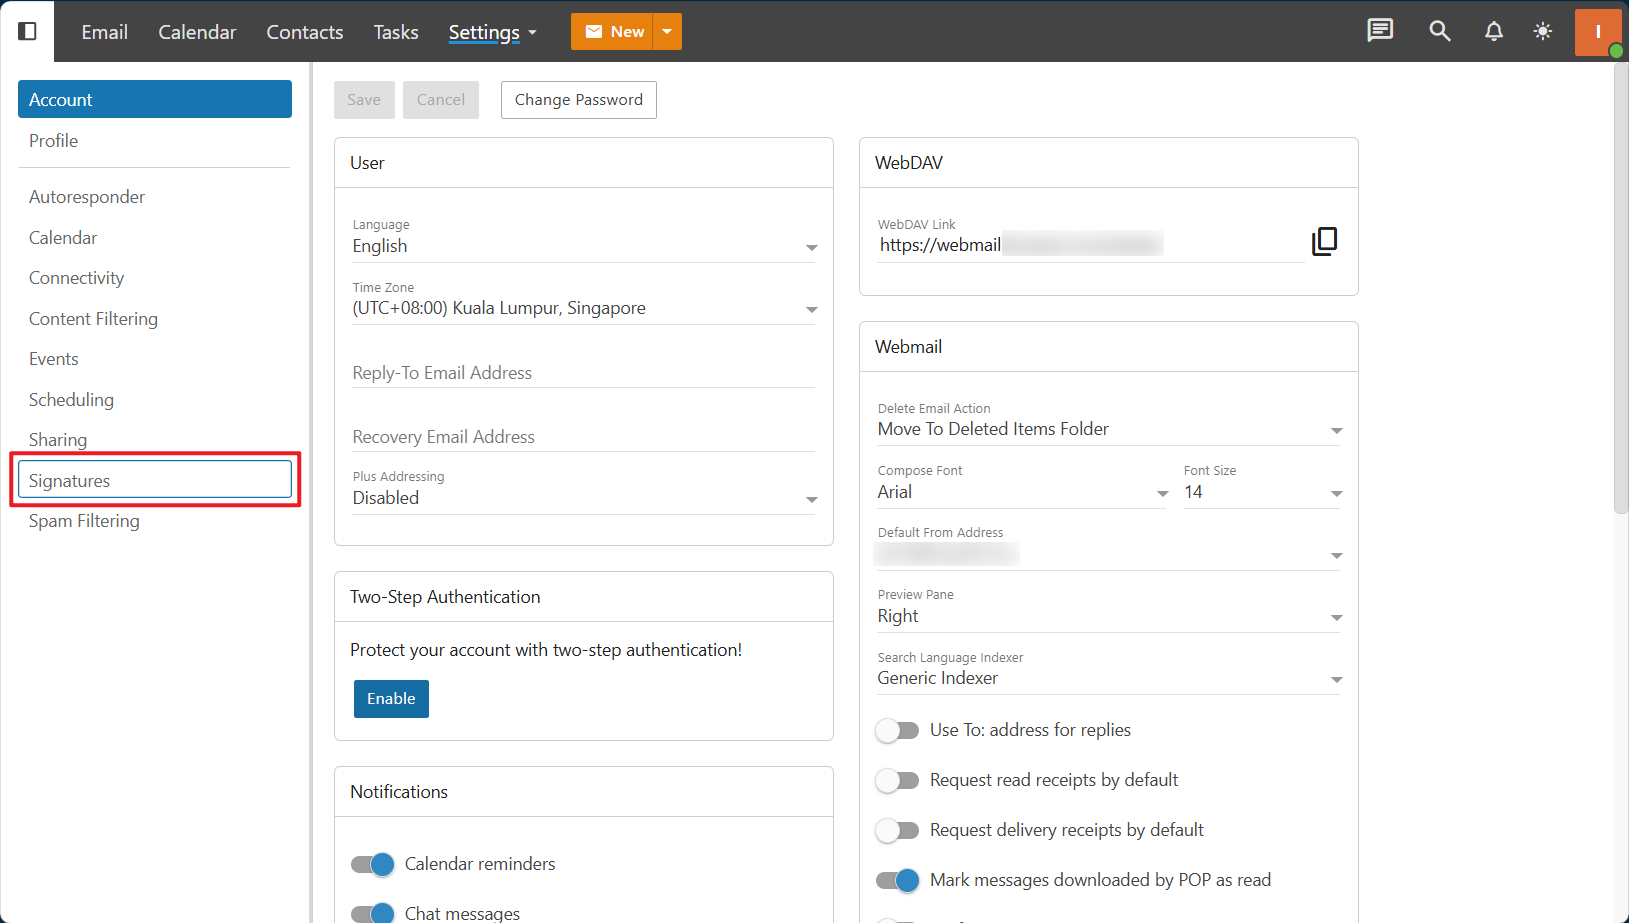
3. Navigate to Signatures
Click on ‘Signatures’ in the left navigation pane.
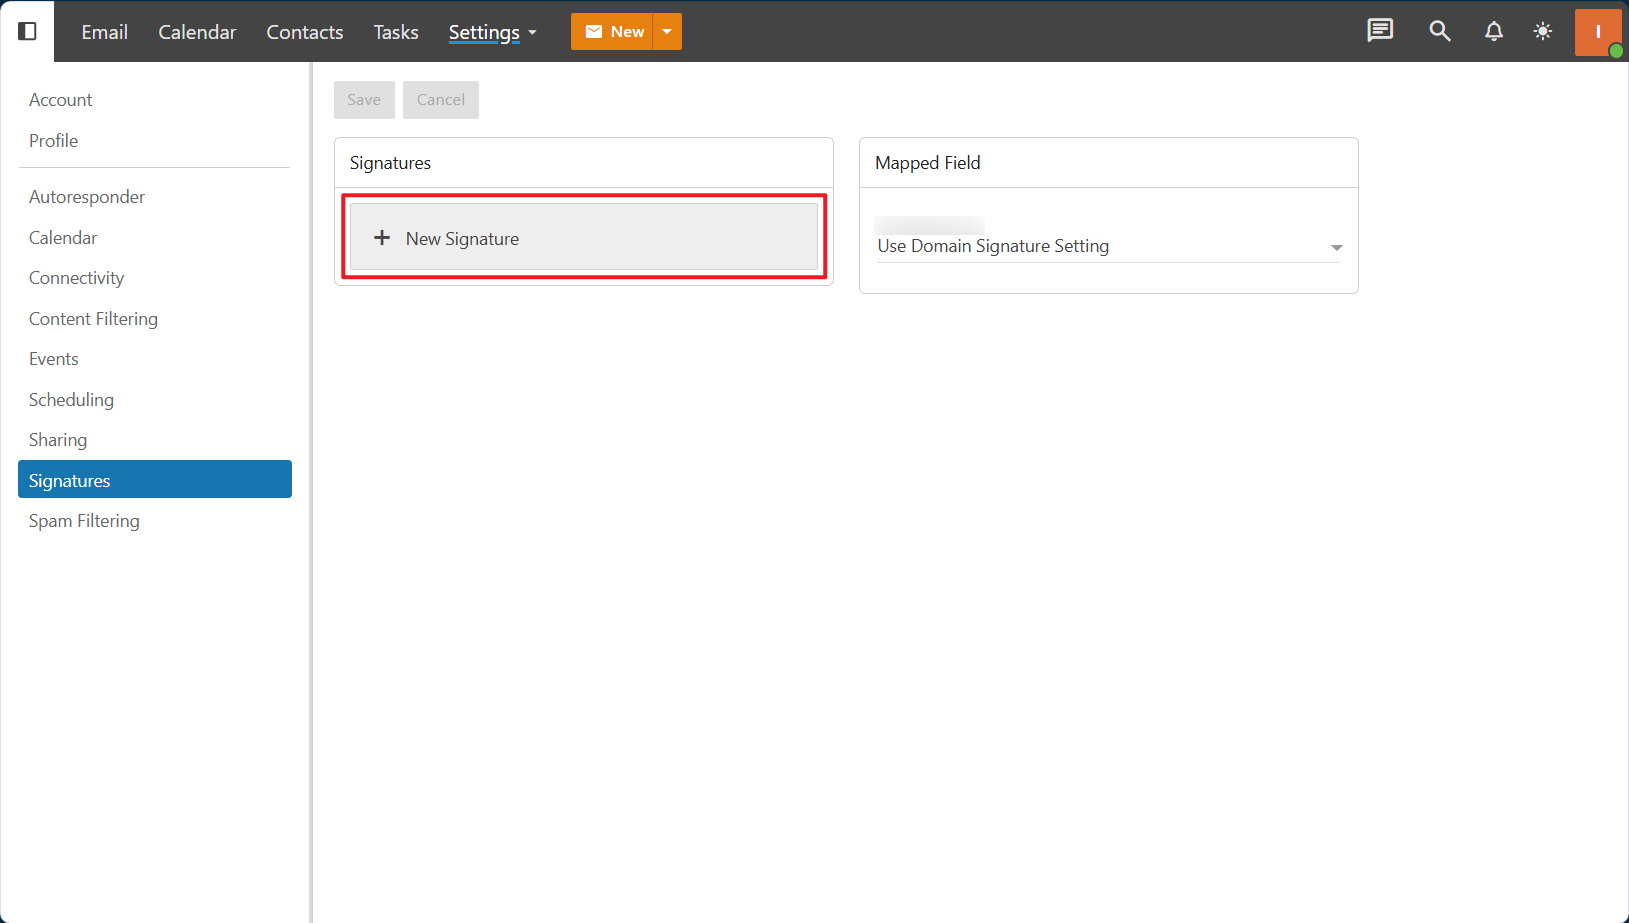
4. Create a new signature
4. Click on ‘New Signature’.
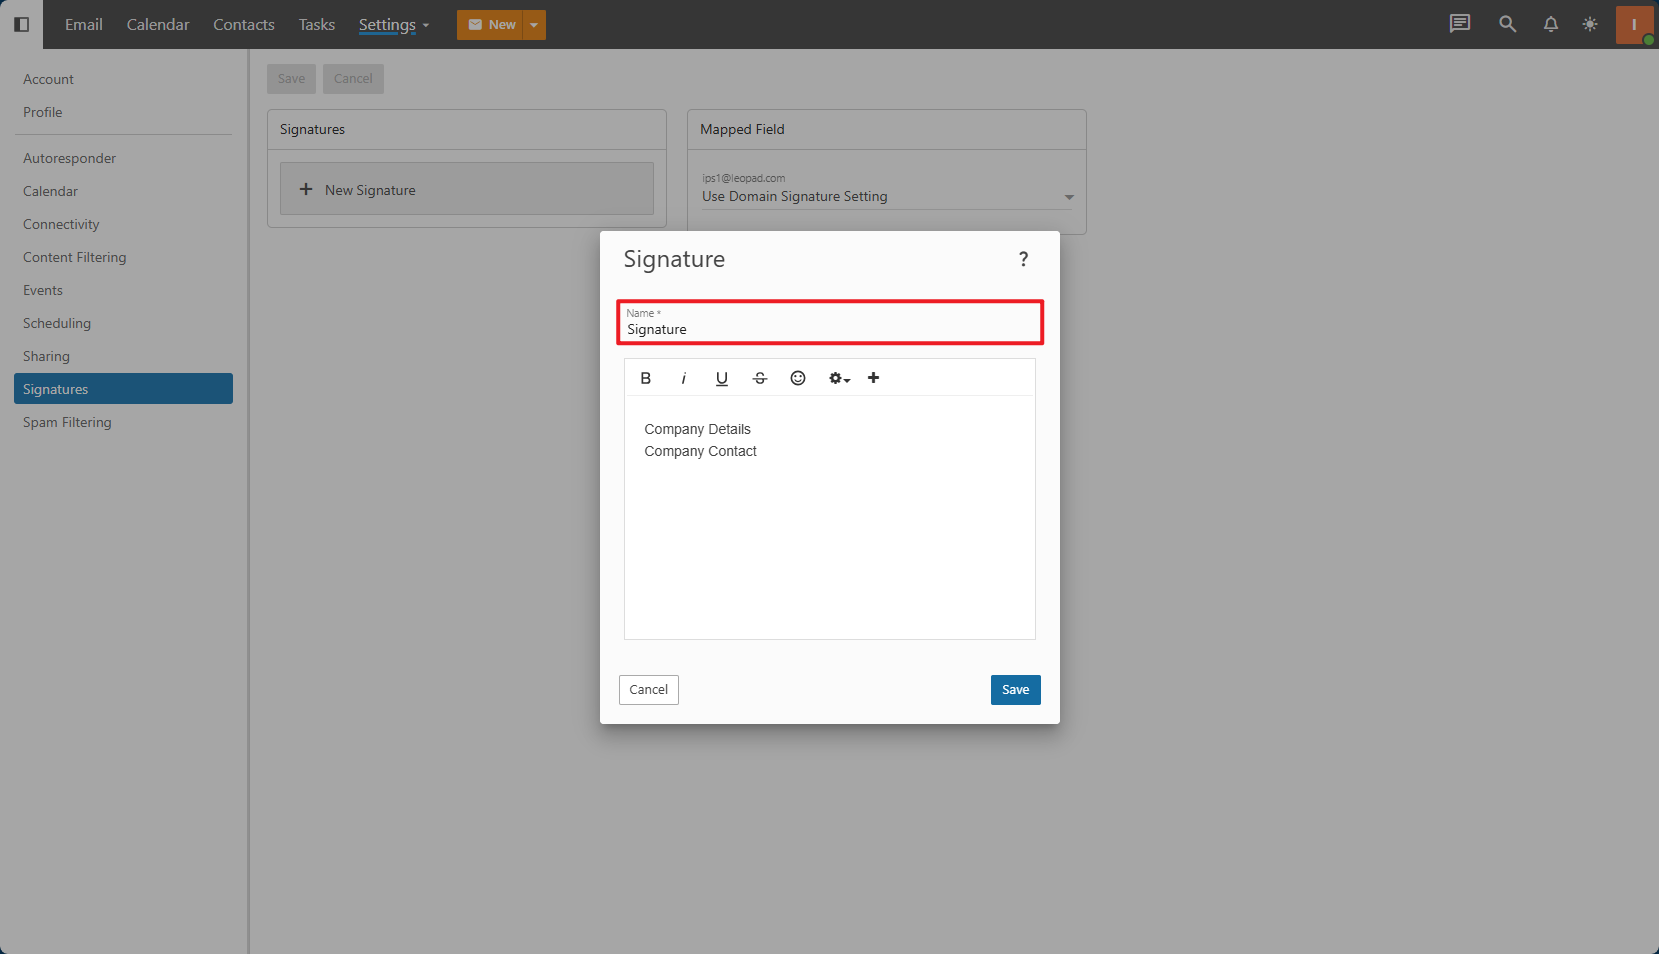
5. Enter signature details
In the Name field, type the name of the signature. At the same time, you can type the content of the signature in the text box below. Then, click ‘Save’.
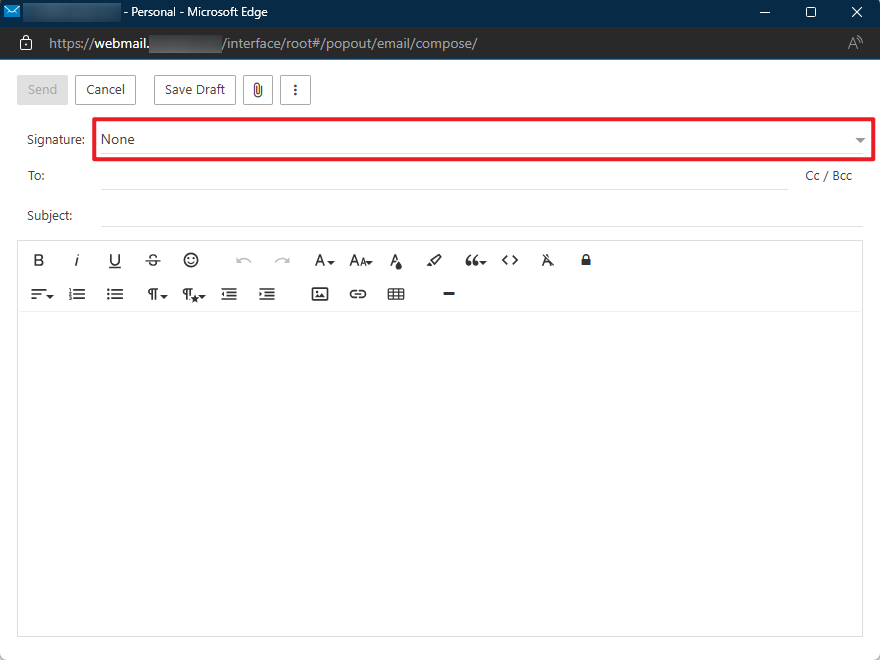
6. Verify signature addition
You can verify that the signature was added successfully by composing an email. Next, click on the Signature dropdown menu.
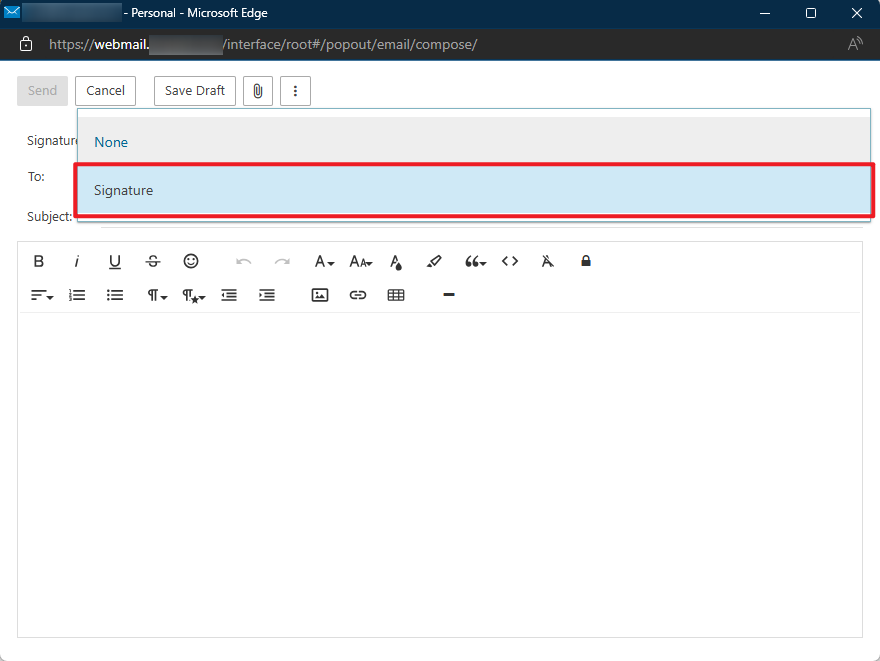
7. Select the signature
Select the signature you recently added.
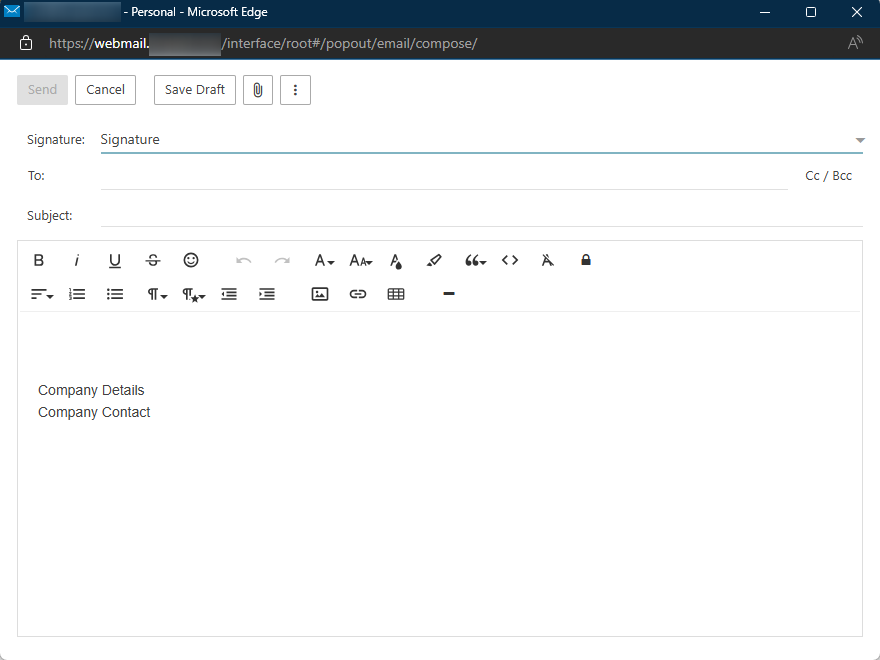
8. Confirm signature appearance
You will see the signature appear in the text box after selecting the one you want to use.
Conclusion
By following these steps, you can easily create a signature for outgoing emails in SmarterMail to include the informational text or disclaimer.
Article posted on 26 March 2020.