Search Our Database
How to create FTP accounts in Plesk control panel
Introduction
This guide provides step-by-step instructions on how to create new FTP accounts in Plesk versions 9.x and 10.x. FTP accounts are essential for managing files on your server, allowing users to upload, download, and modify content within specified directories. This guide is specifically for users and administrators using Plesk versions 9.x and 10.x, which have a different interface from later versions. The process may vary slightly in newer Plesk versions.
Prerequisites
- Access to the Plesk 9.x or 10.x control panel with administrative privileges.
- A domain already set up in Plesk for which you want to create the FTP account.
Step-by-step Guide
To create FTP accounts in Plesk Control Panel, please follow the steps below:-
Step 1: Access the FTP Accounts Section
- Log in to your Plesk control panel.
- From the main page, go to the Files category.
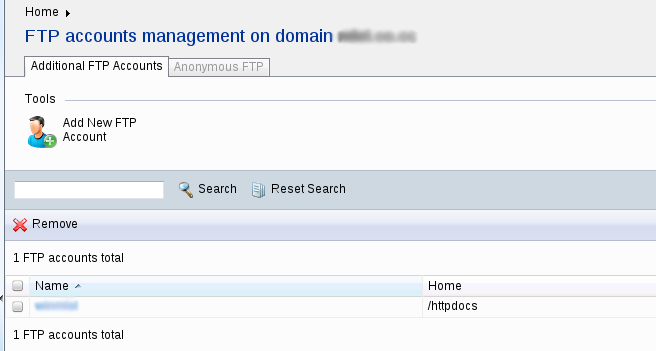
- Click on FTP Accounts to open the FTP account management page.
Step 2: Add a New FTP Account
- On the FTP Accounts page, click on the Add New FTP Account button.
Step 3: Fill in the FTP Account Information
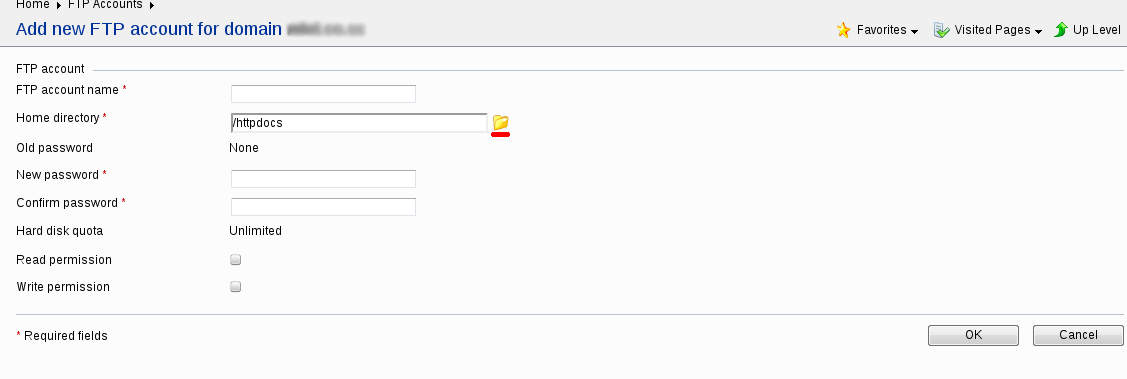
- Enter the desired FTP Account Name in the respective field.
- Set a Password for the FTP account and confirm it by retyping it in the confirmation field.
- Click on the underlined Directory icon next to the Home directory field to select the path you want to grant access to for the new FTP account.
Step 4: Set Permissions and Create the Account
- Check the Read and Write permission boxes to specify the actions this FTP user can perform within the designated directory.
- Read Permission: Allows the user to view and download files from the directory.
- Write Permission: Allows the user to upload, modify, and delete files in the directory.
- Click the OK button to create the new FTP account.
The FTP account will be created, and it will now appear in the list of existing FTP accounts.
Conclusion
By following these steps, you have successfully created a new FTP account in Plesk 9.x or 10.x. You can now use the new credentials to access the specified directory via an FTP client. For additional configurations or troubleshooting, consult the Plesk documentation or contact your hosting provider.
Should you have any inquiries of the guidelines, please feel free to open a ticket through your portal account or contact us at support@ipserverone.com. We’ll be happy to assist you further.


