Search Our Database
How to Create NovaCloud Snapshot in portal
Introduction
Creating a snapshot for Cloud in our customer portal is an essential task for maintaining backups of your data. Snapshots capture the state of your volumes at a specific point in time, allowing you to restore your system to that state if needed. This guide will walk you through the process step-by-step, ensuring you can easily create and manage snapshots within our customer portal environment.
Prerequisite
- Access to customer portal where the instance is under
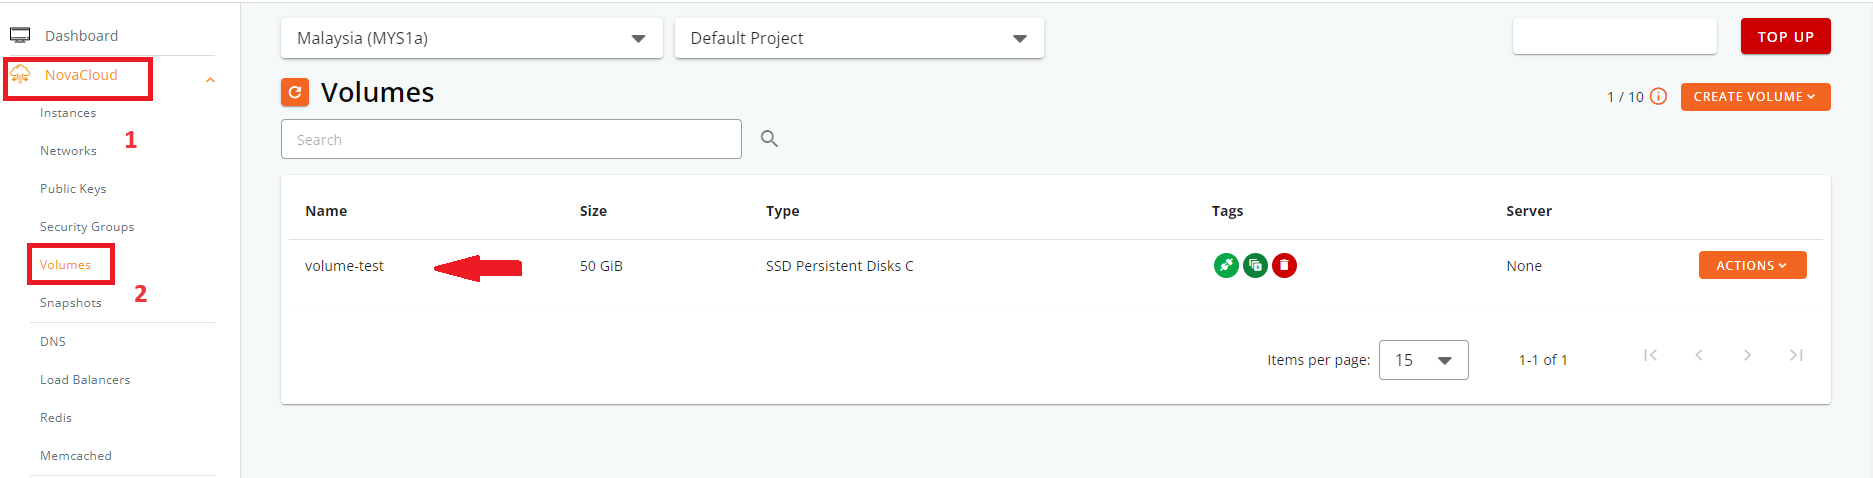
- Existing volume to create the snapshot.
Step-by-step guide
Step 1: Login into the Portal at https://portal.ipserverone.com/
Step 2: From the Dashboard, locate and click on NovaCloud. In the NovaCloud section, click on the dropdown menu and select Snapshot.
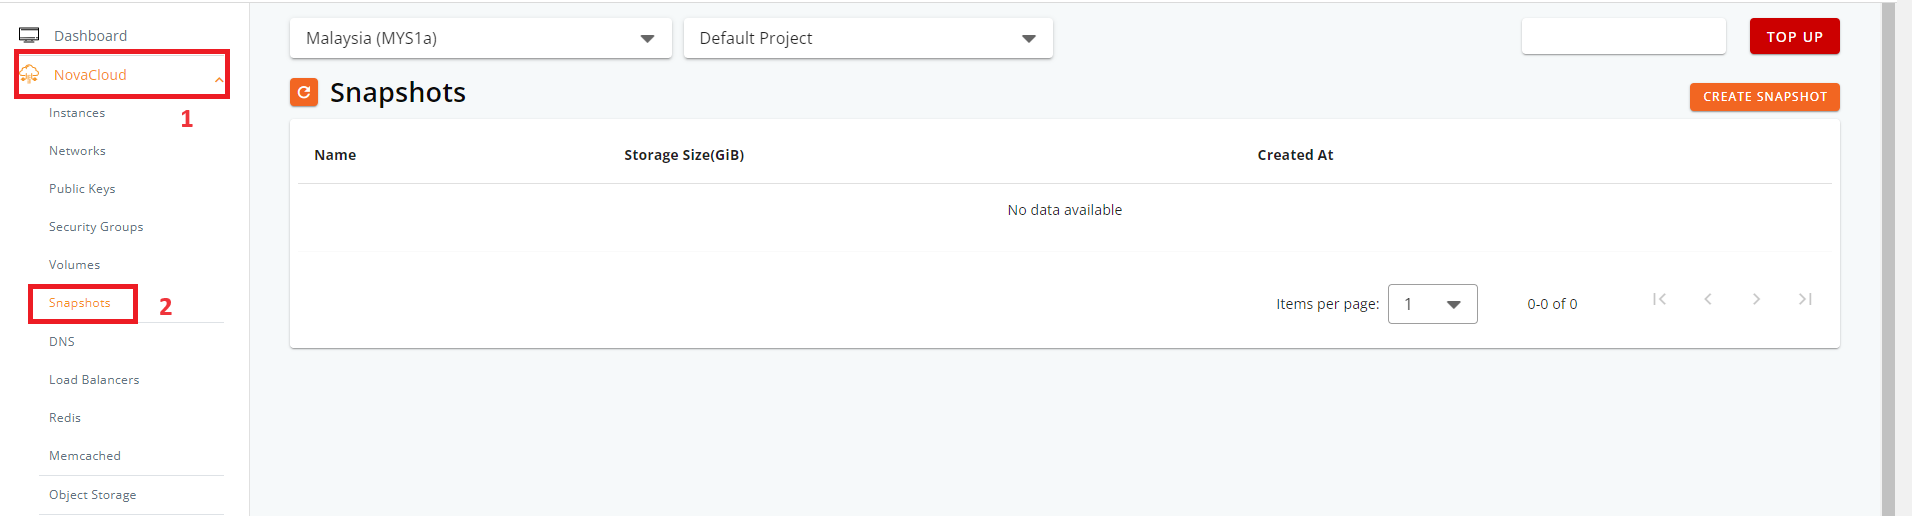
Note: Kindly ensure your volume exists for snapshot. Snapshots can be created from an unattached volumes and volumes attached to a running instance. (NovaCloud -> Volumes)
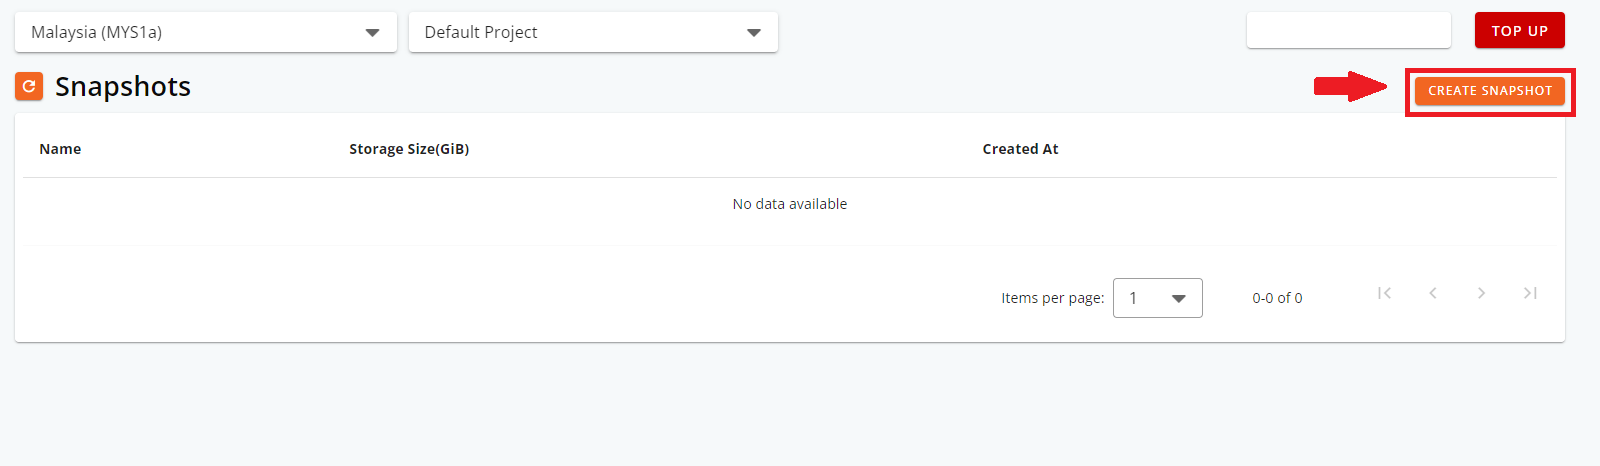
Step 3: Click on the Create Snapshot button.
Note: Ensure you have a Volume created before proceeding.
Step 4: Enter a name for your snapshot. It’s advisable to include the date for easier identification. Choose the volume(s) from the existing list that you want to include in the snapshot.
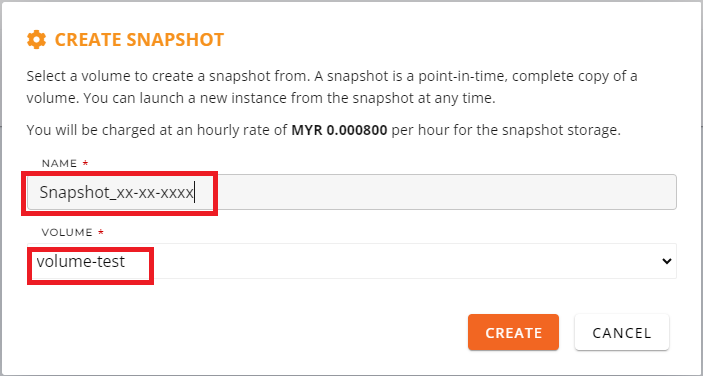
Step 5: Finally, click on the Create button to generate the snapshot.

Your snapshot will now be created. Depending on the size of the volume and the system’s performance, this process may take some time.
Using Snapshots
Snapshots are incredibly useful for various purposes, such as creating backups before making significant changes to your system or preparing for a migration to a new instance. You may utilize the snapshot to launch a new Cloud Instance. For detailed instructions on how to launch a Cloud Instance from a snapshot, please refer to the following link: