Search Our Database
How to create task in SmarterMail
Introduction
SmarterMail is a powerful and user-friendly email and collaboration platform that offers various productivity tools, including task management. With its built-in task feature, users can efficiently create, manage, and track their tasks to enhance workflow and organization. This guide will walk you through the process of creating a task in SmarterMail, ensuring you can easily stay on top of your to-do list.
Prerequisites
- A SmarterMail account with login credentials.
- Access to the SmarterMail web interface.
Step-by-Step Guide
Step 1: Log in to SmarterMail Account
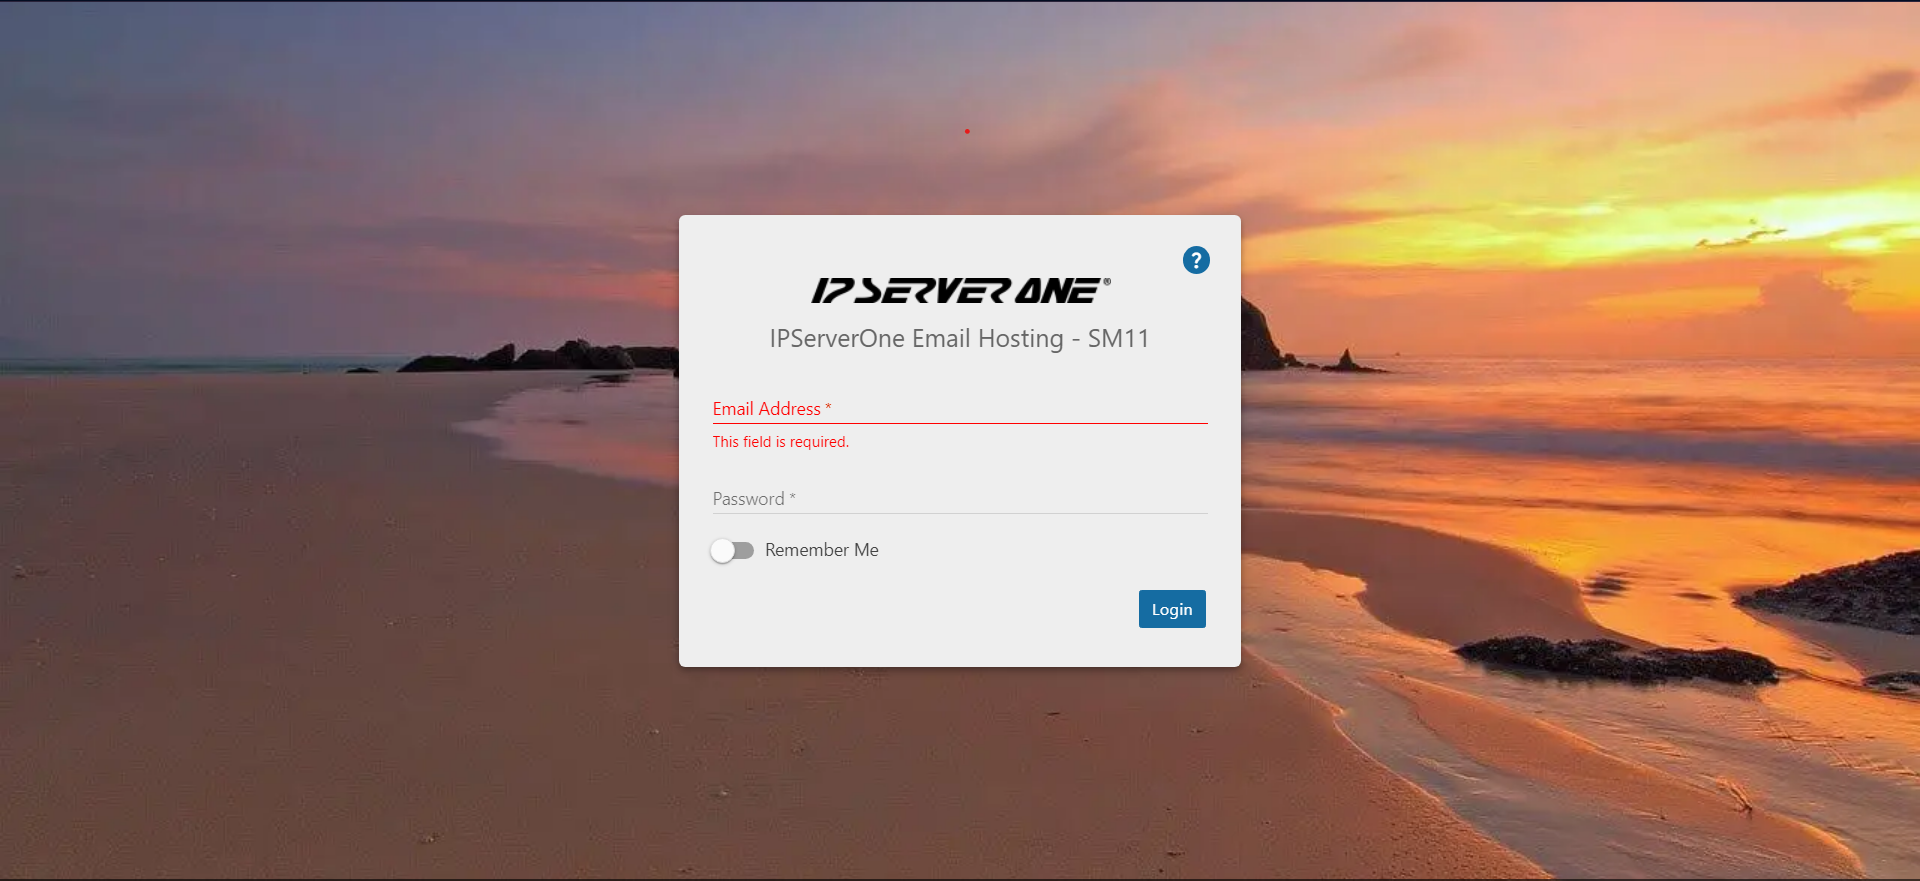
- Navigate to your SmarterMail login page (e.g., http://mail.yourdomain.com).
- Enter your full email address and password, then click the Login button.
Step 2: Create New Task
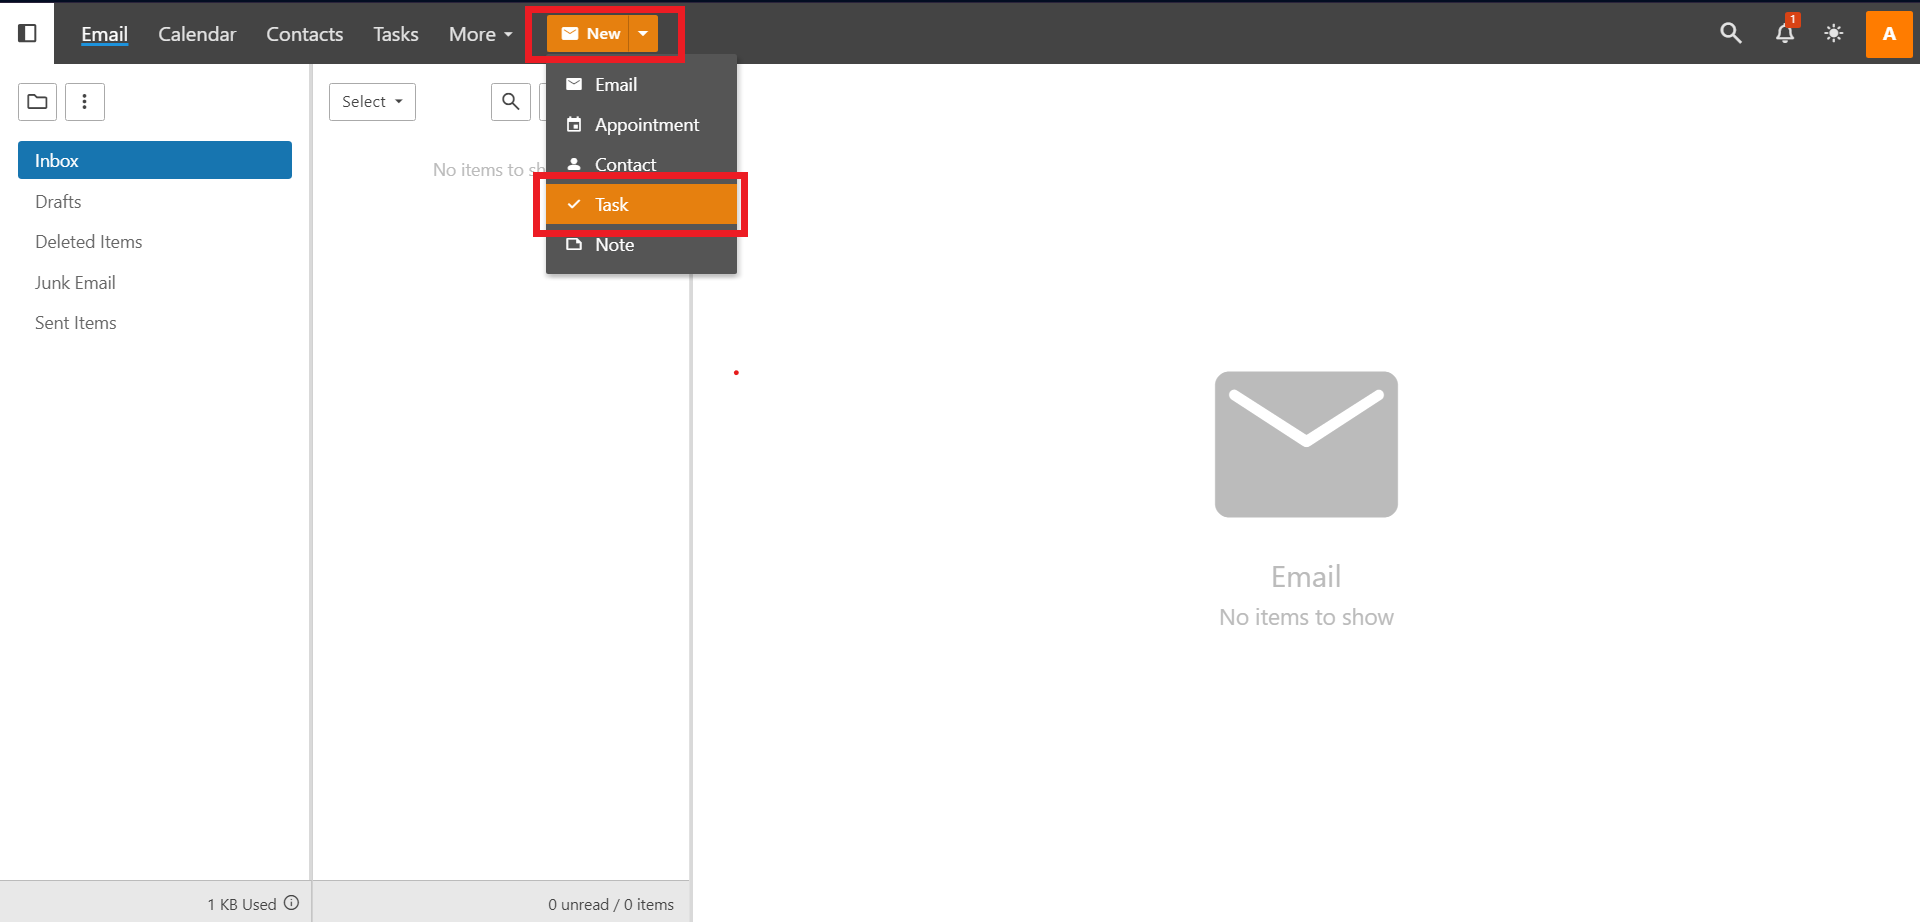
- Once logged in, click on New, then click Task .
Step 3: Add relevant detail for the task
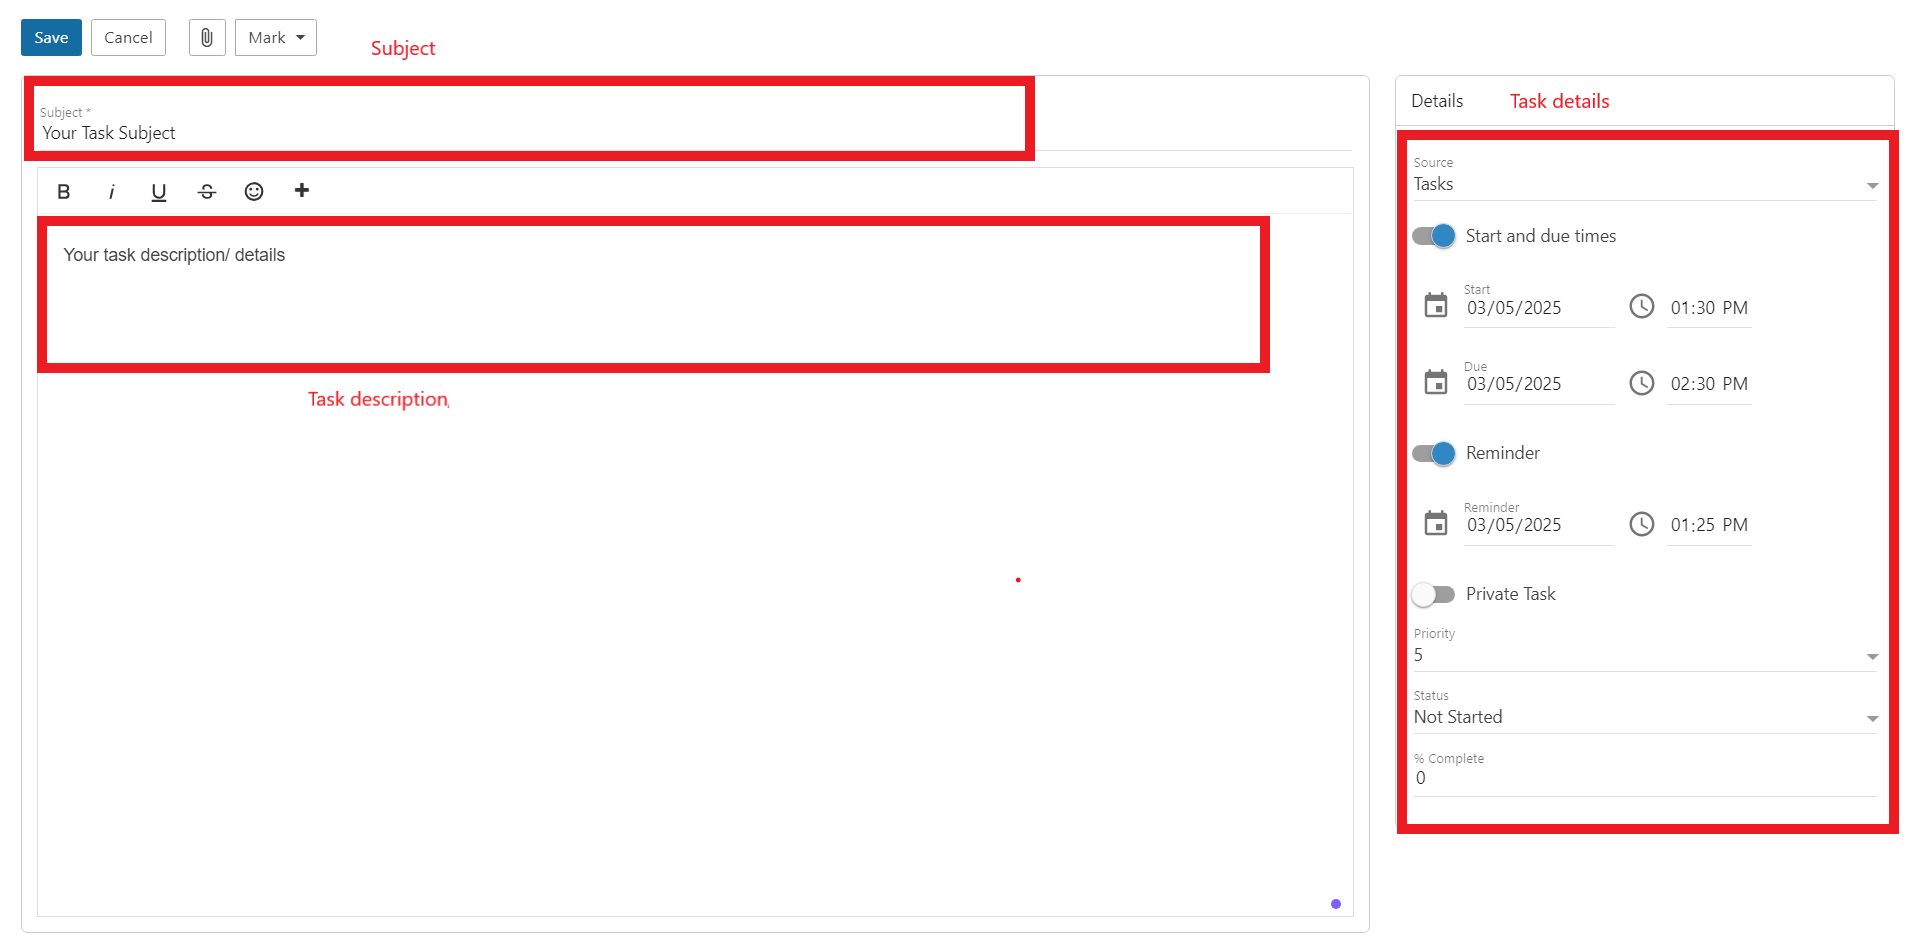
- Add in any relevant details for the task. These can include:
- Subject – This is the simple name for the task, like “Create new blog post” or “Organize meeting notes”.
- Task Description – This is where you enter more details about the task. For example, a copy of any meeting notes or general notes necessary for the completion of the task. These can be updated at any time. Editing the description and keeping additional notes there is especially beneficial when participating in shared tasks. In addition, the task description area is fully HTML compliant with a rich editor, so it’s possible to stylize the description with different fonts and colors, links to outside resources, etc.
- Then there are the Task Details, which include:
- Source – Where the task is kept. By default, new tasks are stored within Tasks, but if you have shared tasks with others, you can save a task there as well so the person you’re sharing with can keep track of the task’s status.
- Start – The date and time the task is supposed to start. Both areas have quick-select icons for setting the date as well as the time, but you can manually enter this information as well.
- Due – The date and time the task is due. Again, both areas have quick-select icons for setting the date as well as the time, but you can manually enter this information as well.
- Reminder – If you want to be reminded prior to the Start Date/Time
- Private Task – Toggle this to keep details of the task private, especially when adding tasks to your calendar.
- Priority – Priorities help you keep abreast of important tasks and organize your time. Important tasks, obviously, would take a higher priority whereas daily or monthly tasks may carry less weight. 0 priority would have less importance whereas 10 tasks would have the highest priority.
- Status – The status of a task reminds you and others if sharing tasks, where the task is in terms of its progress towards the due date.
- % Complete – Adding a % Complete further lets you, and others if sharing tasks, see how far along the task is in terms of meeting the due date.
Step 4: Manage Created Task
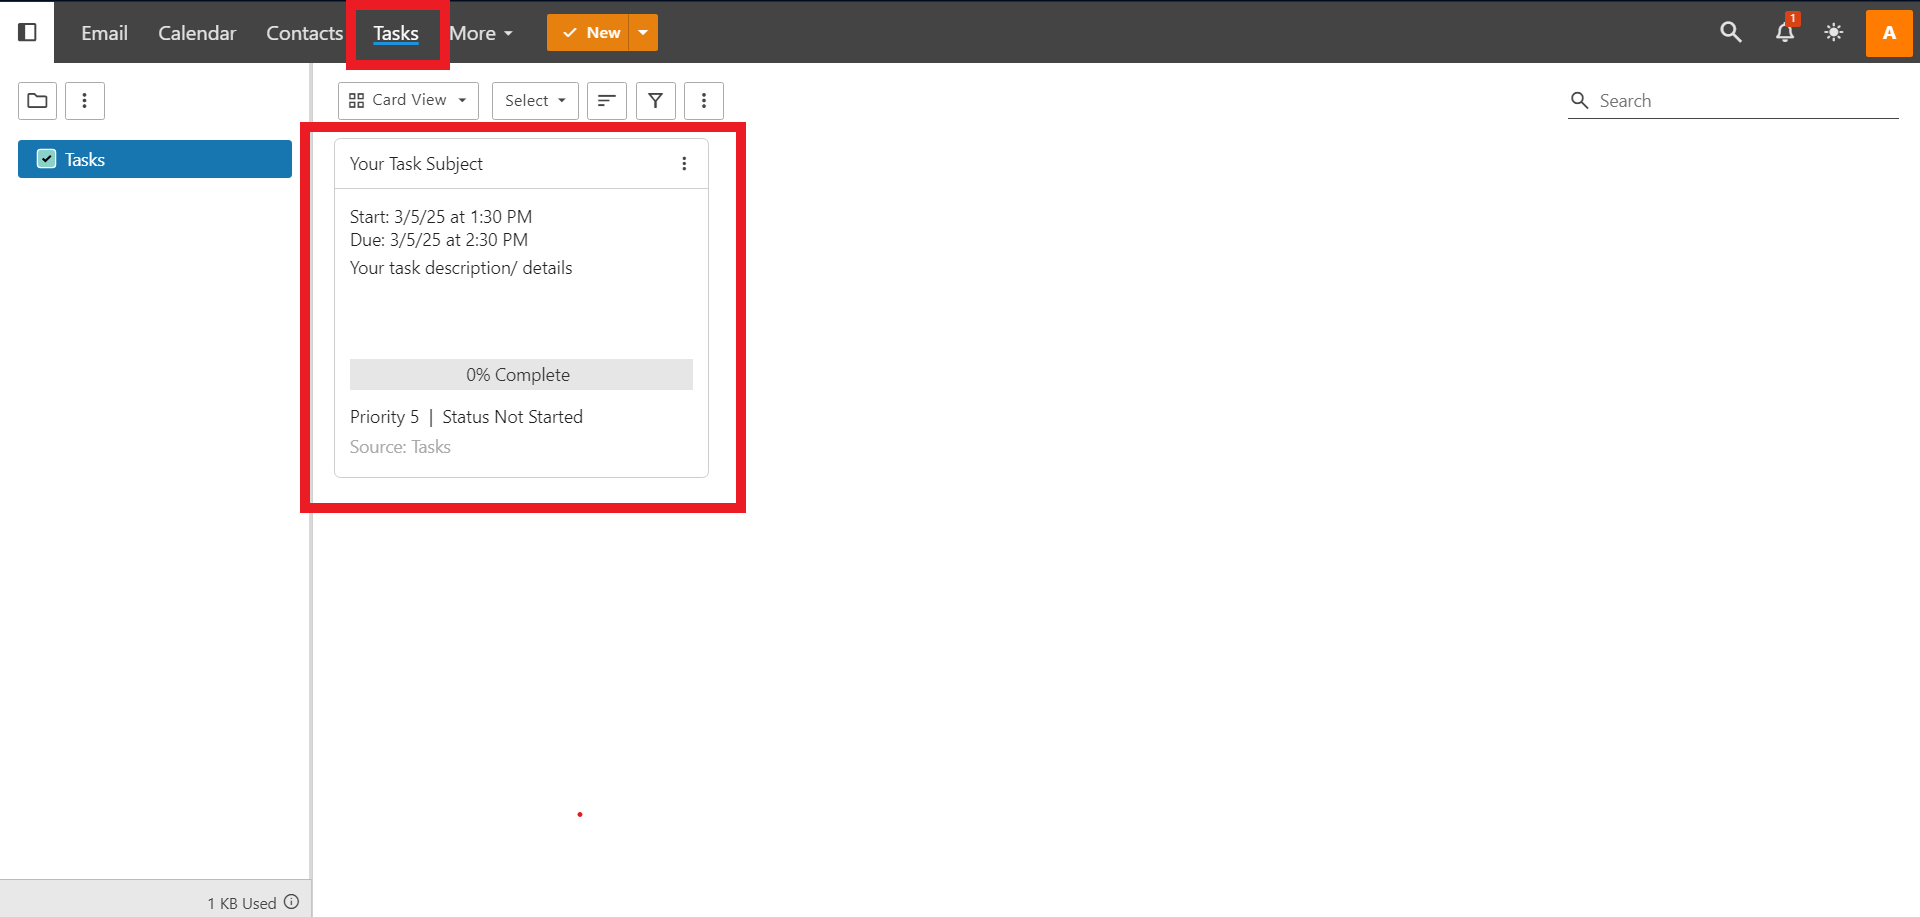
- Once you save it, the task that just have been created will be show up in Task section.
- To edit a task, simply click on the card of the task you want to modify. Once opened, you’ll be able to edit any area of the task
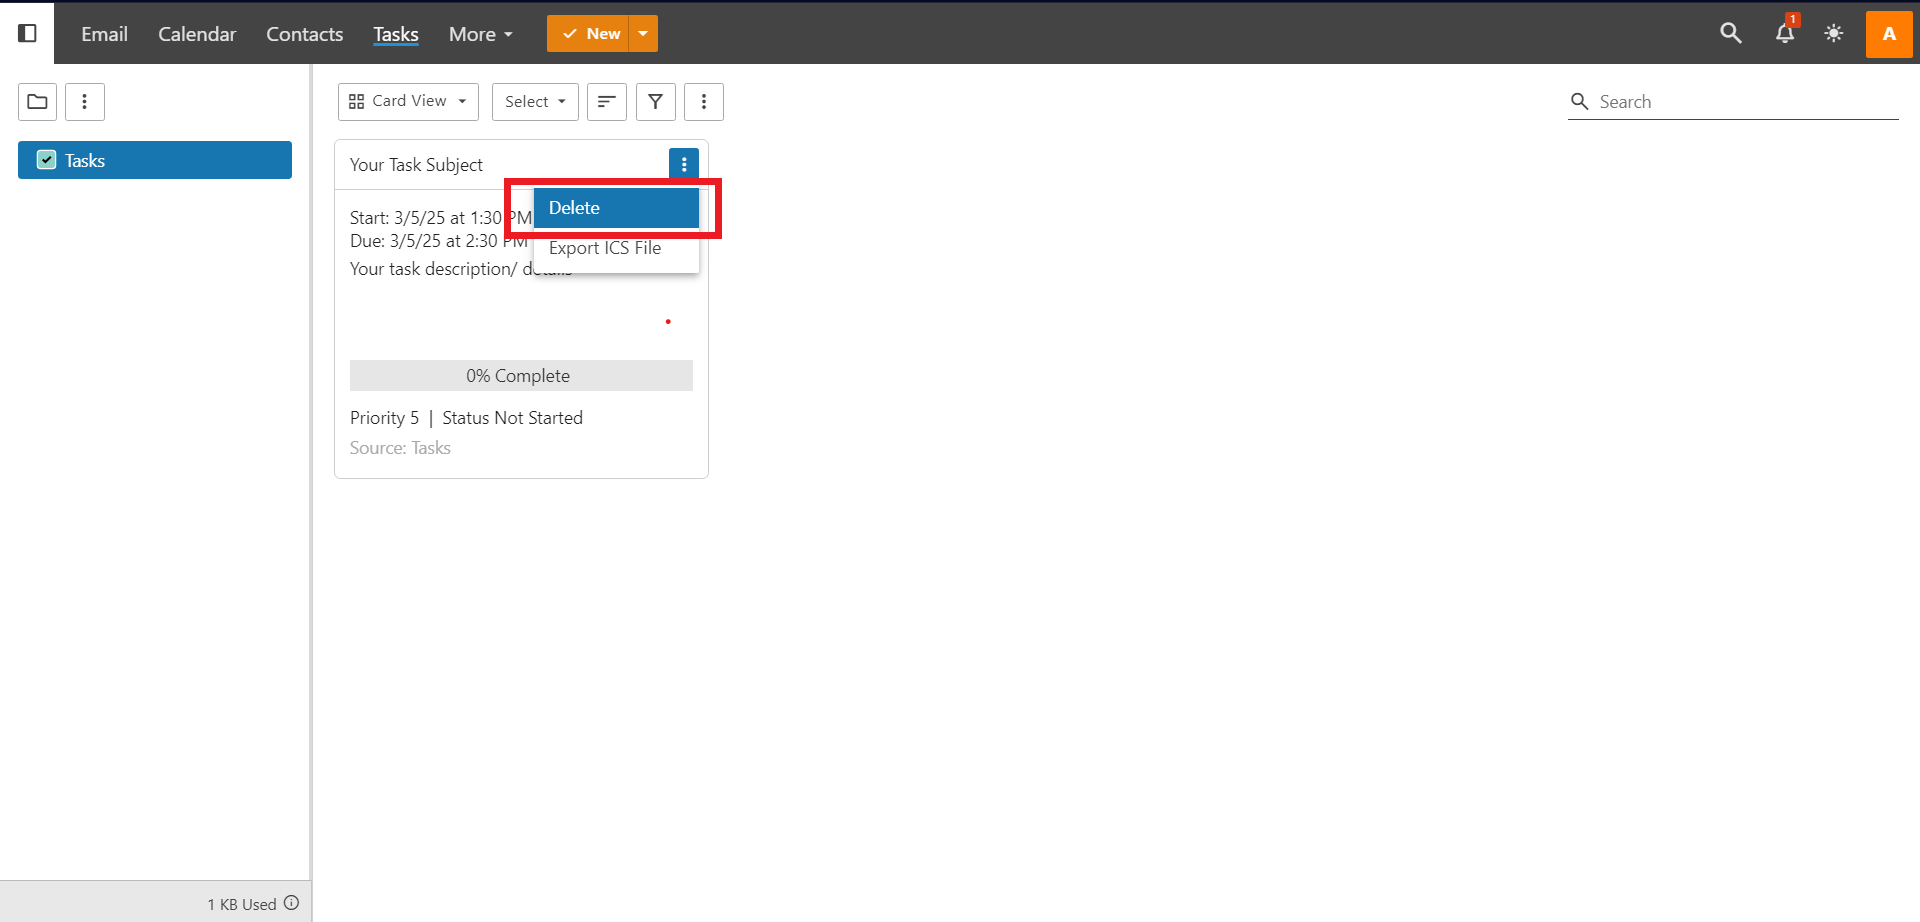
- To delete the task, click on the triple dot on the card of the task you want to delete and click Delete .
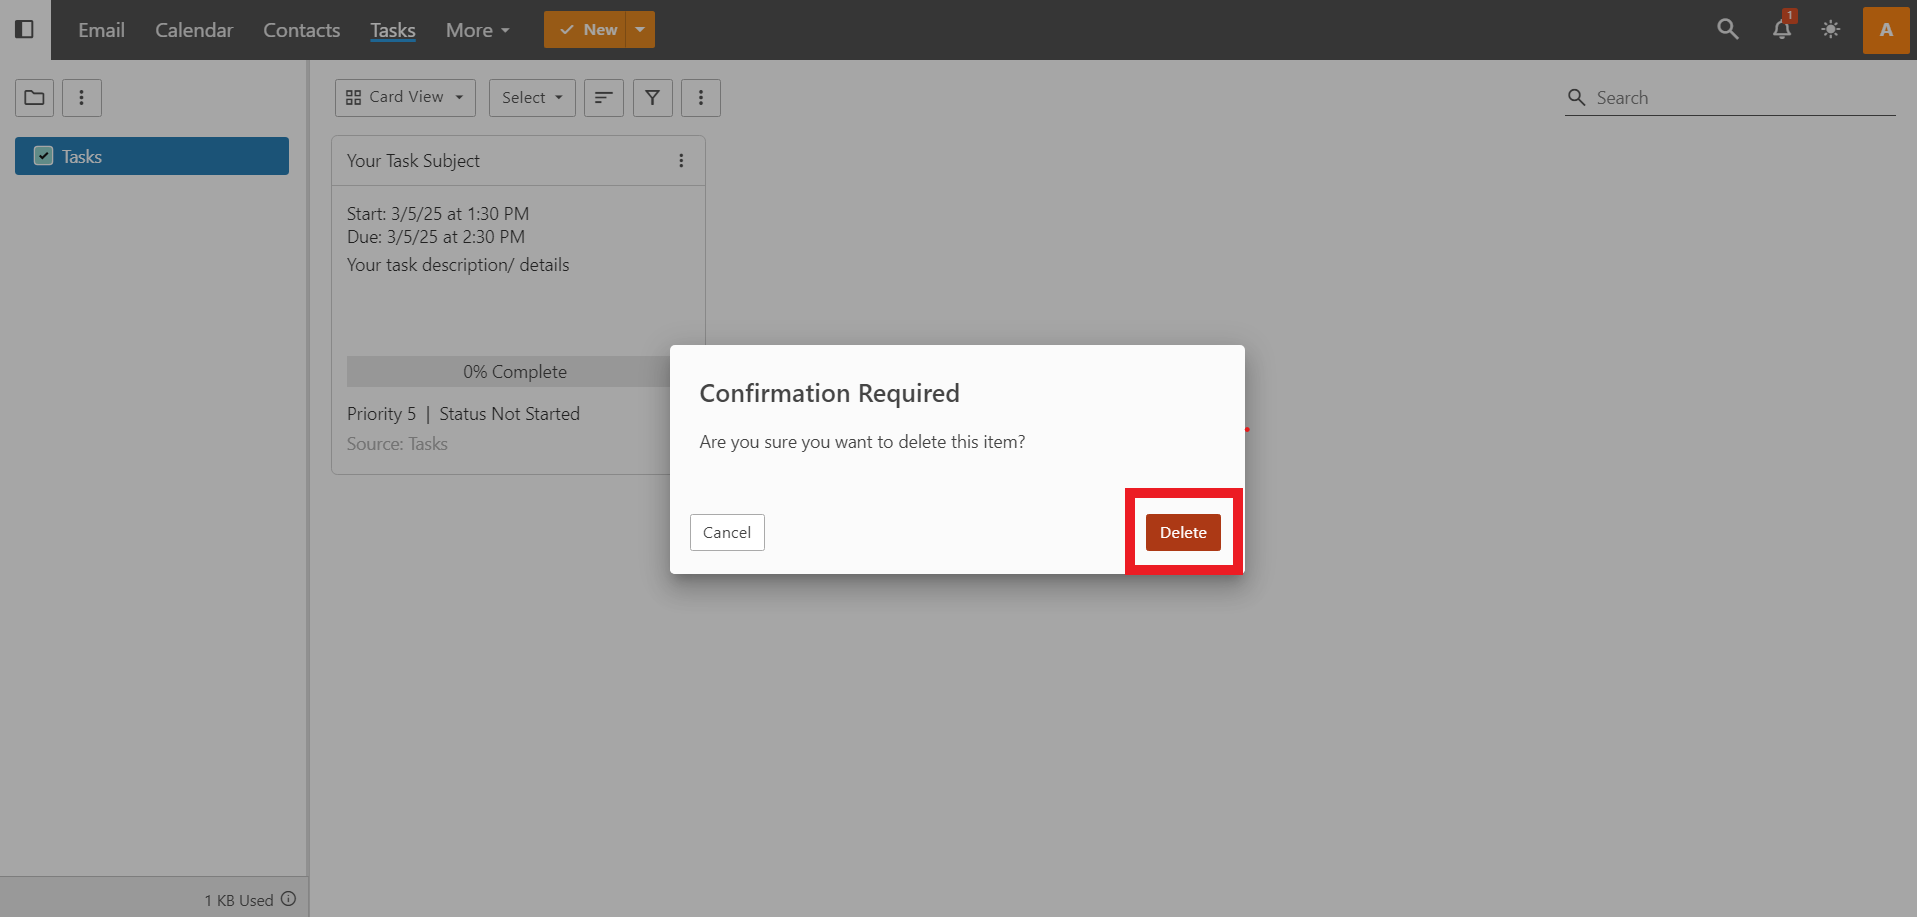
- It will show a pop-up of deletion confirmation, and you can just click Delete if you want to proceed.
Conclusion
By following these steps, you can effectively create and manage tasks in SmarterMail, helping you stay organized and productive. Whether you’re setting reminders, tracking progress, or prioritizing tasks, SmarterMail’s task management feature provides a seamless way to enhance your workflow. Regularly updating and reviewing your tasks ensures efficiency and keeps you on track with your goals.
Should you encounter any issues or have any questions, our support team at IPSERVERONE is always here to assist you. Don’t hesitate to reach out to us at support@ipserverone.com for any help you need.
