Search Our Database
How to disable ipv6 on Centos
Introduction
Disabling IPv6 on your server may be necessary for various reasons, such as compatibility issues or specific network configurations. This guide will walk you through the steps to disable IPv6 and configure your SSH settings accordingly.
Prerequisites
- A server running CentOS 7 (with root or sudo access).
- Basic familiarity with SSH and command-line text editors (e.g., vim or vi).
Step-by-Step Guide
🖥️ Step 1: Check if IPv6 is Enabled on Your Server
Run the following command to check if IPv6 is currently active:
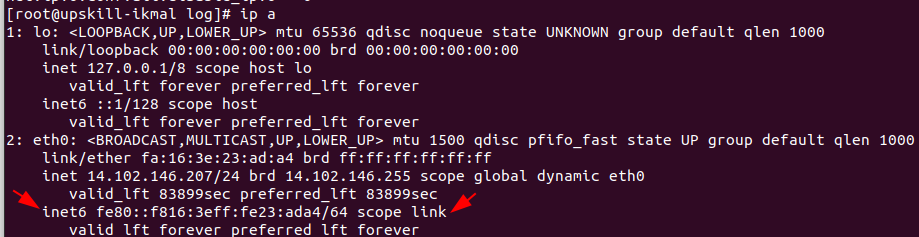
If the output shows IPv6 addresses, IPv6 is enabled. Proceed to the next step to disable it.
⚙️ Step 2: Edit the sysctl Configuration File
Open the sysctl configuration file in a text editor:
vim /etc/sysctl.conf
📝 Step 3: Add the Following Lines to Disable IPv6
Scroll to the bottom of the file and add the following lines:
net.ipv6.conf.all.disable_ipv6 = 1
net.ipv6.conf.default.disable_ipv6 = 1
Save and exit the file by pressing ESC, then typing :wq and pressing Enter.
🔄 Step 4: Apply the New Settings
Run the following command to apply the changes:
sysctl -p
This will reload the sysctl.conf file and disable IPv6.
🛠️ Step 5: Edit the SSH Configuration File
To ensure SSH operates using IPv4 only, open the SSH configuration file:
vi /etc/ssh/sshd_config
📌 Step 6: Configure SSH to Use IPv4 Only
Find and add the following line inside the file:
AddressFamily inet
Save and exit the file by pressing ESC, then typing :wq and pressing Enter.
🔄 Step 7: Restart SSH Service to Apply Changes
Restart the SSH service for the changes to take effect:
systemctl restart sshd
✅ Step 8: Verify if IPv6 Has Been Disabled
Check if IPv6 has been successfully disabled by running:

If no IPv6 addresses appear in the output, IPv6 has been successfully disabled.
Conclusion
By following these steps, you have successfully disabled IPv6 on your server and configured SSH to use IPv4 only. This can help resolve compatibility issues and ensure your network configuration is aligned with your requirements. Always ensure that changes to network settings are tested to confirm they work as expected and do not disrupt service.