Search Our Database
How to Download and Install TeamViewer for Personal Use
Introduction
TeamViewer is a powerful remote access tool that allows users to connect to and control computers and servers from any location with ease. Whether for troubleshooting, file sharing, or remote management, it provides a seamless solution for IT professionals and personal users alike. This guide outlines the step-by-step process for downloading and installing TeamViewer, enabling secure remote access to your devices. By following these instructions, users can ensure they have the necessary setup to manage remote operations efficiently, improving productivity and support capabilities.
Steps to Download and Install TeamViewer
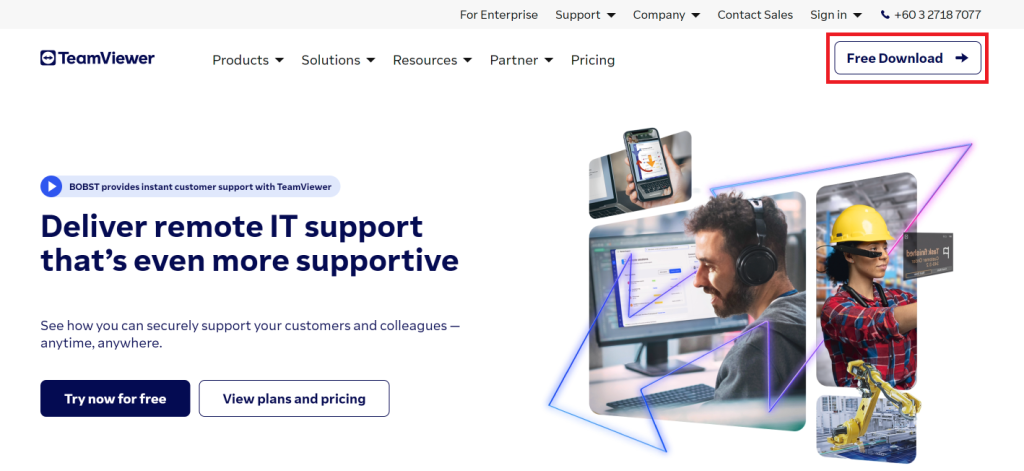
1. Download TeamViewer from the official TeamViewer website by navigating to https://www.teamviewer.com/en/. Once there, click on the Free Download button to begin the download process.
2. Once the download is complete, open the installer. During installation, select the Default Installation option and choose Personal as the usage type. Then, click on the Accept-Finish button to complete the installation.
3. After the installation is complete, launch TeamViewer by navigating to:
Start → Applications → TeamViewer
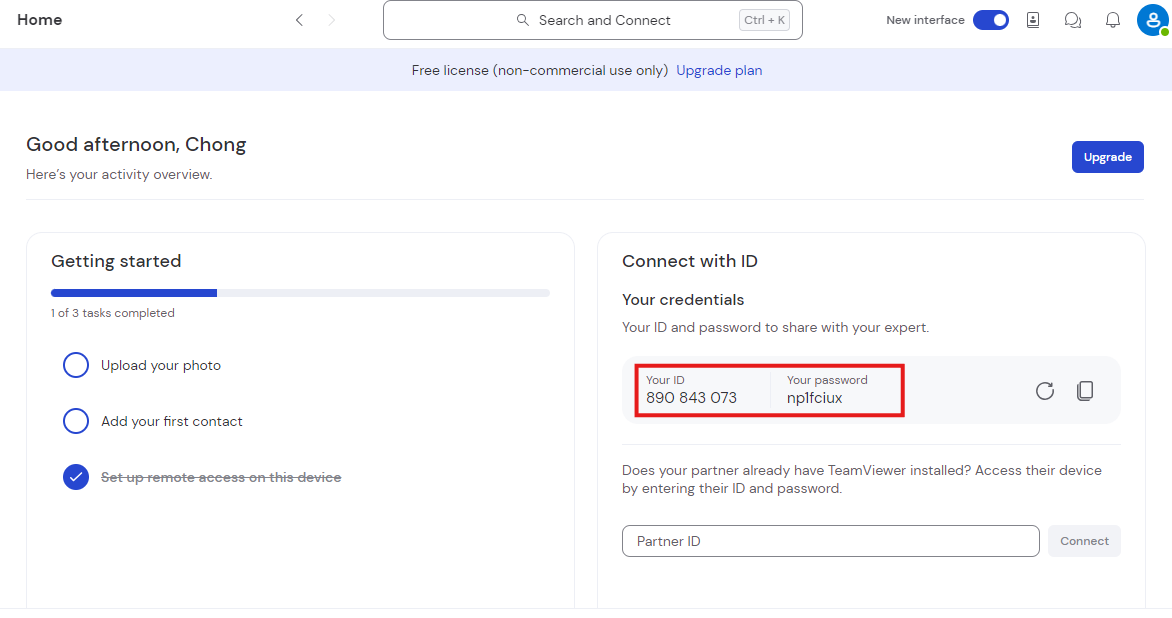
For remote login support, you will need to provide your ID and Password displayed in the TeamViewer window. Please send this information to the support personnel so they can access your system remotely, as shown below:

Conclusion
By following these simple steps, you can successfully download, install, and run TeamViewer to enable remote access to your devices. For remote support, don’t forget to provide the necessary ID and password.
Should you have any inquiries about the guidelines, please feel free to open a ticket through your portal account or contact us at support@ipserverone.com. We’ll be happy to assist you further.
Article posted on 23 March 2020 by IPSERVERONE

