Search Our Database
How to edit the ‘hosts’ file on Windows
Introduction
The hosts file on Windows allows you to map IP addresses to domain names, which can be helpful for testing websites or redirecting domains to specific servers. This guide walks you through the process of editing the hosts file on a Windows machine to make these changes. It is particularly useful for developers who need to test changes before a website goes live or for troubleshooting domain resolution issues.
Prerequisites
- Text editor application such as Notepad, Notepad++, Sublime, etc., with administrator privilege
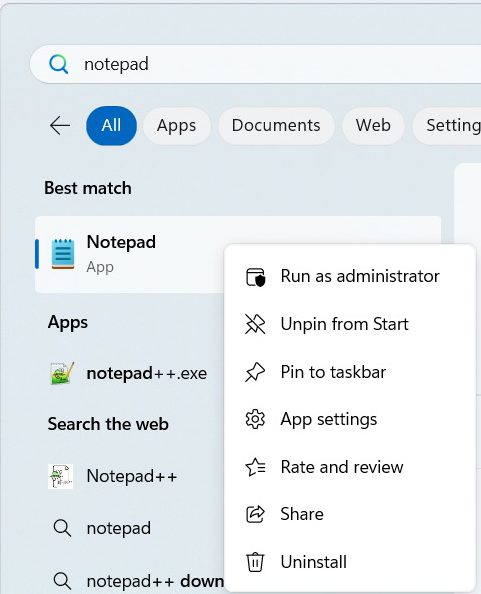
1. Navigate to Start, then search for Notepad. After you have find the Notepad, right click on the application and choose “Run as administrator“. Pop up windows will show up and just select ‘Yes‘.
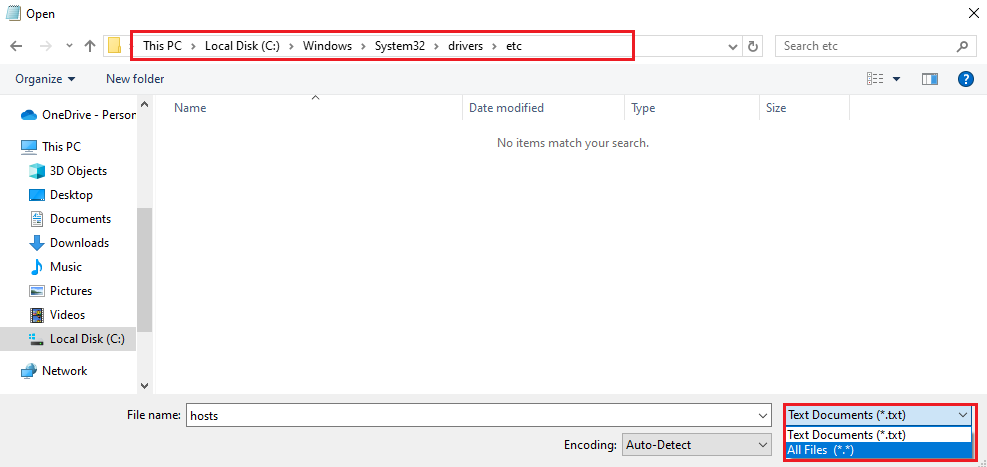
2. After the notepad have open, navigate to upper left and go to File tab, then select Open
3. Navigate to Local Disk(C:) > Windows > System32 > drivers > etc. After you have navigate to the path, on the bottom right choose All Files (*.*)
C:\Windows\System32\drivers\etc
4. Select the hosts file and open the files with any text editor e.g. Notepad, Sublime, etc.,
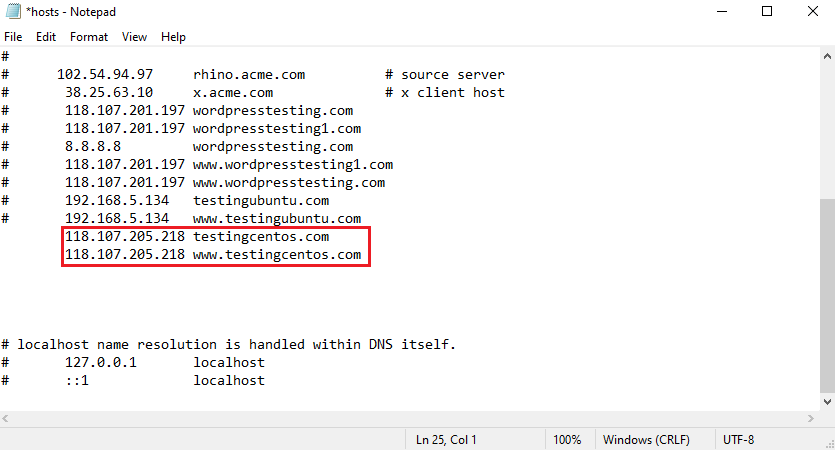
5. Add the new IP address and your domain name that you want to test, as an example we choose testingcentos.com that pointing to IP 118.107.205.218. After the changes have been done, save it.
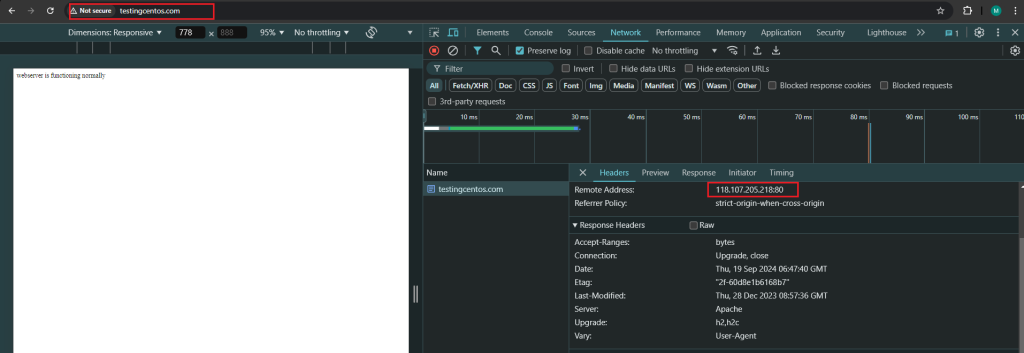
6: Browse the website to test it.
Conclusion
By following the steps outlined, you can successfully edit the hosts file on your Windows system to direct domain names to specific IP addresses. This can assist with testing, troubleshooting, or even blocking certain websites. Be sure to carefully manage these changes, as incorrect entries could disrupt normal network activity. If you encounter any issues or require further help, feel free to seek technical support.


