Search Our Database
How to edit the hosts file On Windows 8
Introduction
The hosts file is a critical system file that maps IP addresses to domain names. It acts as a local DNS, allowing users to manually assign IP addresses to specific domains, bypassing the internet DNS. On Windows 8, editing the hosts file is useful for tasks like blocking websites, testing local development environments, or resolving domain-related issues. However, since it is a protected system file, editing it requires administrative privileges. This guide will walk through the steps to safely edit the hosts file on Windows 8, ensuring proper functionality.
Prerequisites
Before editing the hosts file on a Windows 8 system, ensure the following requirements are met:
- Administrator privileges on the Windows 8 system to make changes to system files.
- A text editor, such as Notepad, with elevated (Administrator) permissions.
- Basic understanding of IP addresses and domain names for making the correct entries in the hosts file.
- Backup of the hosts file in case any changes lead to system issues. It is recommended to copy the original file before making modifications.
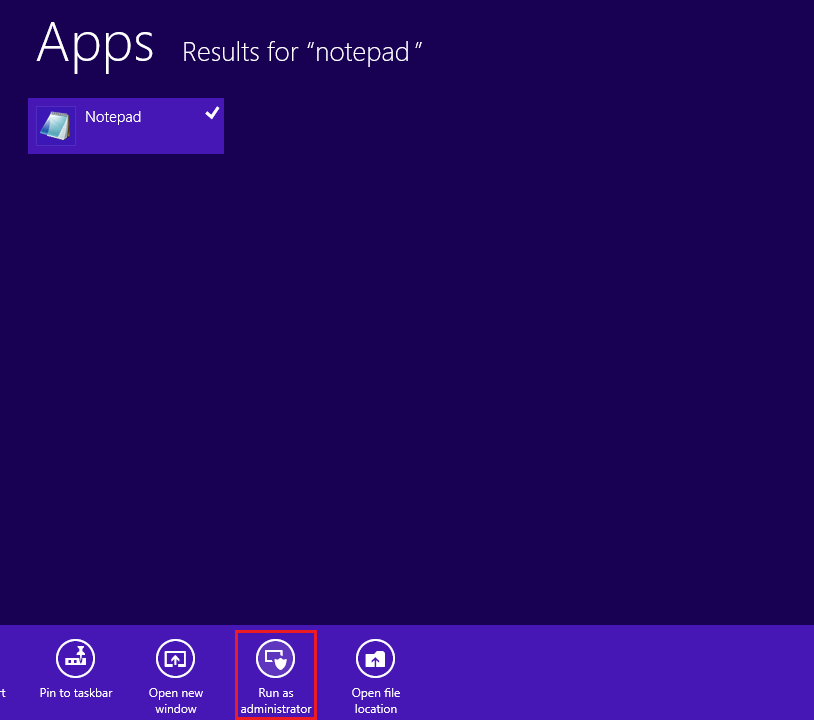
1. Open Notepad as Administrator
Click the Windows button to access your applications. Search for “Notepad,” then right-click on it and select Run as Administrator from the context menu.
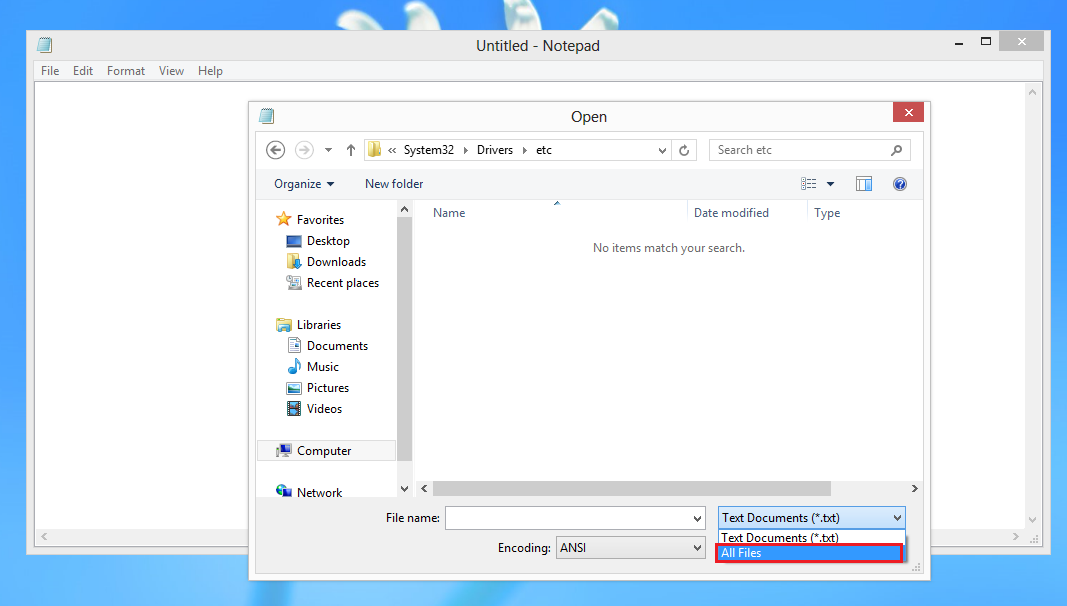
2. Open the Hosts File
Once Notepad is launched, go to File → Open from the menu bar. Navigate to
C:\Windows\System32\Drivers\etc\
and select All Files from the dropdown menu to view the hosts file.
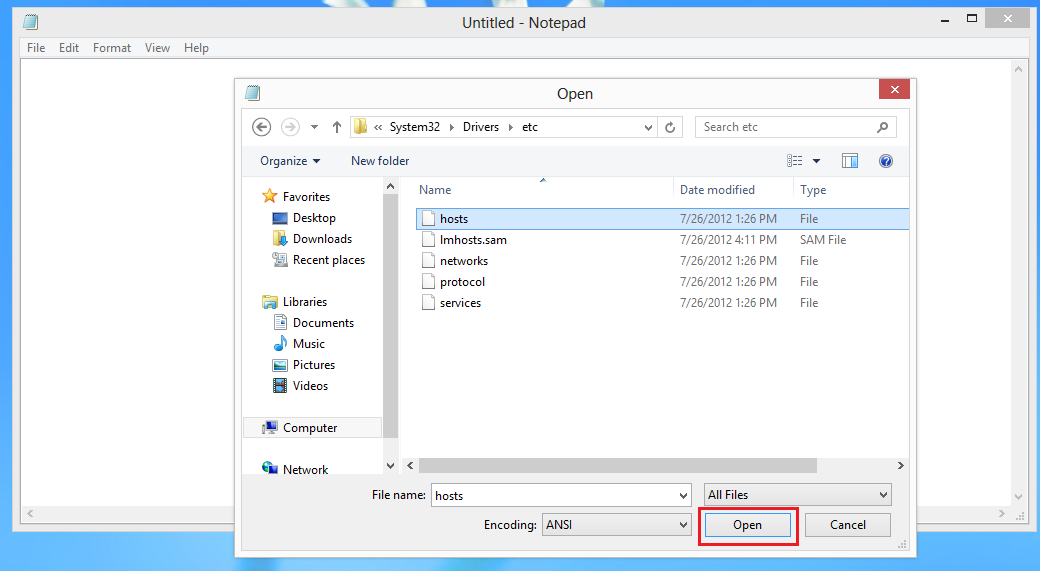
3. Edit the Hosts File
Locate the file named hosts and click on it to select it, then click Open.
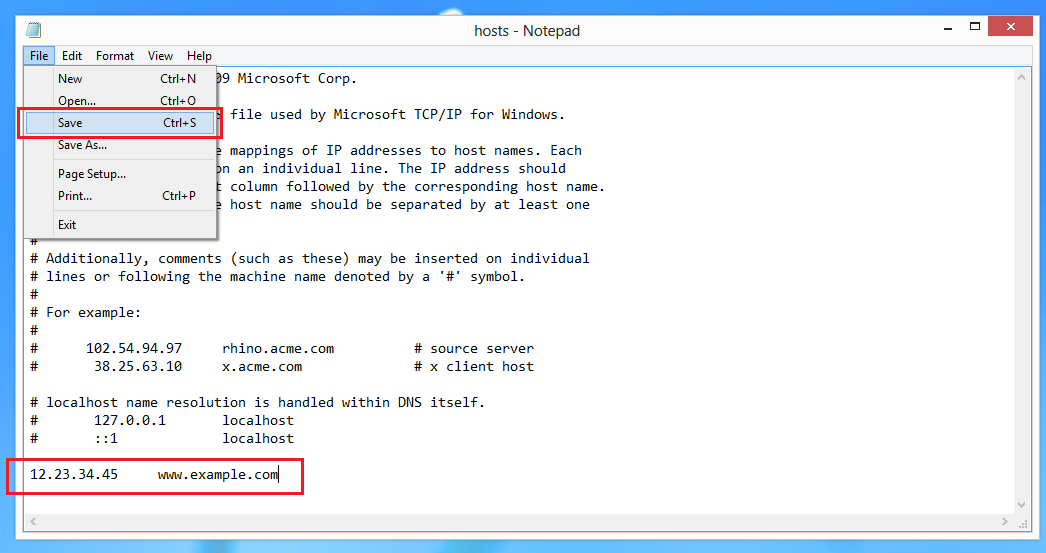
4. Add IP Address and Domain Name
At the bottom of the text file, add the IP address and domain name of your destination server. Ensure you save the file after making your changes.
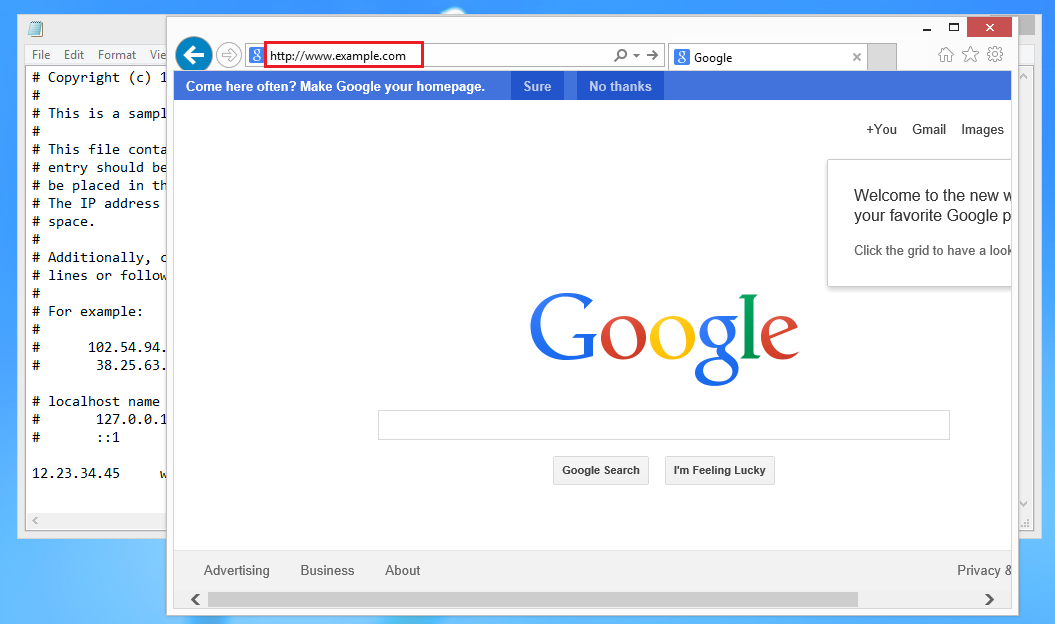
5. Verify Changes
You can now open your web browser and navigate to the domain name you added in Step 4 to verify that the changes have been applied.
Conclusion
By following these steps, you can successfully modify the hosts file on your Windows system to direct domain names to specific IP addresses. This can be useful for various purposes, such as testing website configurations or blocking certain domains. If you encounter any issues or need further assistance, feel free to reach out for support at support@ipserverone.com.
Article posted on 24 March 2020 by Louis