Search Our Database
How to improve the security of MySQL installation using mysql_secure_installation script
Introduction
When MySQL is first installed, it comes with default settings that prioritize functionality over security. These defaults may leave your server vulnerable to unauthorized access or attacks. The mysql_secure_installation script is a built-in tool that addresses these security risks by guiding you through a series of steps to configure critical security features. It allows you to perform tasks such as setting a root password, removing anonymous users, disabling remote root access, and removing the test database.
Running this script is a recommended step for anyone setting up a MySQL server, whether in a development or production environment. This article explains how to run the mysql_secure_installation script to improve the security of your MySQL database server. Following these steps will help protect your server against common security threats and ensure that your database remains secure and stable.
This guide is particularly useful for system administrators and database managers who are responsible for maintaining a secure MySQL environment. It provides a straightforward method to implement fundamental security measures, reducing the risk of unauthorized access or data breaches. It is advisable to run this script immediately after installing MySQL, or at any time you want to strengthen the security of your database.
Prerequisites
- Access to your Linux server with root or sudo privileges.
- MySQL installed on the Linux server.
Step-by-Step Guide
Note: You can skip steps 4 and 5 if you do not need to configure password strength for the root password.
1. Access the terminal
Access your server’s terminal via SSH, using an account with root or sudo privileges, as administrative access is necessary to run the script.
2. Run the mysql_secure_installation script
In the terminal, run the following command to start the MySQL security script:
mysql_secure_installation
3. Enter the password for user root
After running the mysql_secure_installation command, enter the root password for your MySQL database.
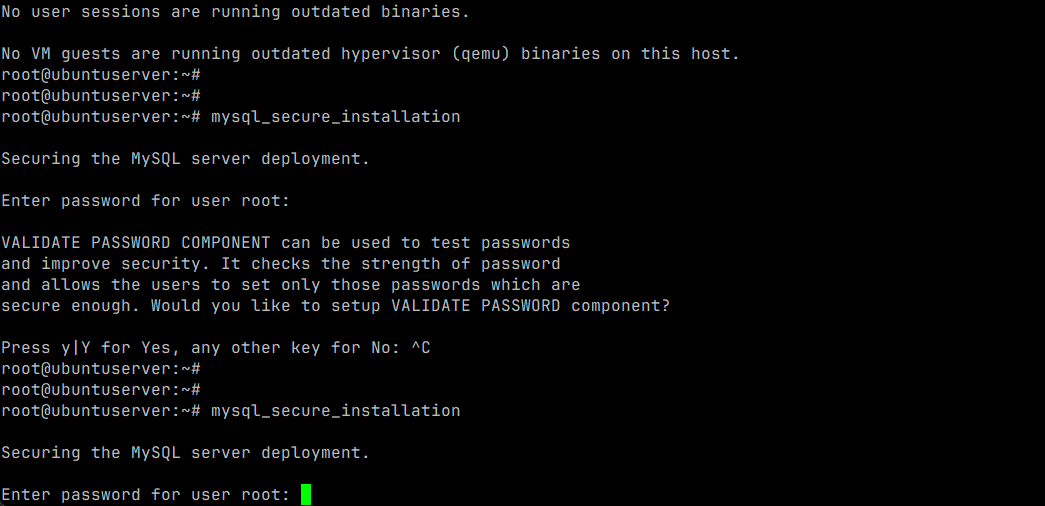
4. Validate the password strength
You can validate the password strength of the MySQL root password by typing ‘y’ or ‘Y’.

5. Select the password validation policy
Select the password validation policy applicable to your use case. For example, type ‘1’ to select a medium level of password validation policy.

6. Update the MySQL root password
If you do not want to change the root password, type any other key besides ‘y’ or ‘Y’ for No.

7. Remove anonymous user
Type ‘y’ or ‘Y’ to remove anonymous users. This prevents unauthorized users from accessing the MySQL server without a user account.

8. Disallow remote root login
Type ‘y’ or ‘Y’ to disallow remote root login. This enhances security by restricting root access to local connections only.

9. Remove test database
Type ‘y’ or ‘Y’ to remove test database. The test database is used for testing purposes and can pose a security risk if left accessible in a production environment.
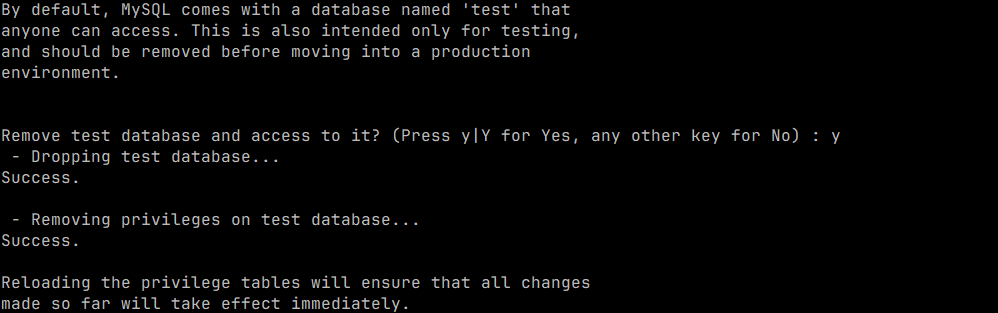
10. Reload privilege tables
Type ‘y’ or ‘Y’ to reload privilege tables and apply the changes made during the security configuration process.

11. Verify MySQL is running
After completing the steps above, ensure that MySQL is running correctly by executing:
systemctl status mysql
Conclusion
By running the mysql_secure_installation script, you have significantly improved the security of your MySQL installation. This process helps protect your database from unauthorized access by removing default insecure settings, disabling remote root access, and enforcing stronger password policies. Regularly running this script after significant changes to your MySQL server or configuration can help maintain a secure environment.
For more advanced security configurations, consider additional steps such as enabling SSL connections, configuring firewall rules, and regularly updating MySQL to the latest version. If you encounter any issues or have further questions, do not hesitate to reach out to our support team for assistance.
Should you have any inquiries of the guidelines, please feel free to open a ticket through your portal account or contact us at support@ipserverone.com. We’ll be happy to assist you further.
Article posted on 24 February 2020.