Search Our Database
How to install Linux Malware Detection on Linux Server
Introduction
Linux Malware Detection (LMD) is an open-source malware scanner for Linux environments designed to detect and remove malware threats, specifically targeting Linux systems. It is vital for securing servers and preventing vulnerabilities from being exploited by malicious software. This guide covers the steps to install Linux Malware Detection (LMD) on a Linux server, helping administrators secure their systems from malware threats by monitoring and removing malicious files.
In addition, threat data is also derived from user submissions via the LMD checkout feature and from various malware community resources. The signatures used by LMD include MD5 file hashes and HEX pattern matches, which can be easily exported to other detection tools, such as ClamAV.
Prerequisite
- SSH access to server with root privilege
- Basic knowledge of Linux/Unix commands
Step-by-Step Guide
Step 1: Access Your Server via SSH
- Access your server via SSH. Then run command below to gain root privilege.
sudo su -
Step 2: Download and install LMD
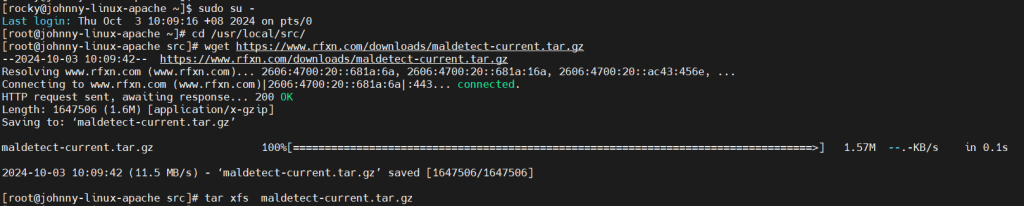
- Navigate to source directory by command below.
cd /usr/local/src/
- Download the LMD file from its URL by running command below.
wget https://www.rfxn.com/downloads/maldetect-current.tar.gz
- If you are receiving -bash: wget: command not found when running command above, you will need to install wget command-line tool. Run the command below to install wget.
For RHEL (RockyLinux, AlmaLinux)yum install wget -y
For Debian-based (Ubuntu, Debian)
apt install wget -y
- If you are receiving -bash: wget: command not found when running command above, you will need to install wget command-line tool. Run the command below to install wget.
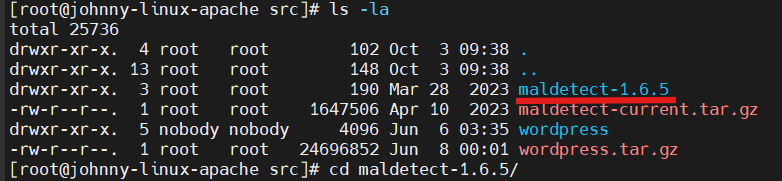
- Extract the downloaded LMD files.
tar xfz maldetect-current.tar.gz

- Verify the extracted LMD file name and navigate to it.
ls -la
cd maldetect-1.6.5/
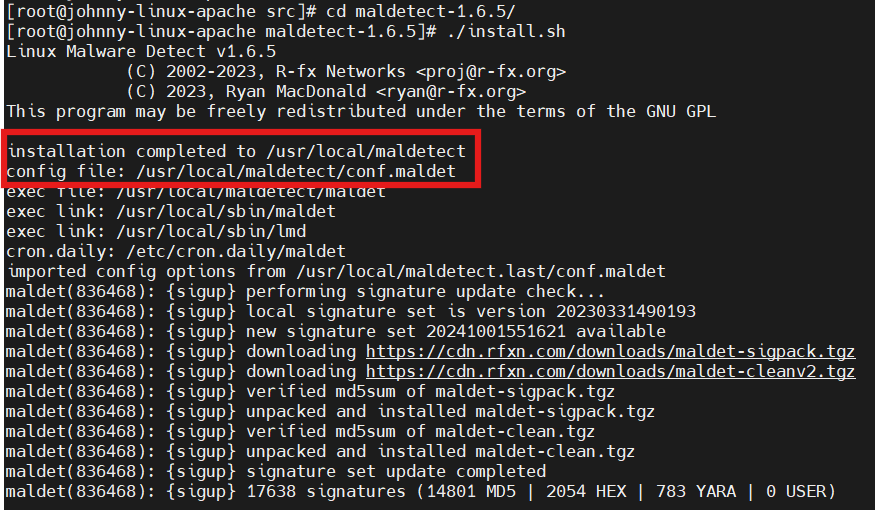
- Run the installation command that provided from LMD to install.
./install.sh
- After the installation was finished, you will the message indicate the installation was successful and the path of its configuration file.
Step 3: Configure LMD
- LMD is configurable based on your needs. You may skip this step if you prefer to run on default settings.
- To configure you may run the command below.
vi /usr/local/maldetect/conf.maldet
- Press i to enter edit mode.
- Once you have completed the new configuration, press ESC and :wq to save the new configuration.
Step 4: Run LMD
- Enter maldet, you will be seeing the options that it provided.
-a (–scan-all <path>) – To scan all files in the path.
-b (–background) – To execute operations in the background.
-c (–checkout <file>) – To upload suspected malware file to rfxn.com for review and hashing into signatures.
-d (–update-ver) – To update the installed version.
-e (–report <scan ID> <email address> – To view the most recent scan or a particular scan ID and email scan report to the provided e-mail address.
-h (–help) – To list all available maldet help options.
-l (–log) – To view maldet log file events.
-n (–clean <scan ID> – To clean & restore malware hits from the report.
-p (–purge) – To clear logs, session, and temporary data.
-q (–quarantine <scan ID> – To quarantine all malware from the report.
-r (–scan-recent <path> <days> – To scan the file those are created or modified in the last X days ( 7 days by default and ? for wildcard).
-s (–restore <file> or <scan ID> – To restore the quarantined file from the quarantine queue to the original path or restore all quarantined files from a particular scan ID.
-u (–update) – To update malware detection signatures.
- For example, running LMD scan by entering maldet -a for all paths. Once the scan is completed, it will provide a report for you to preview.
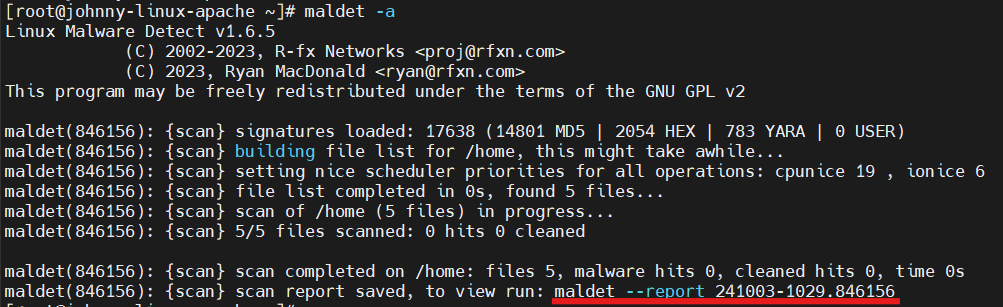
- Enter the provided command to view the scan report. Enter :q to exit the report.

Conclusion
By going through this guidance, you will be able to successfully install Linux Malware Detection (LMD) and protect your Linux server from potential malware attacks.
For additional assistance or if you encounter any issues, please contact our support team at support@ipserverone.com.