Search Our Database
How to install PHP in Windows Dedicated Server
Introduction
This guide is intended for Windows system administrators and developers who need to install PHP on a Windows dedicated server. PHP is a widely-used open-source scripting language ideal for web development. This guide walks through the process of setting up PHP on a Windows server, covering the prerequisites, download, installation, and configuration of PHP to ensure it’s running smoothly in a production environment. The steps should be applied when setting up a server for PHP-based applications like WordPress or other web platforms.
Prerequisites
Before installing PHP on your Windows Server, ensure the following requirements are met:
- Windows Server 2012/2016/2019/2022 installed.
- Administrator access to the server.
- IIS (Internet Information Services) installed and running, or Apache web server if preferred.
- Microsoft Visual C++ Redistributable (specific to PHP version; typically 2015-2022 version is required).
Step-by-Step Guide
Step-by-step guide
1. Download PHP for Windows
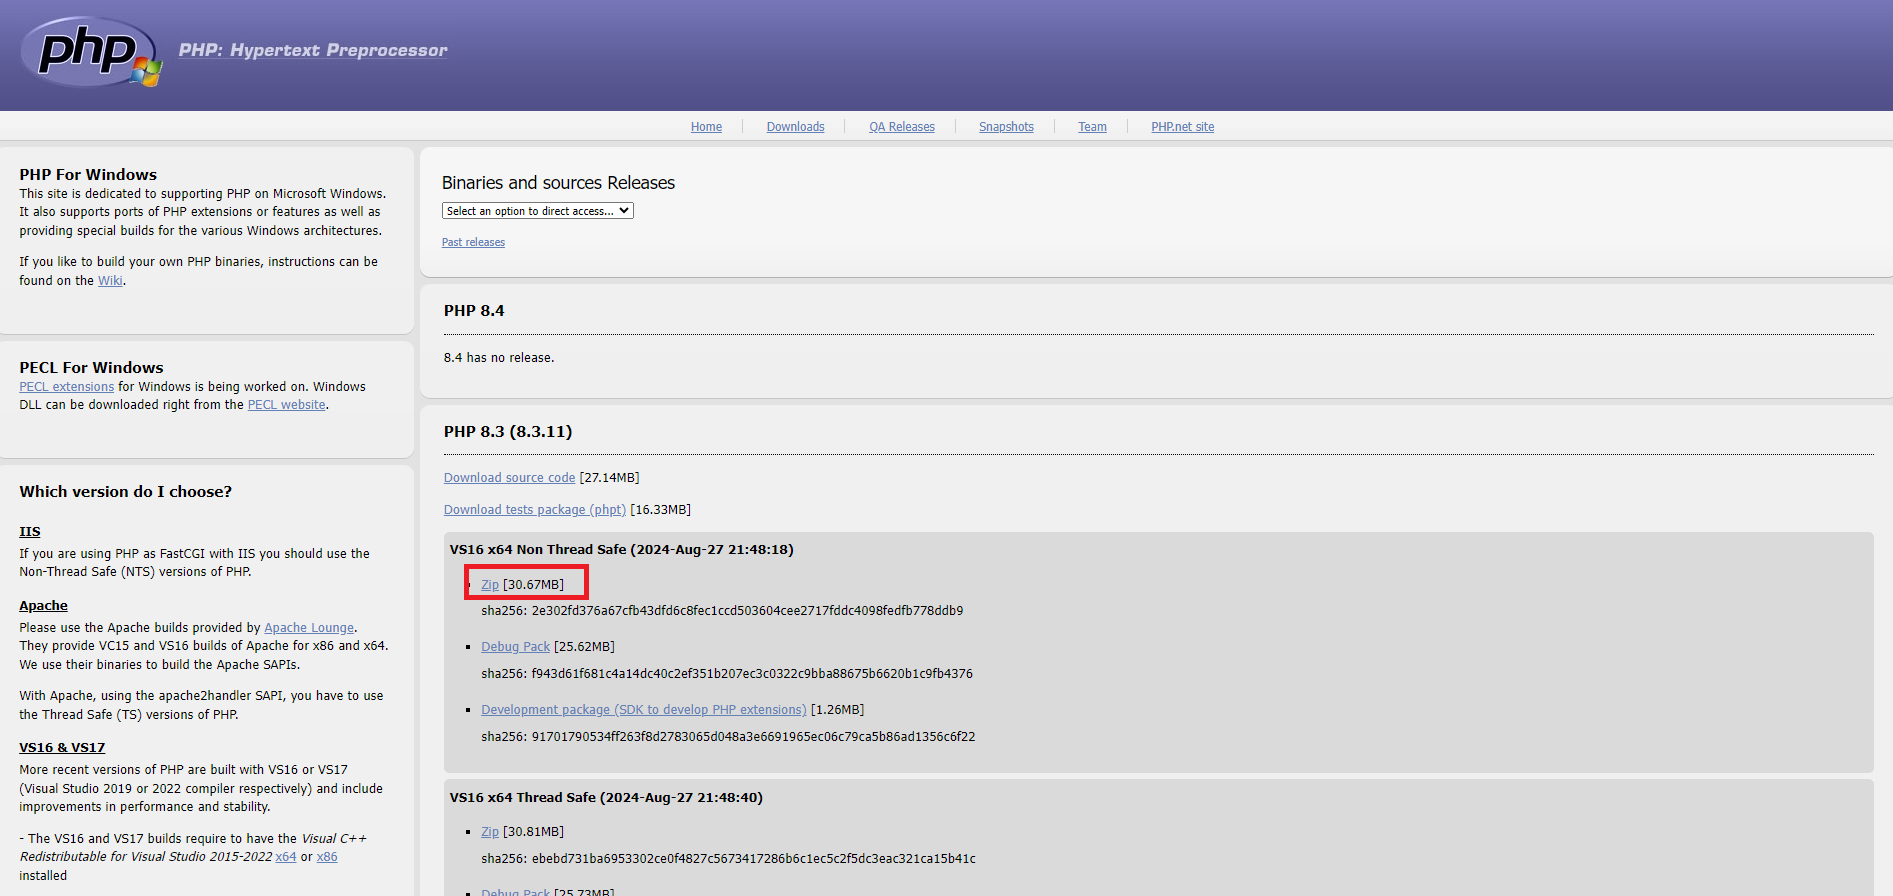
- Visit the official PHP Windows downloads page: https://windows.php.net/download.
- Select the appropriate PHP version. For most setups, the Non-thread-safe version is recommended for IIS, while Thread-safe is recommended for Apache.
- Download the Zip file corresponding to your selected version.
2. Extract PHP files
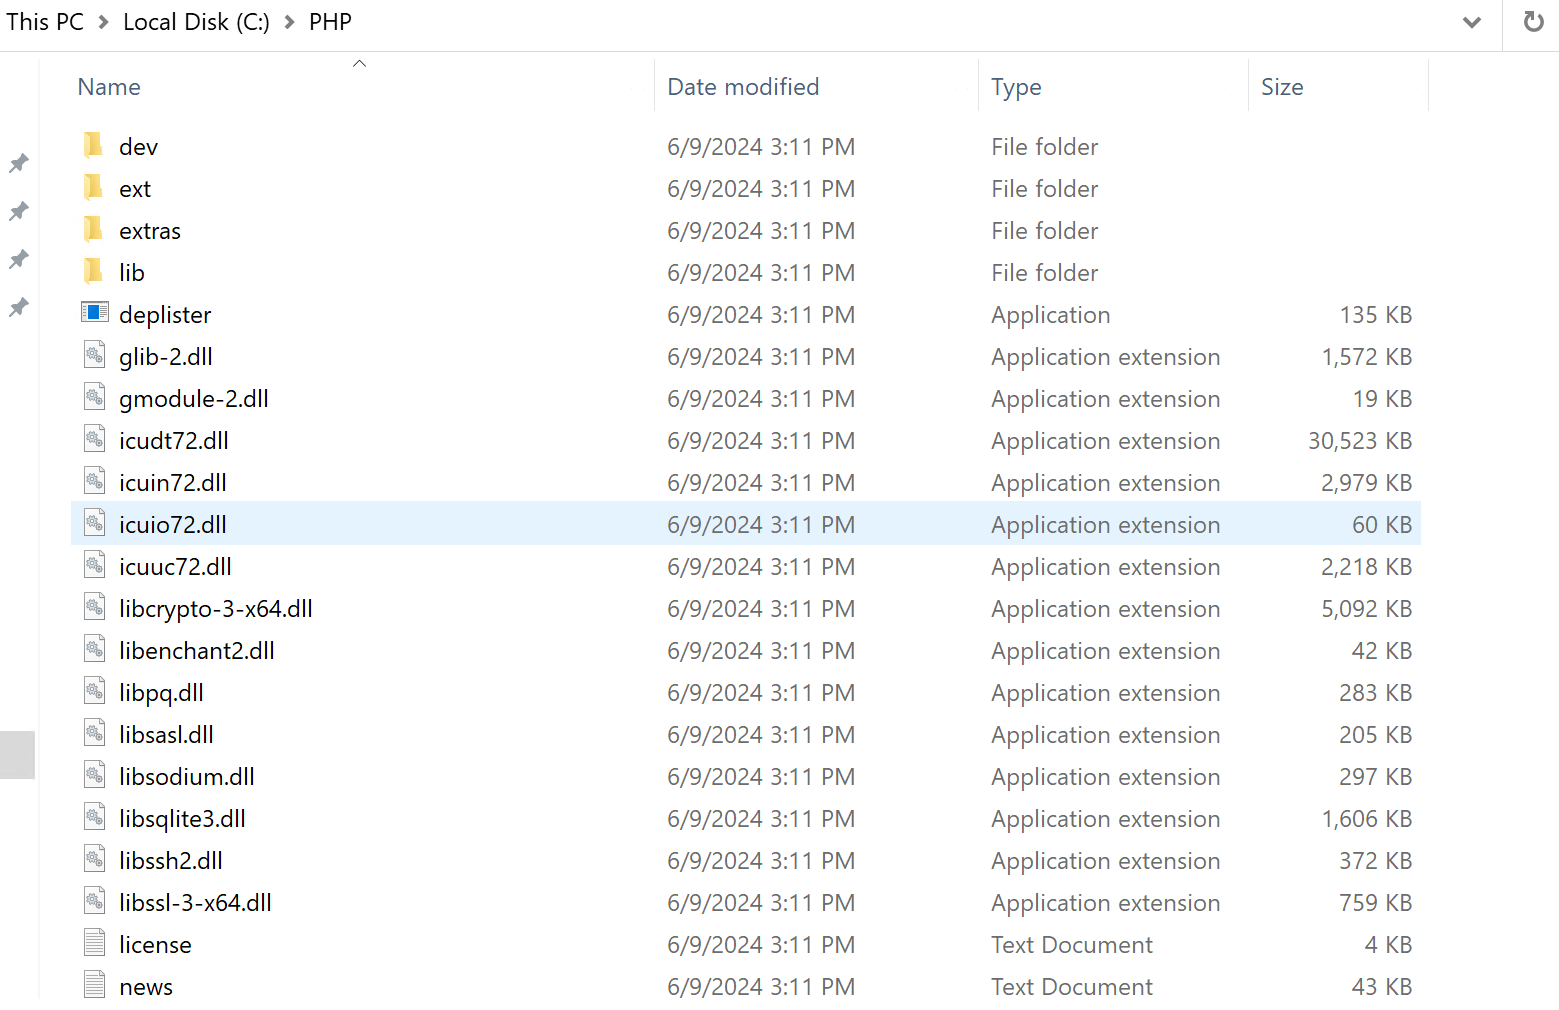
- After downloading the zip file, extract it to a directory of your choice. For this guide, we’ll assume the directory is C:\PHP.
3. Add PHP to the system path
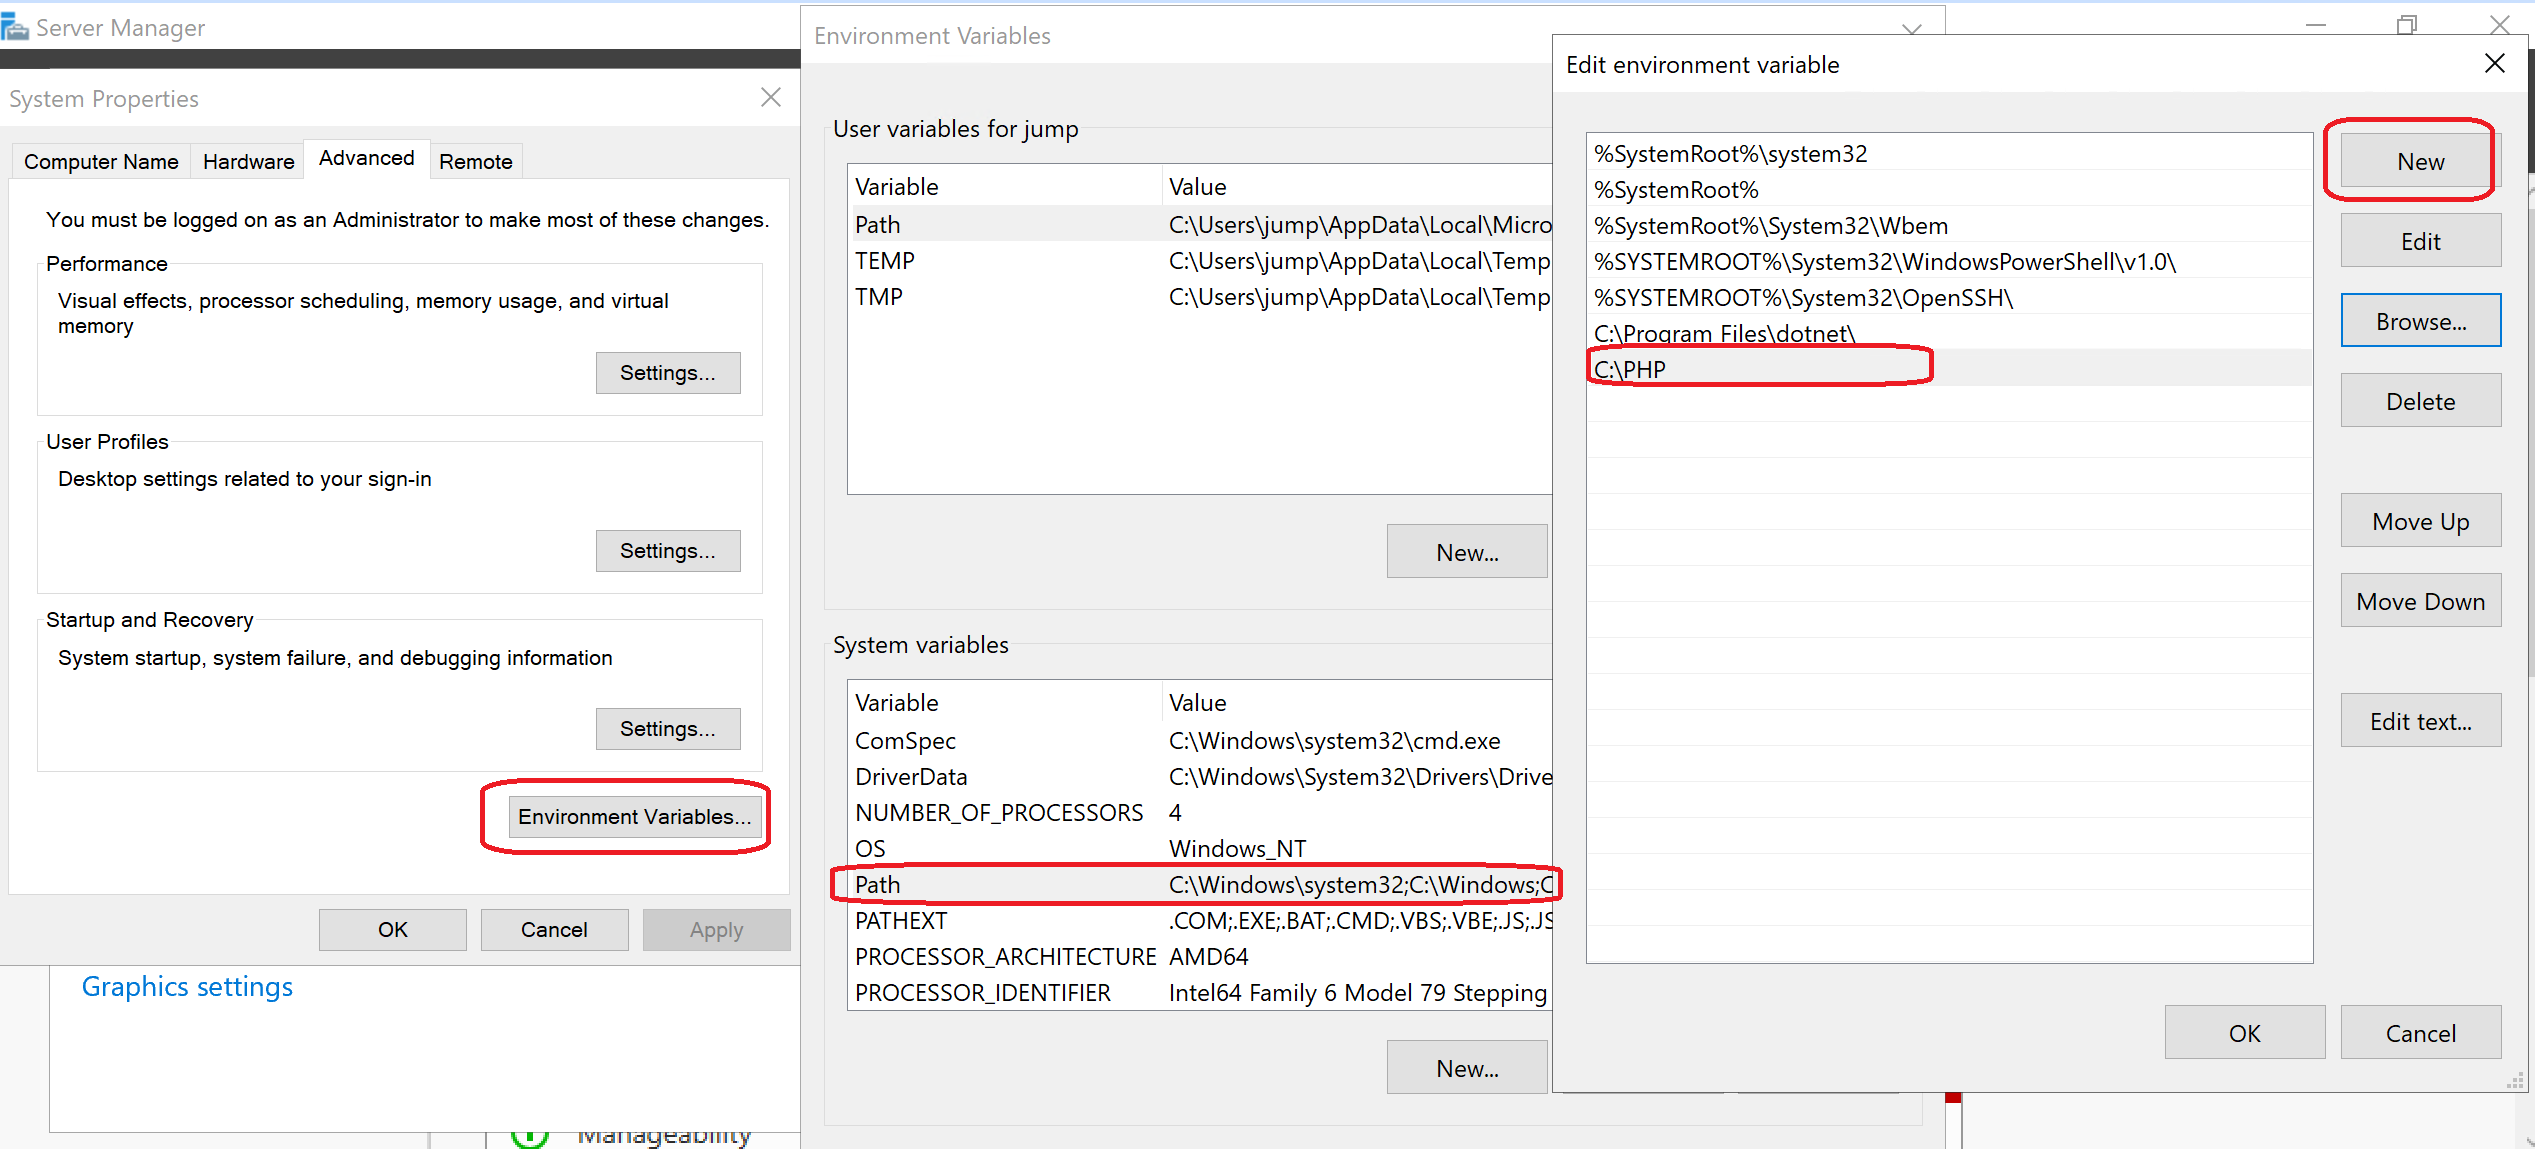
- Right-click This PC or My Computer and select Properties.
- Click Advanced system settings on the left, then go to the Environment Variables button at the bottom.
- Under the System variables section, find and select the Path variable, then click Edit.
- Add C:\PHP (or the path to where you extracted PHP) to the list.
- Click OK to close all the dialogs.
4. Configure PHP for IIS (optional for Apache)
If you’re using IIS, you need to set up PHP as a FastCGI handler:
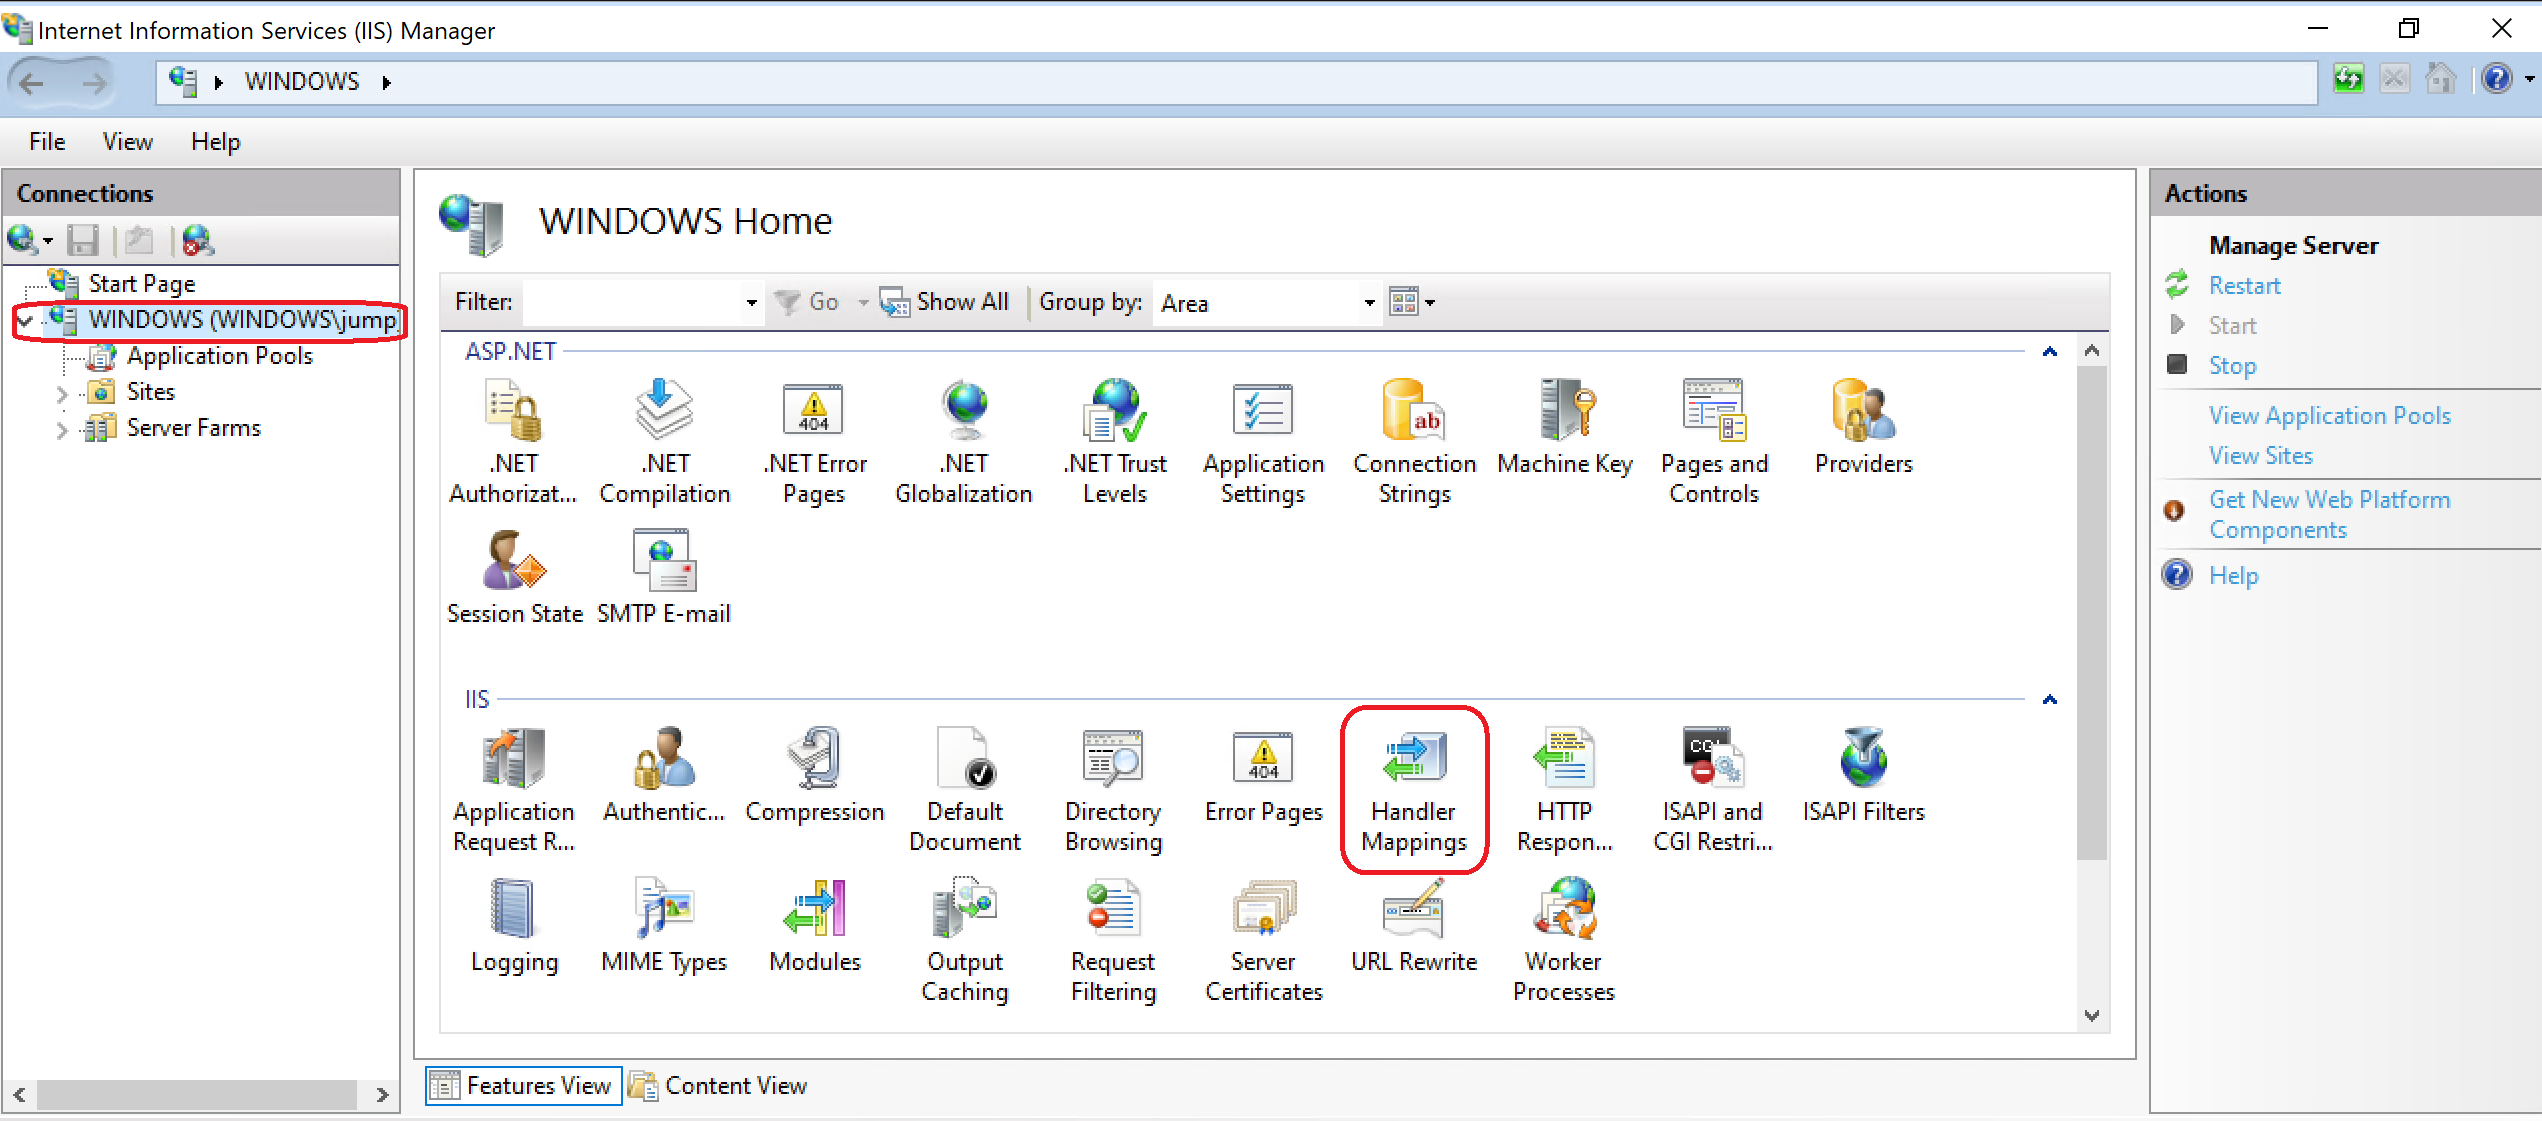
- Open IIS Manager by typing inetmgr in the Run window or searching it from the Start menu.
- Under your server’s name, double-click Handler Mappings.
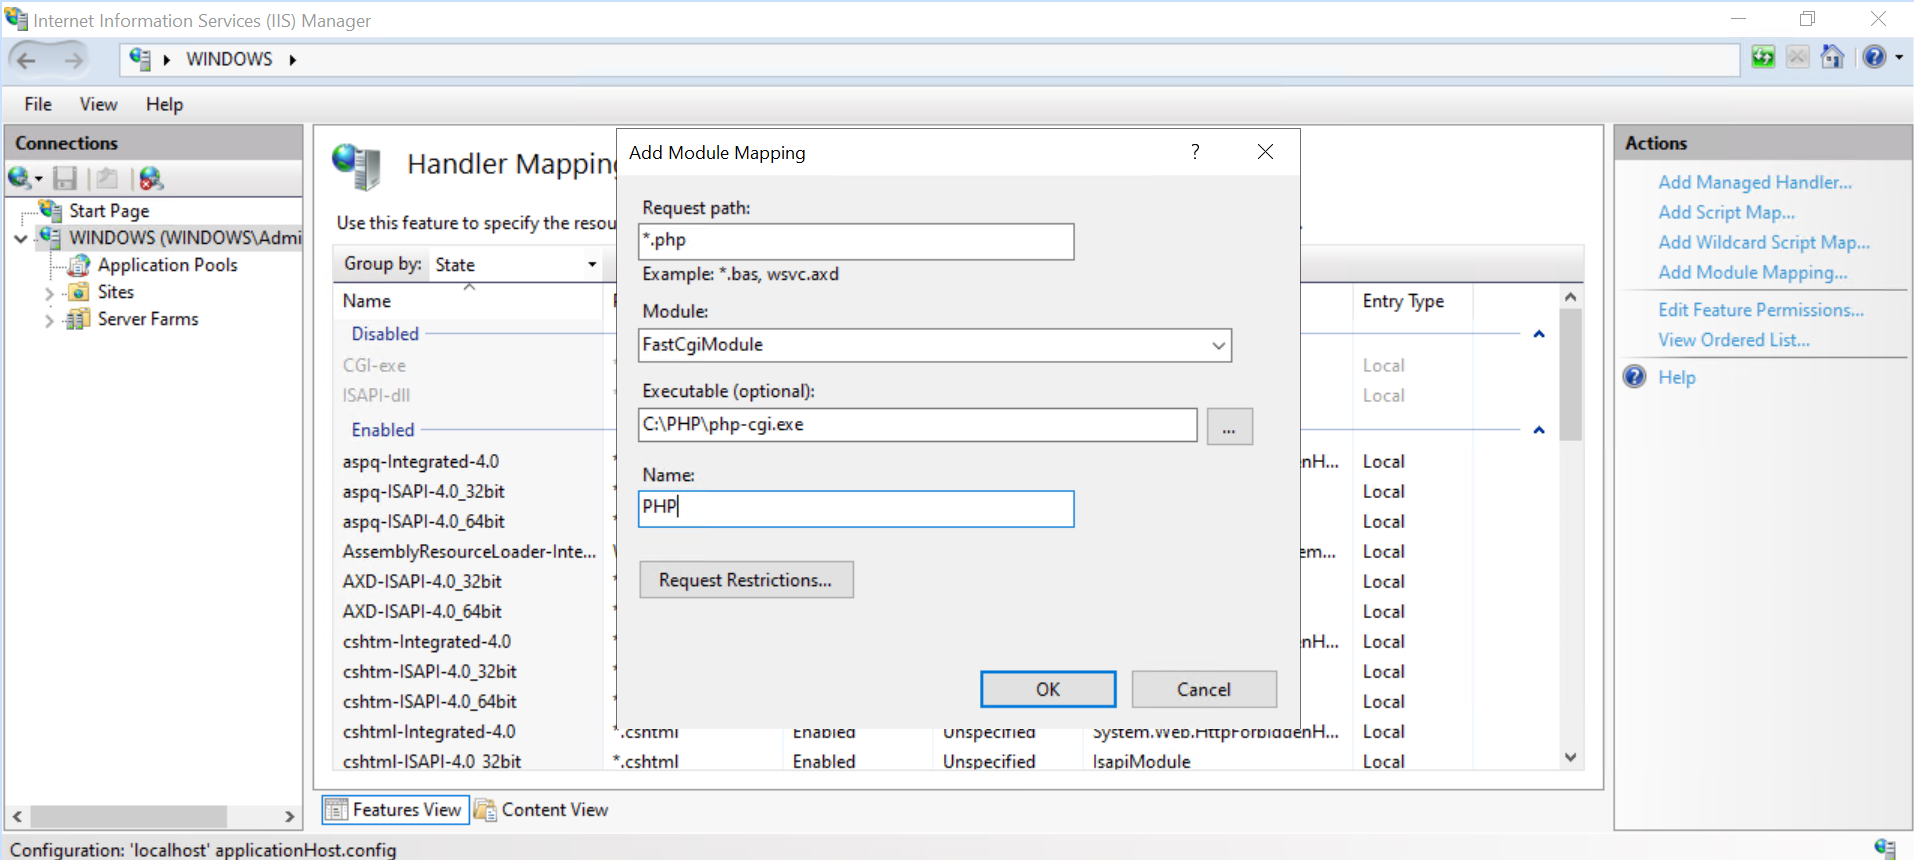
- Click Add Module Mapping on the right.
- In the Request Path field, enter *.php.
- In the Module drop-down, select FastCGIModule.
- In the Executable field, browse to C:\PHP\php-cgi.exe.
- Enter PHP for the Name field and click OK.
- Click Yes if a confirmation dialog appears.
5. Configure php.ini file
- Navigate to C:\PHP and locate the php.ini-development file.
- Rename it to php.ini.
- Open the php.ini file in a text editor such as Notepad.
- Modify the following settings to optimize your server’s performance:
- max_execution_time = 300 (adjust as needed)
- memory_limit = 256M (or higher based on your needs)
- upload_max_filesize = 50M (adjust according to your needs)
- Enable necessary extensions by uncommenting lines like extension=mysqli or extension=curl.
6. Restart IIS (or Apache if applicable)
- Open an Administrative Command Prompt.
- Run the following command to restart IIS:
iisreset
Step 7: Verify PHP installation
- Open an Administrative Command Prompt.
- Run the command below to verify the PHP version:
php -v
Conclusion
This guide provided a comprehensive walkthrough to install and configure PHP on a Windows dedicated server. Once completed, PHP should be running efficiently and ready to support web applications.
For additional assistance or if you encounter any issues, please contact our support team at support@ipserverone.com.
