Search Our Database
How to install SSL certificates in DirectAdmin (Evolution Skin)
Introduction
SSL certificates are crucial for securing your website by encrypting the data transmitted between the server and the visitor’s browser. This guide will help you install an Alpha SSL certificate in DirectAdmin with the Evolution Skin, ensuring your website’s security and integrity.
Prerequisites
- Ensure you have admin or user-level access to DirectAdmin.
- Have your SSL certificate and private key ready. The certificate is usually provided by a Certificate Authority (CA) after verifying your domain.
Detailed Steps
Step 1. Access your DirectAdmin panel with your credentials as a user.
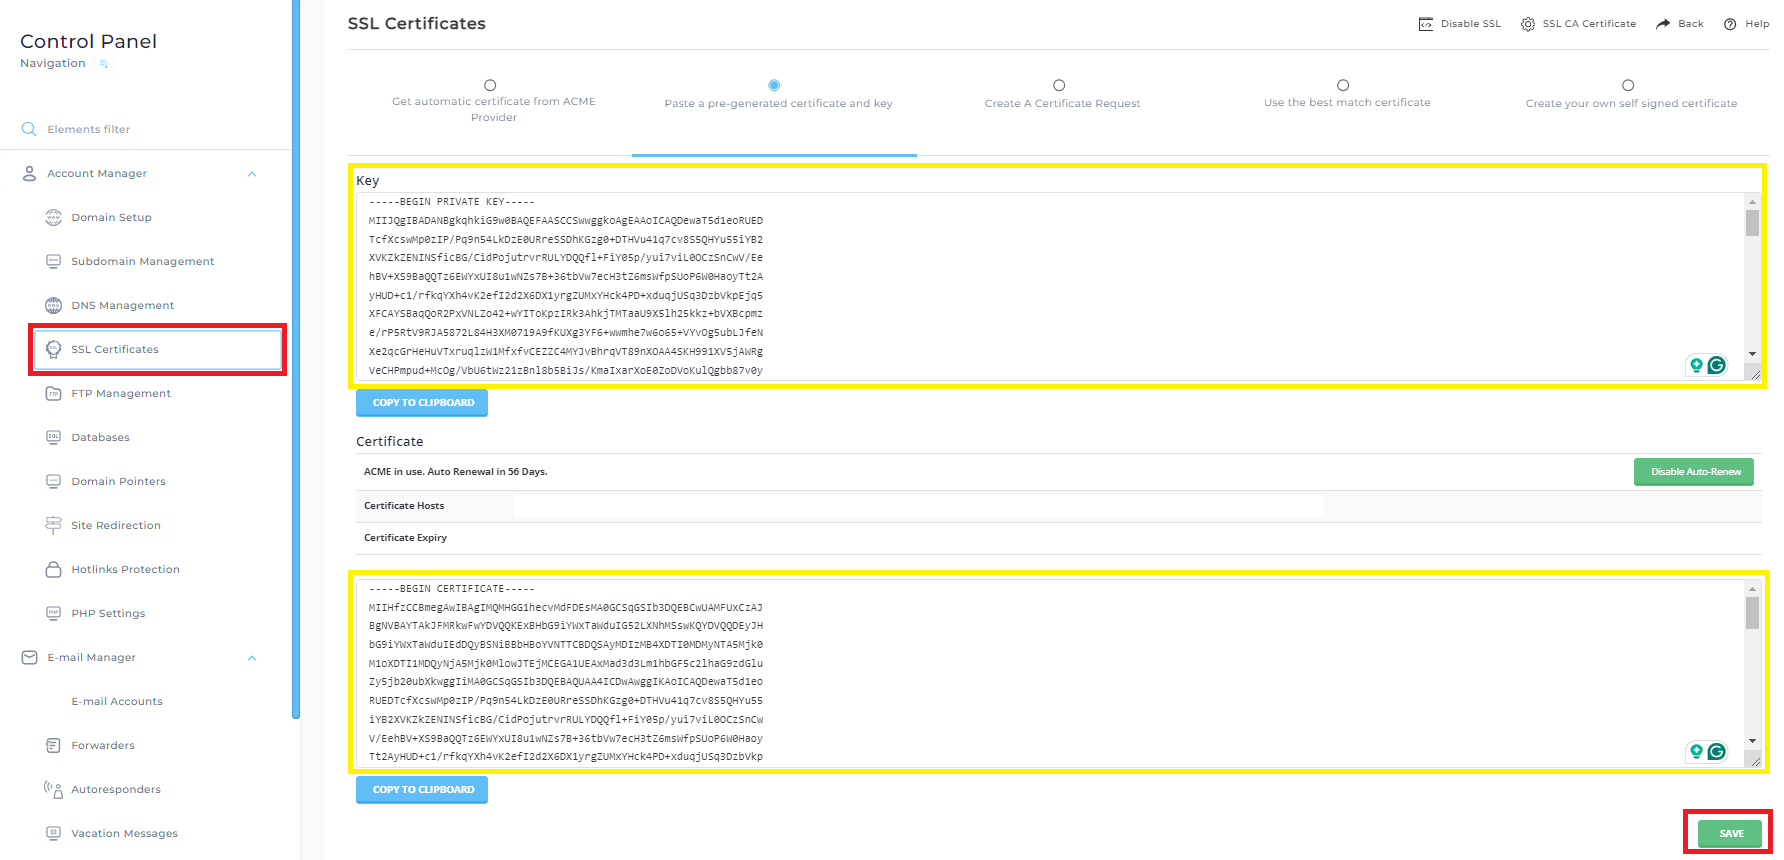
Step 2. From the main menu, proceed to the Account Manager section and select SSL Certificates.
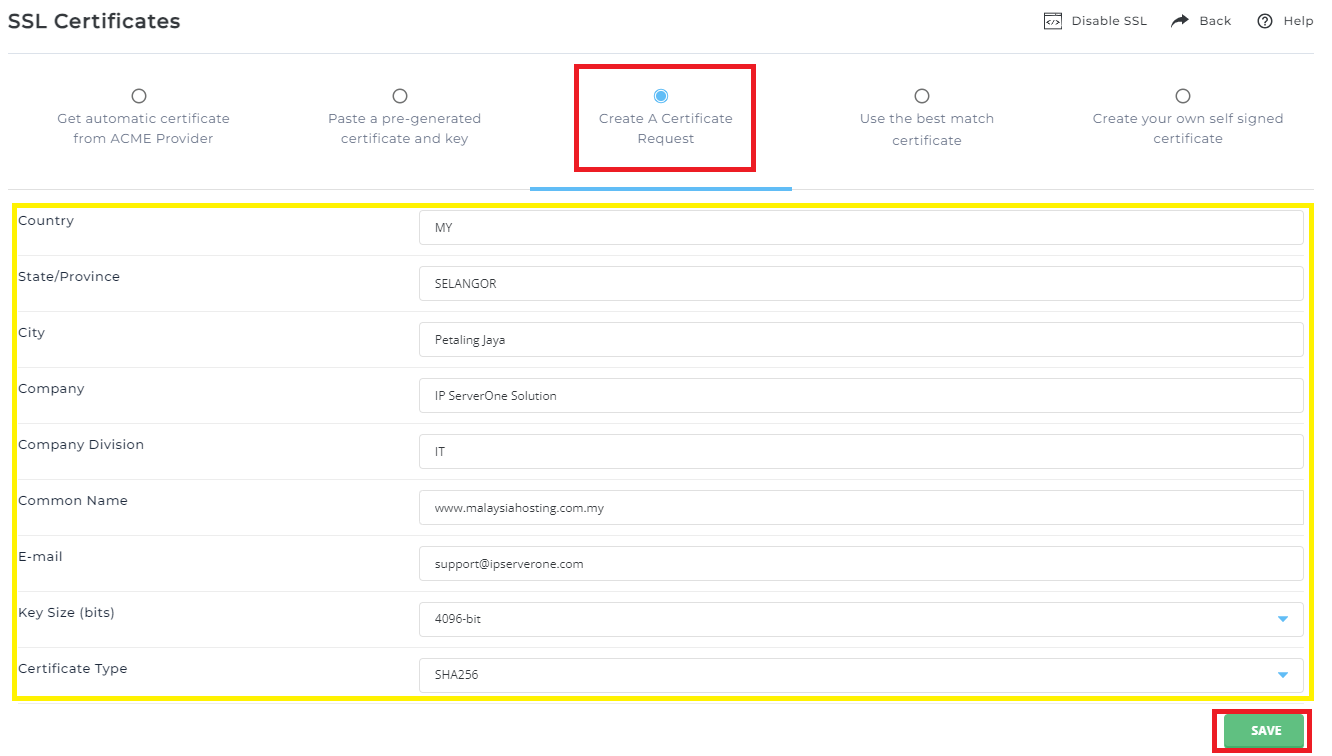
Step 3. Click Create A Certificate Request, and input the details and click Save. After that, save the generated CSR certificate and private key in your Notepad:
- Country
- State/Province
- City
- Company
- Company Provision
- Common Name: If you installing a Single Domain Certificate, input the common name as www.<domain-name>. If you installing a Wildcard SSL Certificate, input the common name as *.<domain-name>.
- Key Size (bits): Choose 4096-bit
- Certificate Type: Choose SHA256
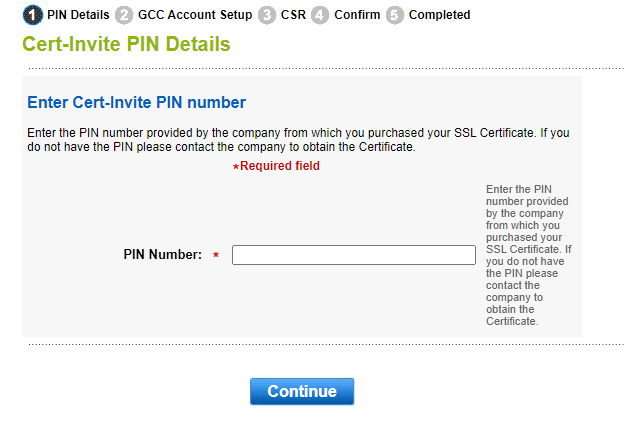
Step 4. Open the GlobalSign Certificate Link. Open the GlobalSign Certificate link that you purchased and input the PIN.
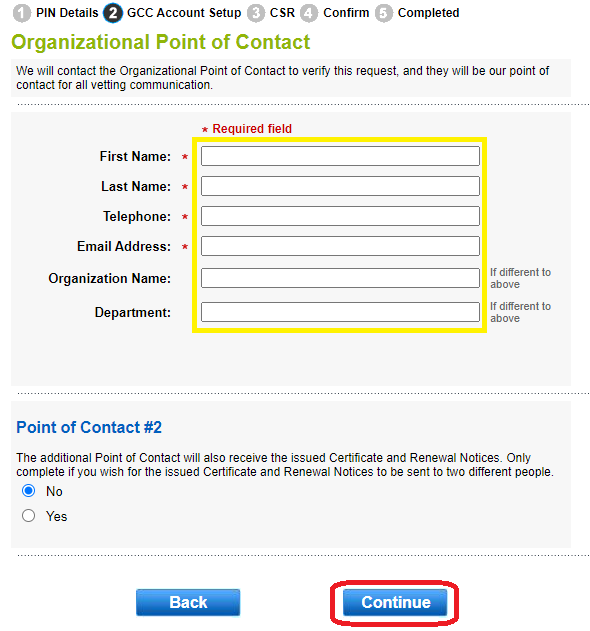
Step 5. Fill in the GlobalSign Details: Fill in the details and click Continue.
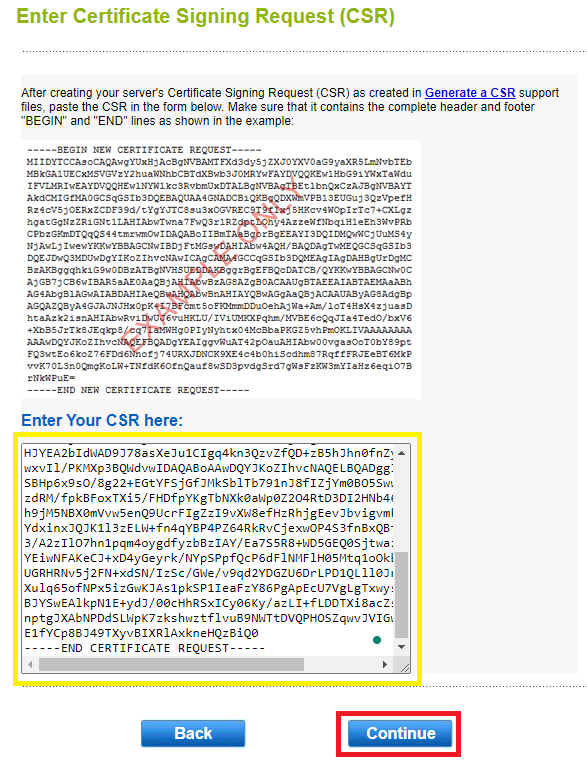
Step 6. Paste the CSR certificate: Paste the CSR certificate which generated in step 3. The CSR certificate start with —–BEGIN CERTIFICATE REQUEST—– and end with —–END CERTIFICATE REQUEST—–. After that, click Continue.
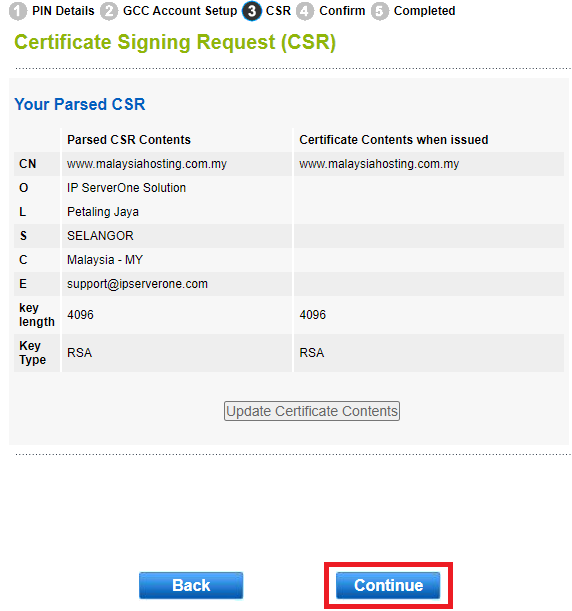
Step 7. Check the Certificate Details: Check the CSR certificate details. After that, click Continue.
Step 8. Complete the Domain Verification: Choose the Domain Verification you prefer. You can check the KB below as guide:
- If you have access to the email listed by GlobalSign, you can choose Email Verification: https://www.ipserverone.info/knowledge-base/globalsign-domain-verification-method-email-verification/
- If you have access to edit the website’s web file, you can choose HTTP Verification: https://www.ipserverone.info/knowledge-base/globalsign-domain-verification-method-http-verification/
- If you have access to the DNS hosting of the website, you can choose DNS Verification: https://www.ipserverone.info/knowledge-base/globalsign-domain-verification-method-dns-verification/
Step 9. Get the SSL certificate in PEM format. Check the inbox of the email address you provided in Step 5 to find the email regarding your issued SSL certificate. You can find the SSL certificate in the email. Copy the SSL certificate in your Notepad.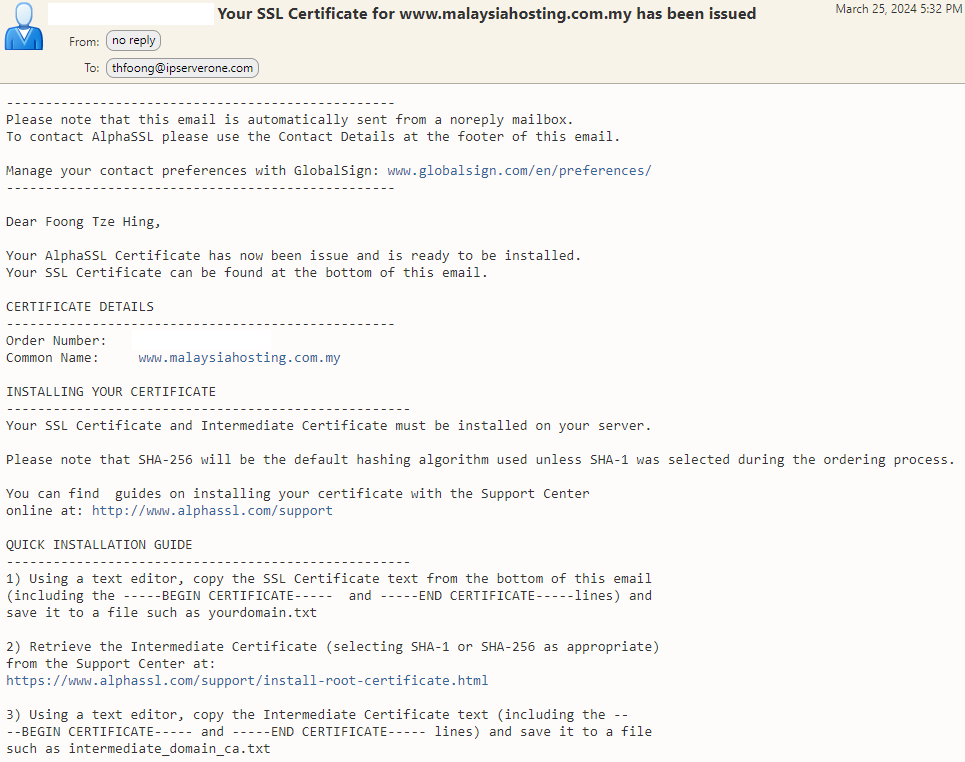
Step 10. Input the Private Key and SSL certificate into Direct Admin: Login into Direct Admin as user and open SSL Certificate. Click Paste a pre-generated certificate and key. After that, paste the Private Key and the SSL certificate and Save. You can check below for the Private Key and SSL certificate info:
- Private Key:
- You can get the Private key in Step 6.
- The private key starts with —–BEGIN PRIVATE KEY—– and ends with —–END PRIVATE KEY—–.
- SSL certificate:
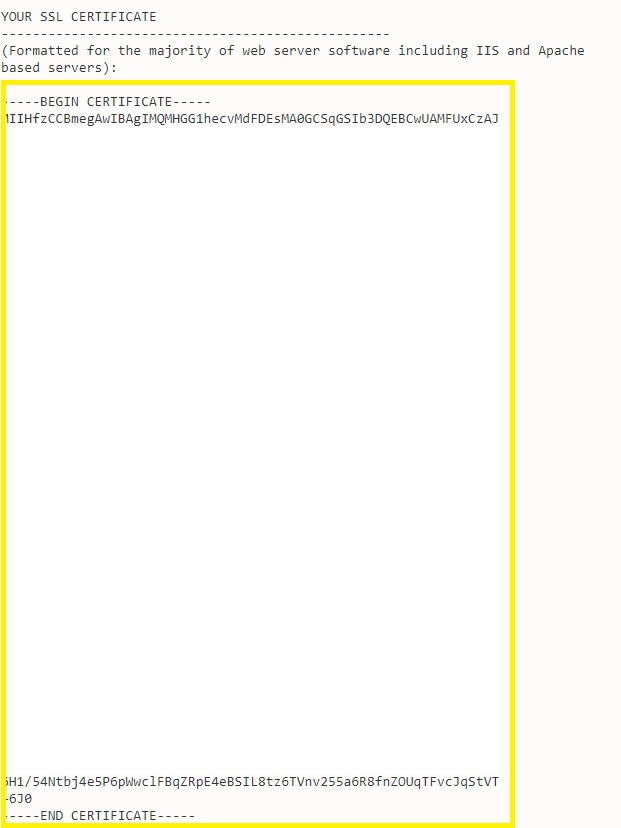
- You can get the SSL certificate in Step 9.
- The SSL certificate starts with —–BEGIN CERTIFICATE—– and ends with —–END CERTIFICATE—–.
Step 11. Update CA cert: Click SSL CA Certificate to update the CA cert.
Step 12. Save the CA cert: Paste the latest CA certificate and tick Use a CA Cert. After that, click Save.
You can get the latest CA cert here: https://support.globalsign.com/ca-certificates/intermediate-certificates/alphassl-intermediate-certificates
Conclusion
Following these steps should result in a successful SSL certificate installation for your website in DirectAdmin using the Evolution Skin. This process enhances your site’s security, ensuring encrypted communication between your server and visitors.
For additional assistance or if you encounter any issues, please contact our support team at support@ipserverone.com.
