Search Our Database
How to launch cloud instance from image
Overview
This tutorial will guide you through launching your first self-managed Cloud Instance from an Image via the Portal.
Prerequisites
Instructions
-
Log in to IP ServerOne’s Customer Portal.
-
On the left sidebar, click on NovaCloud, then select Instances.
-
Select the region where you want to launch your instance, then click Launch Instance.
Note: The region selected for your instance is permanent and cannot be changed later. -
Click Create Instance from Image.
-
Select the Flavour (Plan) that best suits your requirements.
Note: The flavor can be upgraded later if needed. Refer to this guide on How To Resize Cloud Instance. -
Choose your preferred Image (Operating System).
Note: Windows OS may incur additional charges. -
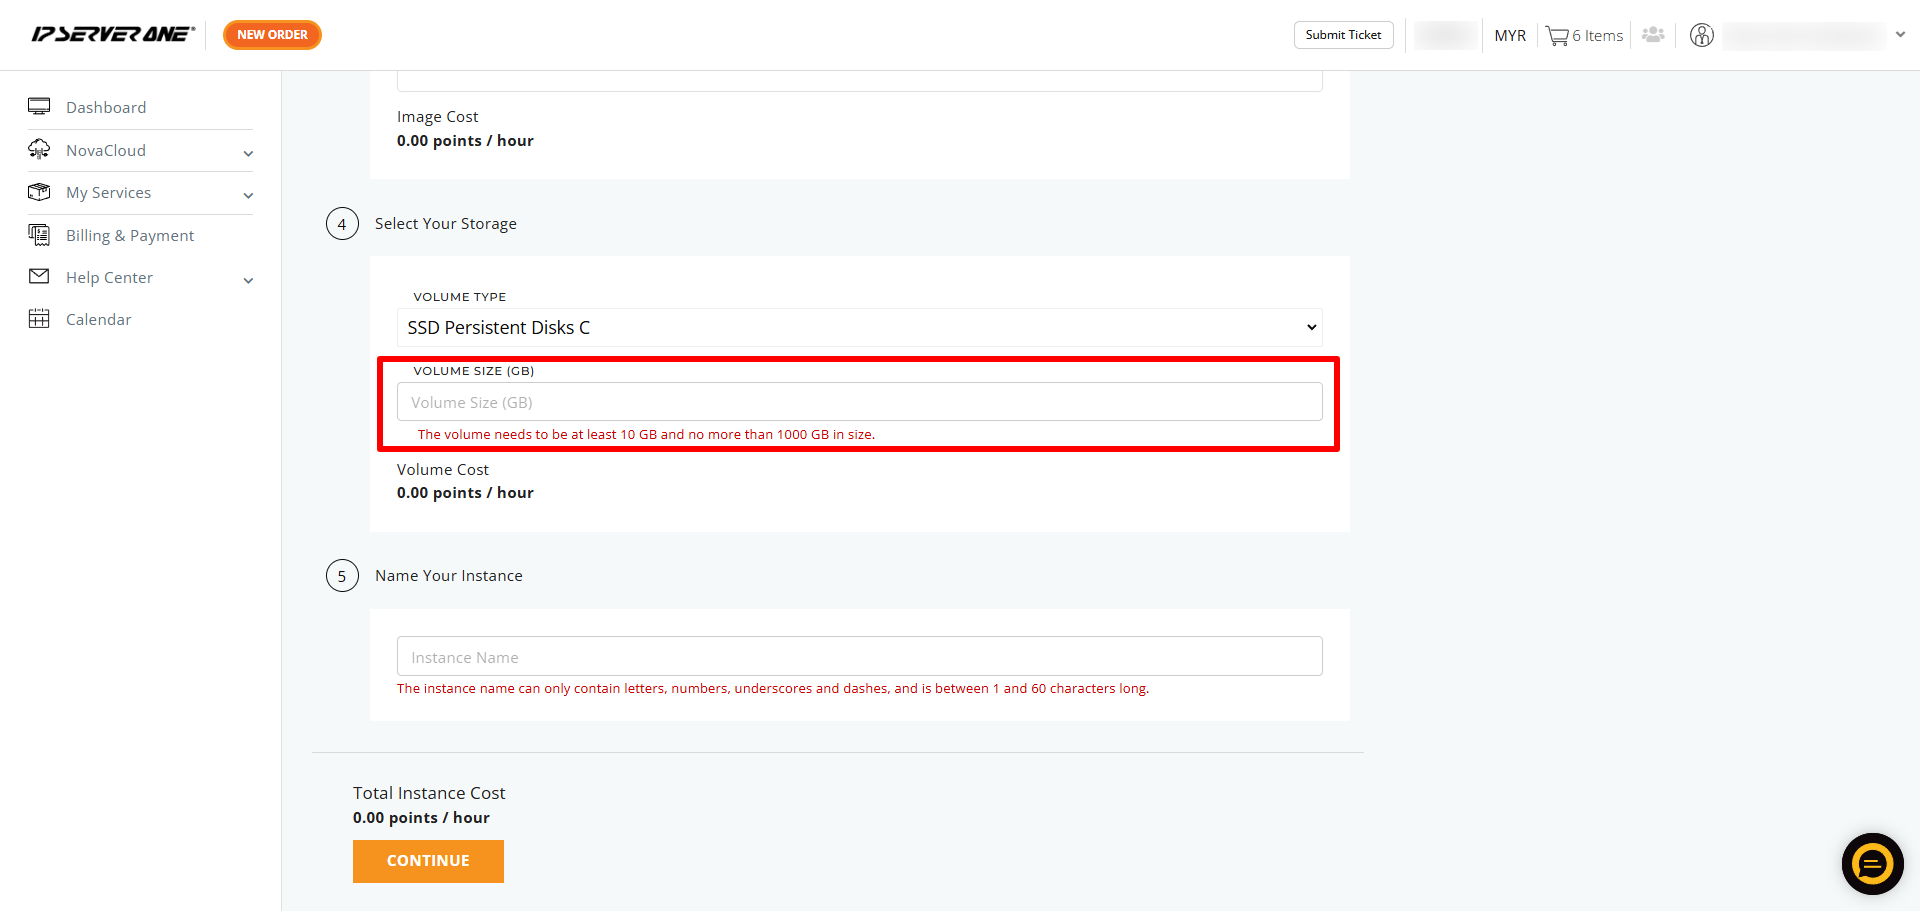
Scroll down to select the Volume Type (SSD Persistent Disks A / SSD Persistent Disks C) and specify the Volume Size.
Note: If you do not have a specific volume in mind, enter a minimum of 10GB in the Volume Size (GB) box. You may extend the volume later by referring to this guide: How To Extend Cloud Volume. -
If you are satisfied with your selections, name your instance and click Continue.
-
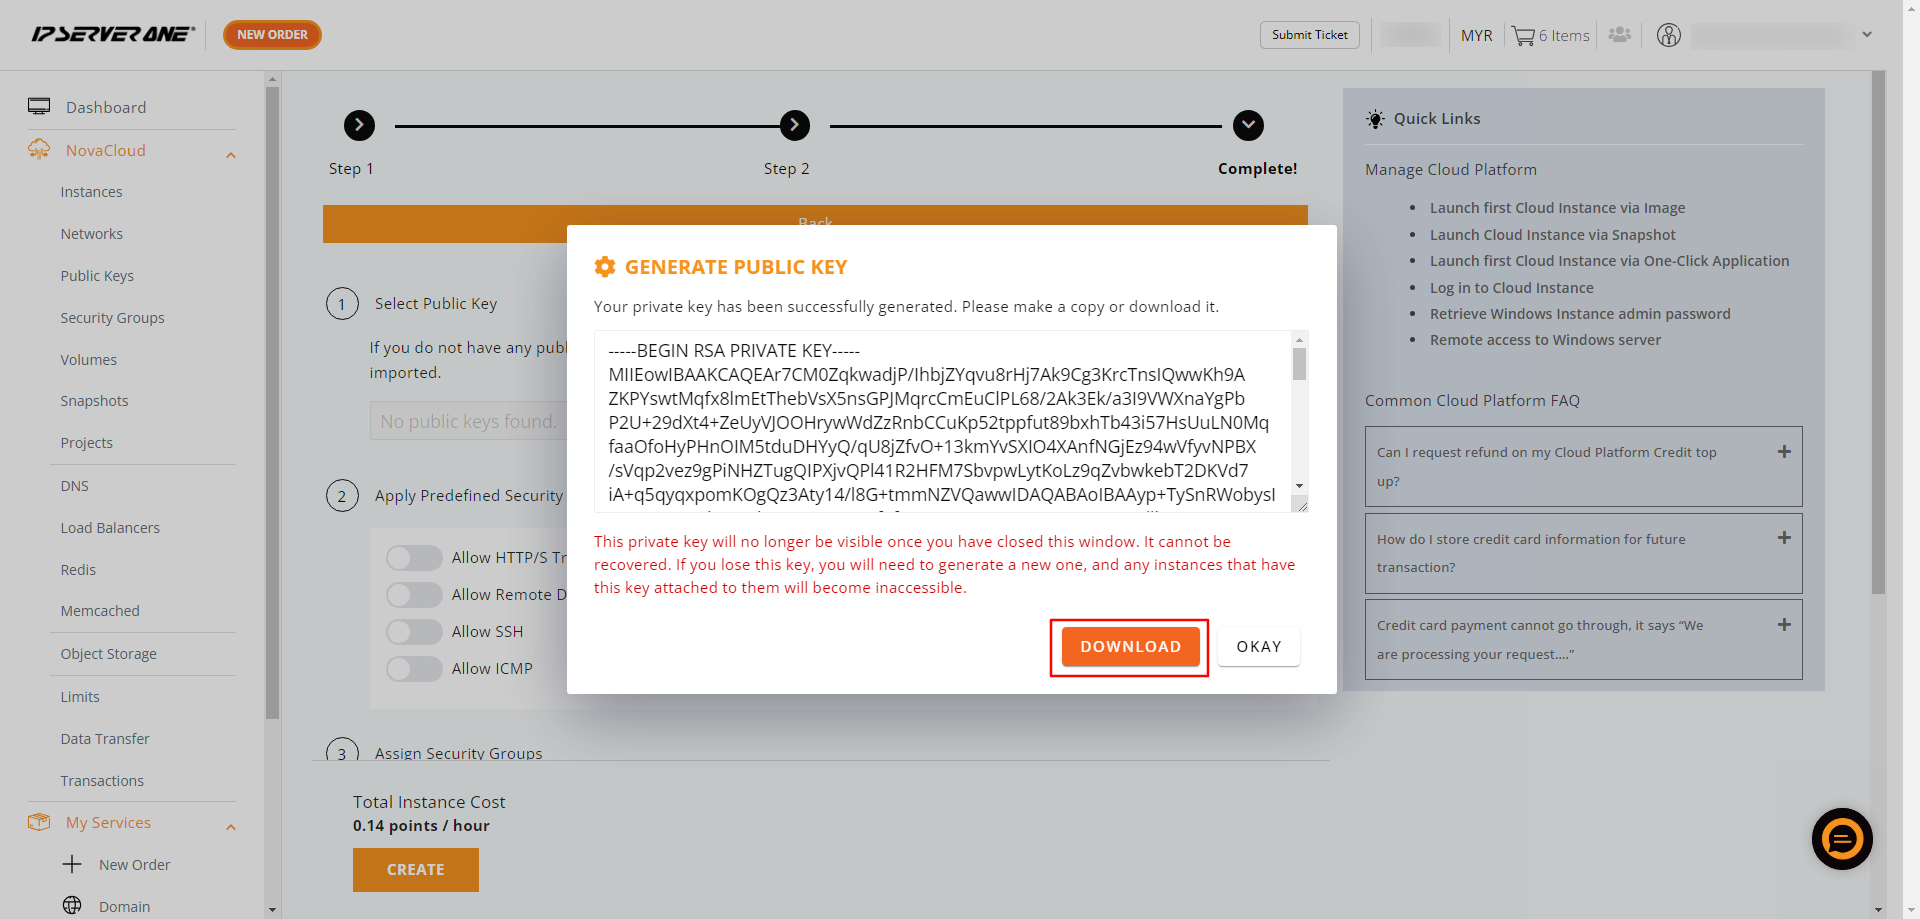
Next, select a Public Key. If you don’t have an existing key, you can generate a new one or import an existing key.
-
Download your private key (.pem) for safekeeping.
Note: The private key is unique and non-retrievable. If it is lost, you may lose access to your instance. -
Select Predefined Security Group Rules and assign them to your security group by naming it, then click Create.
Note: The default security group allows all outgoing traffic and blocks all incoming traffic. -
Ensure that Public Network is enabled before clicking Create.
-
Review the instance cost and click Create if you have sufficient credit in your account.
-
Click Instances to view your newly launched instance.
-
Please wait while your Instance is being created. You can refresh this section to check the status.
-
Once the launch is successful, your instance will show as Active.
Note: Take note of the IP addresses assigned to your instance.
Get started with NovaCloud:
To get started with NovaCloud instance, you may refer to the knowledge based below:
Conclusion
Congratulations! You have successfully launched your Cloud Instance. Remember to keep your private key safe and monitor your instance through the IP ServerOne Customer Portal. For further assistance, please refer to our support portal.
Article posted on 17th April 2020, by Louis.


