Search Our Database
How to login to your Linux Server via SSH
Introduction
SSH (“Secure Shell”) is a protocol used to securely log into remote systems and execute commands. It’s essential for managing Linux servers remotely and securely. Learn how to log into your Linux server using SSH for secure remote management. Ideal for system administrators or developers needing remote access to servers.
Prerequisite
- Downloaded the private key when you launch your first Instance. Note: If you used your own key-pair during Instance creation, please use the same private key for this tutorial.
- (Optional) Have PuTTY installed. You can download and install PuTTY from here. Note: You can use any SSH client as you like. We will be using PuTTY for our tutorial.
- (Optional) Convert your private key file to .ppk format. You may refer to the tutorial here if you have not done so. Note: You only need to convert your private key to .ppk format if you are using PuTTY.
Step-by-step guide
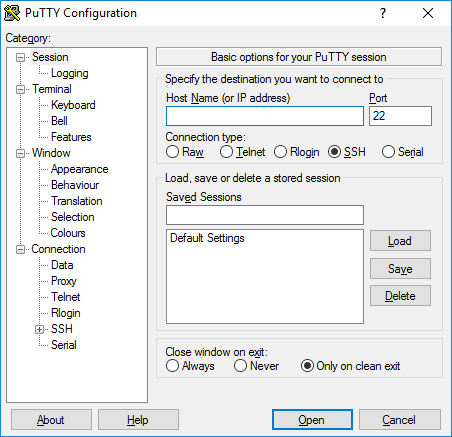
Step 1: Open your SSH client
- Open your SSH client. For this guide, we will be using PuTTY SSH client.
Step 2: Enter server details
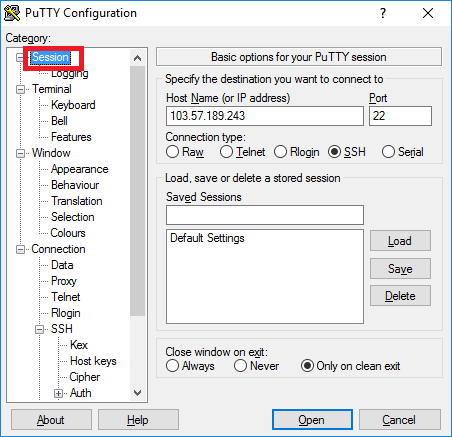
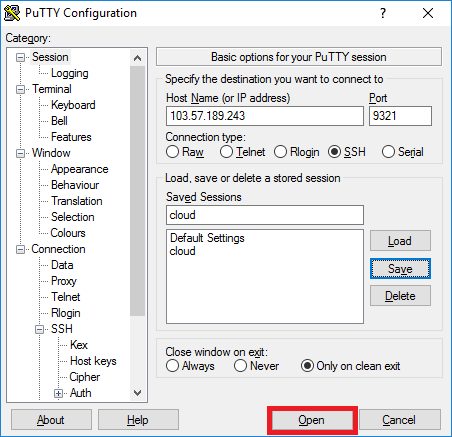
- In the Category pane, select Session and enter <username>@<server IP>, such as root@103.57.189.243 in the Host Name field.
- For the Host Name field, you enter only the Server IP because we can enter the username after connected the server.

- Under Port, make sure the connection port is 22. As the port 22 is the default port for SSH connection.
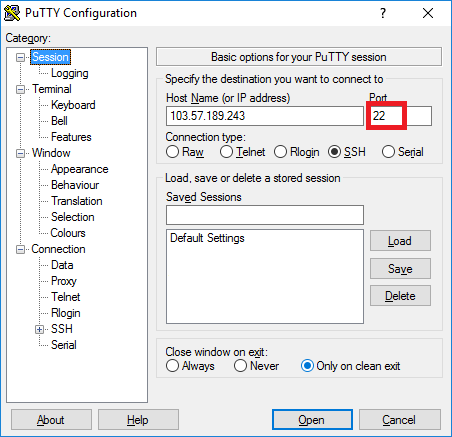
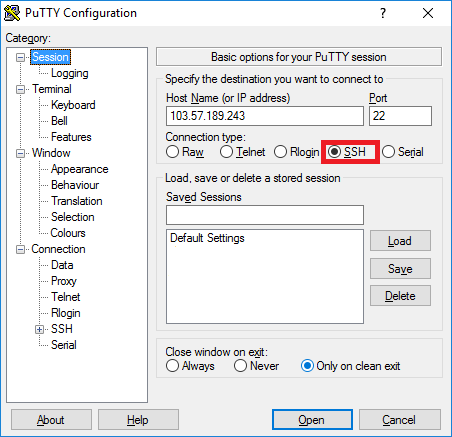
- For the Connection type options, choose SSH.
Step 3: Import your private key
- Under the Connection settings, expand the SSH by clicking on the +.
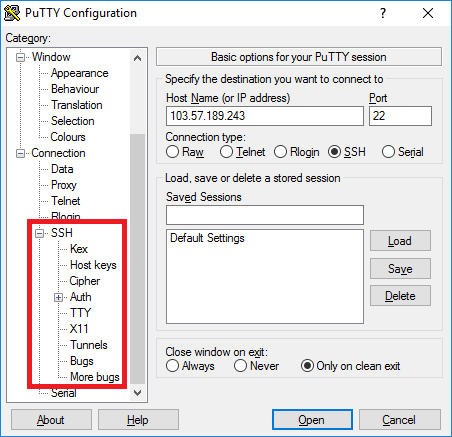
- Select Auth after expanded the SSH.
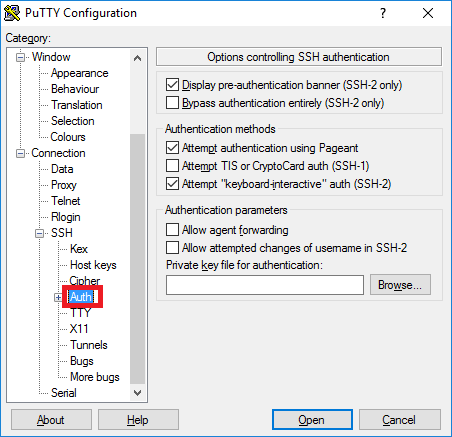
- Under the Private key file for authentication, click on Browse to access your PC for your .ppk private key file.

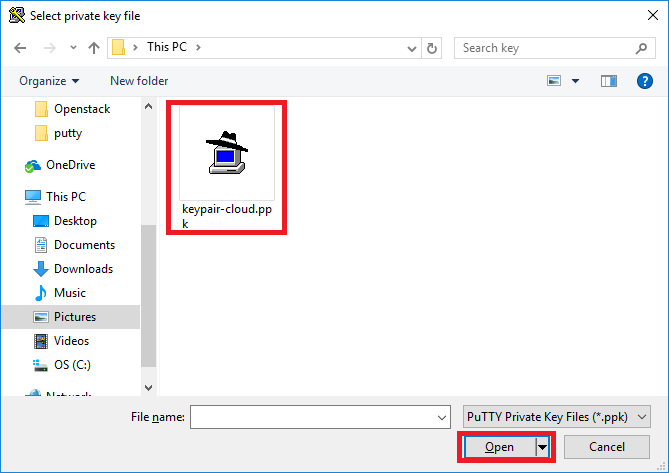
- Browse to the location where you keep your key file, select the .ppk and Open.
- Navigate back to the Session.
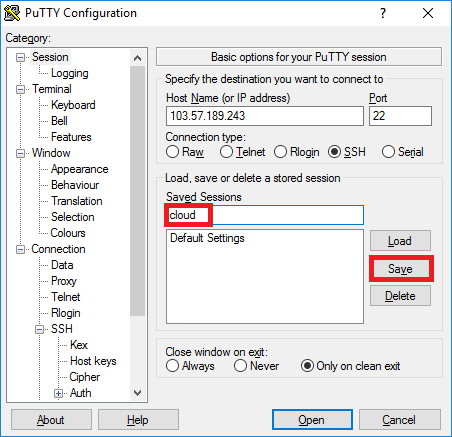
- In the section under the Saved Sessions, enter a name for this session and Save for future. Once you have saved the session, you may just select the saved session to login your server.
Step 4: Connect and login into your server
- Click Open to establish a SSH connection to your remote server.
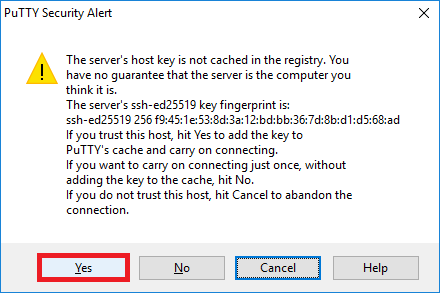
- Choose Yes for the security alert to acknowledge the warning. This alert will only appear during your first connection.
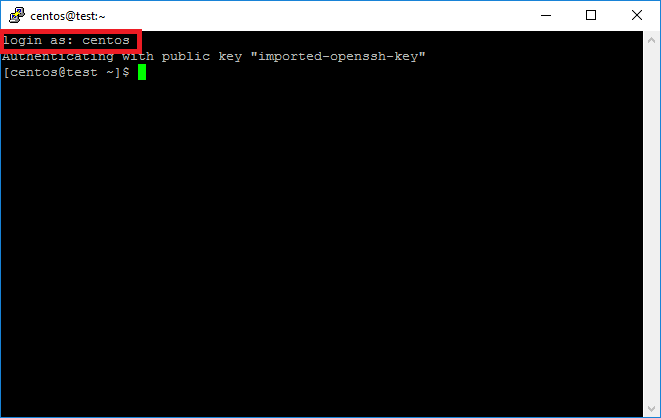
- Login as default user. This user depends on the Image you launch your instance with. You may refer more details as below.
- Ubuntu: ubuntu
- Debian: debian
- CentOS : centos
- CentOS Stream 8 : centos
- CentOS Stream 9 : cloud-user
- CentOS Stream 10: cloud-user
- RedHat Enterprise Linux 8 : cloud-user
- RedHat Enterprise Linux 9 : cloud-user
- RedHat Enterprise Linux 10 : cloud-user
- AlmaLinux: almalinux
- RockyLinux: rockylinux (before 26/04/2023) / rocky (from 26/04/2023)
- OpenSUSE: opensuse
- Fedora: fedora
- FreeBSD: freebsd
- Since you are logging in using private key, you will not be necessarily to enter password.
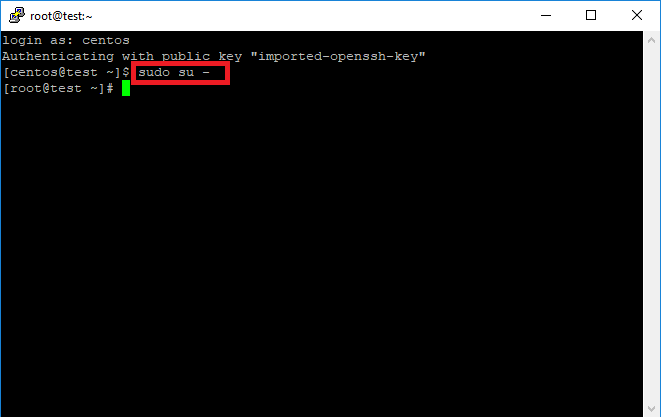
- To gain root privilege by switching to the root user. You may enter the command below.
sudo su -
Conclusion
By following this guide, you will be able to securely log into your Linux server via SSH for remote management and tasks.
For additional assistance or if you encounter any issues, please contact our support team at support@ipserverone.com.
Article posted on 03 May 2020 by Loius.