Search Our Database
How to manage cron jobs through cPanel
Introduction
Cron jobs are scheduled tasks that run automatically at specified intervals on a server. They are commonly used for repetitive tasks such as running scripts, sending automated emails, or performing system maintenance. In a cPanel environment, cron jobs can be easily managed through a user-friendly interface without needing to access the command line.
This guide explains how to set up, manage, and troubleshoot cron jobs using cPanel’s built-in tools. Whether automating backups, refreshing data, or running scripts at specific times, understanding cron jobs can enhance productivity and streamline server management.
Prerequisites
- Access to cPanel: Login credentials for your hosting account’s cPanel.
- Basic knowledge of scripting: Familiarity with the script or command you want to automate (e.g., PHP, Python, shell scripts).
- File permissions: Ensure the script has the correct permissions to be executed.
- Paths to scripts: Full server paths for the scripts or commands you intend to run.
Step-by-Step Guide
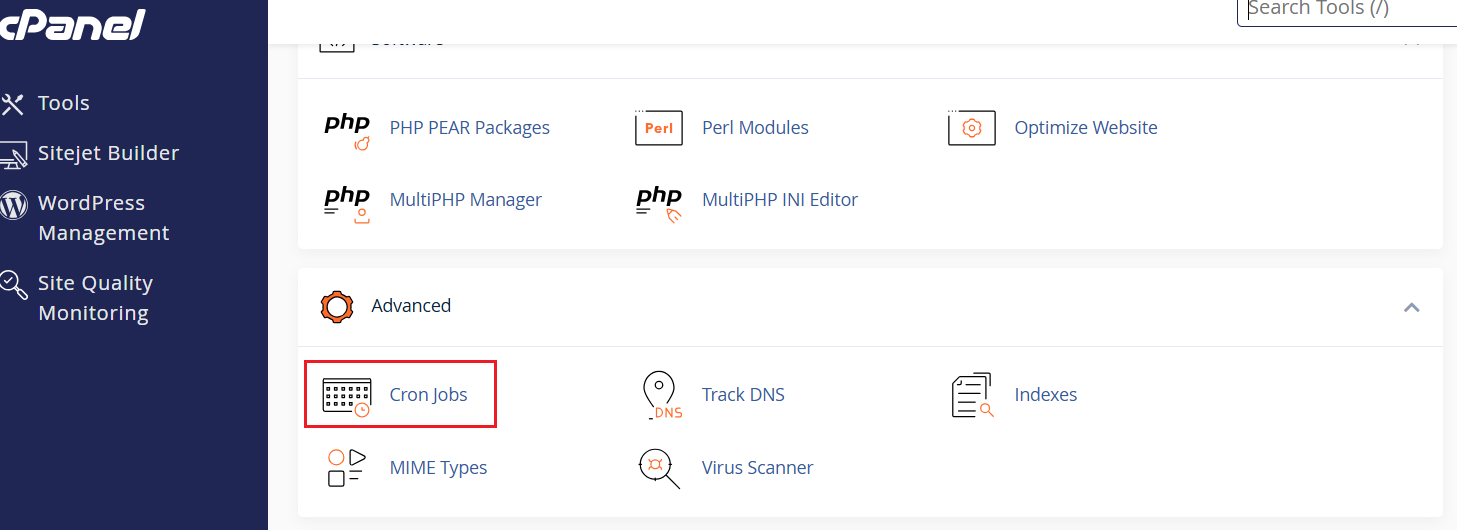
Step 1: Access the Cron Jobs Interface in cPanel
- Log in to cPanel: Go to http://yourdomain.com/cpanel and enter your username and password.
- Locate the Cron Jobs tool: In the Advanced section, click on Cron Jobs.
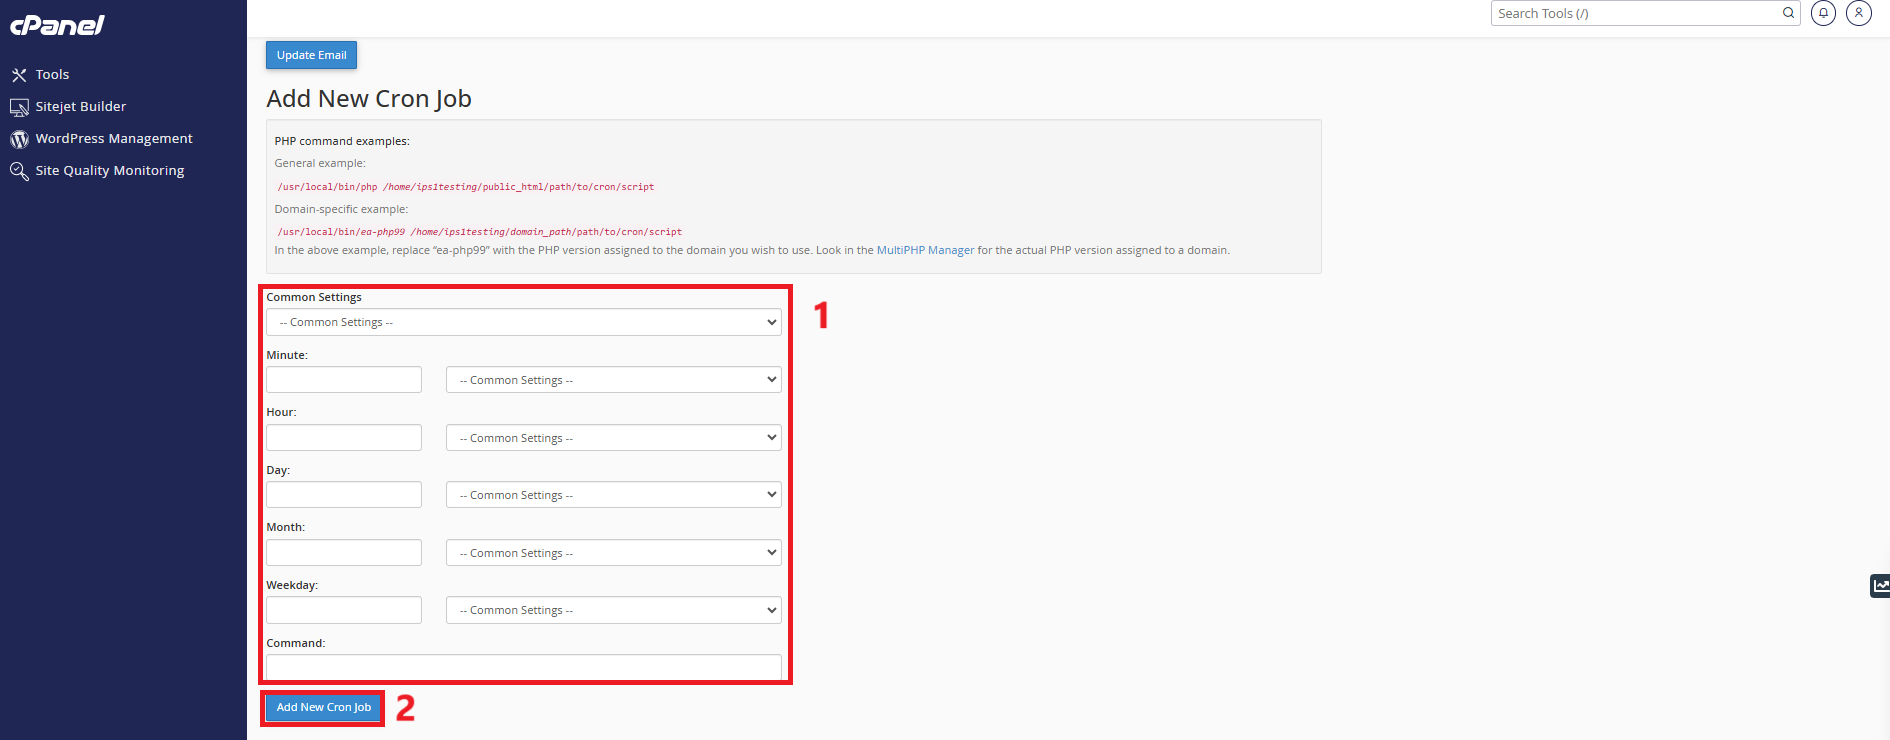
Step 2: Set Up a New Cron Job
- Add an Email for Cron Job Notifications (Optional):
In the Cron Email section at the top, enter your email address to receive notifications each time a cron job runs. Click Update Email. - Configure the Cron Job Schedule:
In the Add New Cron Job section, select a predefined schedule from the Common Settings dropdown, or set a custom schedule using the provided fields:- Minute: (0–59)
- Hour: (0–23)
- Day: (1–31)
- Month: (1–12)
- Weekday: (0–7) where both 0 and 7 represent Sunday
- Enter the Command to Run:
Enter the full command in the Command field, including the absolute path to the script.
Example for a PHP script:
/usr/bin/php /home/username/public_html/script.php - Create the Cron Job: Click Add New Cron Job to save.
Step 3: Manage Existing Cron Jobs
- View Existing Cron Jobs: Scroll down to the Current Cron Jobs section to see all scheduled tasks.
- Edit a Cron Job: Click Edit next to the cron job you wish to modify, adjust the timing or command, then click Edit Line.
- Delete a Cron Job: Click Delete next to the cron job to remove it.

Step 4: Troubleshooting Cron Jobs
- Check Email Notifications: Review cron job email outputs for errors if tasks aren’t running as expected.
- Redirect Output to a Log File:
Modify the cron command to log output:
/usr/bin/php /home/username/public_html/script.php >> /home/username/logs/cron.log 2>&1 - Ensure Correct File Permissions:
Make sure the script is executable:
chmod +x /home/username/scripts/backup.sh - Check Absolute Paths: Always use full paths to the interpreter (e.g., /usr/bin/php) and scripts.
Conclusion
Managing cron jobs in cPanel simplifies the automation of repetitive tasks such as backups, script executions, and maintenance activities. By following this guide, users can create, modify, and troubleshoot cron jobs with ease. Regular monitoring and logging of cron jobs ensure that scheduled tasks run smoothly and efficiently.
Should you have any inquiries about the guidelines, please feel free to open a ticket through your portal account or contact us at support@ipserverone.com. We’ll be happy to assist you further.