Search Our Database
How to Mount IPS1 Object Storage Bucket in MS Windows with Open-Source Utility
Introduction
The purpose of this article is to show a way to mount IPS1 Object storage bucket from a MS Windows System. Here’s the step in general:
- Create an Object storage bucket in IPserverone’s customer portal
- Download rclone open-source tool
- Run the Utility to mount the object storage as Windows drive
Create an Object storage bucket in IPserverone’s customer portal
1. First, Login to IP ServerOne customer portals go to the Object Storage in the cloud platform.
2. Create a bucket. At this case, the bucket named as “nbdata“
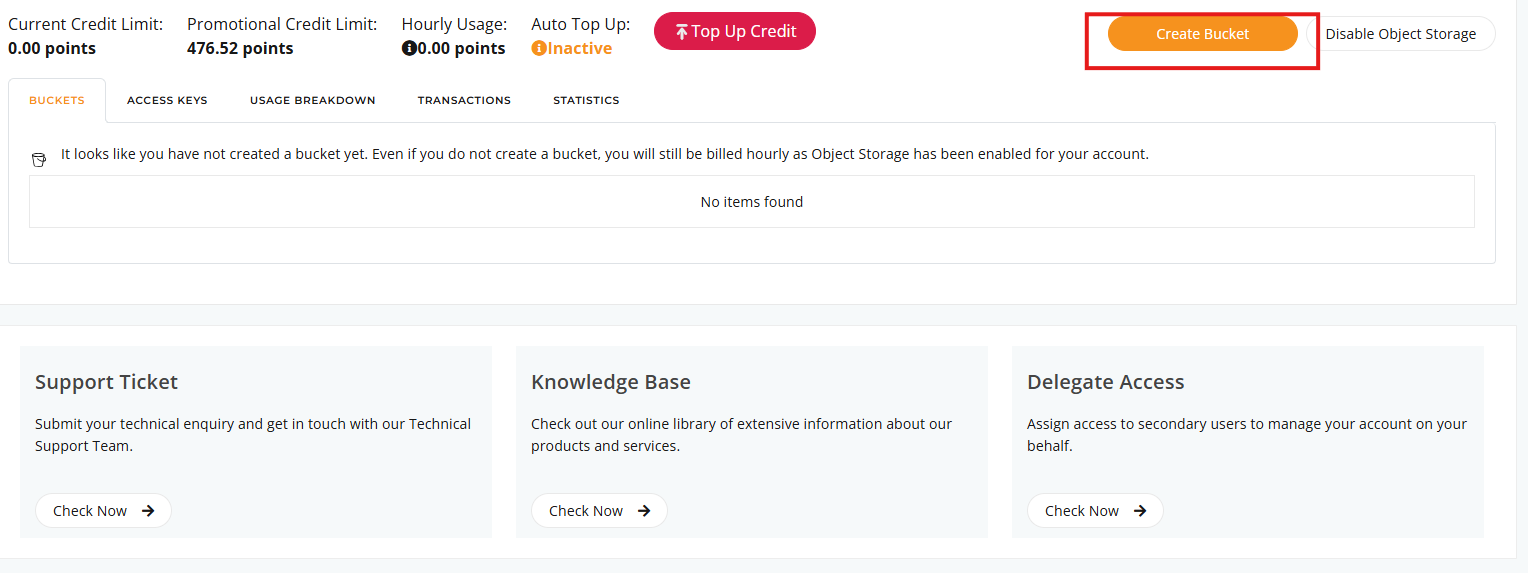
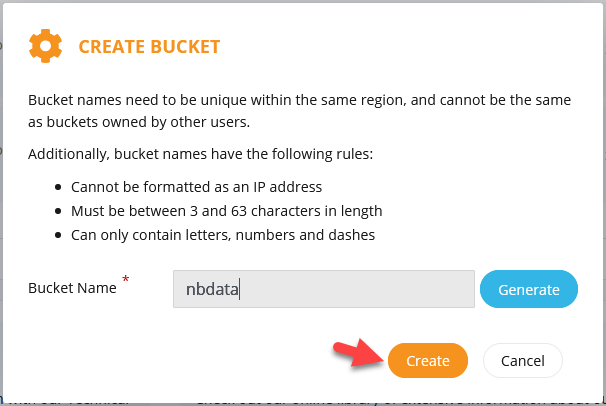
3. Once the bucket has been created, create an Access Key for this bucket
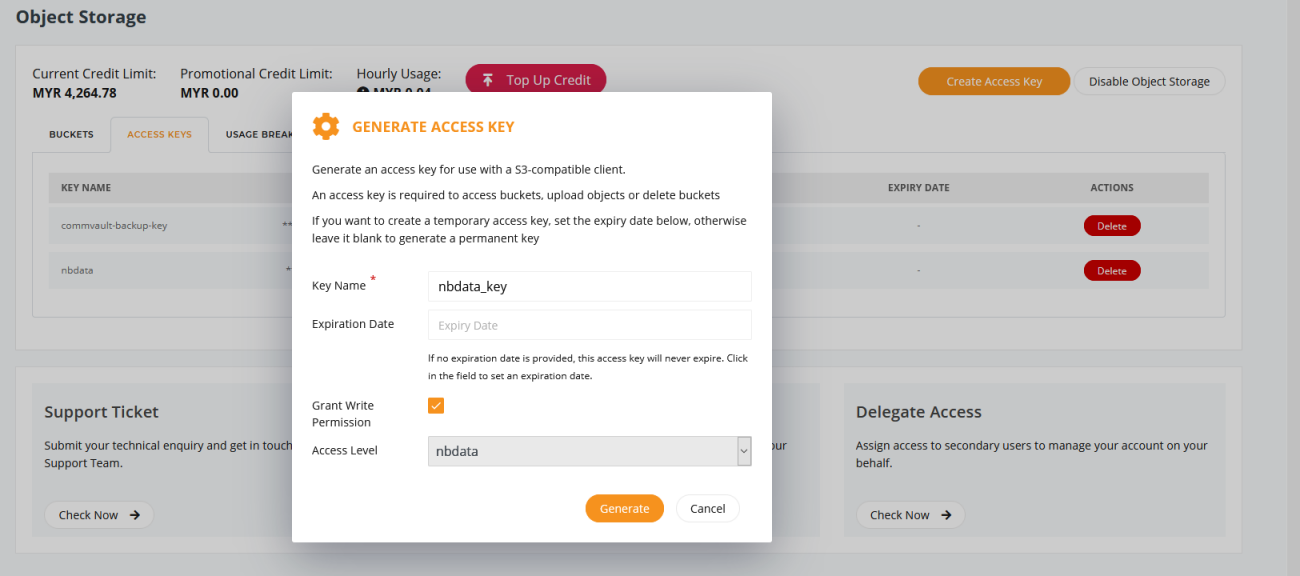
4. Once the Key has been created, Please copy the key, and keep into a safe place. As we will need the key for the software to access to the Object Storage Drive
Access Key : 6TZJ8X2EYS66********
Secret Key : VetThTTZJ73urYvn+NZRItXXxrx6epOY********
Download rclone open-source tool
rclone is a software that allow us to mount a Drive in Windows/Linux environment. We will mount the bucket that we created just now as X: Drive in MS Windows system.
1. First, we will required a href=”http://www.secfs.net/winfsp/”>Windows File System Proxy driver for rclone to be able to mount a Drive in Windows system. The Installation for WinFSP is quite straight forward by running the Setup Program in the archive file.
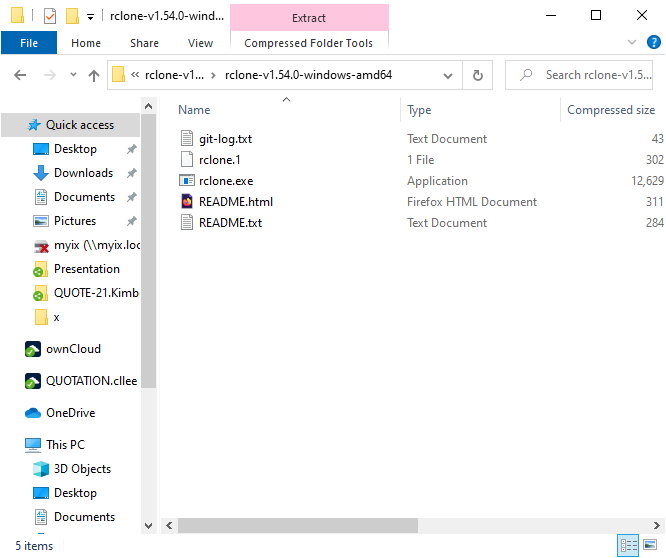
2. Download the rclone from https://rclone.org. It has no installation program, all we need to do is to unzip the files and store in a Folder.
Run the Utility to mount the object storage as Windows drive
3. To begin with the configuration for RCLONE, we will need to go to the command Prompt. Go to command line and use command as below.
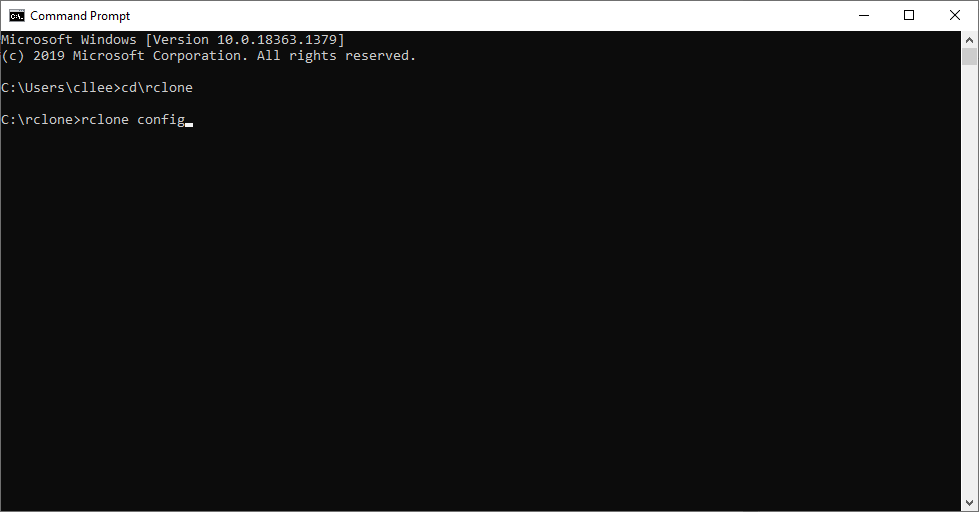
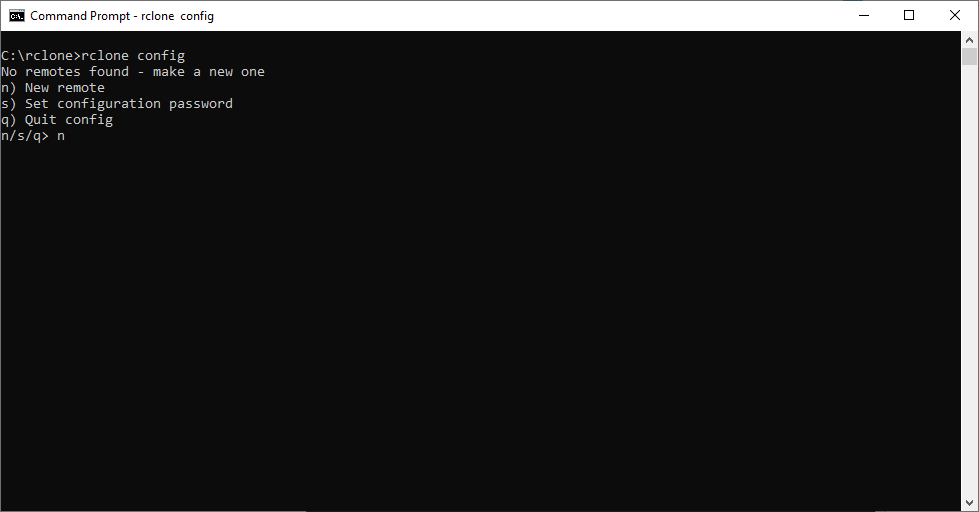
4. You are being prompt to key in the parameters to access to the Object Storage drive. Once you have ran the above command, key in “n” to create a new config
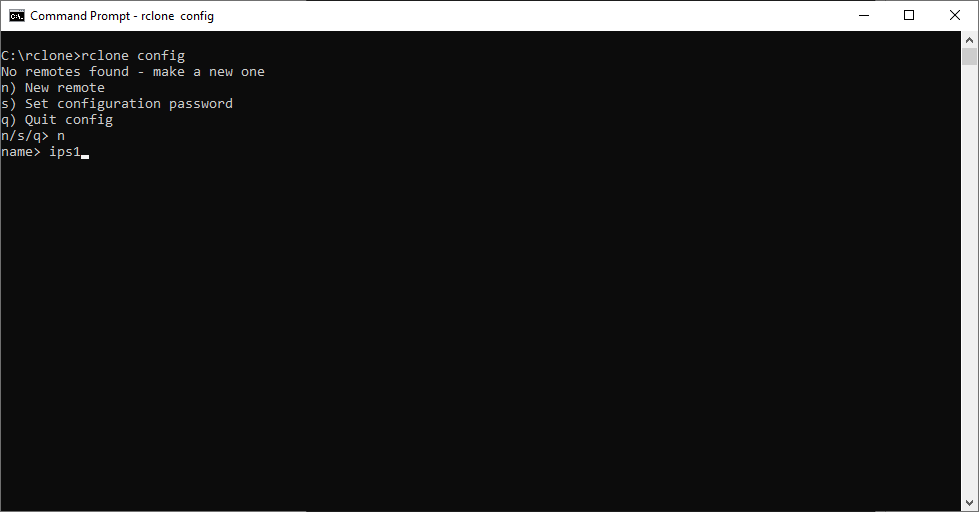
5. You may enter “ips1” to indicate as IP ServerOne Cloud Storage as the name of this connection.
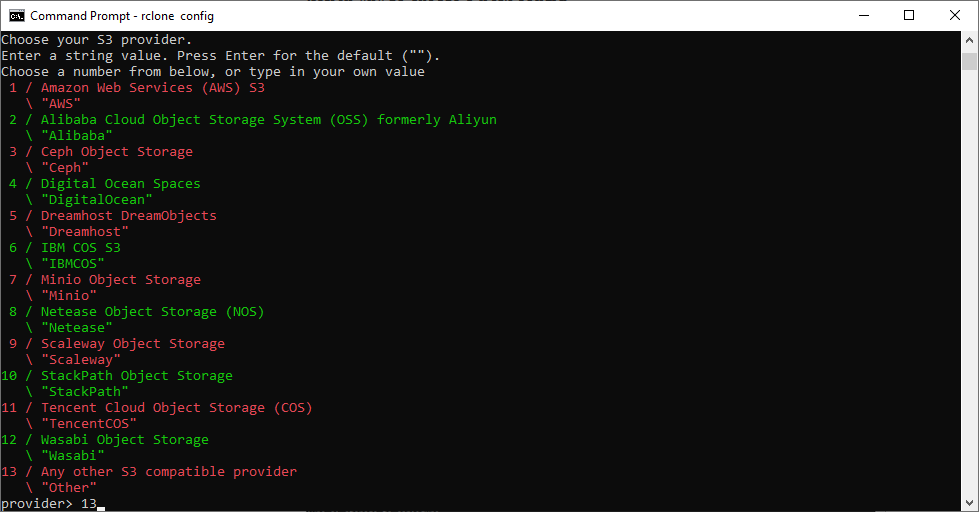
6. Once the name has been entered, the RCLONE will ask you to select the provider. At this section, you will required to enter “13” as Others S3 compatible provider

7. Enter “1” at the env_auth, and also the access_key and secret_key
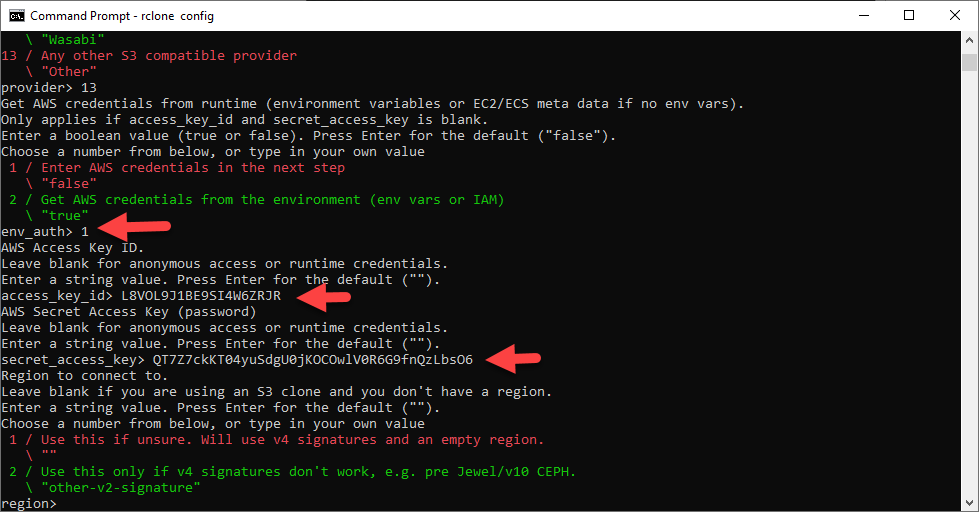
8. Key in “1” as the region, As for the endpoint URL, You will need to key in
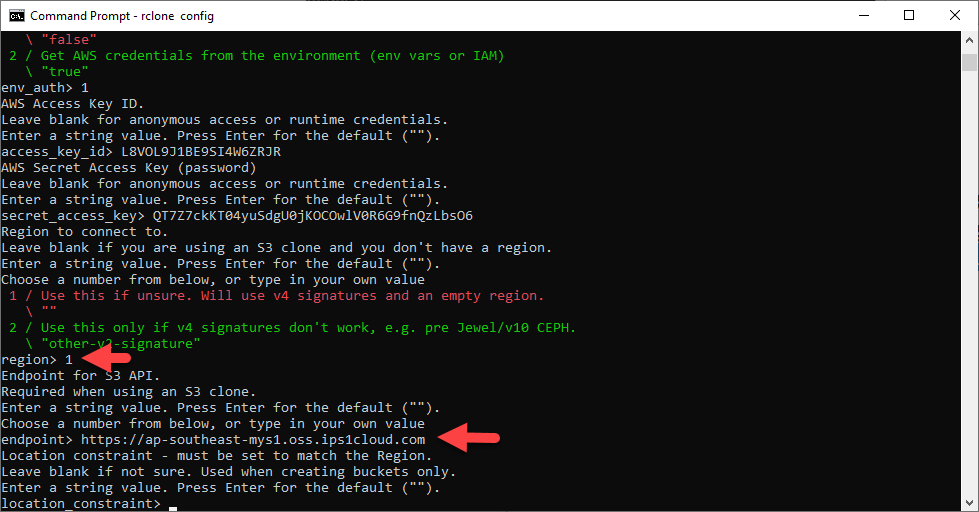
9. The last part would be key in the bucket name. Key in “nbdata” or the bucket name that you have just created earlier.
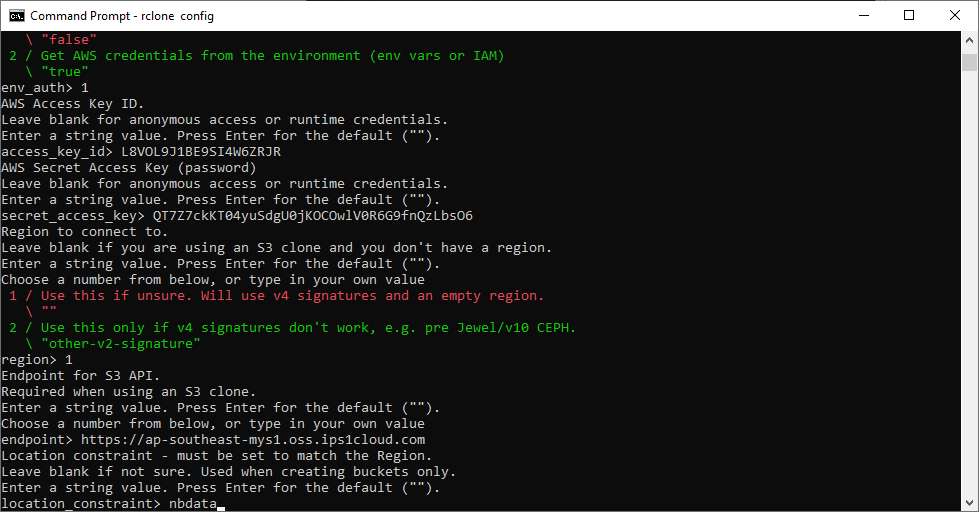
10. The last part would be key in the bucket name. Key in “nbdata” or the bucket name that you have just created earlier.

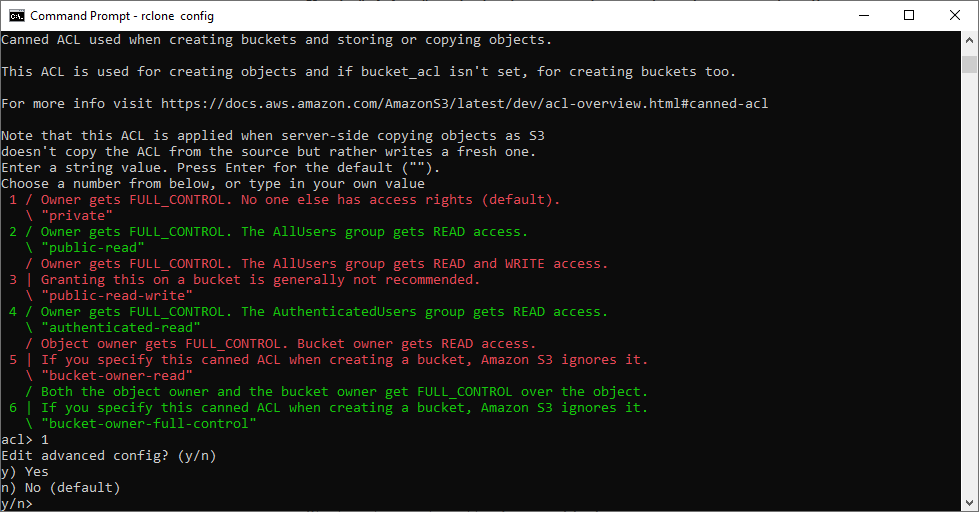
11. Select “1” for the ACL
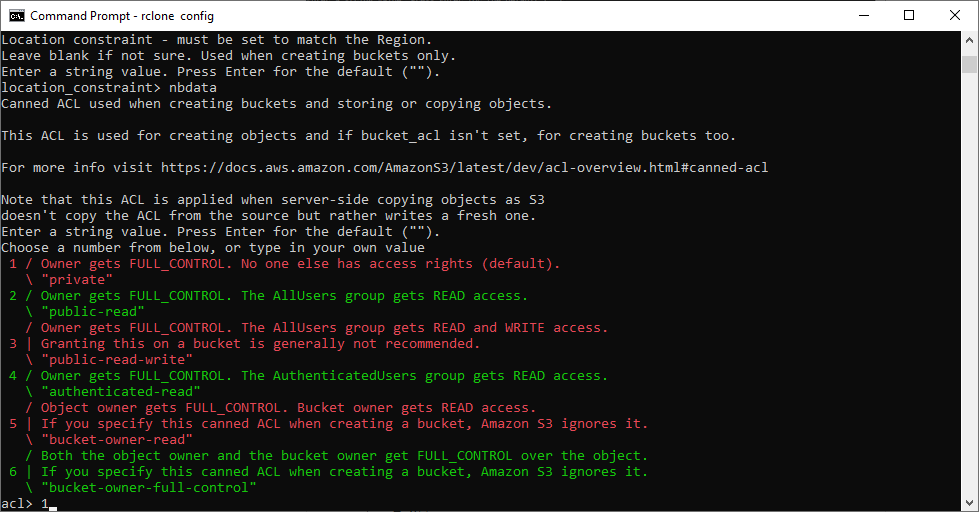
12. Once that’s done, it will come into advance editing for the configuration. At this page, just key in “n”
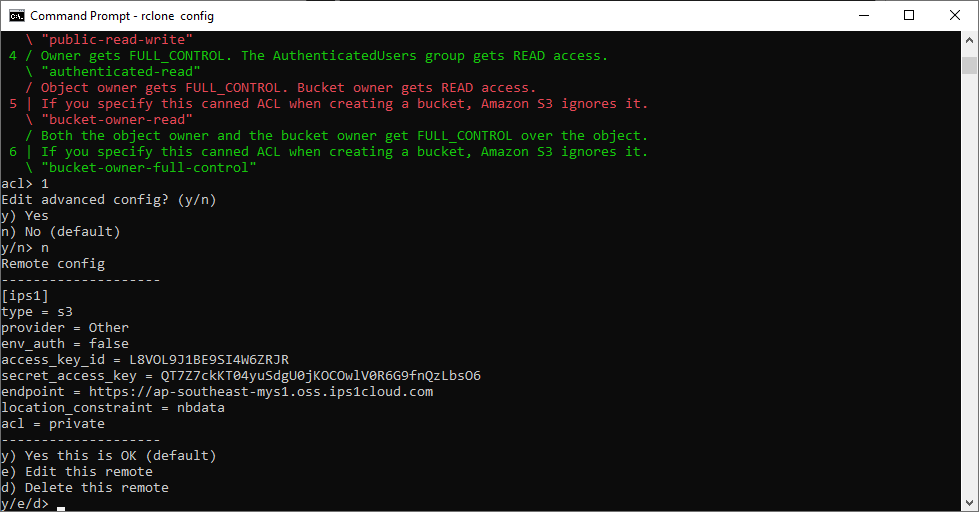
13. This would be the final confirmation for the setting. Press “y” to store the config, and then you can press “q” to exit the config screen.

14. If Everything works well, You can mount the bucket into a Drive X with the following command

15. You will need to keep this window open, and your X: Drive would be accessible, and SYNC with IPS1 Object Storage.
Conclusion
By following this guide, you can mount your IPS1 Object Storage Bucket as a network drive on your Windows machine, providing seamless access to your cloud-stored files. Rclone offers a versatile and open-source solution for integrating object storage into your local environment.
For additional assistance or if you encounter any issues, please contact our support team at support@ipserverone.com.
Article posted on 23 February 2023 by yccheong