Search Our Database
How to Register and Login to your Customer Portal
Introduction
The Customer Portal has been redesigned to offer a seamless and intuitive experience, providing customers with a centralized platform to manage all services efficiently. Through the enhanced portal, users can now access billing information, make payments, manage active subscriptions, and oversee their Cloud Instances—all from a single, user-friendly interface.
The revamped portal also introduces enhanced security features, such as two-factor authentication (2FA), to ensure account integrity and protect user data. Whether you are a new customer registering for the first time or an existing user navigating the updated interface, this guide will walk through the entire registration and login process step by step.
The portal aims to simplify the overall customer journey, giving customers greater control over their services and financial transactions, while reducing administrative complexity. This guide will also assist in locating essential information, such as your Customer ID, and preparing your account for launching your first cloud-based resources.
Prerequisites
- A valid and accessible email address for account registration and login.
- A mobile phone number to complete SMS verification (required for account activation).
- Stable internet connection to access the Customer Portal.
Step-by-step Guide
Step 1: Access the Customer Portal Registration Page
Navigate to the Customer Portal via the following link:
https://portal.ipserverone.com
Once on the homepage, locate and click on the Create Account button to begin your registration.

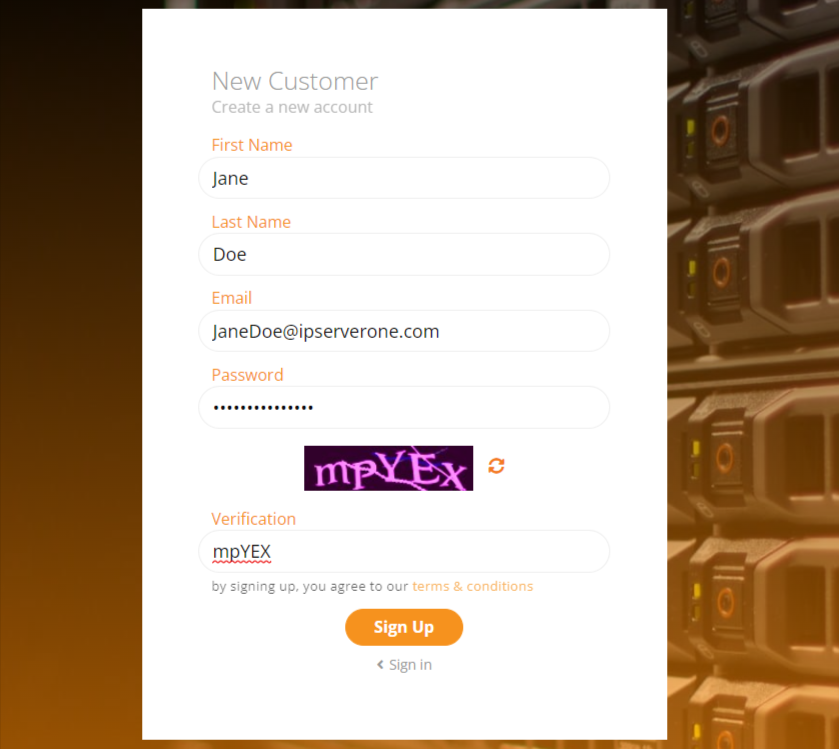
Step 2: Complete the Registration Form
Fill out the required details in the registration form:
- First Name
- Last Name
- Email Address (this will be your User ID)
- Password (ensure it meets the portal’s password complexity requirements)

Once completed, you will need to enter the verification code displayed (CAPTCHA) to proceed. After entering the code, click Sign Up to submit your registration.
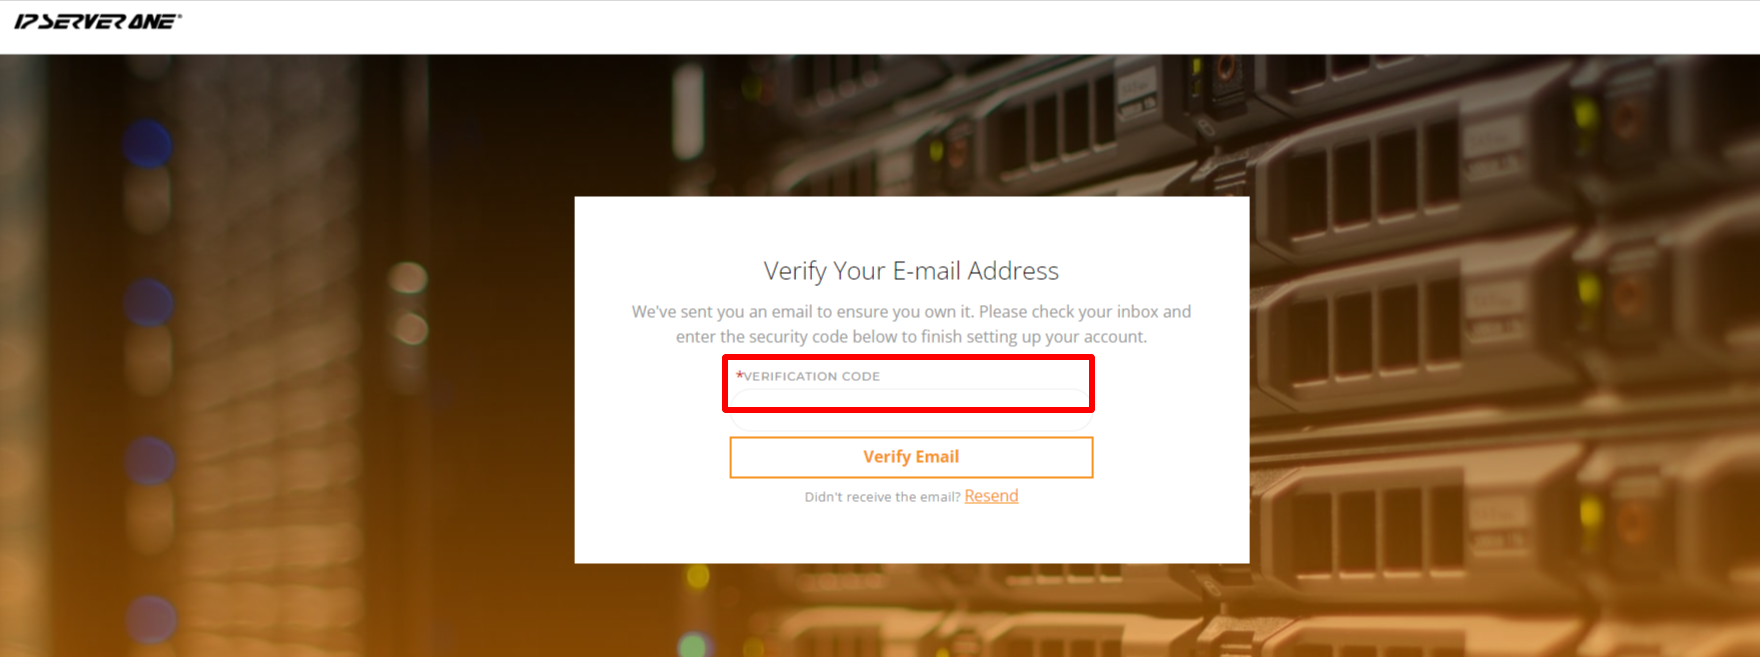
Step 3: Verify Your Email Address
Check your email inbox for a verification email from the portal. This email will include a one-time verification code. If the email is not found in your inbox, check your spam or junk folder.

Return to the Customer Portal and input the verification code to activate your account.
Step 4: Log in to the Customer Portal
Once email verification is successful, you will be redirected to the login page. Enter your registered email (User ID) and password to log in.
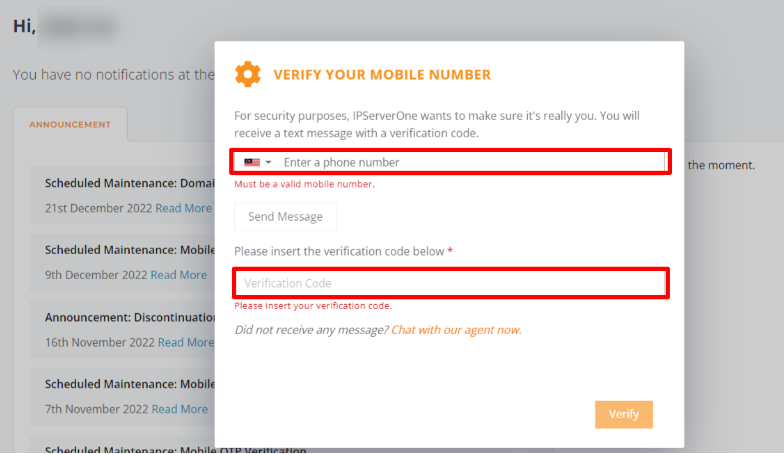
Step 5: Complete Mobile Phone Verification
Upon successful login, the portal will prompt you to verify your mobile number for additional security:
- Select your country from the dropdown list.
- Enter your mobile phone number.
- You will receive a One-Time Password (OTP) via SMS.
- Input the OTP into the portal and click Verify to complete mobile verification.

Step 6: Explore Your Dashboard
After successful mobile verification, you will be redirected to your Customer Dashboard. From here, you can:
- View and manage your billing and payment details.
- Monitor active subscriptions.
- Launch, manage, or terminate Cloud Instances.
Step 7: Locate Your Customer ID
Your Customer ID (e.g., C12345) is displayed at the top right corner of the Customer Portal, inside the user profile dropdown. This ID is used when referencing your account during support queries or transactions.
Step 8: Launch Your First Cloud Instance
Once your account setup is complete, you may try to launch your first instance – Launch your first Cloud Instance..
Conclusion
By following the steps outlined above, you will have successfully registered, verified, and accessed your account in the Customer Portal. You are now ready to begin managing your services and launching cloud instances through our centralized platform.
Should you have any inquiries about the guidelines, please feel free to open a ticket through your portal account or contact us at support@ipserverone.com. We’ll be happy to assist you further.

