Search Our Database
How to Register my own DNS Nameserver in my WHM cPanel
Introduction
You may register your own DNS nameserver for DNS hosting in your server. The criteria listed below must be verified to ensure they have been fulfilled.
Prerequisites
- Decide on a domain name to be used as the DNS hostname (you need at least two).
- Example:
- ns1.myhosting.com
- ns2.myhosting.com
- Example:
- You have at least two subscribed IP addresses in your cloud/dedicated hosting subscription to assign dedicated IPs for each DNS hostname.
- You have a working administrator-level login to your cPanel/WHM hosting control panel.
After verifying these criteria, here we start the steps to register your own DNS nameserver.
Step-by-Step Guide
Step 1: Configure the DNS Nameserver in WHM
- Go to Server Configuration > Basic WebHost Manager Setup.
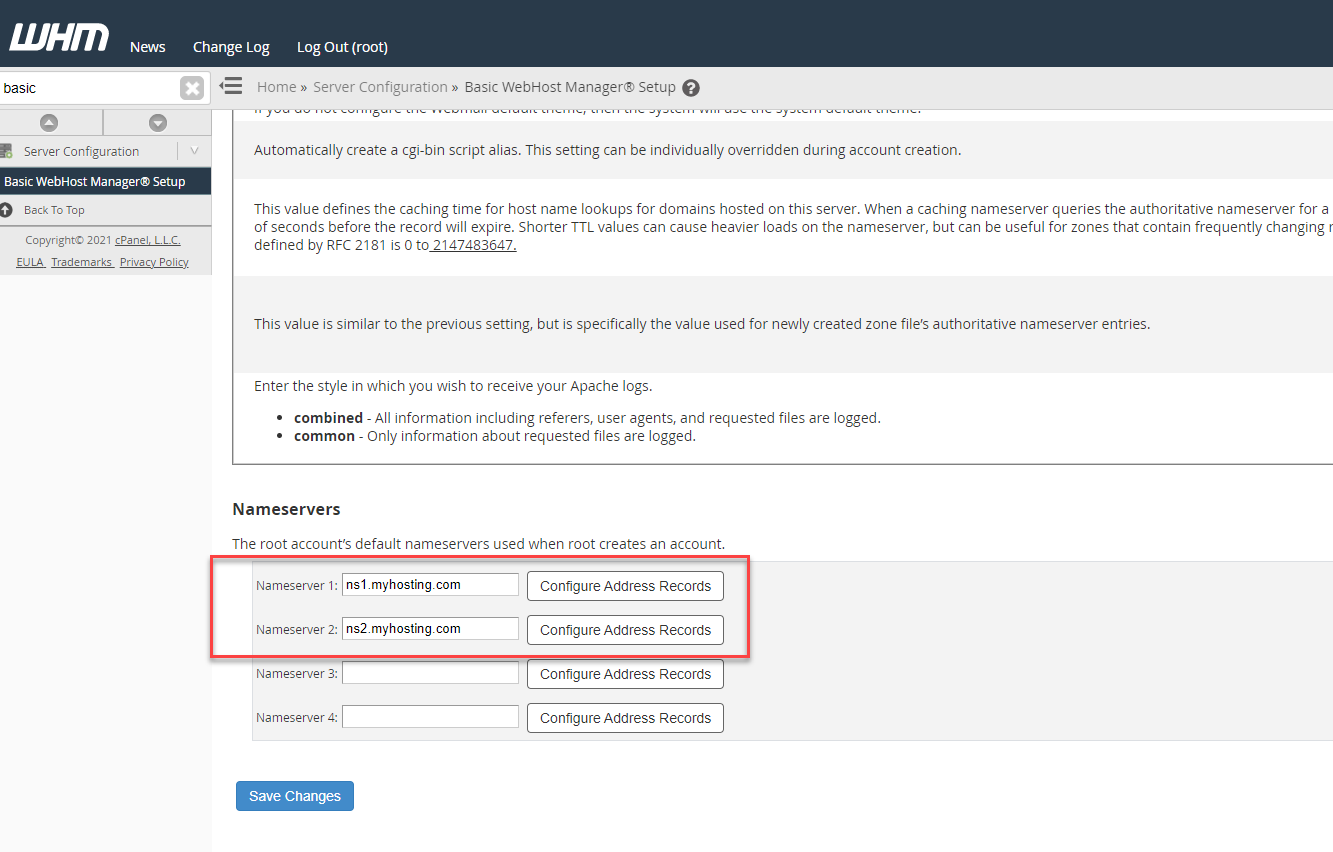
- Set up the DNS Nameserver of your cPanel server as your DNS nameserver, and then click Save Changes.
Step 2: Add Your Main Domain to cPanel
- If you intend to host your main domain (myhosting.com) on the same server, navigate to Home > Account Functions > Create a New Account to create a new cPanel account.
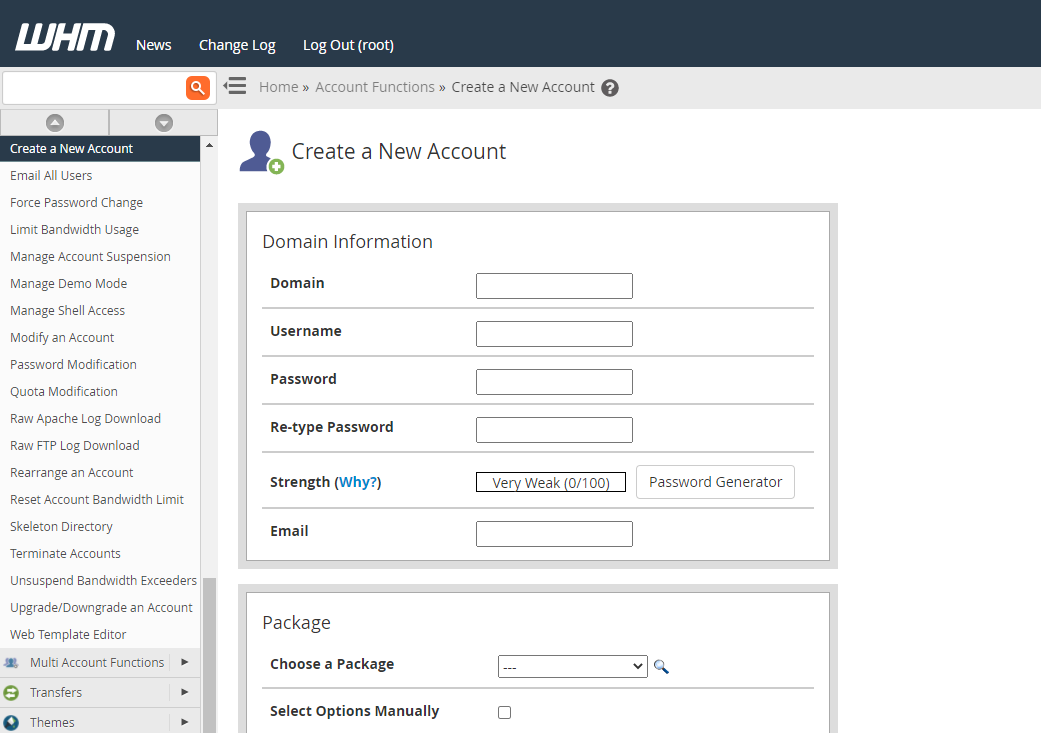
- Create a new cPanel account for the domain.
Step 3: Verify the DNS Zone in WHM
- After adding the hosting account, you should be able to see the domain DNS host available in Home > DNS Functions > DNS Zone Manager.
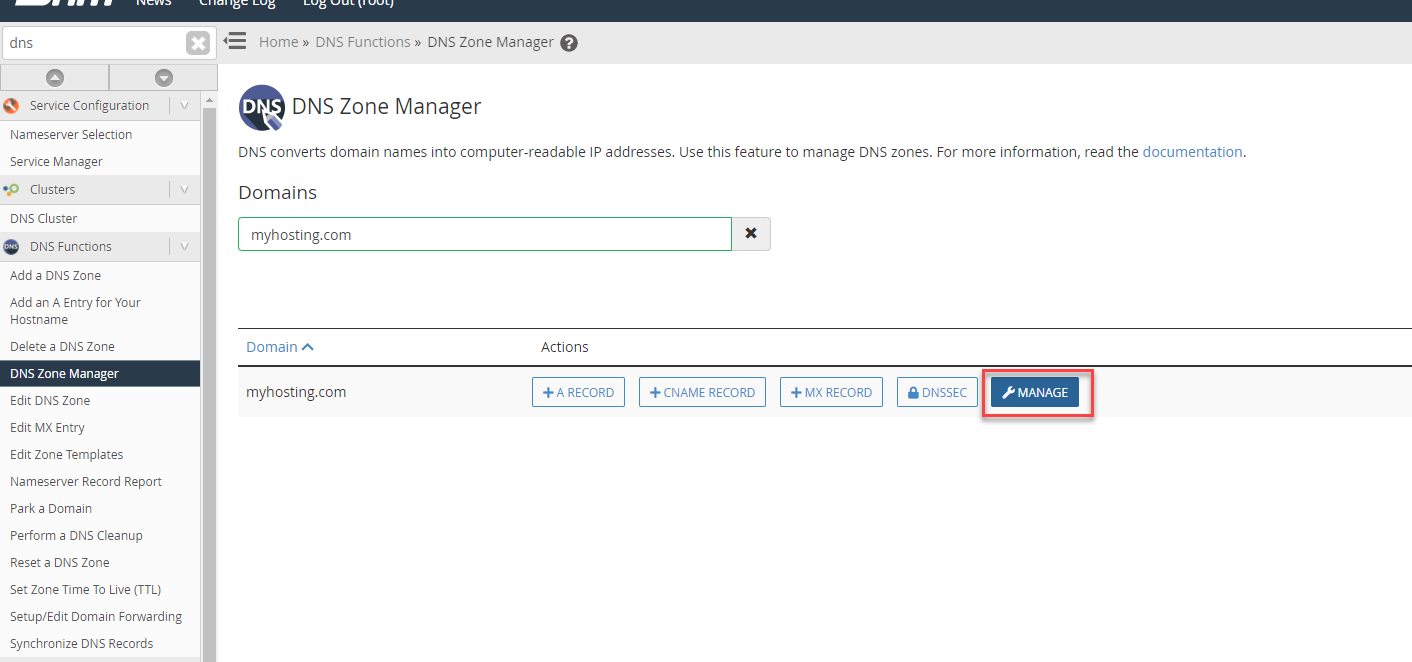
- Search for your main domain (in this example, we clicked on myhosting.com) and click Manage.
Step 4: Add A Records for Nameservers
- Add the A record for ns1 and ns2 DNS hostname and ensure it is pointing to your first IP and second IP.
- Example:
- ns1.myhosting.com → 123.123.123.123
- ns2.myhosting.com → 123.123.123.124
- Example:
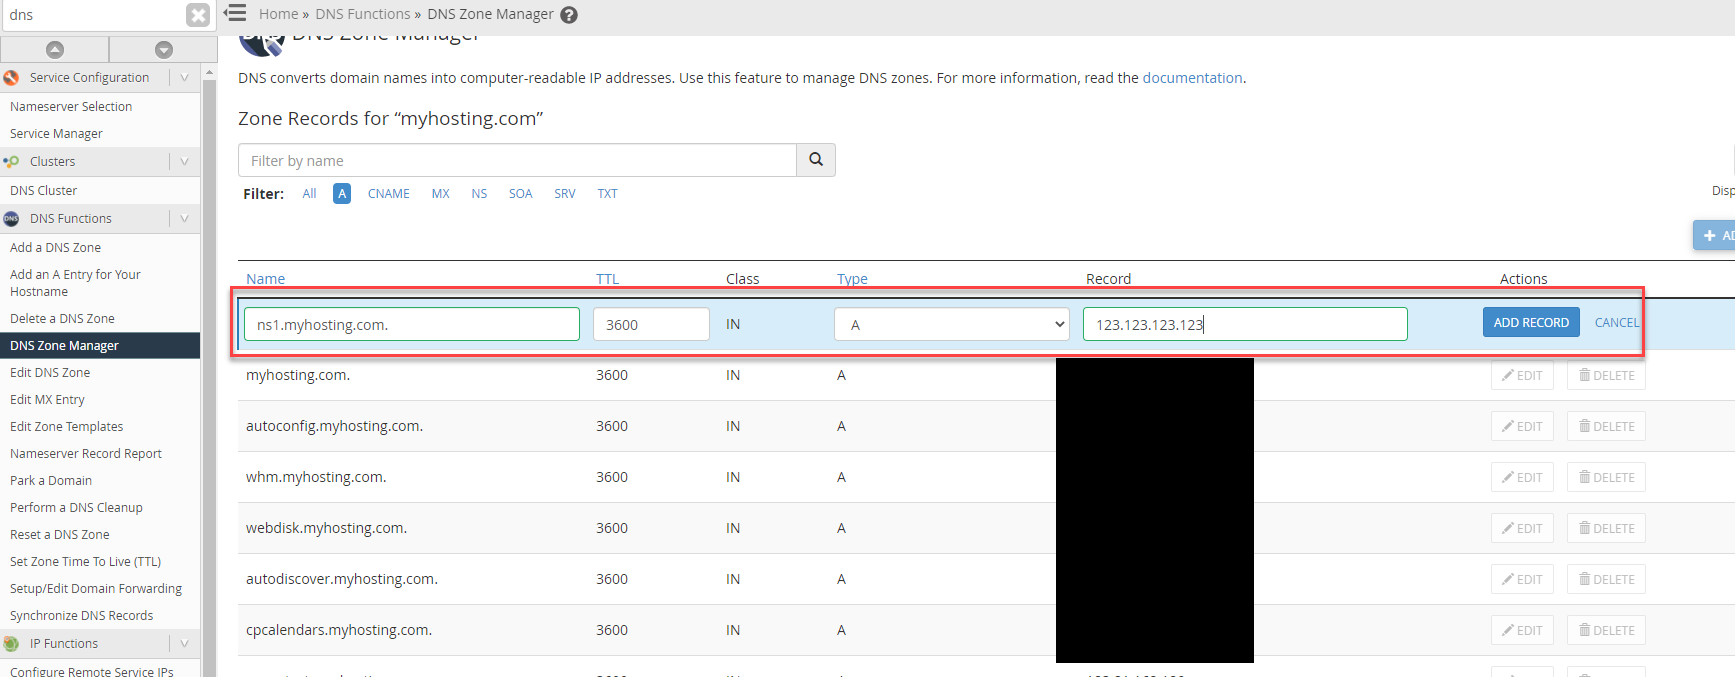
- Click the ADD RECORD button after inserting the hostname and IP.
Step 5: Register Your DNS Hostnames with Your Domain Registrar
- Next step is to register your DNS hostname ns1.myhosting.com and ns2.myhosting.com as publicly recognizable hostnames.
- You need to contact your domain registrar provider to do so.
- If your domain is registered with IPServerOne, contact Customer Support at:
- Email: cs@ipserverone.com
- Phone: +603-2026 1688
- You need to provide the exact hostname and its IP for accurate registration. Example:
ns1.myhosting.com 123.123.123.123
ns2.myhosting.com 123.123.123.124
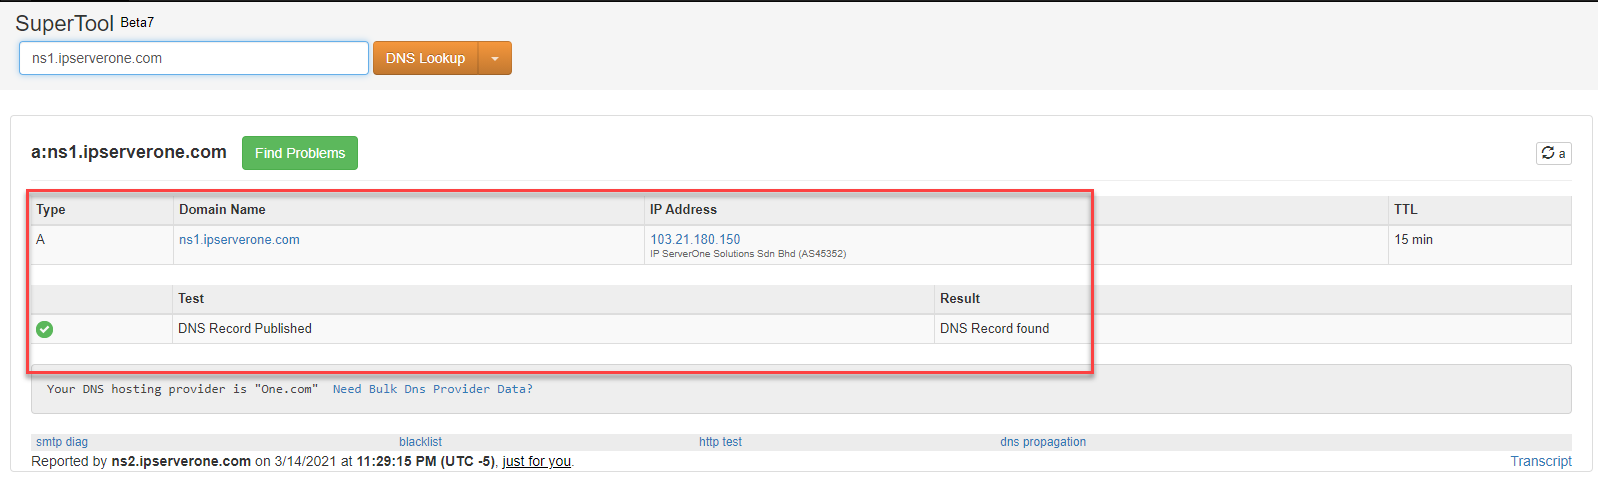
Step 6: Verify Your DNS Hostname Registration
- After the DNS hostname is registered, you can verify the validation of your DNS hostname in this website.
- If your DNS hostname is successfully published, you will see results confirming proper resolution.
Step 7: Point Your Domain to Your Custom DNS Hostname
- You may now start pointing your domain over to your DNS hostname.
Conclusion
You have now successfully registered and configured a DNS nameserver in cPanel/WHM. Your domain is now resolving through your own nameservers, giving you full control over DNS management.
If you need further assistance, please submit a support ticket or contact IPServerOne Customer Support at cs@ipserverone.com or +603-2026 1688.
Article posted by yccheong on 15 March 2021