Search Our Database
How to remove domain in WHM
Introduction
This guide provides a detailed, step-by-step process to help administrators remove a domain from a WHM (WebHost Manager) account. Removing a domain in WHM is typically necessary for administrators managing multiple domains who need to free up resources or discontinue hosting for a specific client.
Be aware that this process is permanent and cannot be undone. Therefore, it is strongly recommended to back up the account’s data before proceeding. Taking these precautions will help ensure that valuable data is retained should the need arise to restore the domain later.
Removing a domain is an administrative action that should only be performed with a full understanding of its implications. This guide will cover the prerequisites and guide you through each step to ensure a smooth and secure removal process.
Prerequisites
- Access Credentials: You must have the necessary login credentials for your WHM account.
- Backup: Create a full backup of the account associated with the domain to be removed. This precautionary step is critical, as once the account is deleted, the data cannot be recovered.
- Review Account Details: Double-check that the account selected for removal is correct to avoid any accidental deletion of important domains.
- User Notification: If the domain is actively used by clients, users, or other services, communicate this upcoming change to any affected parties.
Step-by-Step Guide
Step 1: Log In to WHM
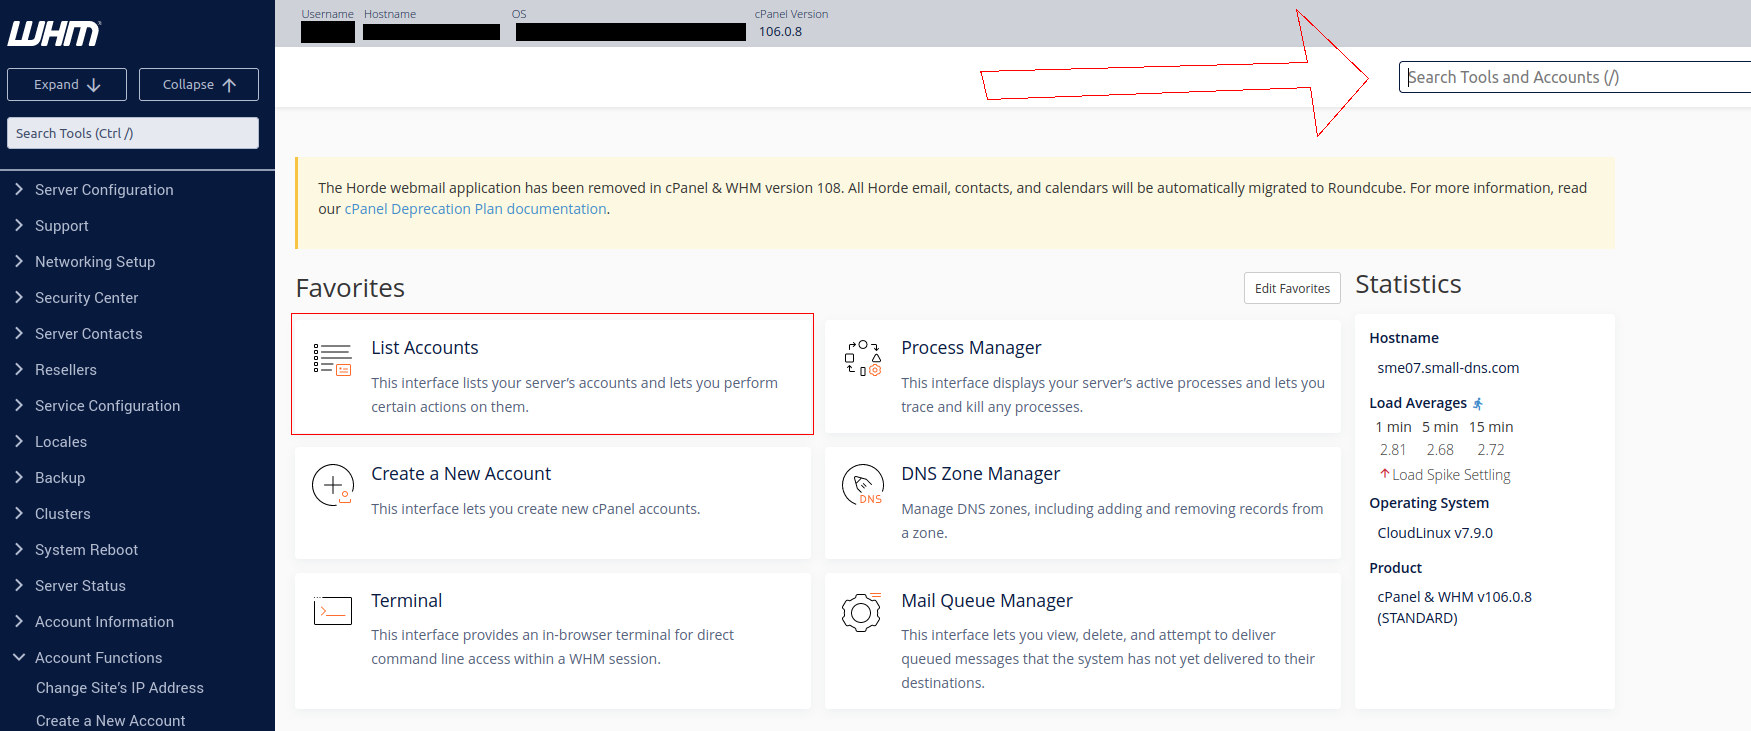
Access your WHM account by logging in with your administrator credentials. This will take you to the WHM main dashboard.
Step 2: Open the List Accounts Page
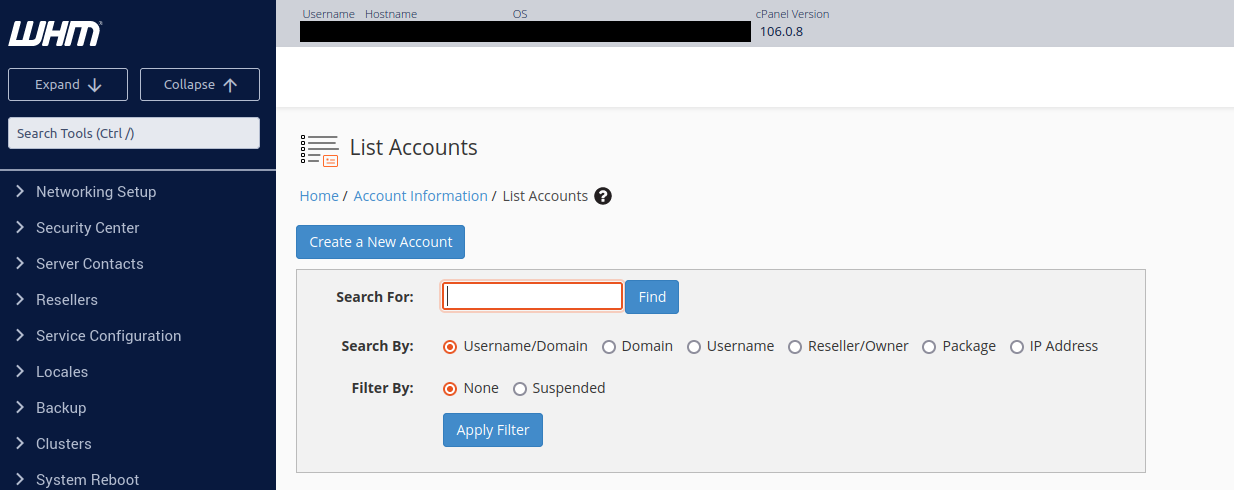
On the WHM dashboard, locate and click on List Accounts. Alternatively, type “List Accounts” in the WHM search bar to quickly access this section.
Step 3: Find the Domain to Remove
In the List Accounts section, scroll through the list or use the search bar to find the domain you intend to remove. Make sure the selected domain is the correct one.
Step 4: Expand Account Options
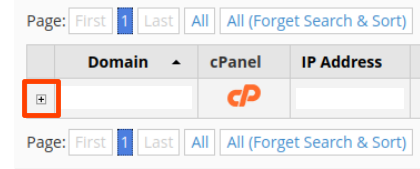
Next to the domain name, click the [+] icon on the left side to expand the options available for that account.
Step 5: Select Terminate Account
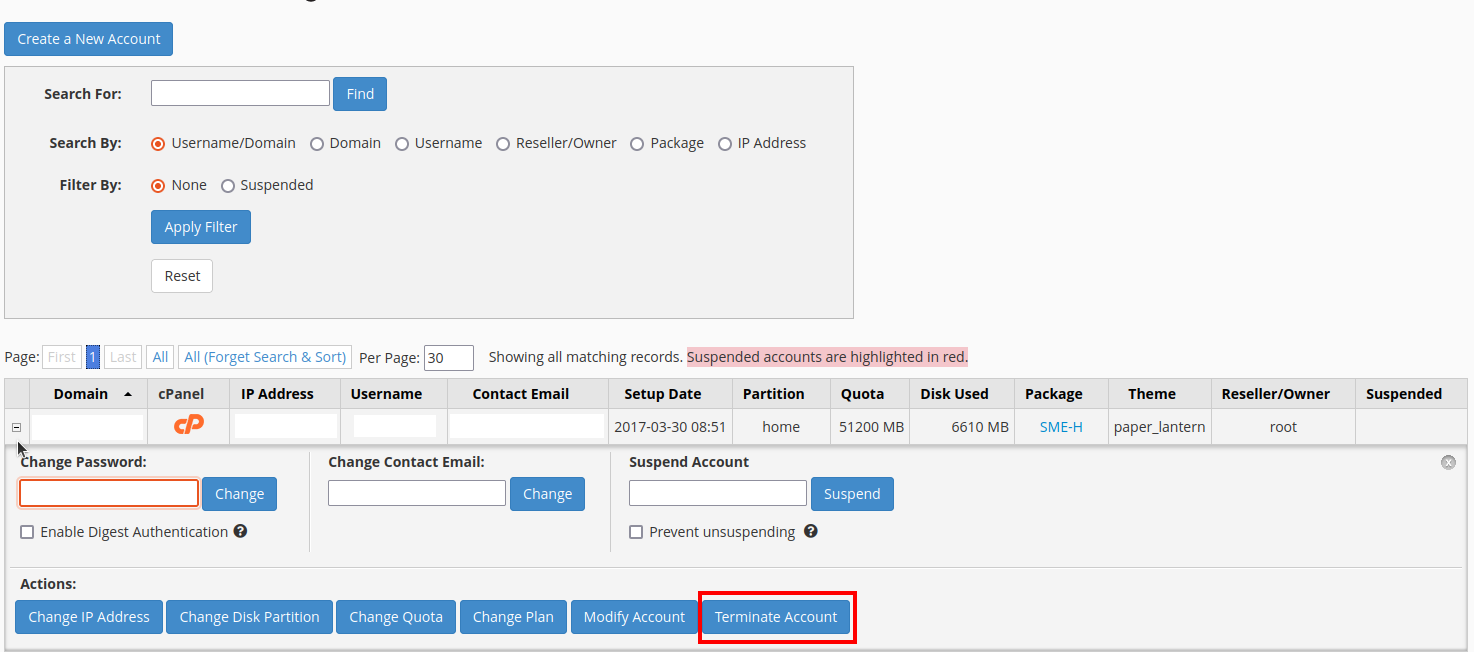
Within the expanded account options, locate and click on Terminate Account. Before confirming, ensure that you are certain about deleting this account, as this action cannot be undone. Verify that a backup exists in case any future data retrieval is needed.
Step 6: Confirm Account Termination
A prompt will appear asking for confirmation. Click on Yes, remove this account to proceed with the deletion.
Step 7: Completion and Confirmation
Once the process is complete, a confirmation message will appear, indicating that the domain has been successfully removed from WHM.
Conclusion
By following these steps, you have successfully removed a domain from your WHM account. Remember that this action is permanent, so taking a backup before deletion is essential.
Should you have any inquiries about the steps outlined, please feel free to email us at support@ipserverone.com. We’ll be happy to assist you further.
Article posted on 4 October 2022


