Search Our Database
How to setup Mailing Lists in cPanel
Introduction
This guide will walk you through the process of setting up a mailing list in cPanel using the Mailman application. With Mailman, you can create a ‘discussion list,’ an interactive mailing list where members can communicate with each other. This feature is useful for communities or groups that need a collaborative platform to share messages and updates.
By the end of this guide, you’ll be able to create, manage, and customize a mailing list for your domain, giving you control over member access and communication flow.
Prerequisites
- Access to cPanel.
- Basic understanding of email and mailing list concepts.
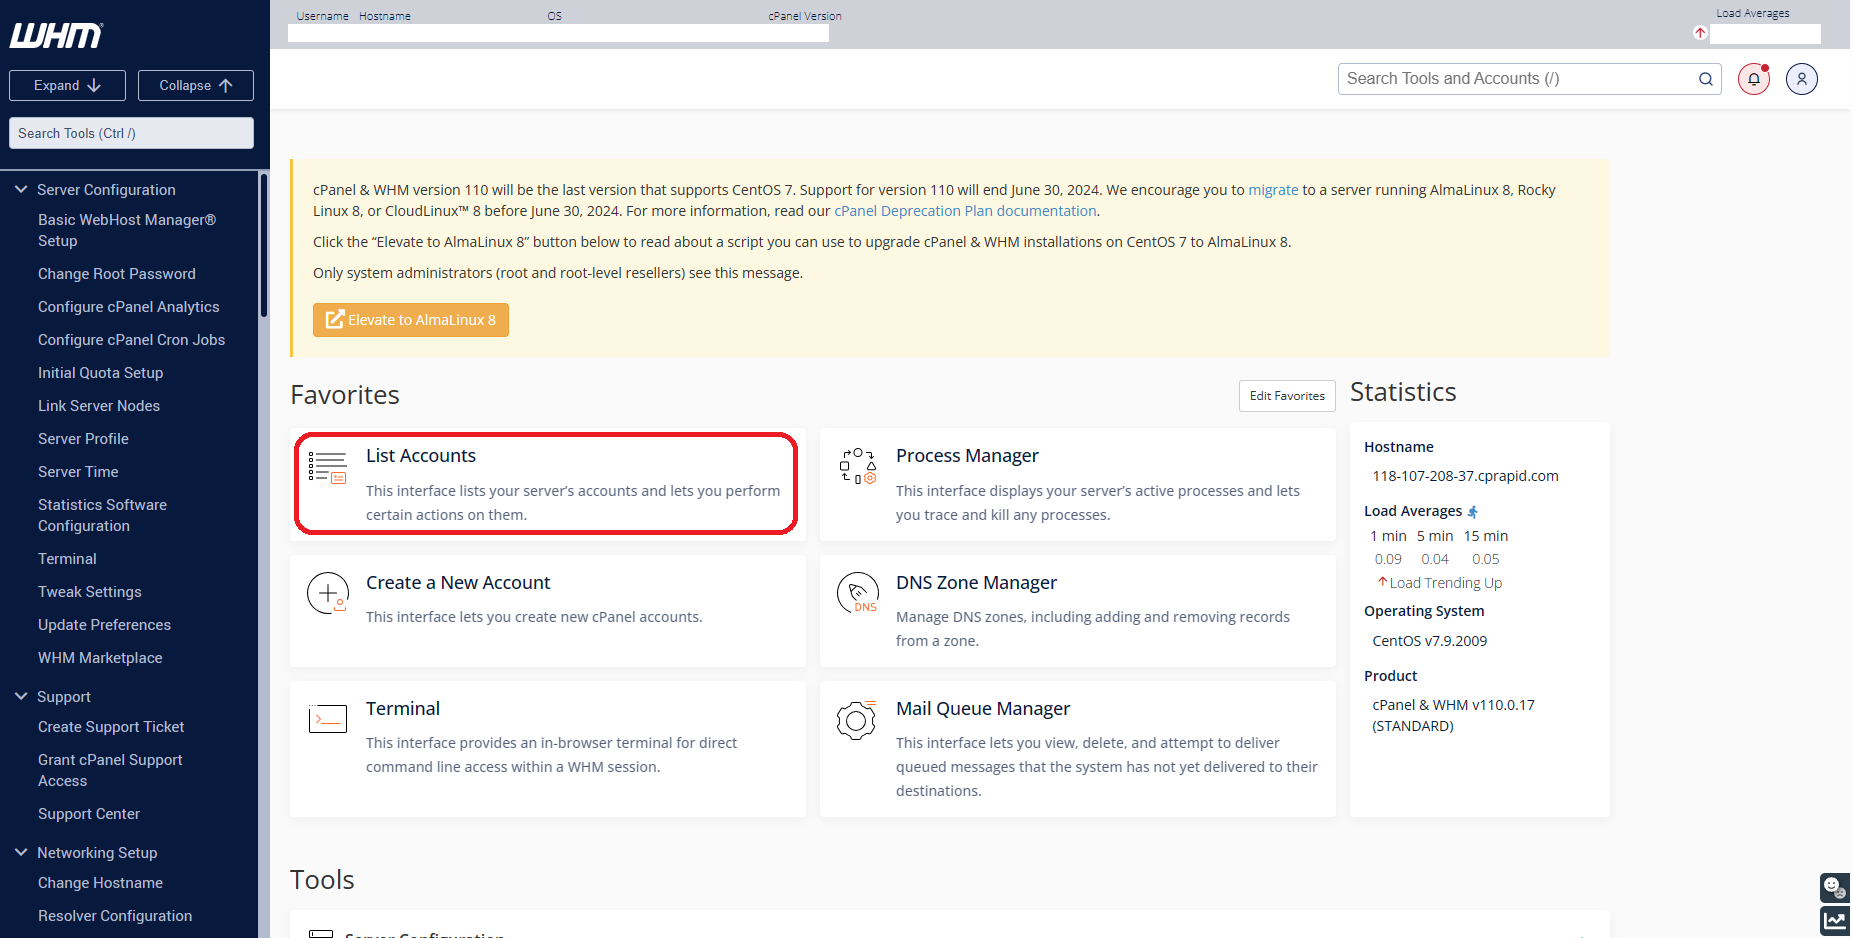
Step 1: Login to cPanel
- Click on List Accounts
- Login to your user Account
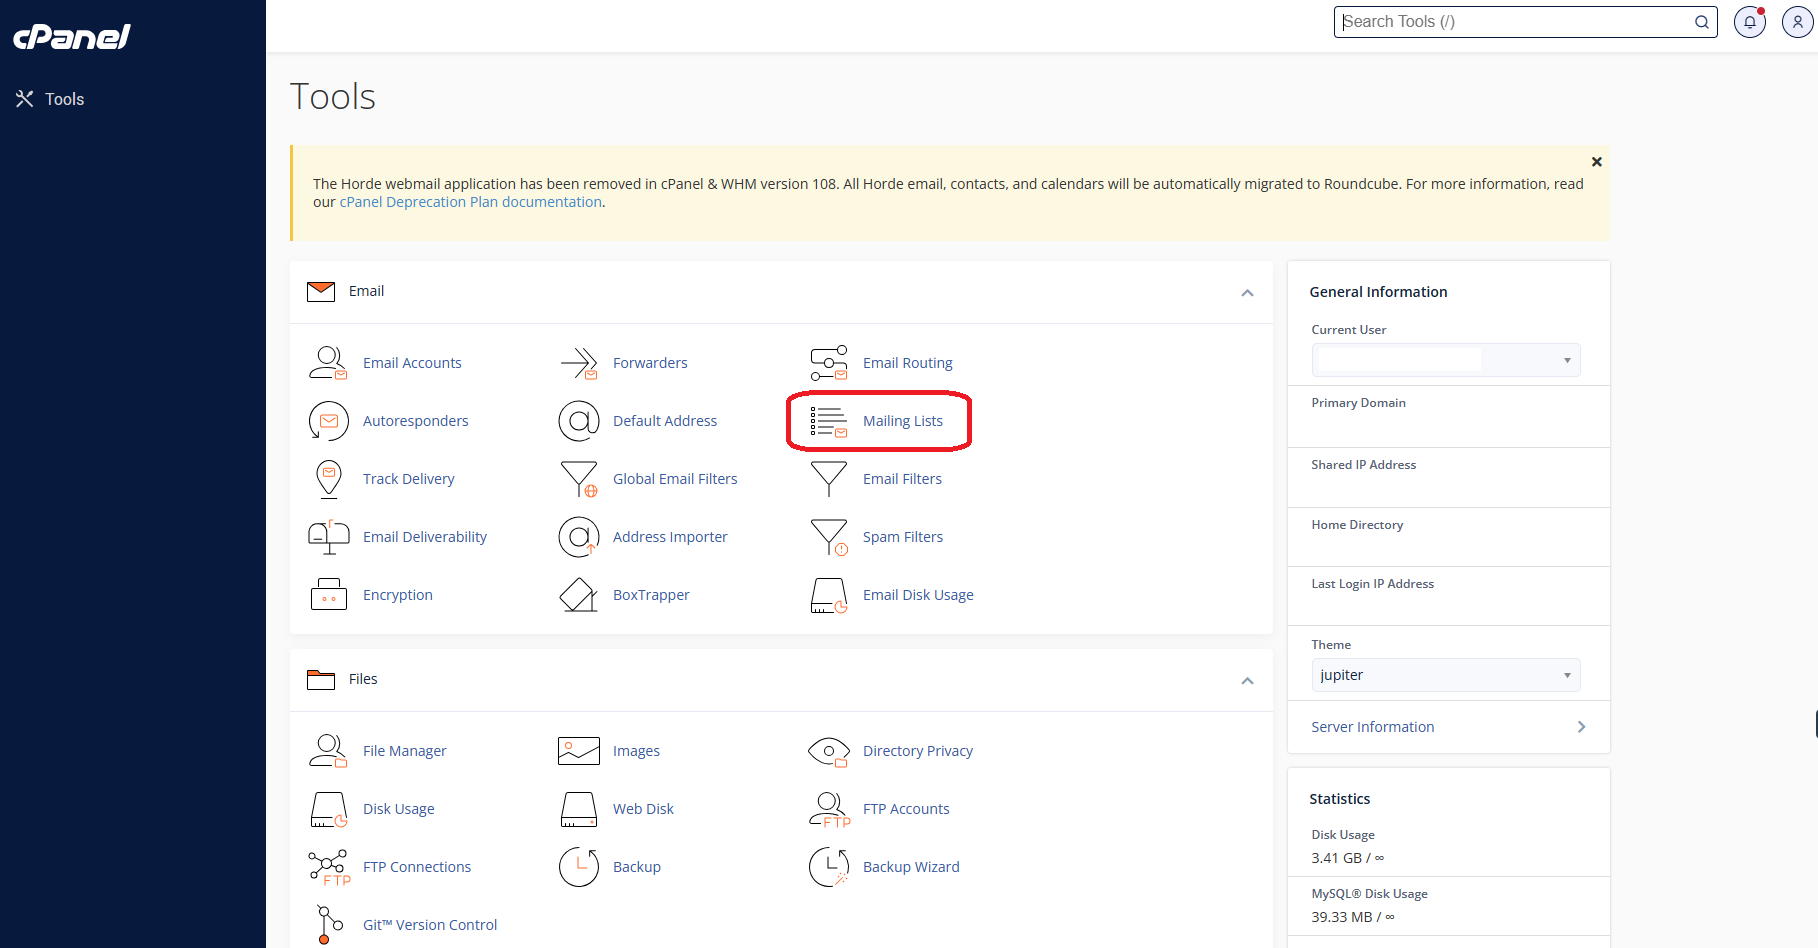
Step 2: Navigate to Mailing Lists
In the ‘Email’ section, click on the Mailing Lists link or icon.
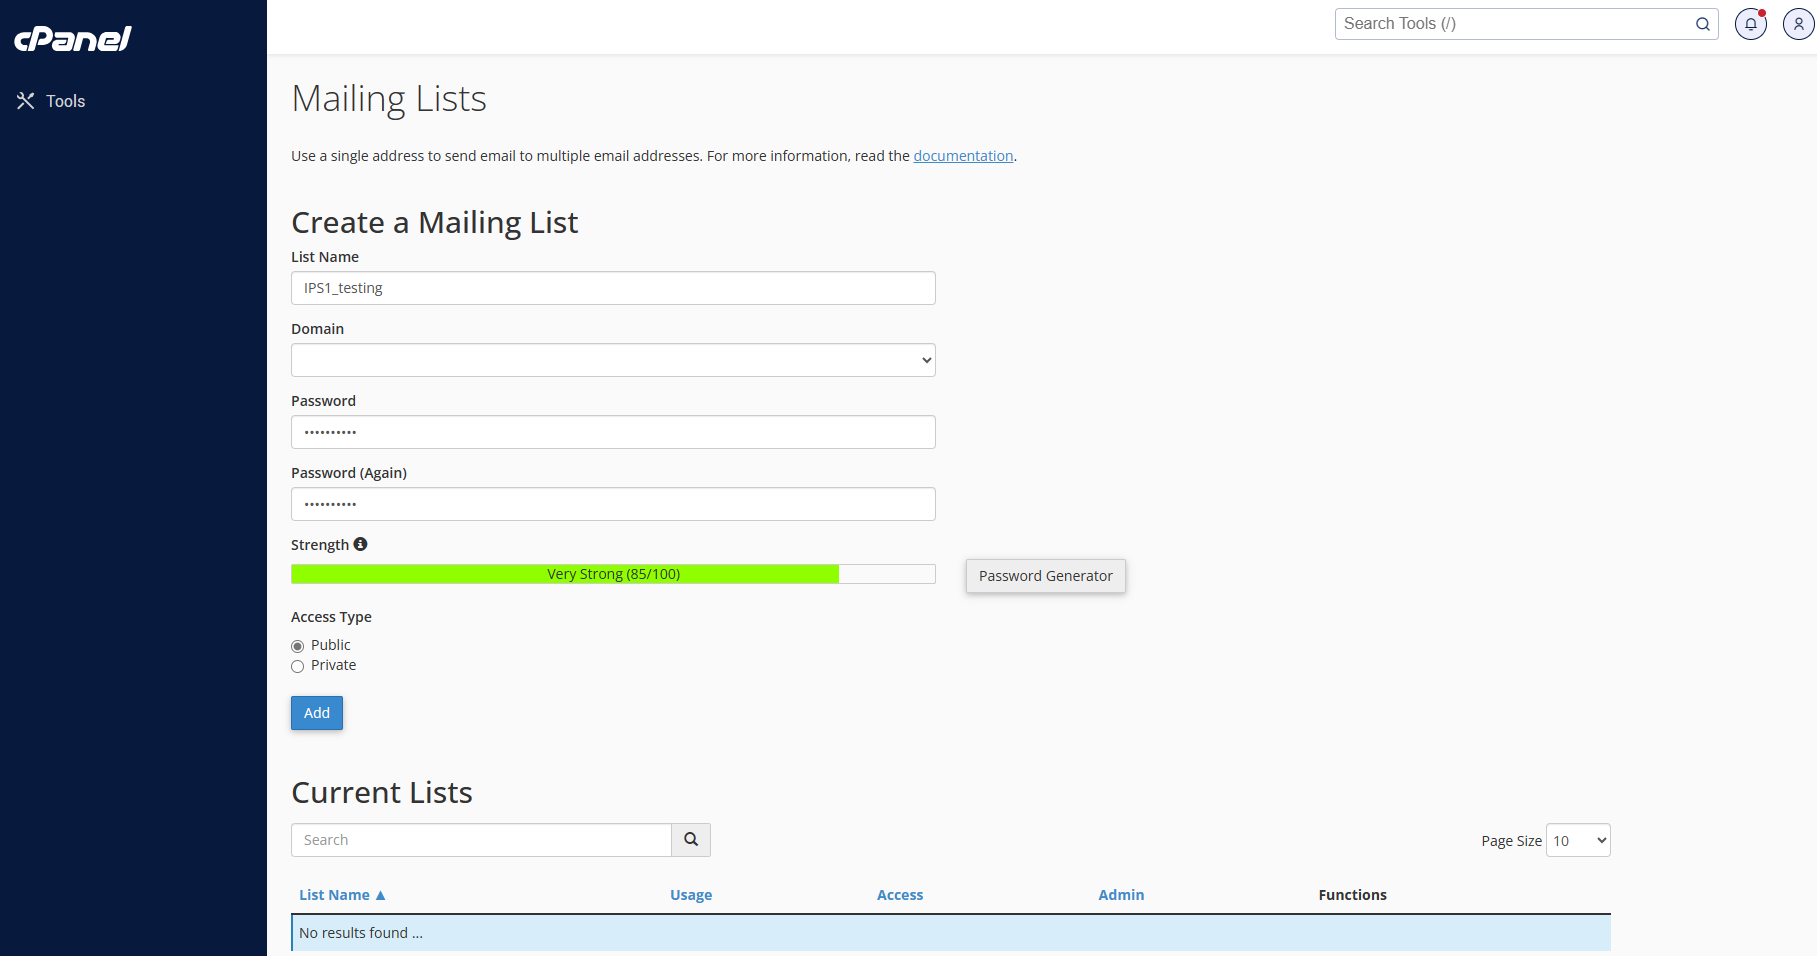
Step 3: Create a New Mailing List
- Fill in the Mailing List details:
-
- List Name: Enter a name for your mailing list. This should be an email-friendly username without spaces, using letters, numbers, underscores, periods, or dashes.
- Domain: Choose the domain which you want to create mailing list
- Password: Input your password
- Access Type: Choose between ‘Public’ (anyone can join) or ‘Private’ (admin approval required for new members).
- Add the Mailing List:
Click the ‘Add’ button to create your mailing list. You’ll receive a confirmation message once the list is successfully created.
Step 4: Using the Mailing List
- New members can join the public list by sending an email to [listname]-join@yourdomain.com.
- To post a message to the list, members should send an email to [listname]@yourdomain.com.
- Special email addresses include [listname]-leave@yourdomain.com for unsubscribing and [listname]-owner@yourdomain.com to reach the list owner/moderators.
Step 5: Manage Your Mailing List
- Change the list type by clicking Public or Private in the Current Lists section.
- Use Delete to remove the list and Change Password to update the list’s password.
- Add or remove list administrators using the Delegation link.
- For advanced configurations, visit the Mailman list management page by clicking Manage.
Conclusion
By following the steps in this guide, you’ve successfully created and configured a mailing list using Mailman in cPanel. You can now manage your list, control membership, and facilitate discussions among your group members. Whether for a public or private list, Mailman provides flexibility and ease of management for all your mailing needs.
If you need further assistance or encounter any issues, feel free to contact our support team at support@ipserverone.com.


