Search Our Database
How to setup email on iPhone
Introduction:
This article explains how to set up an email account on an iPhone using the default Mail app. It is intended for iPhone users who want to configure their email manually or through auto-setup for various email providers. The guide covers essential steps to add email accounts, including custom email accounts from third-party domains or services. This process can be applied to any iPhone running iOS 12 or later.
Prerequisites:
- An iPhone running iOS 12 or later.
- Your email address and password.
- Incoming and outgoing mail server settings (if applicable, for custom domains).
Step-by-Step Guide:
Step 1: Open the Settings app
- On your iPhone’s Home screen, tap the setting icon.
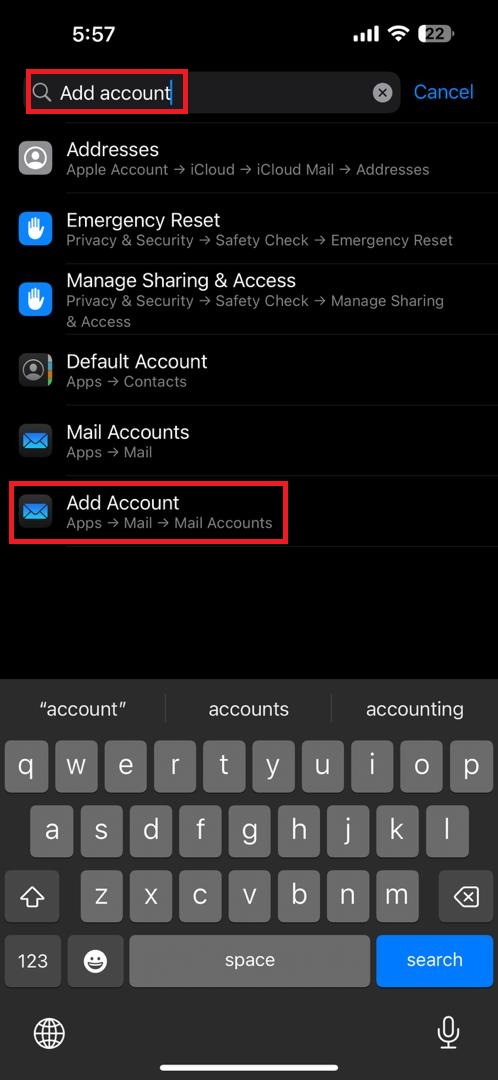
- Search for “add account” and tap the “add account”
Step 2: Add a new email account
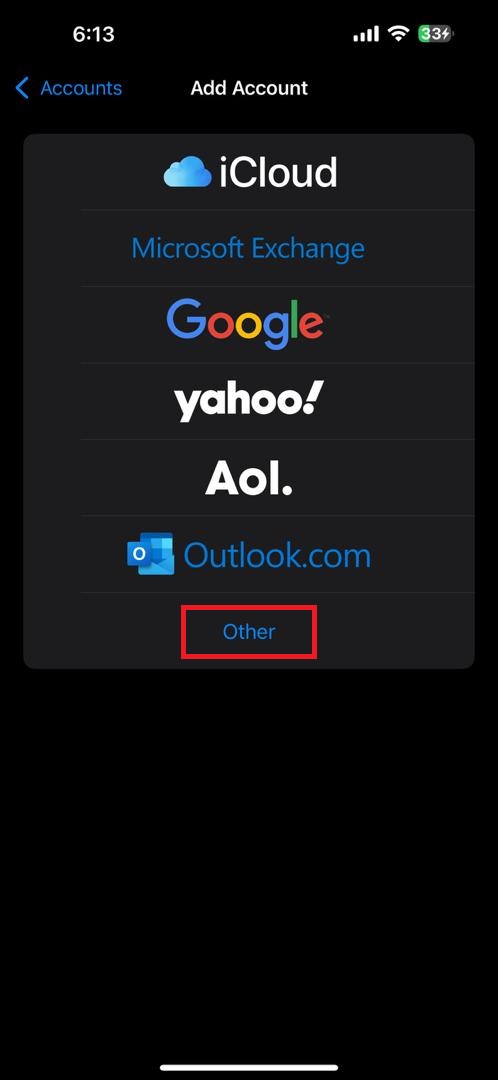
- Tap Add Account.
- You will see a list of popular email providers (iCloud, Google, Yahoo, Outlook, etc.). If your email provider is listed, tap on it.
Step 3: Configure your email provider
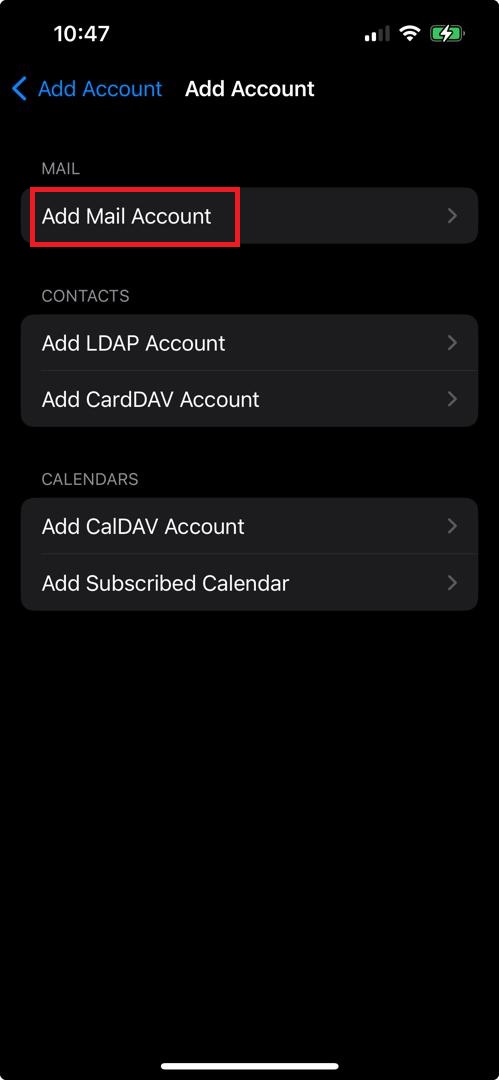
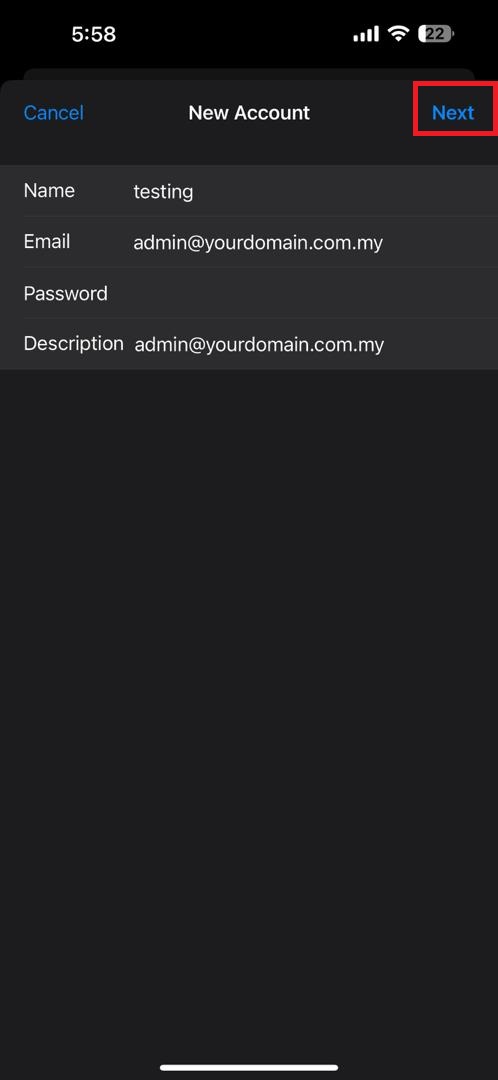
- For manual setup (custom domains or providers not listed):
Step 4: Enter incoming and outgoing mail server details (for custom accounts)
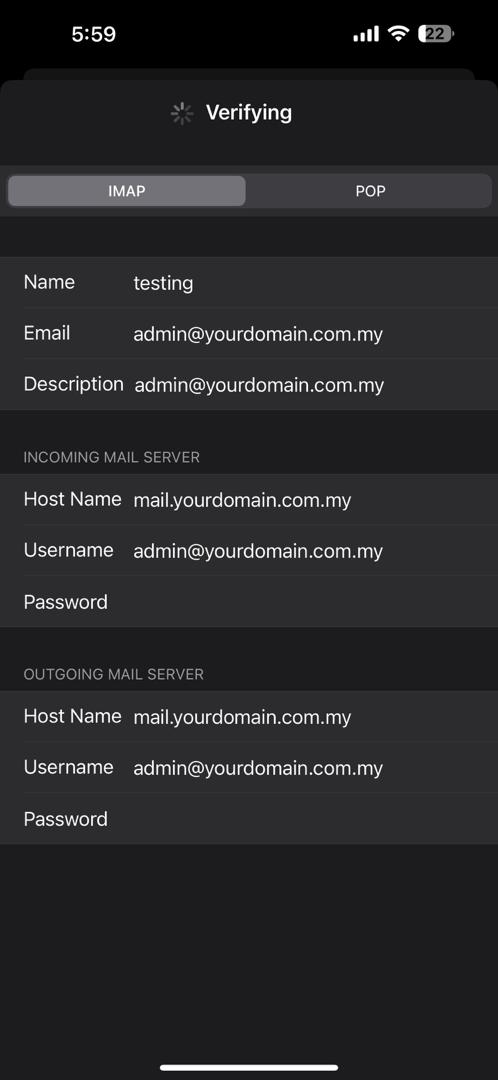
- You will need to choose either IMAP or POP3
- Incoming Mail Server:
- Host Name: Enter the incoming server provided by your email service (e.g., mail.yourdomain.com).
- Username: Enter your full email address.
- Password: Enter your email password.
- Outgoing Mail Server:
Step 5: Complete the setup
- After entering the mail server details, tap Next.
- Your iPhone will verify the settings. If everything is correct, you’ll see a confirmation screen.
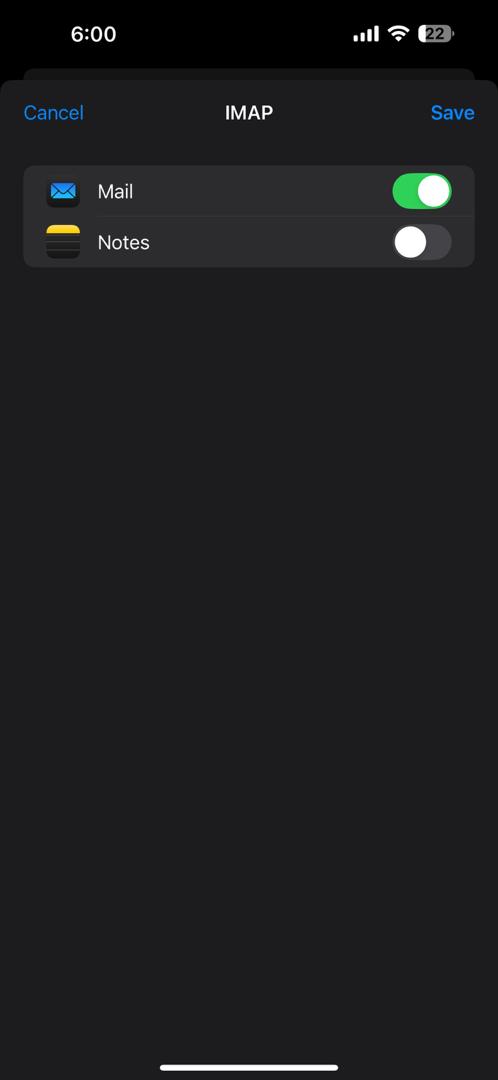
- Tap Save to complete the process.
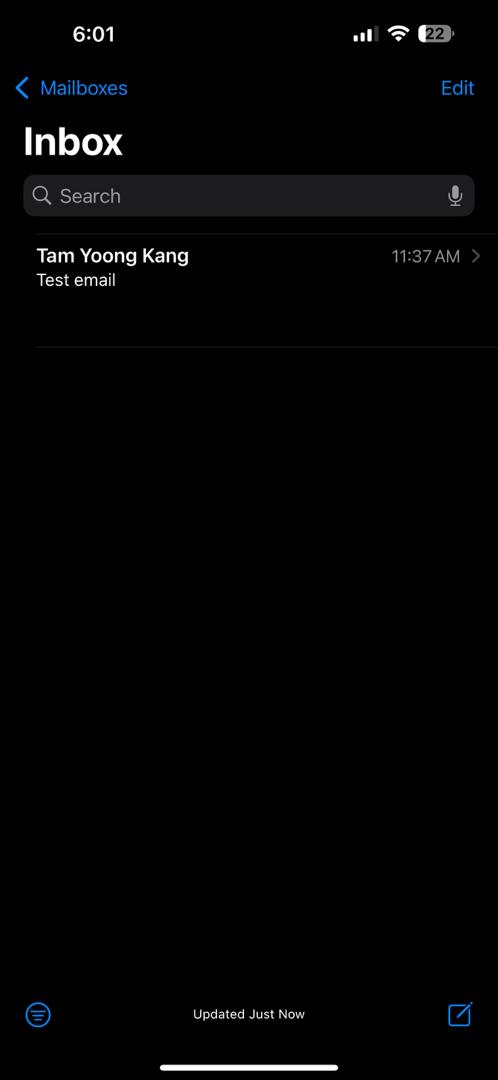
Step 6: Test your email account
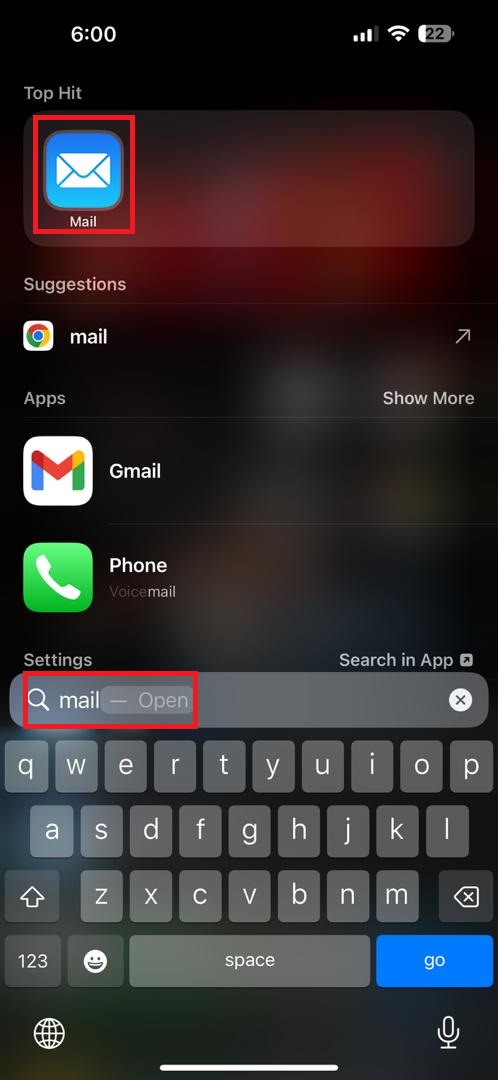
- Open the Mail app on your iPhone.
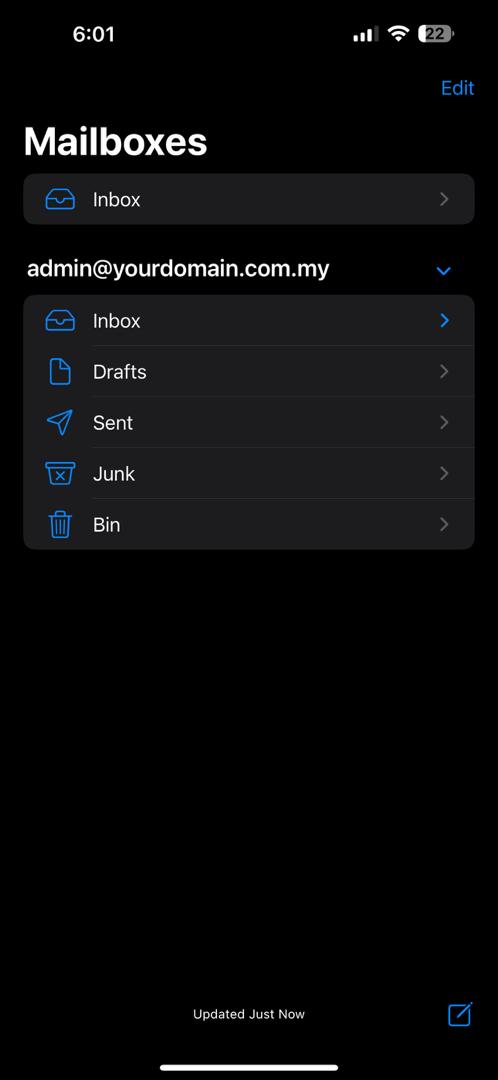
- Try sending and receiving emails to ensure the account is working correctly.
Conclusion:
You have successfully set up your email account on your iPhone. If you encounter any issues, double-check your email provider’s server settings or contact support.
For additional assistance or if you encounter any issues, please contact our support team at support@ipserverone.com.
