Search Our Database
How to setup SpamAssassin in legacy version cPanel
Introduction
SpamAssassin is a robust, open-source mail filter designed to detect and block spam before it reaches your inbox. It uses a combination of techniques like header and text analysis, Bayesian filtering, DNS blocklists, and collaborative filtering to identify unwanted messages. This guide is for users of legacy versions of cPanel and will help you configure SpamAssassin to work effectively with your email accounts.
Steps to Configure SpamAssassin in cPanel
Step 1: Logging into cPanel
- Log in to your cPanel account using your username and password.
Step 2: Accessing SpamAssassin Settings
- Under the Mail section, click on SpamAssassin to access its configuration page.
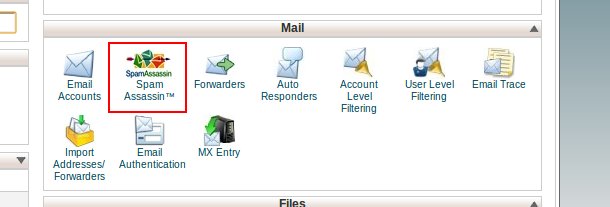
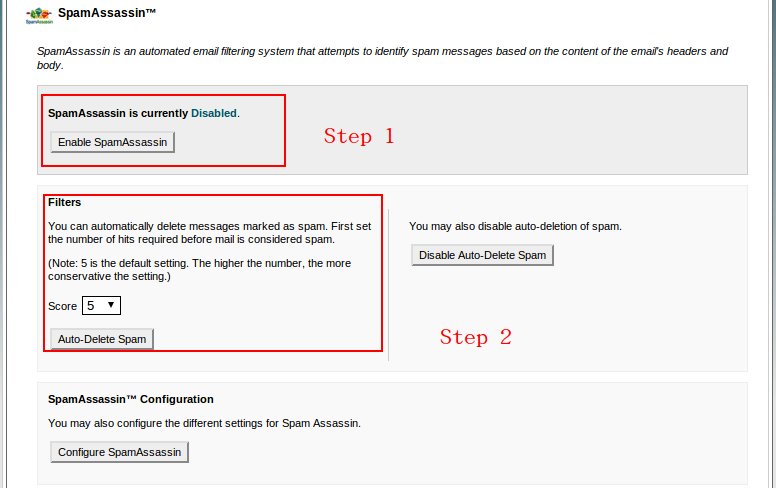
Step 3: Enabling SpamAssassin and Setting the Score
- Enable SpamAssassin by clicking the relevant option.
- Choose a Spam Score threshold. A lower score (e.g., 2 or 3) will apply stricter filtering, while a higher score (e.g., 5 or 6) will be less aggressive.
Step 4: Enabling Auto-Deletion of Spam
- You can choose to automatically delete emails that have been flagged as spam by SpamAssassin.
- Check the box for Auto-Delete Spam if you want this feature enabled.
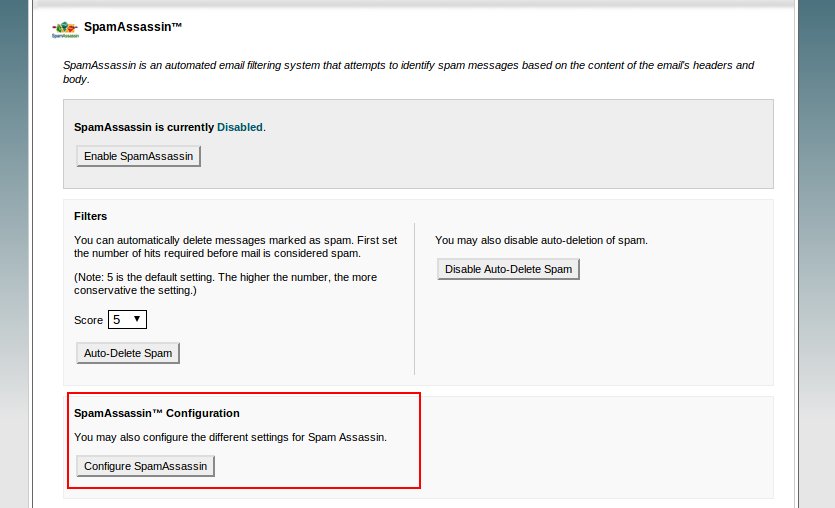
Step 5: Configuring Advanced Settings
- Click on Configure SpamAssassin to access advanced settings.
- Here you can customize how SpamAssassin processes emails, including configuring blacklists and whitelists.
Step 6: Adding Blacklisted Email Addresses
- In the advanced settings, you can specify email addresses or domains to be blacklisted. Emails from these addresses will always be marked as spam.
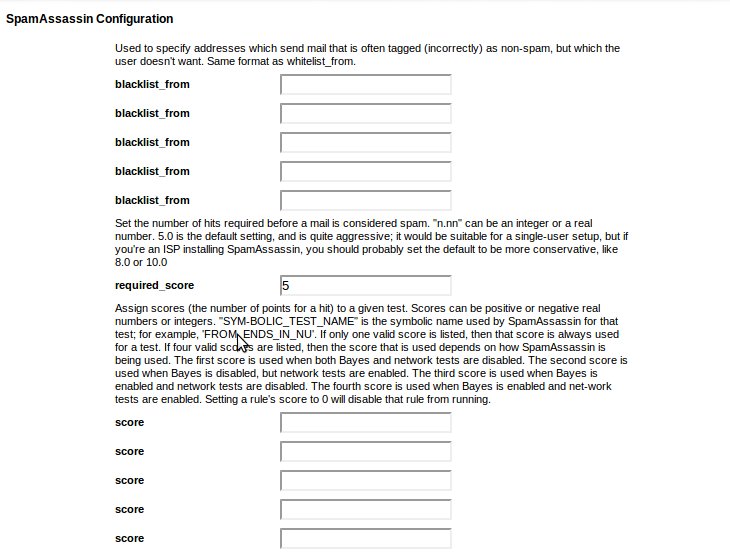
Step 7: Adding Whitelisted Email Addresses
- To ensure certain emails always reach your inbox, add trusted email addresses or domains to the Whitelist. Emails from these addresses will bypass SpamAssassin’s filtering.
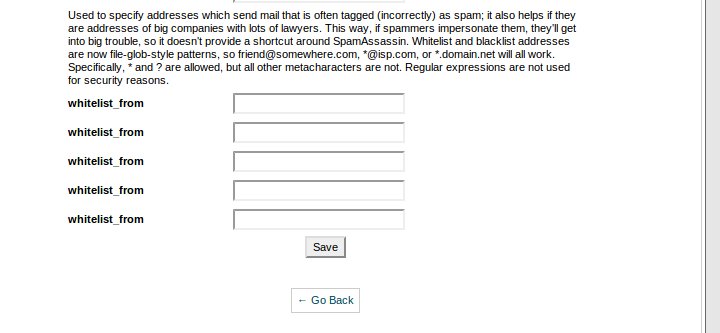
Step 8: Saving Your Configuration
- After configuring your desired settings, click Save to apply the changes.
- SpamAssassin is now configured and ready to filter your emails based on the settings you specified.
Conclusion
Configuring SpamAssassin in legacy versions of cPanel helps you effectively manage and filter unwanted spam emails. By adjusting the spam score and managing blacklists and whitelists, you can fine-tune how aggressive the spam filtering should be. Regularly review and update these settings to maintain optimal email filtering and ensure that important emails are not mistakenly marked as spam.
Article posted on 08 April 2020 by IPSERVERONE