Search Our Database
How to sync SmarterMail contact to MacOS Sierra (10.12) [CardDav]
Introduction
This article guides users through syncing SmarterMail contacts with macOS Sierra 10.12 using the CardDAV protocol. The article is intended for macOS users who utilize SmarterMail for email and contact management. It explains how to configure macOS to pull contacts from the SmarterMail server, ensuring seamless contact synchronization.
Prerequisites
- Access to SmarterMail (requires login credentials).
- A macOS Sierra 10.12 device.
Step-by-step guide
Step 1: Open Apple Mail
- Open the Apple Mail application.
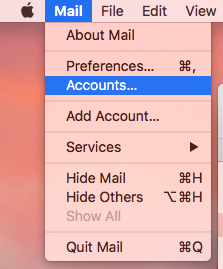
- Navigate to the Mail menu at the top-left of your screen and select Accounts.
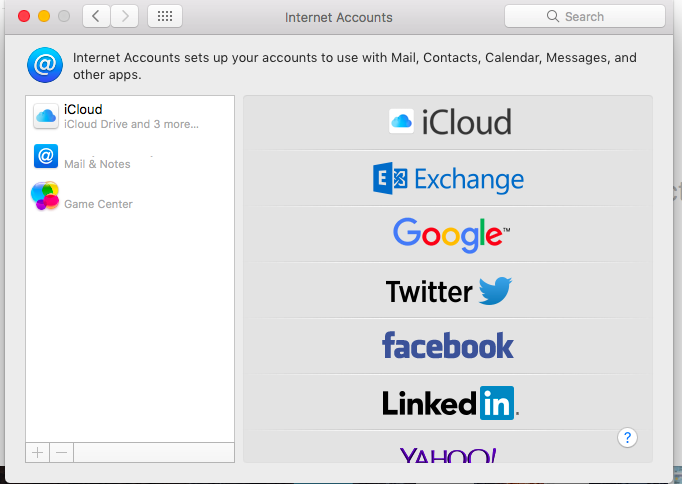
Step 2: Add a new account
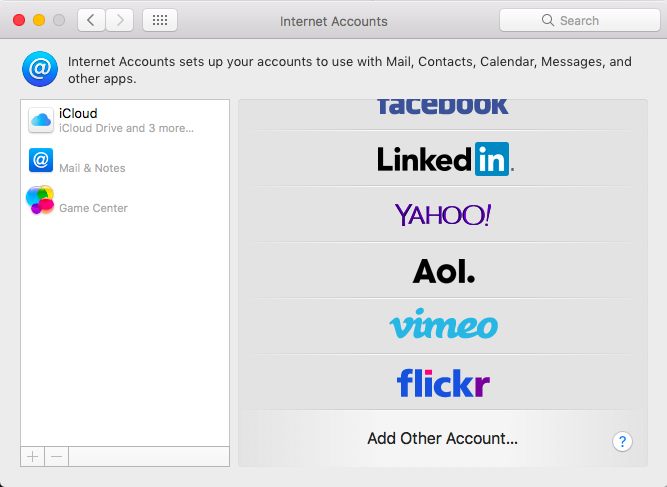
Step 3: Choose to add another account
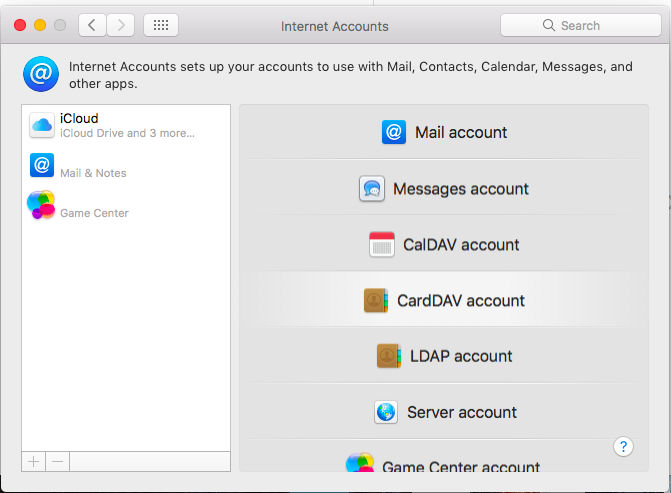
Step 4: Select CardDAV account
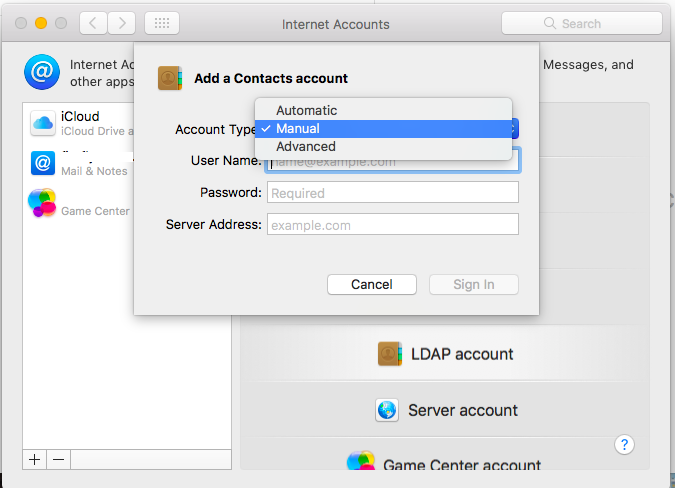
Step 5: Select Account Type
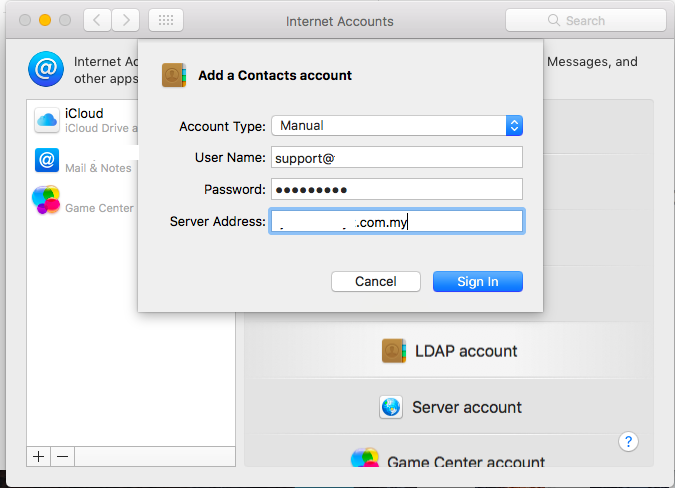
Step 6: Enter your SmarterMail server information
- Fill in the required fields, including the Server Address, which should be your SmarterMail server’s address.
Step 7: Wait for the contacts to sync
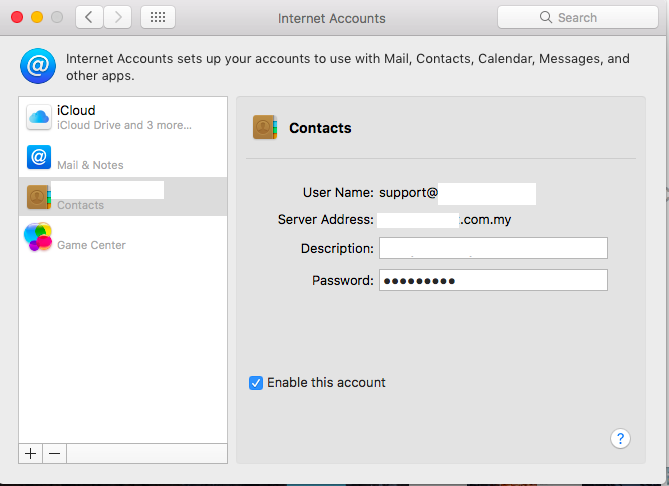
- Once you’ve signed in, the Contacts account will appear, and your contacts will begin to sync. This process might take a few minutes to complete.
Step 8: Test the synced contacts
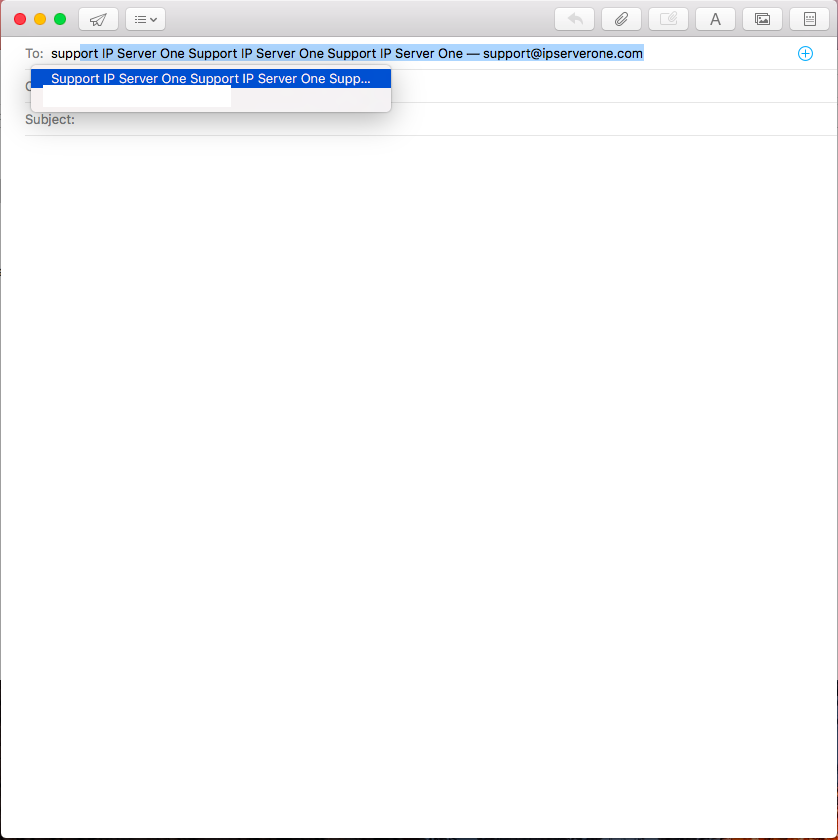
- Open Apple Mail and compose a new email. Begin typing a few letters of a contact’s name, and the synced contacts should appear for you to select.
Conclusion
Following this guide, you should now have successfully synced your SmarterMail contacts with macOS Sierra 10.12 using CardDAV. This setup allows you to view and manage your SmarterMail contacts directly from the macOS Contacts application.
For additional assistance or if you encounter any issues, please contact our support team at support@ipserverone.com.
