Search Our Database
How to Upload Files Using Filezilla on Windows
Introduction
This guide provides step-by-step instructions on how to use FileZilla, a popular FTP client, to upload files to your web server on a Windows system. FileZilla allows users to connect to FTP servers for transferring files between your local computer and the server. This guide is intended for website administrators or anyone who needs to upload files to a remote server.
Prerequisites
Before proceeding, ensure you have the following:
- FileZilla installed on your Windows computer. You can download it from the official FileZilla website.
- Your FTP server login details (host, username, password, and port number).
- Access to the files you wish to upload.
Step-by-step guide
Step 1: Open FileZilla Client
Note: You can download the FileZilla client from Client Download.

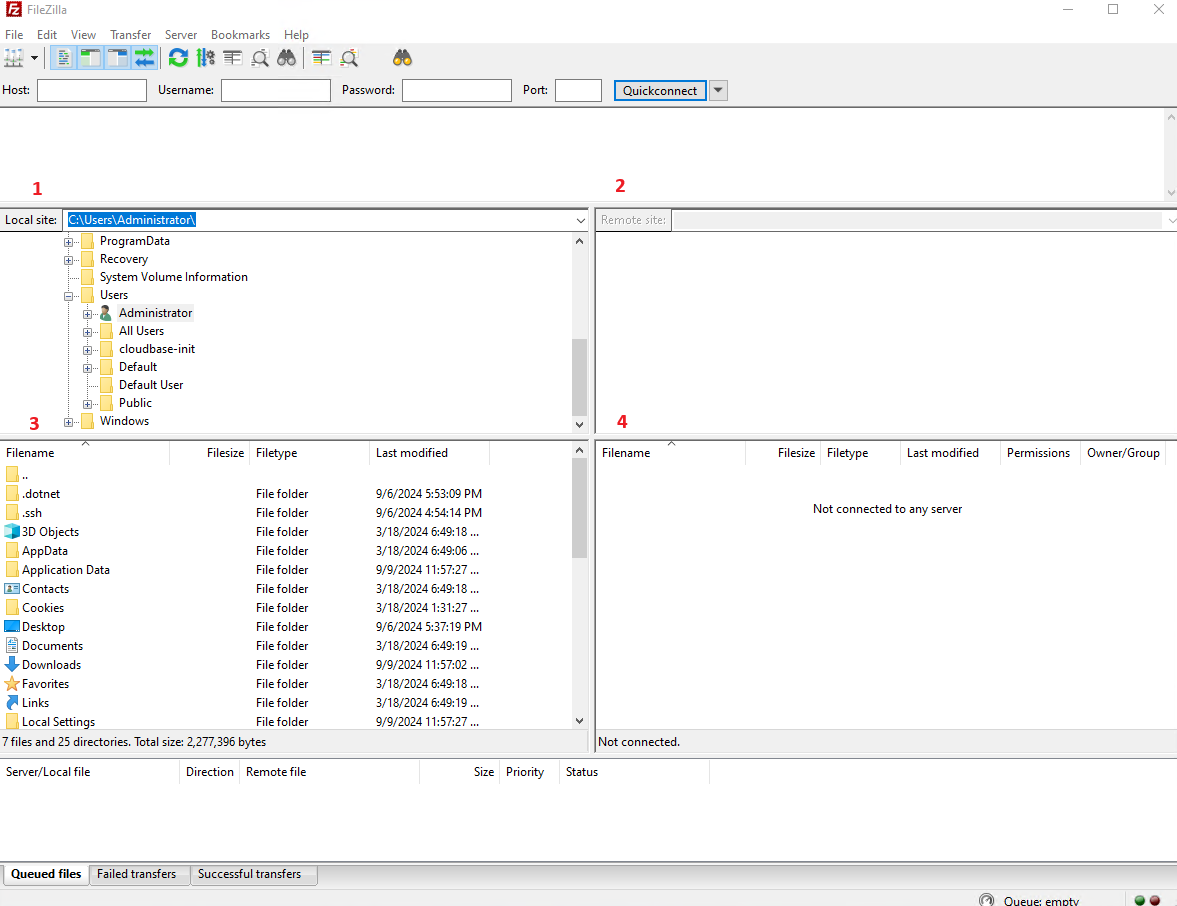
Step 2: Fill in the FTP host, username and password, then click on “Quickconnect”, it will show as the picture above.
Panel 1. local PC directory
Panel 2. hosting server directory
Panel 3. files inside local PC particular directory
Panel 4. files inside hosting server particular directory
There are 2 ways to upload the files to our hosting server:
i. Drag and drop: set the hosting server directory (under httpdocs folder) at panel 2, drag the file from your local PC and drop the files which you wish to upload to panel 4.
ii. Double click: set the local PC directory at panel 1 and set the server directory at panel 2 and double click files from panel 3, it will auto-upload the files to our server, you will see that file will show on panel 4.
Conclusion
Using FileZilla is an easy and efficient way to upload files to your server on Windows. By following the steps outlined in this guide, you should be able to successfully connect to your FTP server and transfer files.
For additional assistance or if you encounter any issues, please contact our support team at support@ipserverone.com.
Article posted on 18 April 2020 by Louis