Search Our Database
How to use Google Public DNS on Windows PC
Introduction
Google Public DNS is a free, global Domain Name System (DNS) resolution service designed to improve internet browsing speed, security, and reliability. By replacing your ISP’s default DNS settings with Google Public DNS, you can benefit from faster response times, enhanced privacy, and protection against certain types of cyberattacks such as DNS cache poisoning. This can be especially useful in regions where the local DNS servers are slow or unreliable.
Changing the DNS settings on your Windows PC allows you to route your internet traffic through Google’s DNS servers. This process doesn’t affect your internet connection’s bandwidth but instead optimizes how quickly domain names are resolved into IP addresses. Whether you’re troubleshooting slow internet speeds or simply seeking to improve browsing performance, this guide will provide detailed steps on configuring Google Public DNS on a Windows system.
Common use cases for switching to Google Public DNS include overcoming DNS-related issues, speeding up website loading times, improving connection stability, and increasing privacy. This guide covers the necessary steps for users who want to make the switch and explains how to verify the changes after configuration. Following the instructions ensures that DNS changes are implemented correctly, without disrupting your internet access.
Prerequisites
Before setting up Google Public DNS on your Windows PC, ensure the following prerequisites are in place:
- Administrator privileges on your Windows PC to modify network settings.
- Stable internet connection to apply and test the DNS changes.
- Basic understanding of IP addresses and DNS configuration.
- Windows PC running Windows 7, 8, 8.1, 10, or 11 as the operating system.
- Access to the network adapter settings to configure the DNS changes for specific network interfaces.
Steps to Set Google Public DNS
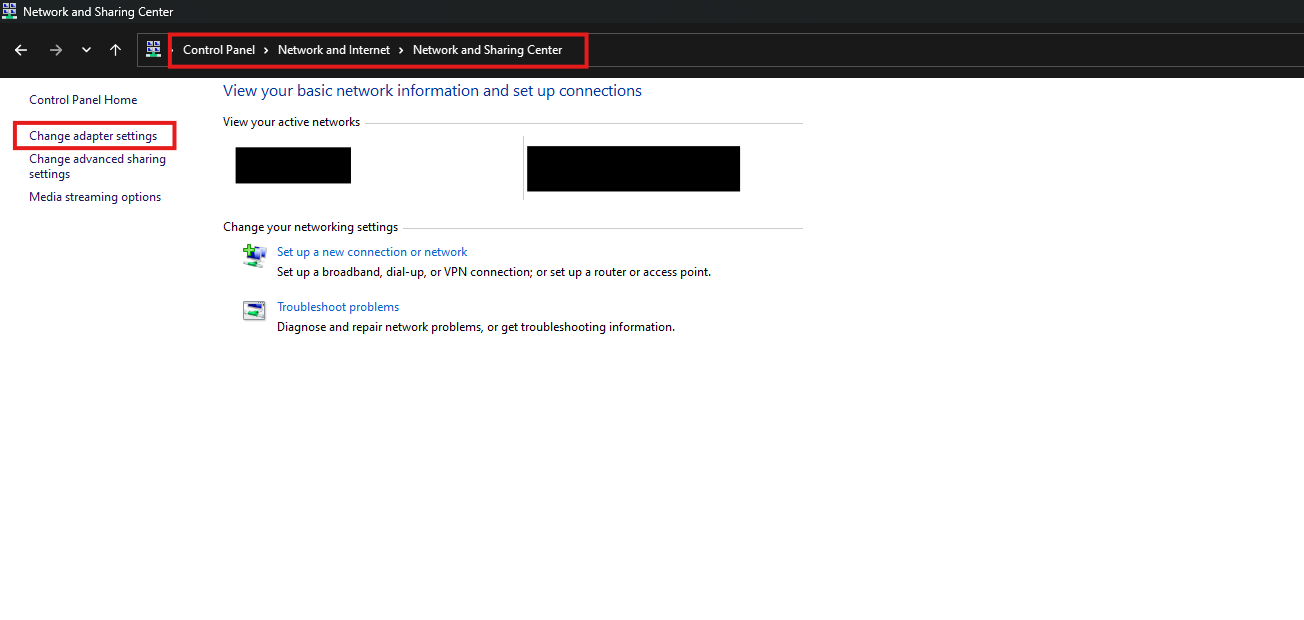
1. Navigate to Control Panel> Network and Internet >> Network and Sharing > Change Adapter Settings.
2. Select the connection that you want to configure Google Public DNS.
For example:
- To change the settings for an Ethernet connection(wired), right-click Local Area Connection, and click Properties.
- To change the settings for a wireless connection (Wi-Fi), right-click Wireless Network Connection, and click Properties.
3. Click on the ‘Properties” tab. Double Click on Internet Protocol Version 4 (TCP/IPv4). Select (use the following DNS server addresses. Then, key in 8.8.8.8 (google primary DNS server) and 8.8.4.4 (google secondary DNS server) in the preferred and alternate DNS server field.
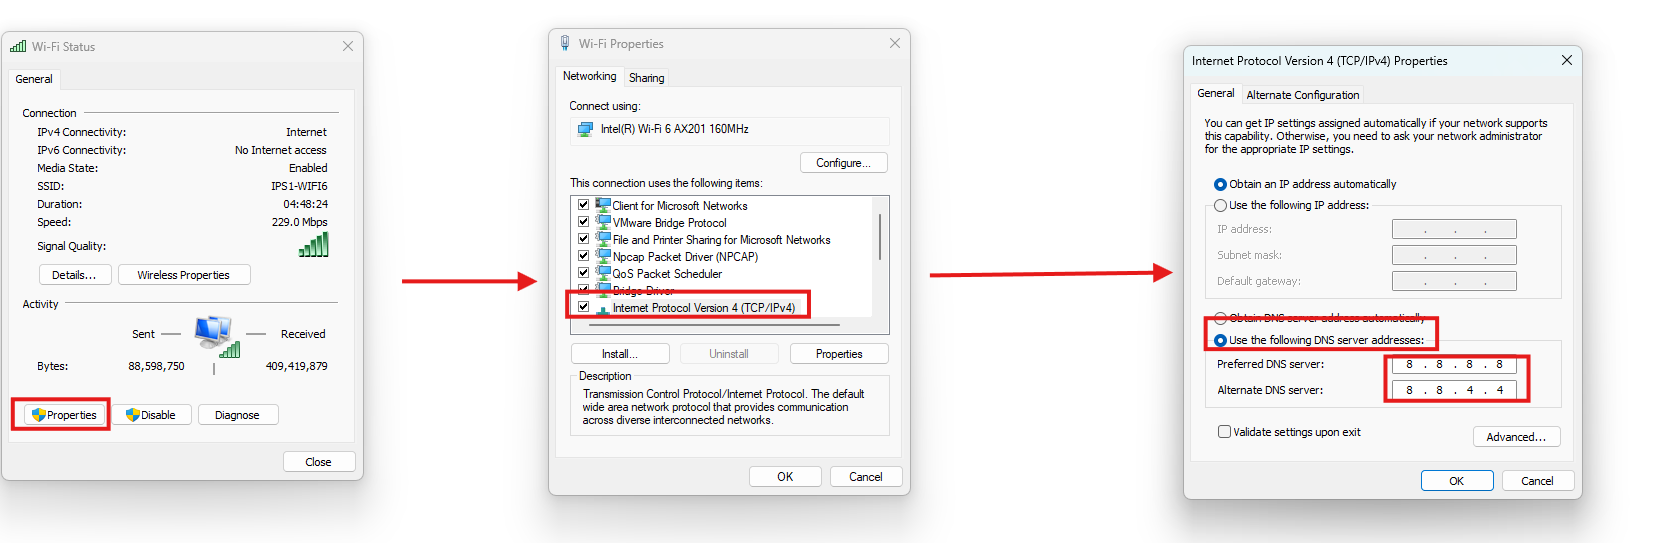
4. Click on Advanced and then DNS tab. Use the add button to add the following DNS server in the DNS server list.

If there is an existing IP address listed here, do write them down for future reference.
For Google Public DNS, select Use the following DNS server addresses:
Preferred DNS Server: 8.8.8.8

Alternate DNS Server: 8.8.4.4
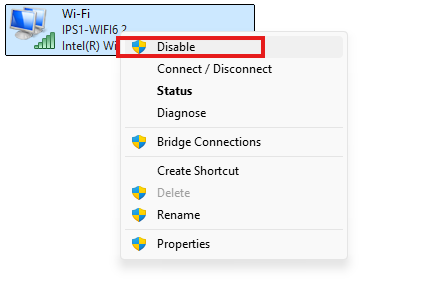
5. Click OK and restart your network connection for changes to be applied. You can restart the network adapter by right clicking on it, then disable and enabling it.
You are now using Google Public DNS.
Conclusion
By configuring your PC to use Google Public DNS, you can enhance your browsing experience with faster, more secure, and reliable DNS resolution. This setup ensures smoother internet performance and fewer restrictions. If you ever need to revert to the previous DNS settings, make sure to note down the original DNS addresses before making changes. For more information or assistance, feel free to reach out to your system administrator or consult the original guide.
If you encounter any issues, contact our support team at support@ipserverone.com.
Article posted on 2020-02-24 by Louis