Search Our Database
Installing Internet Information Services (IIS) on Windows Server
Introduction
Internet Information Services (IIS) is a flexible, secure, and manageable web server from Microsoft that is used for hosting websites and other content on the web. Installing IIS on Windows Server enables hosting web applications, services, and dynamic content such as ASP.NET and PHP.
Prerequisites
- Windows Server Operating System: Ensure Windows Server 2016, 2019, or 2022 is installed.
- Administrator Access: You need to have administrative privileges to install IIS.
- Network Configuration: Ensure the server is properly configured with a static IP address and is connected to your network.
- Windows Update: Ensure all the latest security updates from Windows Update are installed.
Detailed Steps
1. Login to Your Server
- Login to your Windows Server with an administrator account.
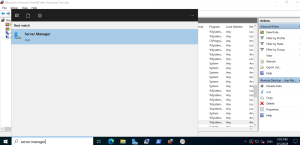
2. Open Server Manager
- You can find the Server Manager on your desktop or pinned on your taskbar. Alternatively, you can press Windows key + S and search for “Server Manager.”
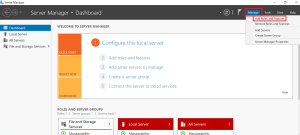
3. Adding Roles and Features
- Click on “Manage” in the top right corner of the Server Manager and select “Add Roles and Features”.
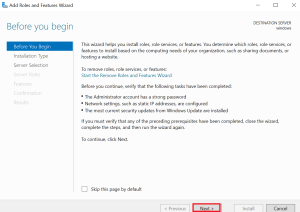
- Press “Next” on the “Before You Begin” page if it appears.
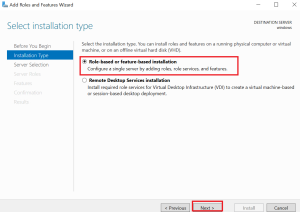
4. Installation Type
- Select “Role-based or feature-based installation” and click “Next”.
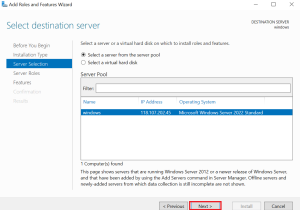
5. Server Selection
- Choose the server you wish to install IIS on from the server pool and click “Next”.
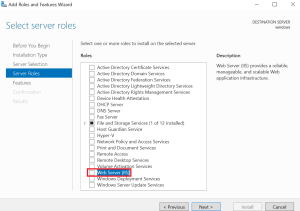
6. Roles
- In the “Roles” section, check the box for “Web Server (IIS)”.
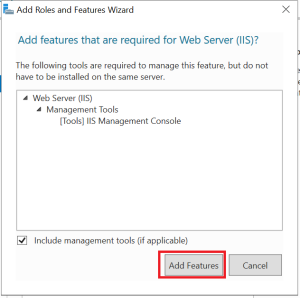
- A new window will pop up asking to add features that are required for Web Server (IIS), click on “Add Features” then click “Next”.
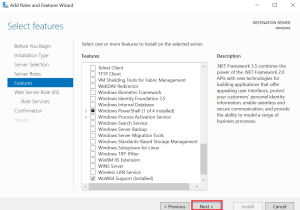
7. Features
- No additional features are needed for a basic IIS setup, so you can just click “Next” here.
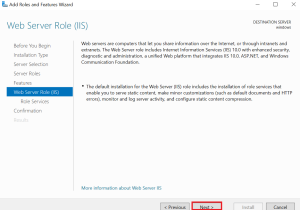
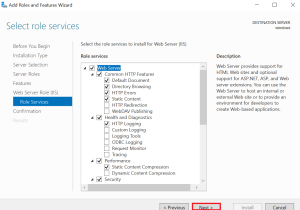
8. Web Server Role (IIS)
- On the “Role Services” page, you can select additional role services to install with IIS (such as FTP Server) or just proceed with the defaults by clicking “Next”.
9. Confirmation
- Review your selections and click “Install”.
10. Installation Progress
You will see the installation progress. Once the installation is complete, click “Close” to exit the wizard.
Verify Installation
To verify that IIS is installed, open a web browser and type http://localhost in the address bar. You should see the default IIS welcome page.
Conclusion
IIS is now installed and operational on your Windows Server. You can begin hosting your web applications and sites, configure additional IIS modules, and adjust server settings as per your requirements.
For additional assistance or if you encounter any issues, please contact our support team at support@ipserverone.com.
