Search Our Database
Mount IP ServerOne Object Storage in Windows with Open Source Utility
Introduction
When backing up data to IPServerOne Object Storage, not all backup software supports writing directly to object storage. To overcome this limitation, an open-source tool called Rclone can be used to mount IPServerOne Object Storage as a drive on Windows or Linux.
This guide will walk through the process of:
- Setting up IPServerOne Object Storage
- Generating access credentials
- Configuring Rclone to mount the storage as a drive
Once completed, the mounted drive will allow seamless data synchronization with IPServerOne Object Storage.
Prerequisites
Before proceeding, ensure you have:
- An IPServerOne account with access to the Customer Portal.
- Windows or Linux system where the object storage will be mounted.
- Rclone installed for mounting the storage.
- WinFSP (Windows File System Proxy) installed (for Windows users).
Step-by-Step Guide
Step 1: Enable Object Storage in IPServerOne Portal
- Log in to IPServerOne Customer Portal.

- In the left menu, navigate to Cloud Platform and select Object Storage.
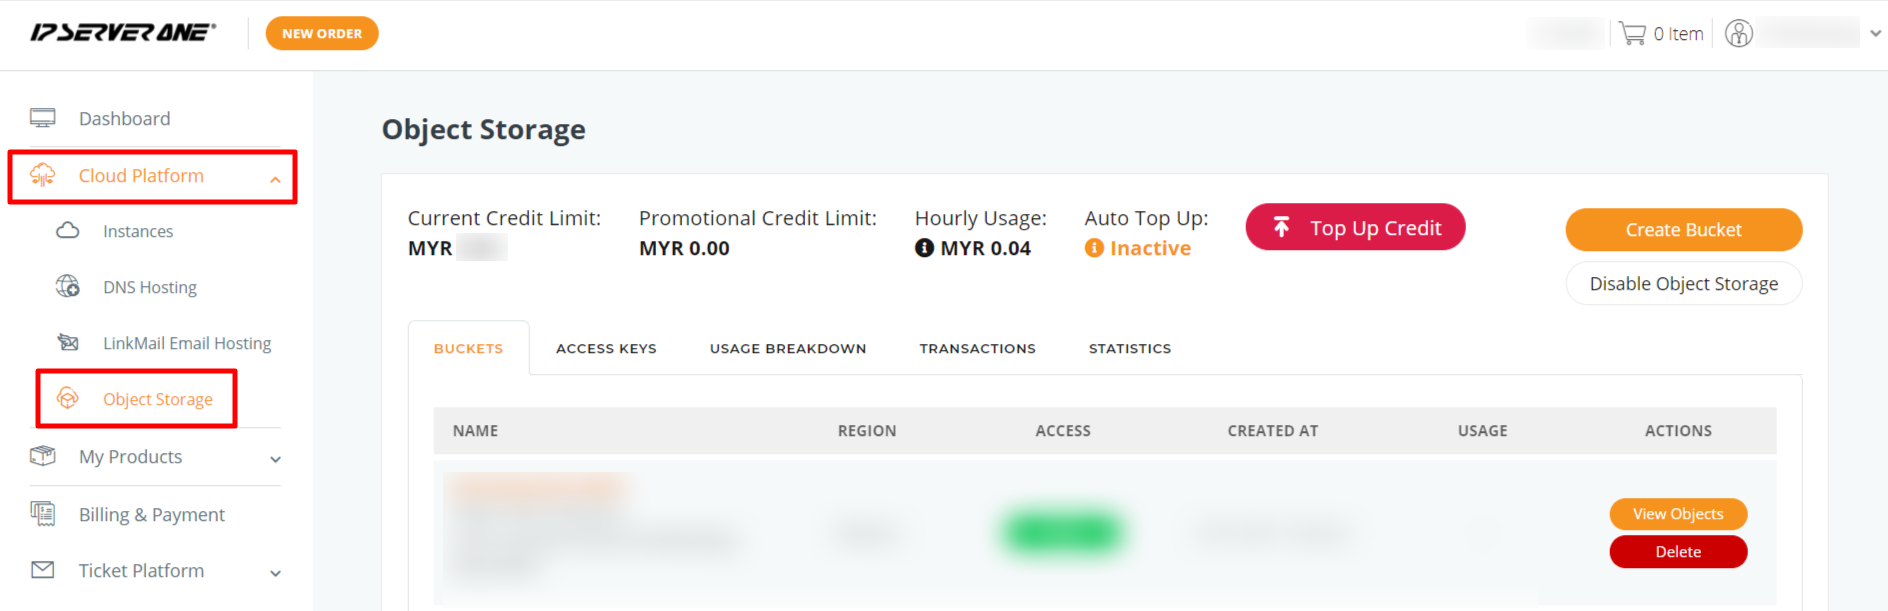
- Click Enable Object Storage and proceed to create a new bucket.
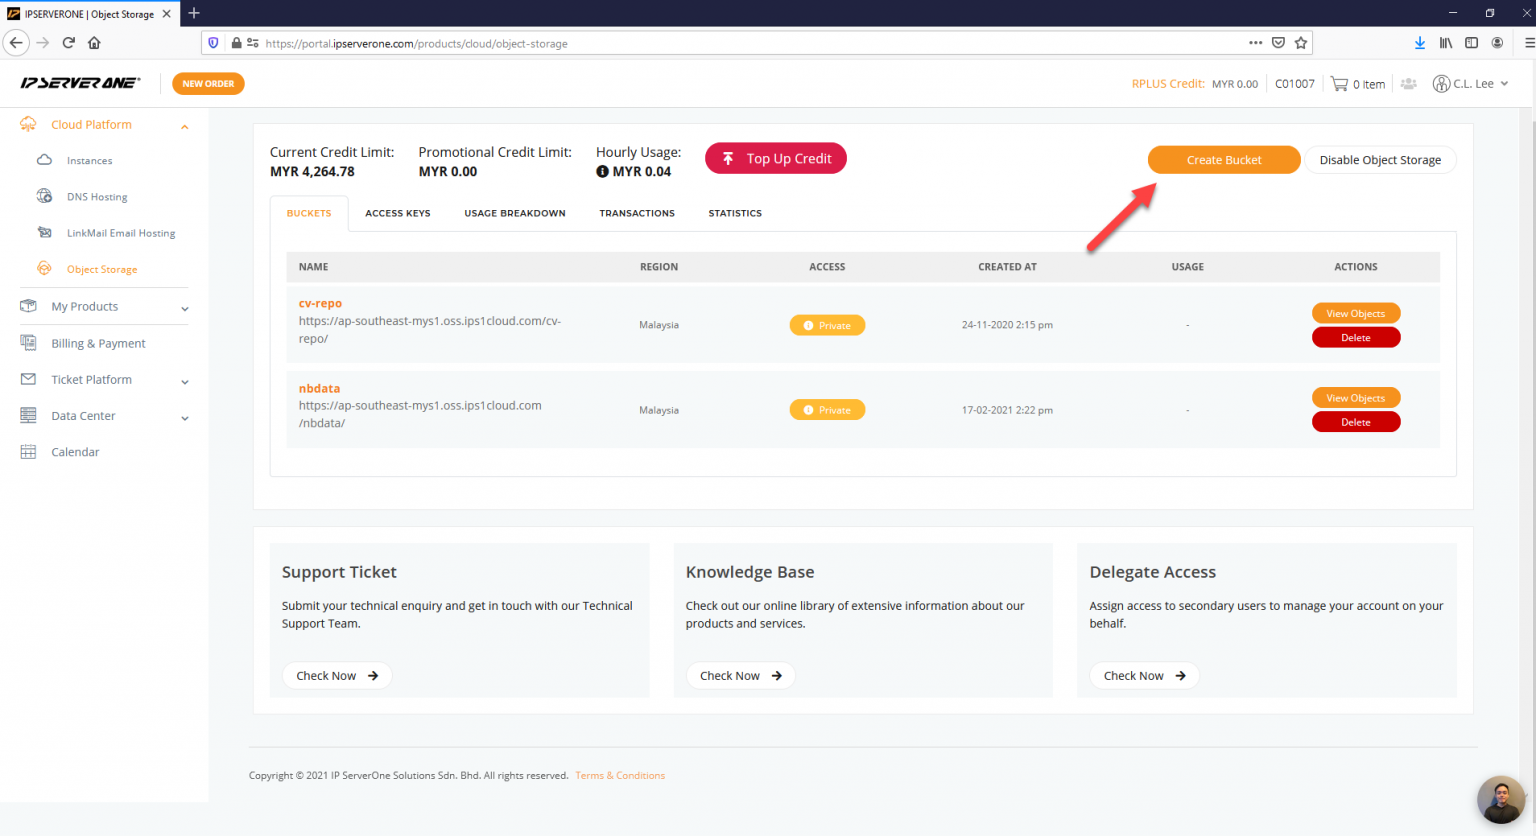
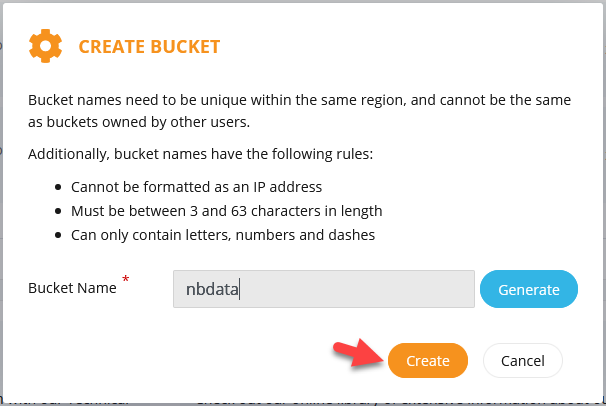
Step 2: Create a Storage Bucket
- Click Create Bucket.
- Enter a bucket name of your choice or generate a random one by clicking Generate.
- Example: nbdata
- Click Create to finalize the bucket creation.
Step 3: Generate Access Keys
- Go to the Access Keys tab and click Create Access Key.
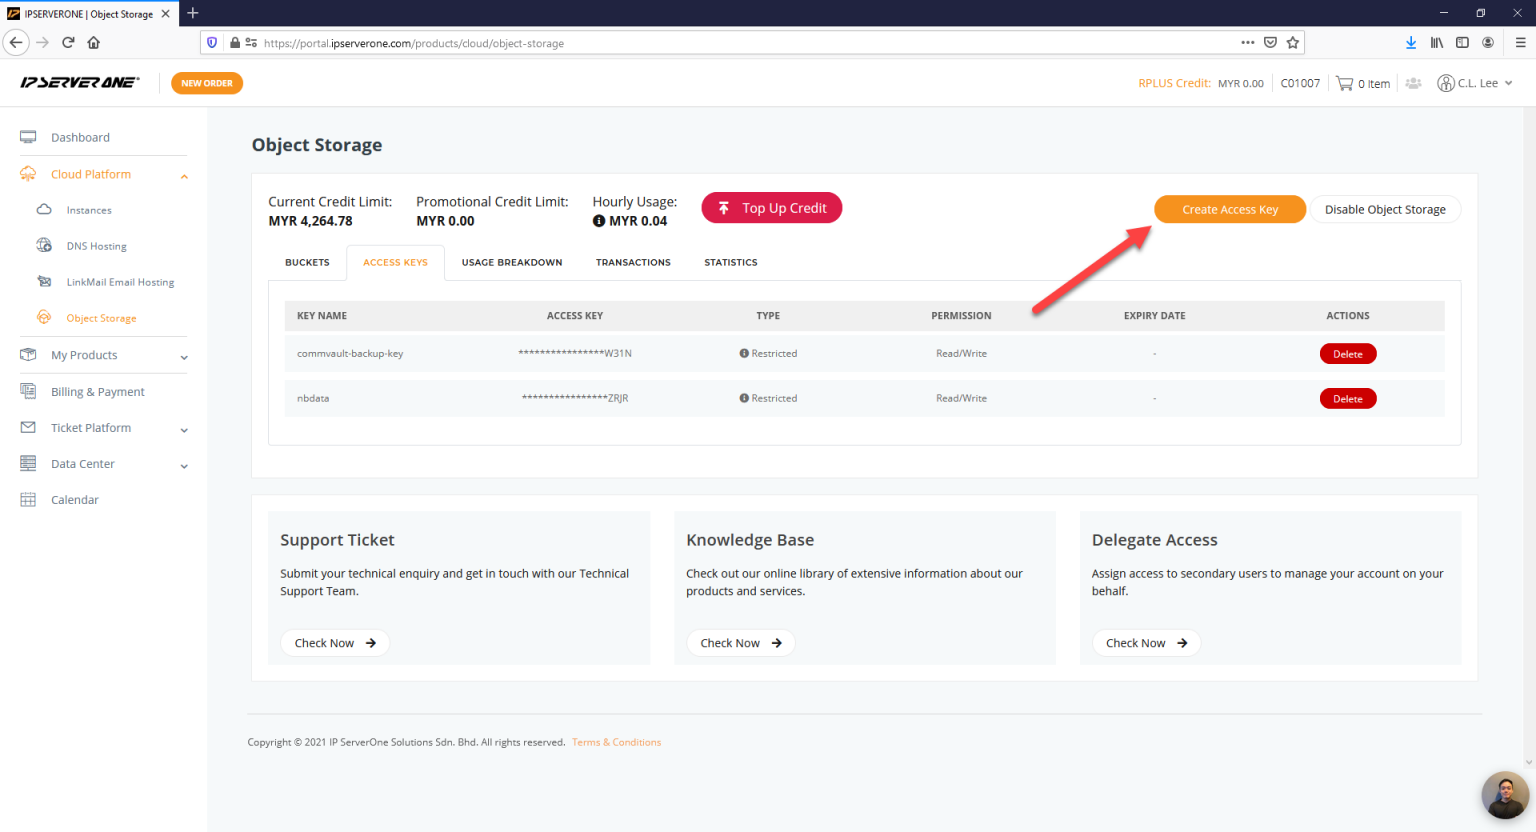
- Provide:
- Key Name
- Expiration Date (optional)
- Write Permission
- Access Level (select the newly created bucket)
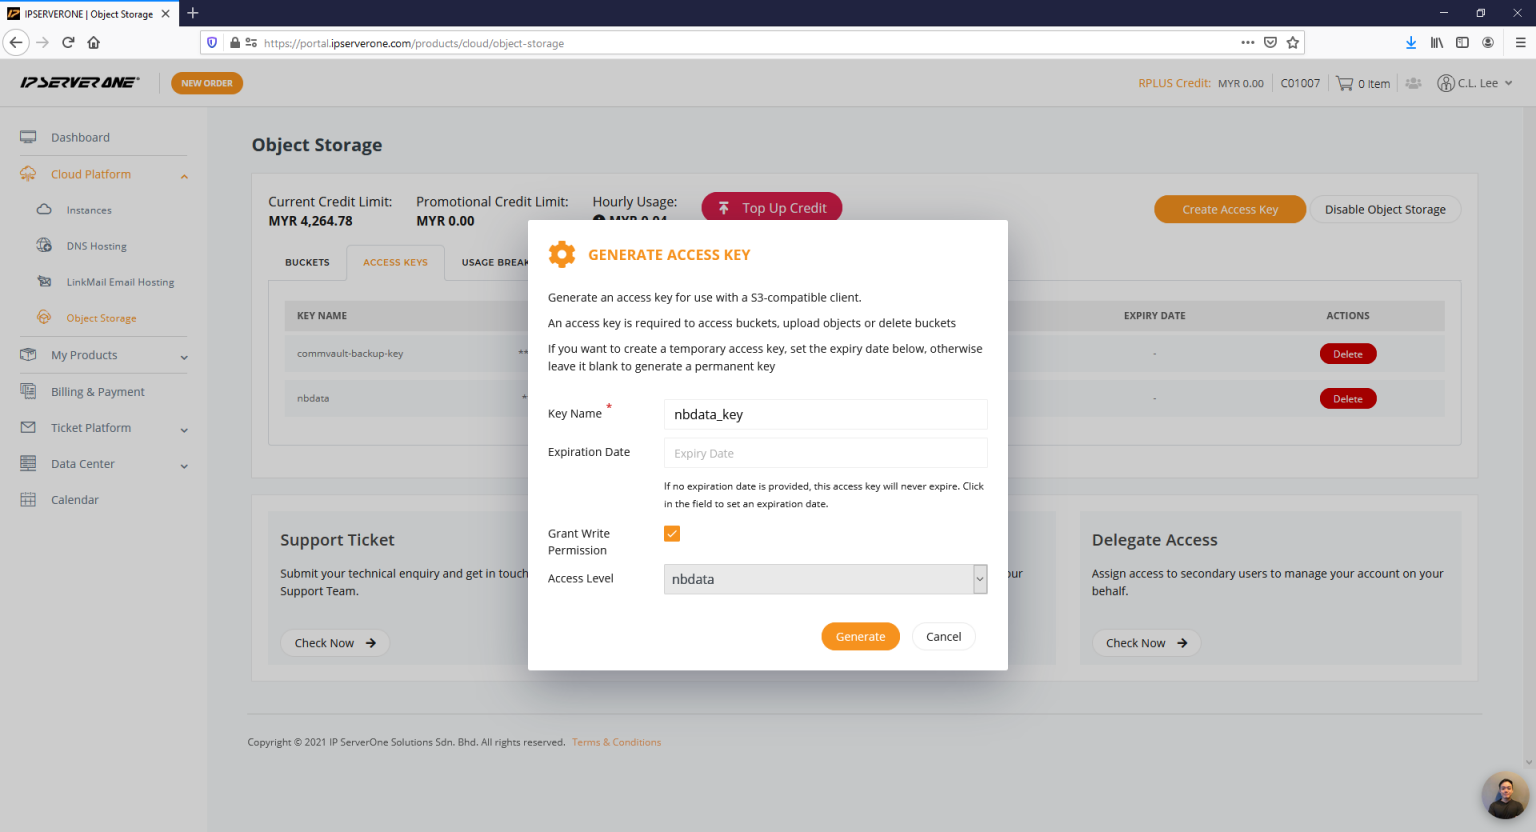
- Click Generate to create the keys.
Step 4: Save Access Key Credentials
Once generated, securely store both the Access Key and Secret Key, as they will be required later for configuration.
Example credentials:
Access Key : 6TZJ8X2EYS66PFL9YYVE
Secret Key : VetThTTZJ73urYvn+NZRItXXxrx6epOYFFXWQ734
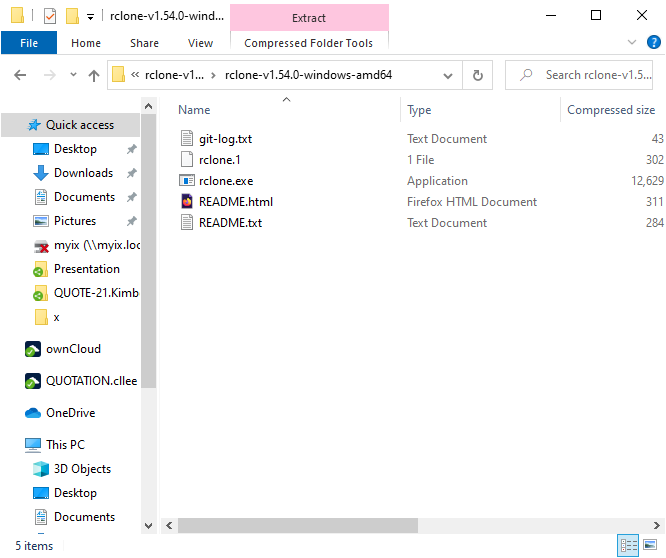
Step 5: Install Required Software
For Windows Users
- Download and install WinFSP (Windows File System Proxy), which is required for Rclone to mount a drive.
- Download Rclone from https://rclone.org.
- Extract the Rclone files to a designated folder (no installation is required).
For Linux Users
-
Install Rclone using the package manager:
sudo apt install rclone  # For Debian/Ubuntu
sudo yum install rclone  # For CentOS/RHEL
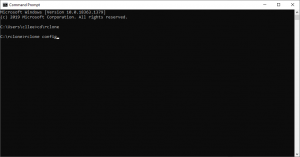
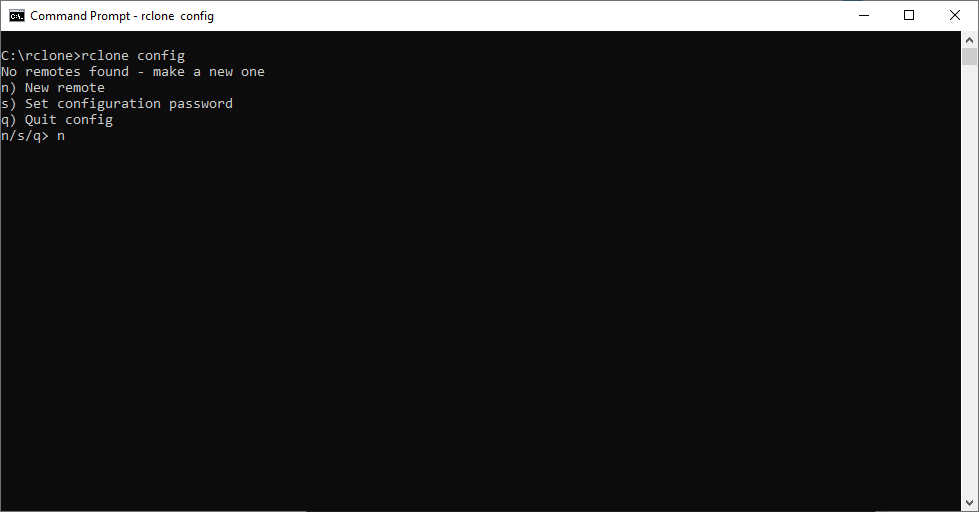
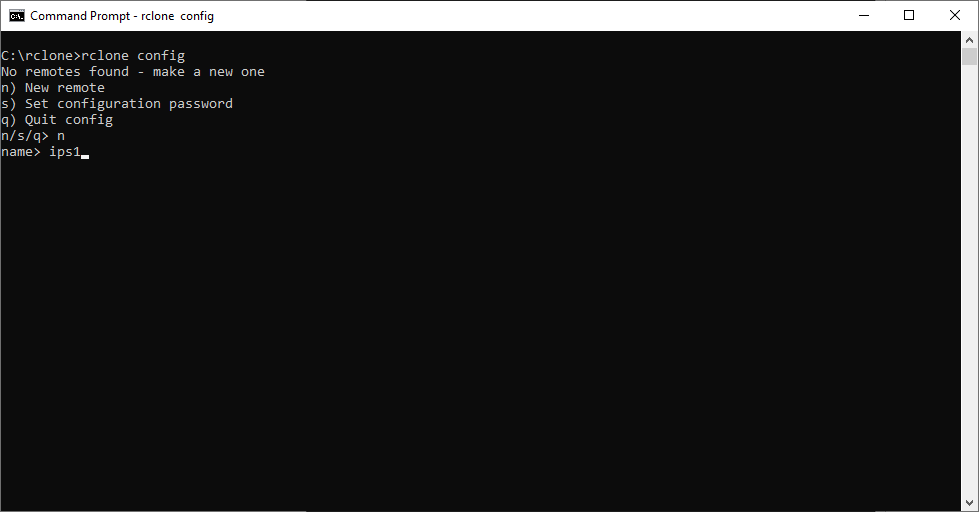
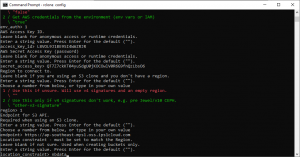
Step 6: Configure Rclone to Access Object Storage
-
Open Command Prompt (Windows) or Terminal (Linux).
-
Run the following command to start Rclone configuration:
-
When prompted, enter “n” to create a new configuration.

-
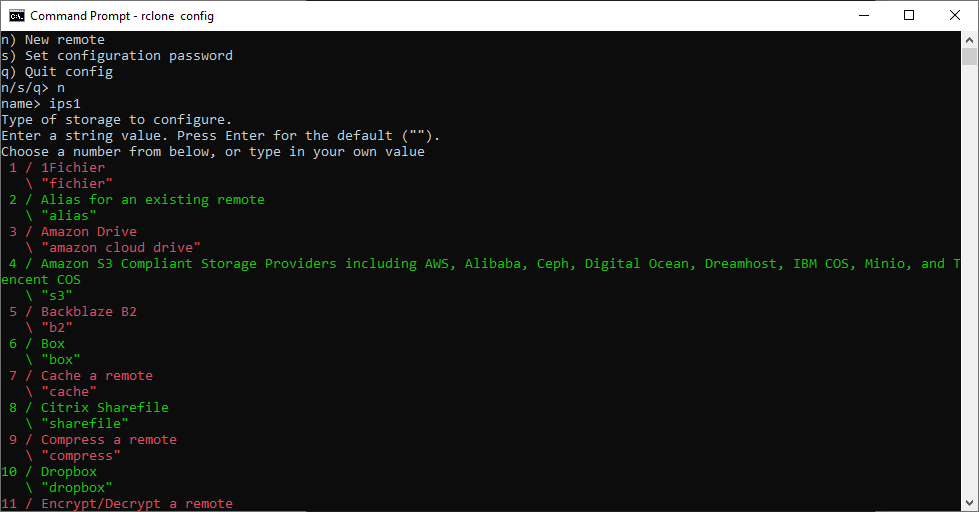
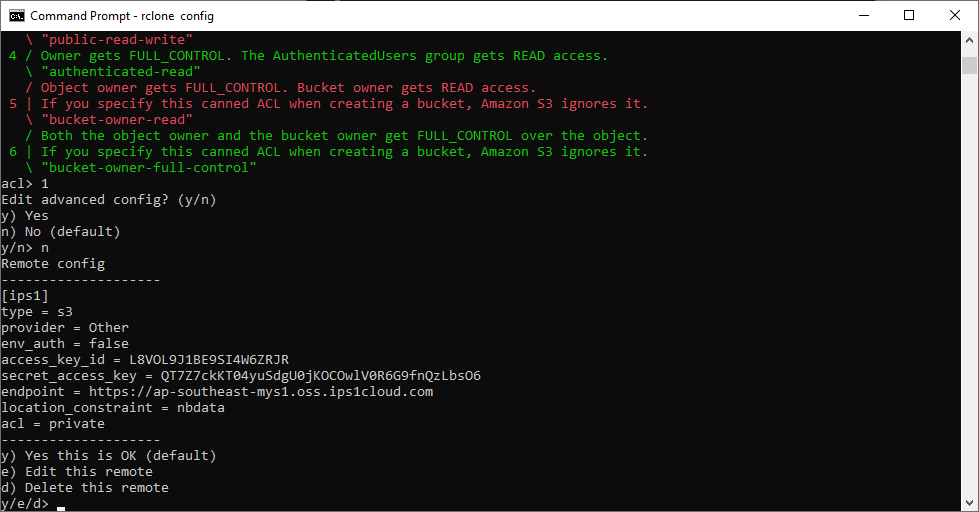
Assign a name for the connection (e.g., ips1 for IPServerOne storage).

-
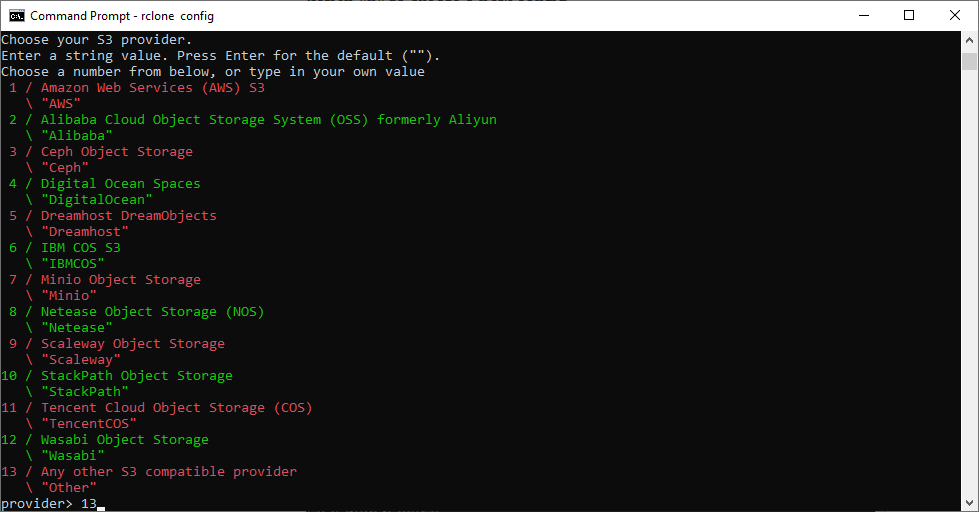
When prompted to select the storage provider, enter “13” (for any other S3-compatible provider).
-
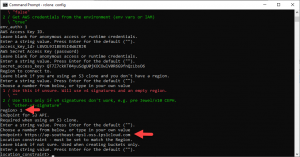
Enter the following details when prompted:

-
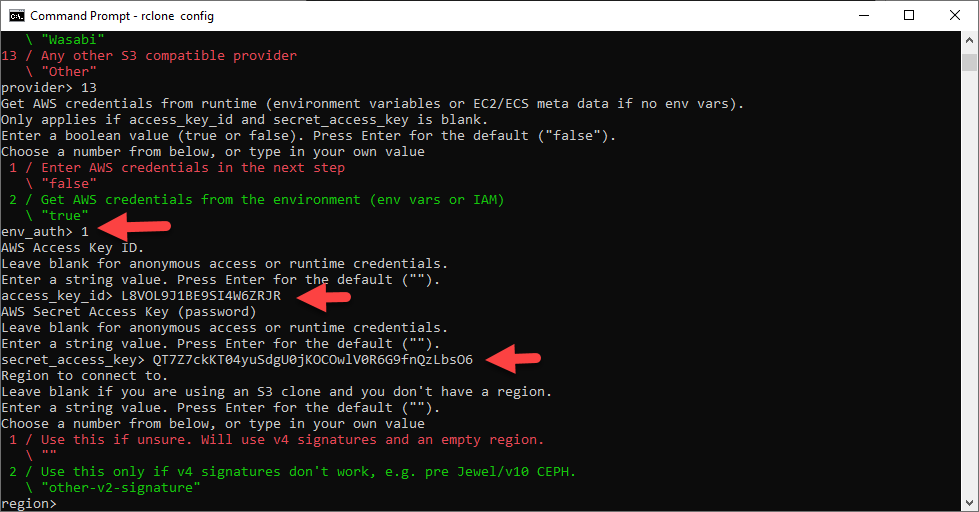
env_auth: Enter “1”
-
Access Key: 6TZJ8X2EYS66PFL9YYVE6
-
Secret Key: VetThTTZJ73urYvn+NZRItXXxrx6epOYFFXWQ734
-
Region: Enter “1”
-
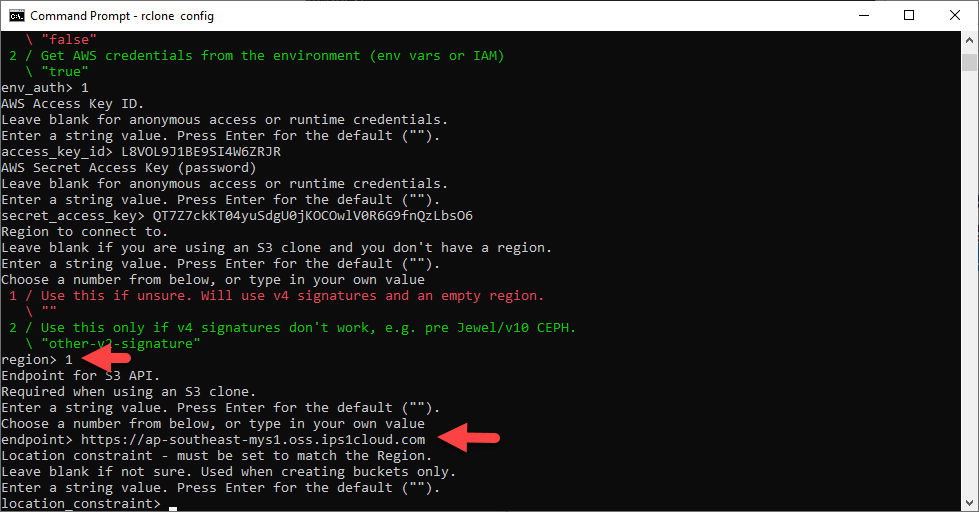
Endpoint URL:
https://ap-southeast-mys1.oss.ips1cloud.com
-
Bucket Name: Enter nbdata or the bucket name created earlier.
-
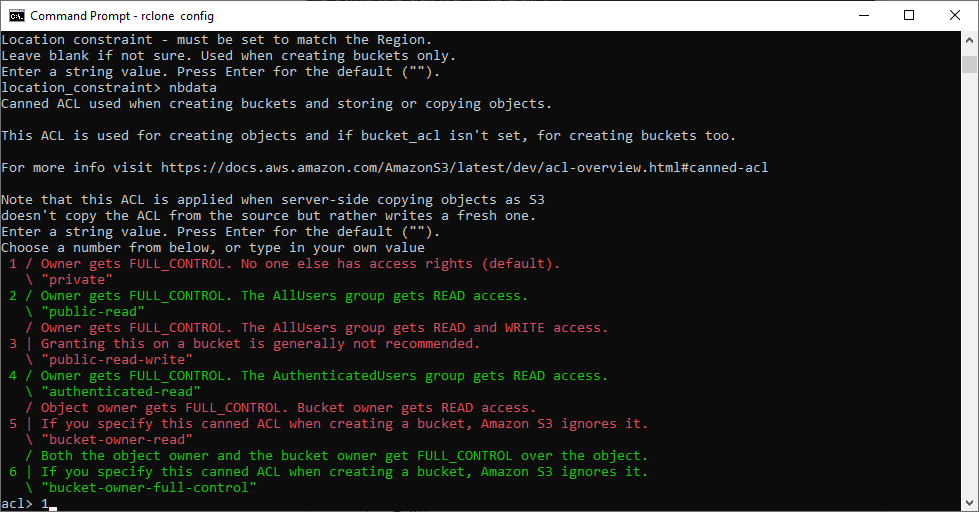
ACL (Access Control List) Option: Select “1”

-
- When prompted for advanced configuration, enter “n” (no advanced configuration needed).

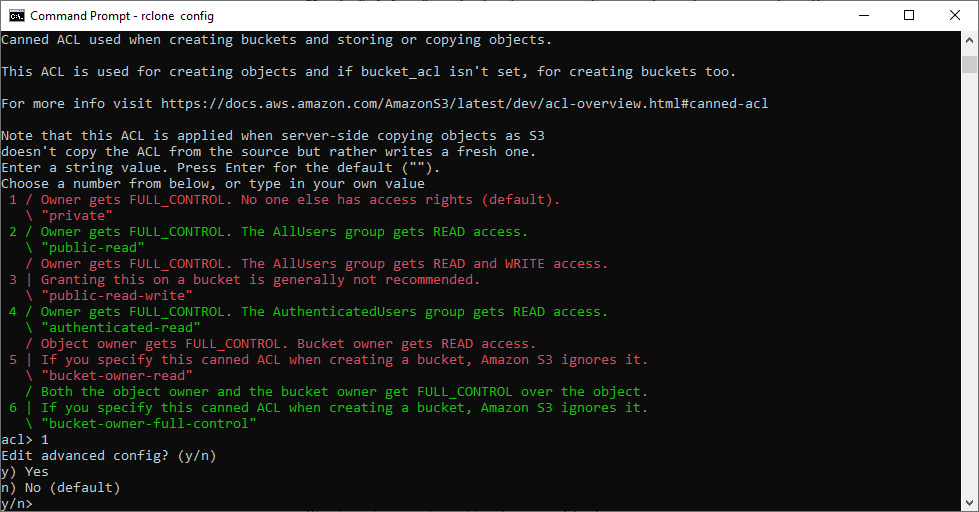
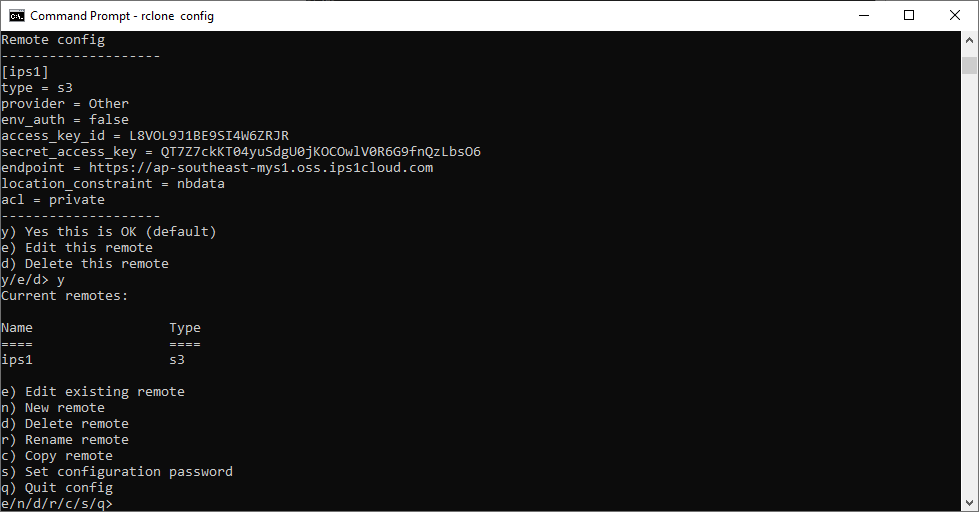
- Confirm the configuration by entering “y”.
- Exit the config screen by entering “q”.
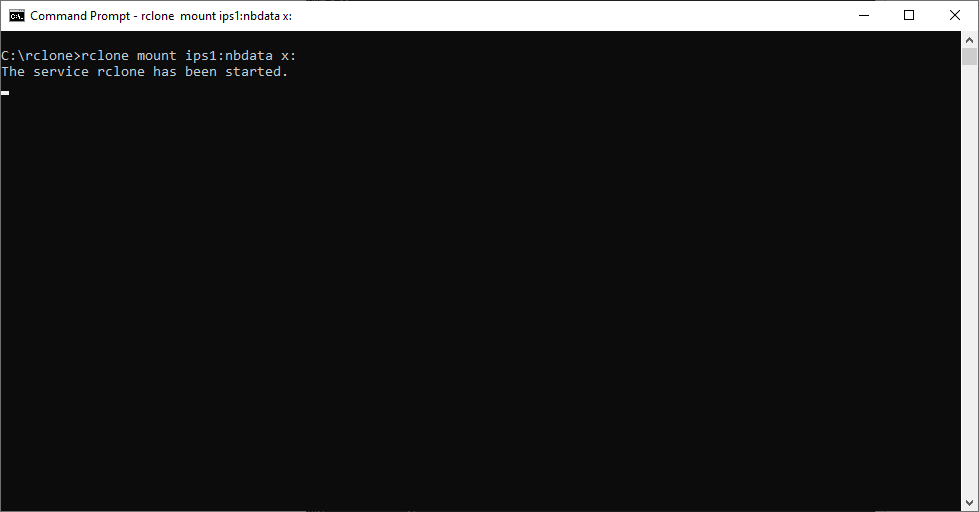
Step 7: Mount Object Storage as a Drive
To mount the bucket to Drive X: (Windows example), run:
Step 8: Verify and Use the Mounted Drive
- Keep the Command Prompt or Terminal open while the drive is mounted.
- The X: Drive should now be visible in File Explorer (Windows) or /mnt/ (Linux).
- Any files copied to this drive will be synchronized with IPServerOne Object Storage.
For Linux Users 🐧: If you are using Linux (Ubuntu) and need specific instructions, please refer to our dedicated guide: Mount IPServerOne Object Storage in Linux (Ubuntu) using Rclone.
Conclusion
By following this guide, IPServerOne Object Storage has been successfully mounted as a drive using Rclone. This allows seamless backup, storage, and file synchronization without requiring specialized backup software.
If you need further assistance, please submit a support ticket or contact IPServerOne Customer Support at cs@ipserverone.com or +603-2026 1688.
Article published by IPSERVERONE on 23 March 2021