Search Our Database
Replace HDD for software RAID in Windows Server
Introduction
If a hard drive in your Software RAID configuration on Windows Server shows an “unhealthy” status, it’s essential to replace it promptly to avoid potential data loss and ensure system stability. By replacing the failed HDD and resyncing the RAID array, you can maintain redundancy and prevent system downtime. This guide will walk you through the process of replacing the failed HDD in your RAID setup, from removing the mirror of the faulty drive to adding and synchronizing the new drive, ensuring that your RAID array functions correctly.
Prerequisites
- Root access to the Windows Server.
- Replacement HDD for the failed disk.
Step-by-Step Guide
Step 1: Open Disk Management
- Open Windows PowerShell and type diskmgmt.msc to launch Disk Management.
Step 2: Remove Mirror from the Failed Disk
- Right-click on the RAID partition linked to the failed disk and select Remove Mirror.
Step 3: Replace the Failed HDD
- Shut down the server, physically replace the failed HDD with the new one, and restart the server.
Step 4: Add Mirror to the New Disk
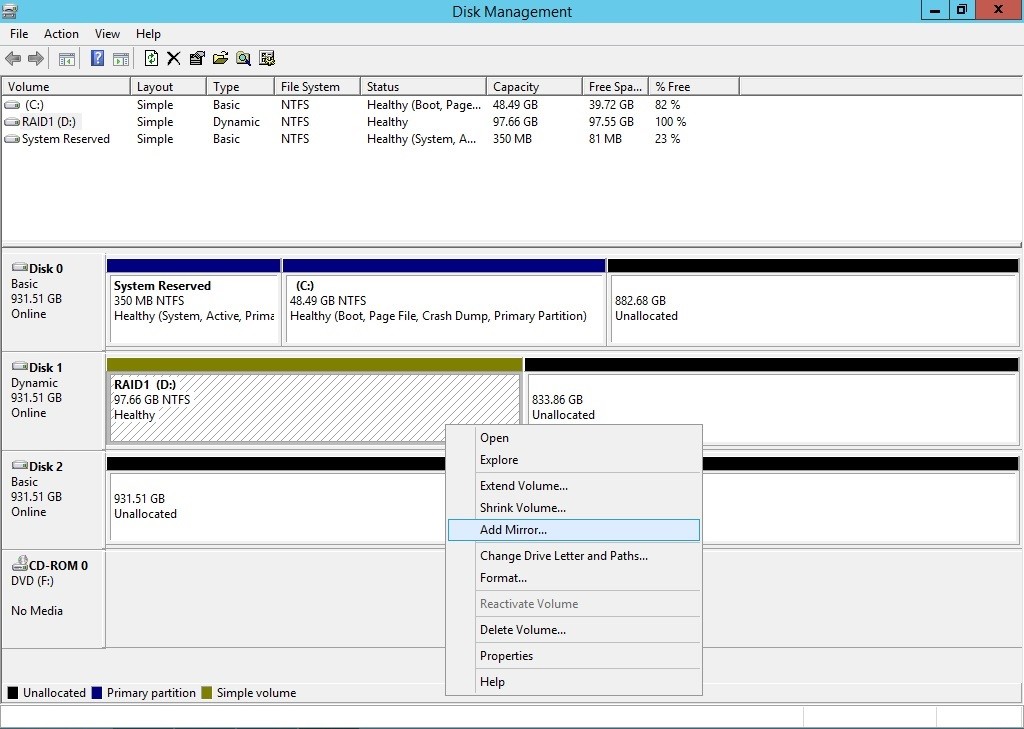
- Open Disk Management again, right-click the remaining RAID partition, and select Add Mirror.

- Choose the new disk and click Add Mirror.
Step 5: Confirm Disk Conversion
- A pop-up will appear asking for disk conversion to dynamic. Click Yes to proceed.

Step 6: Resync the RAID Partition
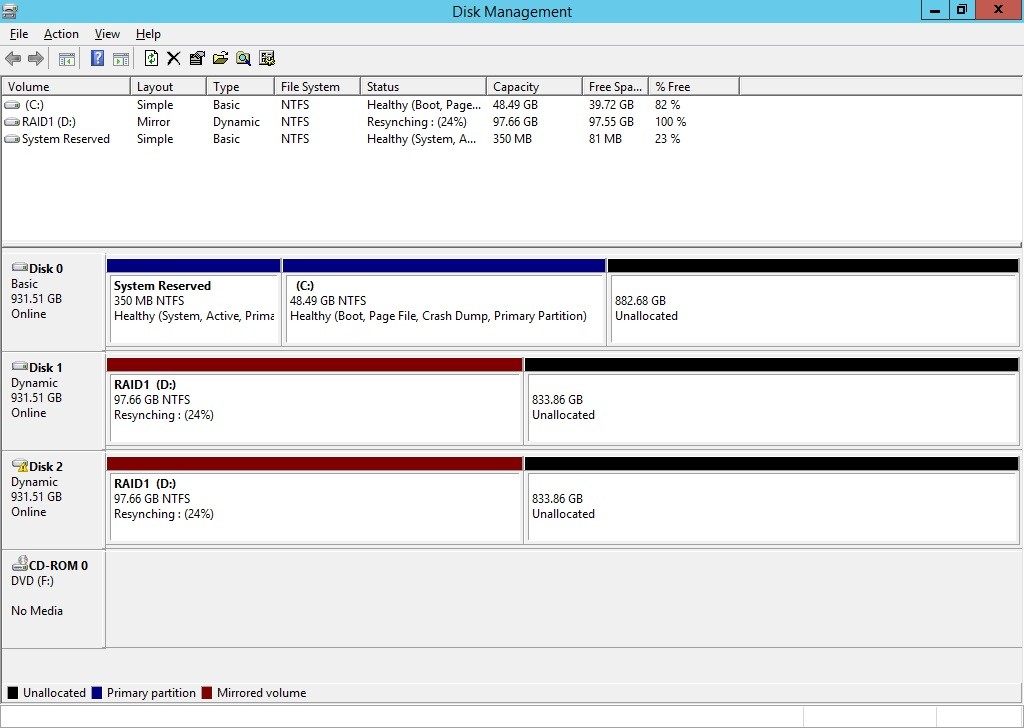
- The system will now resync the RAID partition to the new disk. Wait until the process completes.
Step 7: Verify RAID Health
- After resyncing, check the health of the RAID partition to ensure the process was successful.
Conclusion
By following these steps, you can successfully replace a failed HDD in your Windows Server’s Software RAID, restoring the RAID array’s functionality. Regularly monitor your server’s disk health to prevent future issues.
For any additional support or troubleshooting, feel free to contact support@ipserverone.com.

