Search Our Database
Setting up MX records for Google Workspace in DirectAdmin
Introduction
If you want to switch your domain’s email service to Google Workspace, configuring MX (Mail Exchange) records is essential. This setup ensures that all of your domain’s incoming emails are routed through Google’s mail servers. This guide is provides a step-by-step process to correctly configure MX records using the DirectAdmin control panel. Once completed, your email services will be fully managed by Google Workspace.
Prerequisites
Before you begin, ensure that you have the following:
- Access to the DirectAdmin control panel.
- Your domain’s nameserver or DNS hosting hosted on DirectAdmin server.
Step by step guide
Step 1: Access DirectAdmin
Browse and Login to your Directadmin. eg. https://yourdomain.com:2222
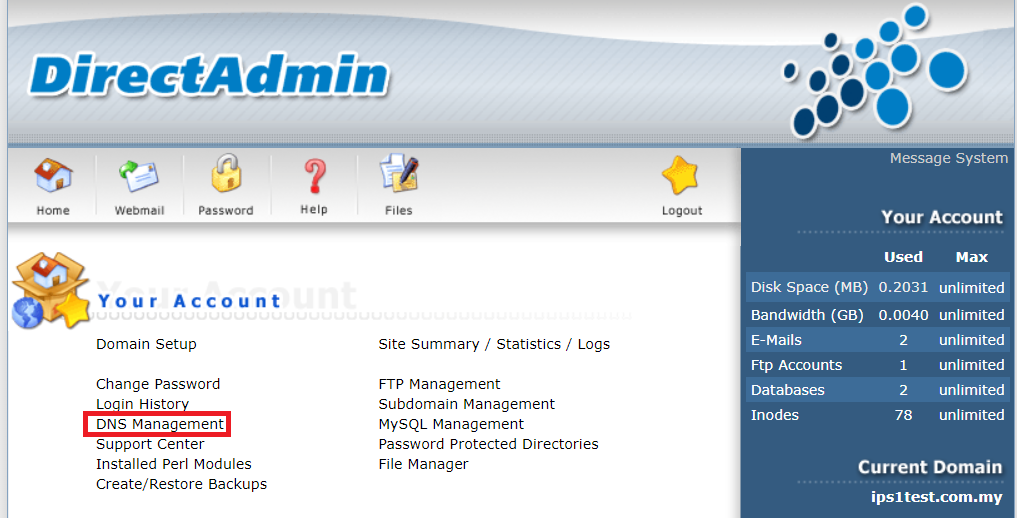
Step 2. Navigate to DNS Management
In Your Account section, select DNS Management to access DNS settings for your domain.
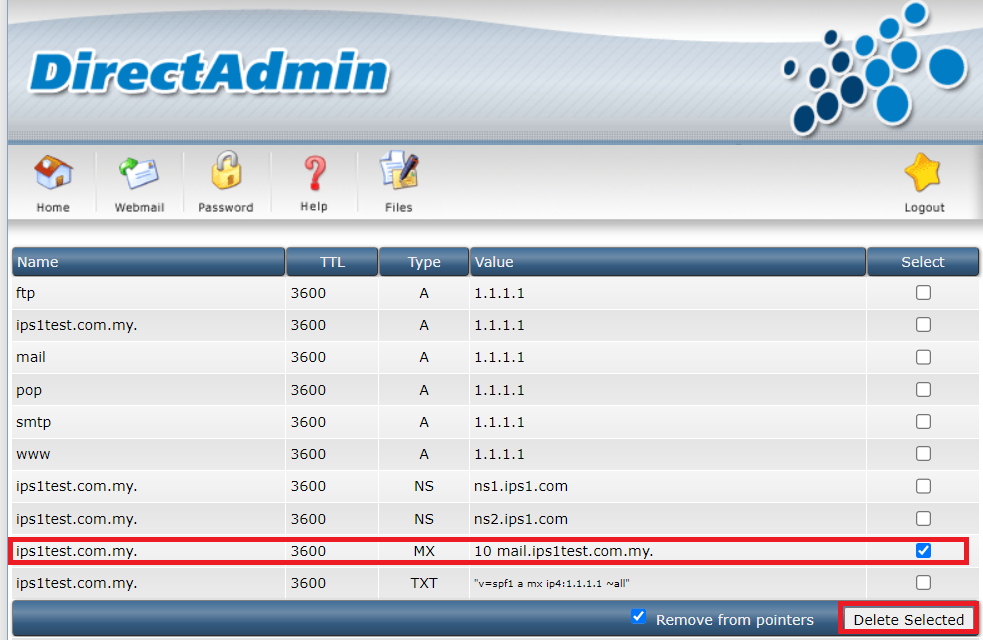
Step 3: Remove Existing MX Records
Locate any existing MX records, select the record and click Delete to remove them. This is important to avoid conflicts with Google Workspace’s MX records.
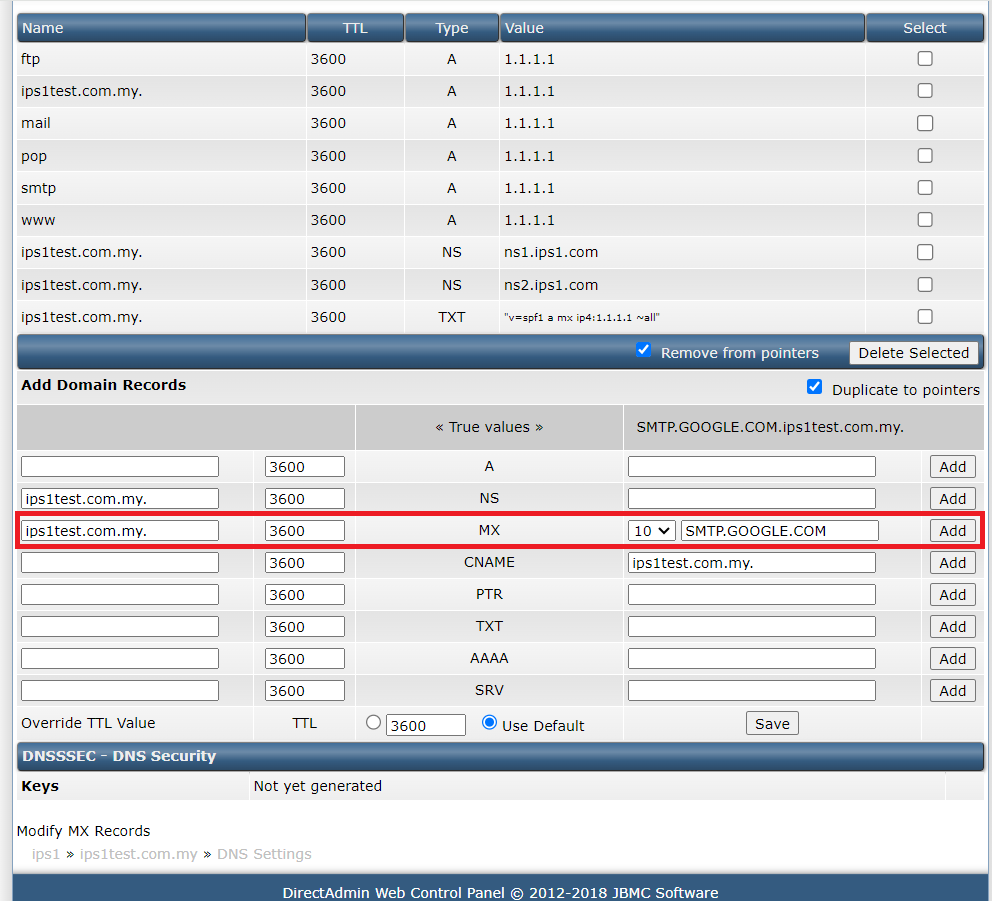
Step 4: Add Google Workspace MX Records
- Input the following Google Workspace MX Records:
Domain: yourdomain.com.
Type: TXT
Value: SMTP.GOOGLE.COM
*MX Records details can be found at https://support.google.com/a/answer/174125
- Click Add to save the changes
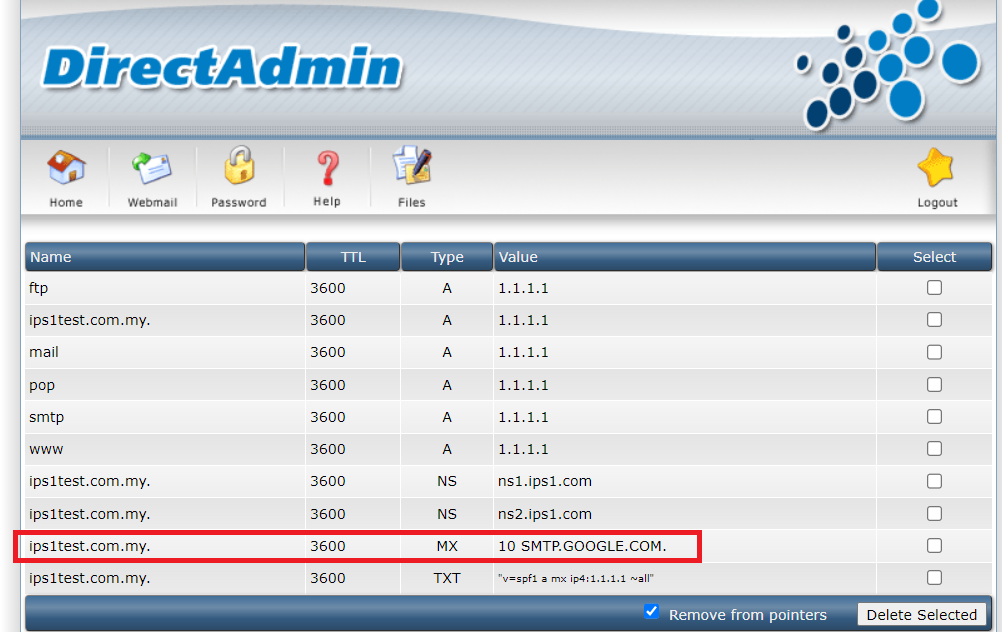
Step 5. Verify changes and DNS propagation
- Once save, the new MX records should now be visible in the list. DNS changes can take up to 24-48 hours to propagate across the internet.
Conclusions
By following this guide, you have successfully configured your domain’s MX records for Google Workspace using DirectAdmin. Once the DNS propagation is complete, your domain’s emails will be routed through Google’s servers, enabling full email management through Google Workspace.
Article posted on 24 February 2020 by Louis